- How to build from source code in GNU/Linux
- Step 1: Download the source
- Final Words
- About Mike Turcotte-McCusker
- Related content
- Disabling the Nouveau open-source Nvidia driver to use the proprietary driver in OpenSUSE Leap 15.3
- Linux Mint 20.2 is now available
- Ubuntu 21.04 is now available with native Microsoft Active Directory integration and Wayland as the default
- Microsoft introduces support for Linux GUI apps on Windows 10
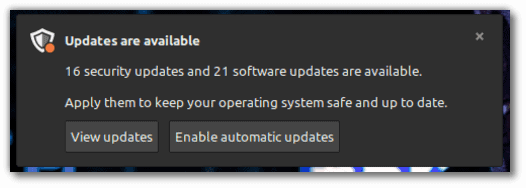
- Linux Mint will inform users about important security updates but not enforce them
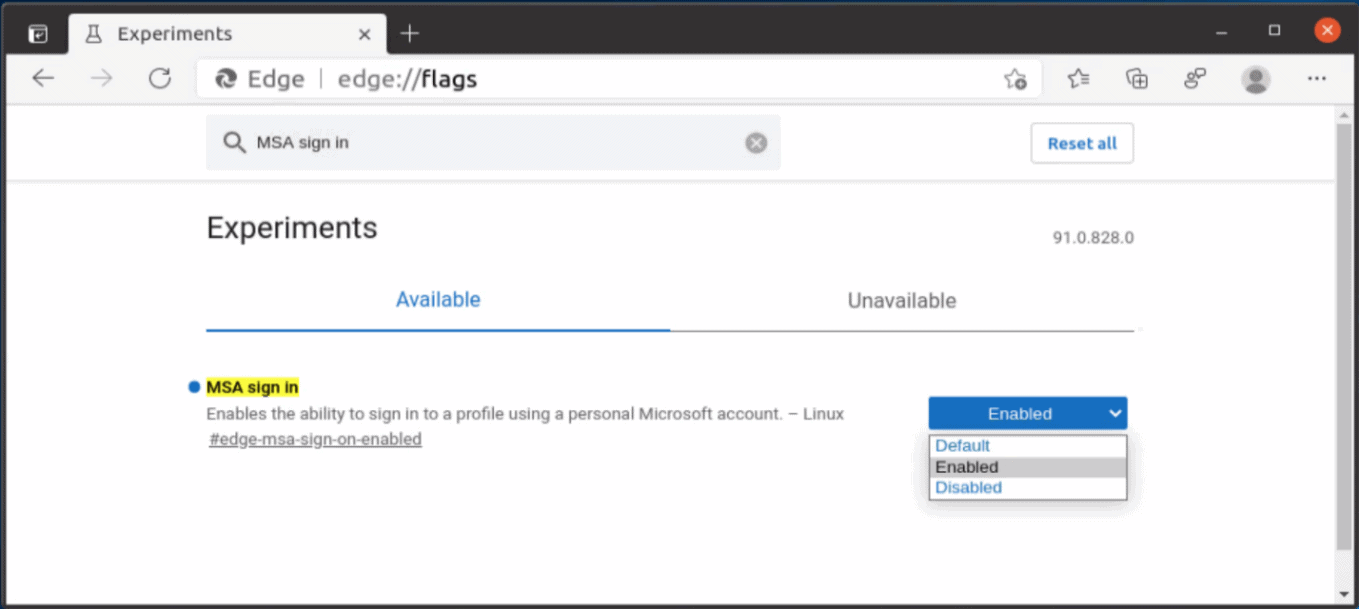
- Microsoft Edge 91 will be the first to support syncing on Linux
- Comments
- How to Install Software from Source Code… and Remove it Afterwards
- A. Installing software from source code in Linux
- Step 1: Getting the source code from GitHub
- Step 2: Understanding the Build System of the program
- Step 3: The FHS
- B. What if things go wrong while installing from source code?
- From Debian 9.0 “Stretch”
- From CentOS 7.0
- C. Making changes to the software installed from source code
- D. Let the shell locate our custom build software
- Adding a link from /usr/local/bin
- Modifying the PATH
- E. How to remove that newly installed software from source code
- Wait? Where was the Dependency Hell?
How to build from source code in GNU/Linux
Most repositories for many GNU/Linux distributions have mass amounts of software and packages available within them; it’s becoming more and more rare you are required to build anything from source (unless you use Gentoo), however, many users are left unaware of how to do so if the need ever arises.
This tutorial will show you from beginning to end, how it’s done. I use Arch Linux, so little quirks may arise that are slightly different from distributions like Ubuntu, but the process is nearly identical, except when fulfilling dependencies comes into play.
Note: This tutorial will be done almost entirely within the command line, so be prepared to get your hands a little dirty and have a terminal window open!
We are going to build Pidgin, from source. Pidgin is a popular multi-protocol chat client, used to connect to multiple different chats at once, such as Skype and Facebook Messenger (There is an article here on Ghacks, showing how to connect to those very two)
Pidgin is available in most distribution repositories, but I thought we would build it, since it’s simple, easily done, and won’t get super complicated for your first time building.
Step 1: Download the source
First thing we need to do, is get our sourcefiles! You can grab them from here.
Once those are downloaded, pop open your terminal and navigate to your Downloads folder (or wherever you downloaded that tarball to)
Next, we need to unpackage the archive, we do this via the ‘tar’ command
the -x tells tar to extract the file
the f tells tar to read the archive content from a file, like our pidgin-2.12.0.tar.bz2
next, we cd into the directory
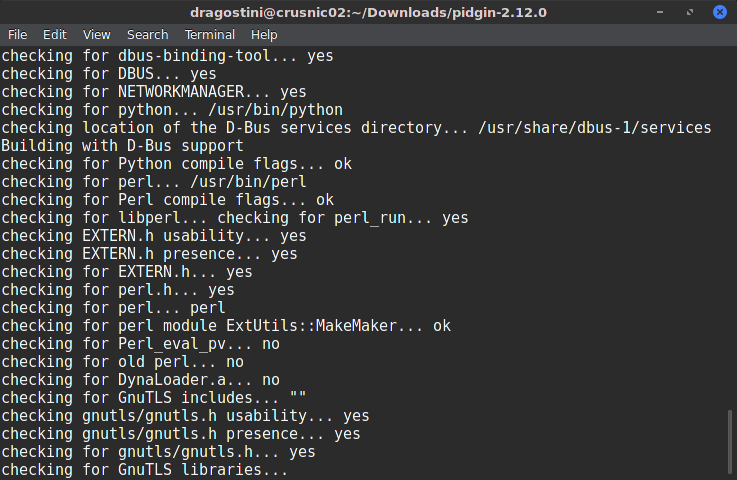
Next, we need to configure the source code for our machine, and ensure that we have all the necessary dependencies required to build the source.
Typically this is done simply by typing ./configure, however, I know that pidgin is going to error if you do that because most distributions do not have the necessary packages to compile two parts of Pidgin: required for TCL support (an older programming language rarely used anymore), as well as packages needed to support ‘meanwhile’, which is needed for using Pidgin with “Sametime,†an IBM instant messaging service/product.
So, unless you specifically need support for TCL or Sametime, we are going to tell our system to disable building those packages into Pidgin, therefore bypassing our need to fulfill those requirements to configure the application!
- ./configure —disable-meanwhile –disable-tcl
if everything goes well (as it did on my very minimal Arch Linux install, so users of more robust distributions also ‘shouldn’t’ run into issues), you’ll get a bunch of scrolling text on the screen, eventually telling you:
configure complete, now type ‘make’
. Which is exactly what we do next
You’re going to see a whole bunch of text absolutely flood your terminal at this point. You on the other hand are going to go get a coffee, walk the dog, or post that image on social media you’ve been wanting to post and kept putting off; this is going to take a few minutes (it took around 5 minutes or so on my laptop)
Once that’s finally finished, the last step is to install Pidgin!
When the wall of text is finished, so are you!
Note: I had to log out and back in, before Pidgin showed up in my applications menu. If you don’t see it, try that.
- Download the source file and extract it.
- Run ./configure
- Run make
- Run sudo make install
Final Words
That’s it! That is the basics of compiling applications from source. Some applications are done a little differently, but that is another topic for another day; you’ll find this process is the same for many, many programs. So, enjoy!

About Mike Turcotte-McCusker
Related content
Disabling the Nouveau open-source Nvidia driver to use the proprietary driver in OpenSUSE Leap 15.3

Linux Mint 20.2 is now available

Ubuntu 21.04 is now available with native Microsoft Active Directory integration and Wayland as the default
Microsoft introduces support for Linux GUI apps on Windows 10
Linux Mint will inform users about important security updates but not enforce them
Microsoft Edge 91 will be the first to support syncing on Linux
Comments
>unless you use Gentoo
Or funtoo, crux, calculate, exherbo and list goes on.
Article doesn’t mention negative effects from building from source instead of using your distro package manager solution (and no word about checkinstall for all debian-based system out there, sigh). Also, one of most important part is actually start ./configure –help and look at options before building anything, most important part being install your build-from-source software anywhere, where is doesn’t collision with your package manager (i.e. /usr/local; /opt), so at least ./configure –prefix=/usr/local need to be pointed out.
More details is always usefull I think.
Ha ! I’ve been waiting for this article for years. Not saying I will actually convert to Linux and start building from code, but I’ve never seen anyone addressing the problem and trying to explain people what it’s about.
Maybe this exists on Linux sites, but when you’re a Linuxist you’re supposed to already know about all that anyway.
Even the first paragraph is news to me — never mind the details about how to do it.
Anything that makes Linux something else than a watering-hole for sectarian fanatics has to be welcome.
I started using Ubuntu in 2007 as a student with no previous exposure to Linux – I just liked that it was free and decided to give it a try. I don’t remember where I saw it (probably on the Ubuntu forums), but I came across a tutorial for compiling from source in my first few days. I migrated to Arch once I had learned the Linux ropes and was ready for a more technically-elegant distro. 🙂
All that to say, I think you’re overstating how difficult it is to find Linux answers.
Let me clarify. It’s not as much about the difficulty of finding Linux answers if you’re really trying (that implies you’ve already made the jump). I don’t know about that, because I’m not using Linux (apart from briefly dipping a toe).
It’s about explaining Linux basics to non-Linux users. Such as : not only there’s less software available, but you’ve got to compile it yourself. OK, but many Linux programs are now pre-compiled, so that makes it easier (although it’s still, on the whole, more difficult). And by the way, if you need, or want, to compile them yourself, here is what it roughly looks like (spare me the details, please). What’s a tarball ? Can you speak english ? etc.
In place of that, what we usually get is : you’re a cunt for not using Linux ! use Linux, you dickhead ! you’re killing kittens if you’re not using Linux ! What ? you don’t even know what building from source is ? educate yourself, you dummy ! and so on.
After reading the first comment, I wanted to reply to it. Same when I read the second comment here.
Instead, I’m adding this as a freestanding comment.
It’s tough to balance “let’s educate and generate enthusiasm among potential DIYers” vs “mentioning ‘negative effects’, caveats, gotchas, etc”. At the very VERY least, an introductory article like this should cite multiple “For further reading” links.
idunno Arch. Are the instructions provided in the article technically correct? tar -xf . (I would expect to explicitly pass a commandline arg which instructs “preserve permissions when untarring.) Even _if_ the default behavior of tar, in an Arch system is to preserve permissions, as a BestPractice, I would still instruct explicit declaration of that arg… besides, it’s reasonable to expect that 99+ percent of the ghacks readers are NOTnotNOT using ArchLinux (nor will be, any time soon).
Clairvaux, I continually find that “supposed to already know about all that” doesn’t hold true
I’m constantly, eternally, forced to scour docs, manpages, stackexchange/stackoverflow, due to changes across versions of (program, build system, dependent libraries) as well as differences between various linux distributions. One size does _NOT_ fit all; tweakamundo is usually required. Quick, simple example: build n install a given gnome app… only to discover that it doesn’t show up in your (xfce, openbox, etc) desktop menu. Why? Because the selfish?dumbass? developer included instructions within .desktop launcher file: “ShowOnlyIn=Gnome”
I’m a serious linux afficionado, yet at the same time, have learned to embrace the motto:
LINUX IS FREE (if your time is worthless)
If this article had been framed as (titled as):
TIL (aka “today I learned”) Howto compile Pidgin in ArchLinux
I would say “kudos”… but framed as a general HOWTO BUILD STUFFS IN LINUX, it’s woefully inadequate (and quite likely misleading, in terms of requisite details)
– LINUX IS FREE (if your time is worthless) –
Very nice, and very probably true (that slight disclaimer because I haven’t been there myself — yet).
N.B.: Arch seems to be one of the difficult distros…
Clairvaux: Really? Allthough you do admit ‘because I haven’t been there myself’… Most people would get by fine when switching from Windows using the repositories, and there is plenty of information for those who want to get into compiling, unless you are using vague search terms and reading ancient articles by those who want to grandstand?
Thanks for the article Mike.
Thank you for illustrating my point so perfectly. I just wrote :
“In place of that, what we usually get is : you’re a cunt for not using Linux ! use Linux, you dickhead ! you’re killing kittens if you’re not using Linux ! What ? you don’t even know what building from source is ? educate yourself, you dummy ! and so on.”
And here you come out of the woodwork, trying the best you can to convince everybody that Linux aficionados are obnoxious, arrogant individuals always attempting to pick up a fight about nothing.
It’s sad enough that people get sectarian and aggressive about subjects such as politics, race or religion, but trolling a thread where the most life-engaging issue is the choice between two different technologies for a personal computer… Have you considered taking up boxing, to channel your aggressivity ? At least, you would get a chance to take up a beating in return for dishing it out.
Whatis “ancient articles by those who want to grandstand”?
an example of “undisclosed quirks” and the “need to continually, eternally, forced to revisit docs”:
During build, it pukes and spews an “error in makefile” message. What. All i did was add one simple line. Search, search, search… an hour later discover that a leading Tab character is expected (4 spaces instead a Tab character is what made the build fail. Seriously. Yeah.) Oh, but end-of-line TRAILING spaces ARE permitted… ‘cept on tuesdays?
(doorbell)
HEY, JUST LEAVE IT ON THE PORCH. THANKS.
Don’t have the energy right now to wade through the heap of dead kittens between here and the door.
I got to admit the arch linux forums are pretty brutal to newbs. Trial by fire. Luckily they make Manjaro, a few tradeoffs and I never have to talk to them. On topic, I appreciate someone is bothering to write stuff about linux and Martin is providing a format. I myself would probably not try to take on such a vast topic as how to build stuff from source in linux, but it does get the ball rolling, thank you.
Источник
How to Install Software from Source Code… and Remove it Afterwards
Last updated August 17, 2020 By Sylvain Leroux 58 Comments

Brief: This detailed guide explains how to install a program from source code in Linux and how to remove the software installed from the source code.
One of the greatest strength of your Linux distribution is its package manager and the associated software repository. With them, you have all the necessary tools and resources to download and install new software on your computer in a completely automated manner.
But despite all their efforts, the package maintainers cannot handle each and every use cases. Nor can they package all the software available out there. So there are still situations where you will have to compile and install new software by yourself. As for me, the most common reason, by far, I have to compile some software is when I need to run a very specific version, or modify the source code by the use of some fancy compilation options.
If your needs belong to the latter category, chances are you already know what to do. But, for the vast majority of Linux users, compiling and installing software from the source code for the first time might look like an initiation ceremony: somewhat frightening; but with the promise of entering a new world of possibilities and a place of prestige in a privileged community.
A. Installing software from source code in Linux
And that’s exactly what we will do here. For the purpose of this article, let’s say I need to install NodeJS 8.1.1 on my system. That version exactly. A version which is not available from the Debian repository:
Now, installing NodeJs on Ubuntu or Debian is pretty simple if you do it with the package manager. But let’s do it via the source code.
Step 1: Getting the source code from GitHub
Like many open-source projects, the sources of NodeJS can be found on GitHub: https://github.com/nodejs/node
So, let’s go directly there.

If you’re not familiar with GitHub, git or any other version control system worth mentioning the repository contains the current source for the software, as well as a history of all the modifications made through the years to that software. Eventually up to the very first line written for that project. For the developers, keeping that history has many advantages. For us today, the main one is we will be able to get the sources from for the project as they were at any given point in time. More precisely, I will be able to get the sources as they were when the 8.1.1 version I want was released. Even if there were many modifications since then.

On GitHub, you can use the “branch” button to navigate between different versions of the software. “Branch” and “tags” are somewhat related concepts in Git. Basically, the developers create “branch” and “tags” to keep track of important events in the project history, like when they start working on a new feature or when they publish a release. I will not go into the details here, all you need to know is I’m looking for the version tagged “v8.1.1”

After having chosen on the “v8.1.1” tag, the page is refreshed, the most obvious change being the tag now appears as part of the URL. In addition, you will notice the file change date are different too. The source tree you are now seeing is the one that existed at the time the v8.1.1 tag was created. In some sense, you can think of a version control tool like git as a time travel machine, allowing you to go back and forth into a project history.

At this point, we can download the sources of NodeJS 8.1.1. You can’t miss the big blue button suggesting to download the ZIP archive of the project. As for me, I will download and extract the ZIP from the command line for the sake of the explanation. But if you prefer using a GUI tool, don’t hesitate to do that instead:
Downloading the ZIP archive works great. But if you want to do it “like a pro”, I would suggest using directly the git tool to download the sources. It is not complicated at all— and it will be a nice first contact with a tool you will often encounter:
By the way, if you have an issue, just consider the first part of this article as a general introduction. Later I have more detailed explanations for Debian- and RedHat-based distributions in order to help you troubleshoot common issues.
Anyway, whenever you downloaded the source using git or as a ZIP archive, you should now have exactly the same source files in the current directory:
Step 2: Understanding the Build System of the program
We usually talk about “compiling the sources”, but the compilation is only one of the phases required to produce a working software from its source. A build system is a set of tool and practices used to automate and articulate those different tasks in order to build entirely the software just by issuing few commands.
If the concept is simple, the reality is somewhat more complicated. Because different projects or programming language may have different requirements. Or because of the programmer’s tastes. Or the supported platforms. Or for historical reason. Or… or.. there is an almost endless list of reasons to choose or create another build system. All that to say there are many different solutions used out there.
NodeJS uses a GNU-style build system, it is a popular choice in the open source community and once again, a good way to start your journey.
Writing and tuning a build system is a pretty complex task, but for the “end user”, GNU-style build systems ease the task by using two tools: configure and make .
The configure file is a project-specific script that will check the destination system configuration and available feature in order to ensure the project can be built, eventually dealing with the specificities of the current platform.
An important part of a typical configure job is to build the Makefile . That is the file containing the instructions required to effectively build the project.
The make tool, on the other hand, is a POSIX tool available on any Unix-like system. It will read the project-specific Makefile and perform the required operations to build and install your program.
But, as always in the Linux world, you still have some leniency in customising the build to your specific needs .
The configure -help command will show you all the available configuration options. Once again, this is very project-specific. And to be honest, it is sometimes necessary to dig into the project before fully understanding the meaning of each and every configure option.
But there is at least one standard GNU Autotools option that you must know: the —prefix option. This has to do with the file system hierarchy and the place your software will be installed.
Step 3: The FHS
The Linux file system hierarchy on a typical distribution mostly comply with the Filesystem Hierarchy Standard (FHS)
That standard explains the purpose of the various directories of your system: /usr , /tmp , /var and so on.
When using the GNU Autotools— and most other build systems— the default installation location for your new software will be /usr/local . Which is a good choice as according to the FSH “The /usr/local hierarchy is for use by the system administrator when installing software locally? It needs to be safe from being overwritten when the system software is updated. It may be used for programs and data that are shareable amongst a group of hosts, but not found in /usr.”
The /usr/local hierarchy somehow replicates the root directory, and you will find there /usr/local/bin for the executable programs, /usr/local/lib for the libraries, /usr/local/share for architecture independent files and so on.
The only issue when using the /usr/local tree for custom software installation is the files for all your software will be mixed there. Especially, after having installed a couple of software, it will be hard to track to which file exactly of /usr/local/bin and /usr/local/lib belongs to which software. That will not cause any issue to the system though. After all, /usr/bin is just about the same mess. But that will become an issue the day you will want to remove a manually installed software.
To solve that issue, I usually prefer installing custom software in the /opt sub-tree instead. Once again, to quote the FHS:
_”/opt is reserved for the installation of add-on application software packages.
A package to be installed in /opt must locate its static files in a separate /opt/
directory tree, where
is a name that describes the software package and
is the provider’s LANANA registered name.”_
So we will create a sub-directory of /opt specifically for our custom NodeJS installation. And if someday I want to remove that software, I will simply have to remove that directory:
Anything but “ok” after the make command has completed would mean there was an error during the build process. As we ran a parallel build because of the -j option, it is not always easy to retrieve the error message given the large volume of output produced by the build system.
In the case of an issue, just restart make , but without the -j option this time. And the error should appear near the end of the output:
Finally, once the compilation has gone to the end, you can install your software to its location by running the command:
B. What if things go wrong while installing from source code?
What I’ve explained above is mostly what you can see on the “build instruction” page of a well-documented project. But given this article goal is to let you compile your first software from sources, it might worth taking the time to investigate some common issues. So, I will do the whole procedure again, but this time from a fresh and minimal Debian 9.0 and CentOS 7.0 systems so you can see the errors I encountered and how I solved them.
From Debian 9.0 “Stretch”
This problem is quite easy to diagnosis and solve. Just install the git package:
No problem here.
Obviously, to compile a project, you need a compiler. NodeJS being written using the C++ language, we need a C++ compiler. Here I will install `g++`, the GNU C++ compiler for that purpose:
One other missing tool. Same symptoms. Same solution:
Please notice: I’ve installed the various tools one by one to show how to diagnosis the compilation issues and to show you the typical solution to solve those issues. But if you search for more information about the topic or read other tutorials, you will discover that most distributions have “meta-packages” acting as an umbrella to install some or all the typical tools used for compiling a software. On Debian-based systems, you will probably encounter the build-essentials package for that purpose. And on Red-Hat-based distributions, that will be the “Development Tools” group.
From CentOS 7.0
Command not found? Just install it using the yum package manager:
You guess it: NodeJS is written using the C++ language, but my system lacks the corresponding compiler. Yum to the rescue. As I’m not a regular CentOS user, I actually had to search on the Internet the exact name of the package containing the g++ compiler. Leading me to that page: https://superuser.com/questions/590808/yum-install-gcc-g-doesnt-work-anymore-in-centos-6-4
C. Making changes to the software installed from source code
You may install software from the source because you need a very specific version not available in your distribution repository, or because you want to modify the program to fix a bug or add a feature. After all, open-source is all about making modifications. So, I will take this opportunity to give you a taste of the power you have at hand now that you are able to compile your own software.
Here, we will make a minor change to the sources of NodeJS. And we will see if our change will be incorporated into the compiled version of the software:
Open the file node/src/node.cc in your favorite text editor (vim, nano, gedit, … ). And try to locate that fragment of code:
It is around line 3830 of the file. Then modify the line containing printf to match that one instead:
Then head back to your terminal. Before going further— and to give you some more insight of the power behind git— you can check if you’ve modified the right file:
You should see a “-” (minus sign) before the line as it was before you changed it. And a “+” (plus sign) before the line after your changes.
It is now time to recompile and re-install your software:
This times, the only reason it might fail is that you’ve made a typo while changing the code. If this is the case, re-open the node/src/node.cc file in your text editor and fix the mistake.
Once you’ve managed to compile and install that new modified NodeJS version, you will be able to check if your modifications were actually incorporated into the software:
Congratulations! You’ve made your first change to an open-source program!
D. Let the shell locate our custom build software
You may have noticed that I’ve always launched my newly compiled NodeJS software by specifying the absolute path to the binary file.
It works. But this is annoying, to say the least. There are actually two common ways of fixing that.
There are actually two common ways of fixing the annoying problem of specifying the absolute path to the binary files,
but to understand them you must first know that your shell locates the executable files by looking for them only in the directories specified by the PATH environment variable.
Here, on that Debian system, if you do not specify explicitly any directory as part of a command name, the shell will first look for the executable programs in /usr/local/bin , then if not found into /usr/bin , then if not found into /bin then if not found into /usr/local/games then if not found into /usr/games , then if not found … the shell will report an error “command not found”.
Given that, we have two way to make a command accessible to the shell: by adding it to one of the already configured PATH directories. Or by adding the directory containing our executable file to the PATH .
Adding a link from /usr/local/bin
Just copying the node binary executable from /opt/node/bin to /usr/local/bin would be a bad idea since by doing so, the executable program would no longer be able to locate the other required components belonging to /opt/node/ (it’s a common practice for software to locate its resource files relative to its own location).
So, the traditional way of doing that is by using a symbolic link:
This is a simple and effective solution, especially if a software package is made of just few well known executable programs— since you have to create a symbolic link for each and every user-invokable command. For example, if you’re familiar with NodeJS, you know the npm companion application I should symlink from /usr/local/bin too. But I let that to you as an exercise.
Modifying the PATH
First, if you tried the preceding solution, remove the node symbolic link created previously to start from a clear state:
And now, here is the magic command to change your PATH :
Simply said, I replaced the content of the PATH environment variable by its previous content, but prefixed by /opt/node/bin . So, as you can imagine it now, the shell will look first into the /opt/node/bin directory for executable programs. We can confirm that using the which command:
Whereas the “link” solution is permanent as soon as you’ve created the symbolic link into /usr/local/bin , the PATH change is effective only into the current shell. I will leave you to do some research on how to make changes in the PATH permanents. As a hint, it has to do with your “profile”. If you find the solution, don’t hesitate to share that with the other readers by using the comment section below!
E. How to remove that newly installed software from source code
Since our custom compiled NodeJS software sits completely in the /opt/node-v8.1.1 directory, removing that software requires no more effort than using the rm command to remove that directory:
BEWARE: sudo and rm -rf are a dangerous cocktail! Always check your command twice before pressing the “enter” key. You won’t have any confirmation message and no undelete if you remove the wrong directory…
Then, if you’ve modified your PATH , you will have to revert those changes, which is not complicated at all.
And if you’ve created links from /usr/local/bin you will have to remove them all:
Wait? Where was the Dependency Hell?
As a final comment, if you read about compiling your own custom software, you might have heard about the dependency hell. This is a nickname for that annoying situation where before being able to successfully compile a software, you must first compile a pre-requisite library, which in its turn requires another library that might in its turn be incompatible with some other software you’ve already installed.
Part of the job of the package maintainers of your distribution is to actually resolve that dependency hell and to ensure the various software of your system are using compatible libraries and are installed in the right order.
For this article, I chose, on purpose, to install NodeJS as it virtually doesn’t have dependencies. I said “virtually” because, in fact, it has dependencies. But the source code of those dependencies are present in the source repository of the project (in the node/deps subdirectory), so you don’t have to download and install them manually before hand.
But if you’re interested in understanding more about that problem and learn how to deal with it, let me know that using the comment section below: that would be a great topic for a more advanced article!
Like what you read? Please share it with others.
Источник


