- Google Chrome для Linux
- Инструкция
- Debian
- Ubuntu
- Manjaro
- Checking out and building Chromium on Linux
- Instructions for Google Employees
- Contents
- System requirements
- Install depot_tools
- Get the code
- Install additional build dependencies
- Run the hooks
- Setting up the build
- Faster builds
- Use Goma
- Disable NaCl
- Include fewer debug symbols
- Disable debug symbols for Blink
- Use Icecc
- ccache
- Using tmpfs
- Build Chromium
- Run Chromium
- Running test targets
- Update your checkout
- Tips, tricks, and troubleshooting
- Linker Crashes
- More links
- Next Steps
- Notes for other distros
- Arch Linux
- Crostini (Debian based)
- Fedora
- Gentoo
- OpenSUSE
- Install Google Chrome on Ubuntu [Beginner’s Tutorial]
- Installing Google Chrome on Ubuntu Graphically [Method 1]
- Install Google Chrome in Ubuntu Terminal [Method 2]
- Few tips about using Google Chrome on Ubuntu
- 1. Sync Chrome with your Google account
- 2. Add Chrome to favorites
- 3. Updating Google Chrome browser
- 4. Google Chrome crash (don’t panic)
Google Chrome для Linux
Браузер от компании Google доступен на всех актуальных стационарных ОС. И речь не только о Windows и Mac OS. Хром для Линукс тоже доступен, причем на большинстве популярных сборок. Разберемся с инсталляцией интернет-обозревателя для них.
Инструкция
В данной статье пойдет речь о наиболее востребованных сборках Linux и процедурой установки для каждой из них. В частности, будут упомянуты инструкции для Дебиан, Минт, Убунту, Manjaro и Kali.
Debian
Специально для Дебиана мы подготовили отдельную статью, где расписаны два метода инсталляции: через Терминал и deb-файл. Ознакомиться с ней вы можете здесь.
С Linux Mint ситуация аналогичная. Для этой вариации операционной системы существует специальная инструкция, которая опубликована на нашем сайте. Там предложено 2 способа установки: опять же через командную строку и с помощью отдельного файла с расширением ДЕБ. Подробности найти можно в этом материале.
Ubuntu
Убунту – распространенная ОС, предназначенная для широкого круга пользователей. Поэтому она очень удобная и стильная, при этом слабо нагружает компьютер. И разумеется, для нее выпущен интернет-обозреватель от компании Гугл. Чтобы ознакомиться с инструкцией по его инсталляции, пройдите на следующую страницу.
Существует простой вариант по установке на Линуксе версии Кали, связанный с командной строкой. Всего лишь 3 команды необходимы для загрузки и запуска интернет-обозревателя. Первая из них отвечает непосредственно за скачивания нужного пакета:
 Вторая – за его инсталляцию с помощью приложения GDebi:
А третья – за сам запуск:
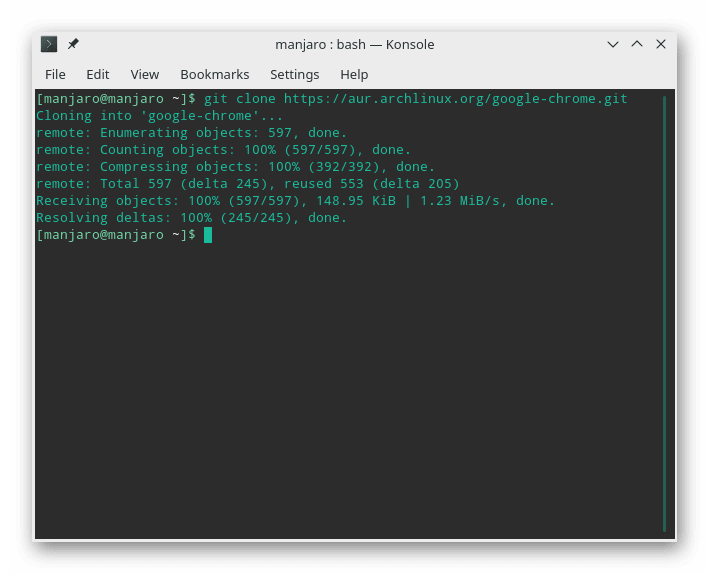
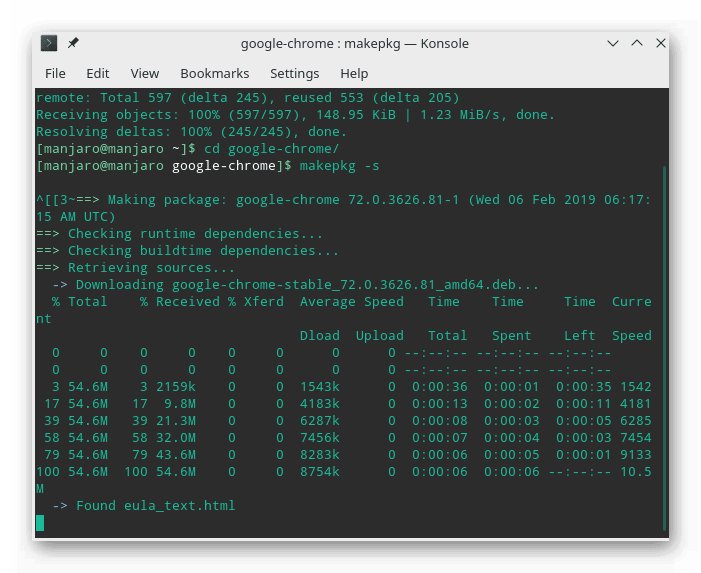
Manjaro
Стандартный вариант инсталляции заключается в использовании Терминала, он и будет рассмотрен далее. Для открытия командной строки нажмите комбинацию Ctrl + Shift + T .
git clone https://aur.archlinux.org/google-chrome.git
Второй и третий:
 Четвертый и пятый:
sudo pacman -U —noconfirm google-chrome-70.0.3538.77-1-x86_64.pkg.tar.xz
Седьмой (непосредственно для запуска браузера):
Источник
Checking out and building Chromium on Linux
There are instructions for other platforms linked from the get the code page.
Instructions for Google Employees
Are you a Google employee? See go/building-chrome instead.
Contents
System requirements
- A 64-bit Intel machine with at least 8GB of RAM. More than 16GB is highly recommended.
- At least 100GB of free disk space.
- You must have Git and Python v3 installed already (and python3 must point to a Python v3 binary).
Most development is done on Ubuntu (currently 18.04, Bionic Beaver). There are some instructions for other distros below, but they are mostly unsupported.
Install depot_tools
Clone the depot_tools repository:
Add depot_tools to the end of your PATH (you will probably want to put this in your
/.zshrc ). Assuming you cloned depot_tools to /path/to/depot_tools :
When cloning depot_tools to your home directory do not use
on PATH, otherwise gclient runhooks will fail to run. Rather, you should use either $HOME or the absolute path:
Get the code
Create a chromium directory for the checkout and change to it (you can call this whatever you like and put it wherever you like, as long as the full path has no spaces):
Run the fetch tool from depot_tools to check out the code and its dependencies.
If you don’t want the full repo history, you can save a lot of time by adding the —no-history flag to fetch .
Expect the command to take 30 minutes on even a fast connection, and many hours on slower ones.
If you’ve already installed the build dependencies on the machine (from another checkout, for example), you can omit the —nohooks flag and fetch will automatically execute gclient runhooks at the end.
When fetch completes, it will have created a hidden .gclient file and a directory called src in the working directory. The remaining instructions assume you have switched to the src directory:
Install additional build dependencies
Once you have checked out the code, and assuming you’re using Ubuntu, run build/install-build-deps.sh
You may need to adjust the build dependencies for other distros. There are some notes at the end of this document, but we make no guarantees for their accuracy.
Run the hooks
Once you’ve run install-build-deps at least once, you can now run the Chromium-specific hooks, which will download additional binaries and other things you might need:
Optional: You can also install API keys if you want your build to talk to some Google services, but this is not necessary for most development and testing purposes.
Setting up the build
Chromium uses Ninja as its main build tool along with a tool called GN to generate .ninja files. You can create any number of build directories with different configurations. To create a build directory, run:
- You only have to run this once for each new build directory, Ninja will update the build files as needed.
- You can replace Default with another name, but it should be a subdirectory of out .
- For other build arguments, including release settings, see GN build configuration. The default will be a debug component build matching the current host operating system and CPU.
- For more info on GN, run gn help on the command line or read the quick start guide.
Faster builds
This section contains some things you can change to speed up your builds, sorted so that the things that make the biggest difference are first.
Use Goma
Google developed the distributed compiler called Goma.
If you would like to use Goma provisioned by Google, please follow Goma for Chromium contributors.
If you are a Google employee, see go/building-chrome instead.
Disable NaCl
By default, the build includes support for Native Client (NaCl), but most of the time you won‘t need it. You can set the GN argument enable_nacl=false and it won’t be built.
Include fewer debug symbols
By default GN produces a build with all of the debug assertions enabled ( is_debug=true ) and including full debug info ( symbol_level=2 ). Setting symbol_level=1 will produce enough information for stack traces, but not line-by-line debugging. Setting symbol_level=0 will include no debug symbols at all. Either will speed up the build compared to full symbols.
Disable debug symbols for Blink
Due to its extensive use of templates, the Blink code produces about half of our debug symbols. If you don’t ever need to debug Blink, you can set the GN arg blink_symbol_level=0 .
Use Icecc
Icecc is the distributed compiler with a central scheduler to share build load. Currently, many external contributors use it. e.g. Intel, Opera, Samsung (this is not useful if you’re using Goma).
In order to use icecc , set the following GN args:
Using the system linker may also be necessary when using glibc 2.21 or newer. See related bug.
ccache
You can use ccache to speed up local builds (again, this is not useful if you’re using Goma).
Increase your ccache hit rate by setting CCACHE_BASEDIR to a parent directory that the working directories all have in common (e.g., /home/yourusername/development ). Consider using CCACHE_SLOPPINESS=include_file_mtime (since if you are using multiple working directories, header times in svn sync’ed portions of your trees will be different — see the ccache troubleshooting section for additional information). If you use symbolic links from your home directory to get to the local physical disk directory where you keep those working development directories, consider putting
in your .bashrc so that $PWD or cwd always refers to a physical, not logical directory (and make sure CCACHE_BASEDIR also refers to a physical parent).
If you tune ccache correctly, a second working directory that uses a branch tracking trunk and is up to date with trunk and was gclient sync’ed at about the same time should build chrome in about 1/3 the time, and the cache misses as reported by ccache -s should barely increase.
This is especially useful if you use git-worktree and keep multiple local working directories going at once.
Using tmpfs
You can use tmpfs for the build output to reduce the amount of disk writes required. I.e. mount tmpfs to the output directory where the build output goes:
Quick and dirty benchmark numbers on a HP Z600 (Intel core i7, 16 cores hyperthreaded, 12 GB RAM)
Build Chromium
Build Chromium (the “chrome” target) with Ninja using the command:
( autoninja is a wrapper that automatically provides optimal values for the arguments passed to ninja .)
You can get a list of all of the other build targets from GN by running gn ls out/Default from the command line. To compile one, pass the GN label to Ninja with no preceding “//” (so, for //chrome/test:unit_tests use autoninja -C out/Default chrome/test:unit_tests ).
Run Chromium
Once it is built, you can simply run the browser:
Running test targets
You can run the tests in the same way. You can also limit which tests are run using the —gtest_filter arg, e.g.:
You can find out more about GoogleTest at its GitHub page.
Update your checkout
To update an existing checkout, you can run
The first command updates the primary Chromium source repository and rebases any of your local branches on top of tip-of-tree (aka the Git branch origin/main ). If you don’t want to use this script, you can also just use git pull or other common Git commands to update the repo.
The second command syncs dependencies to the appropriate versions and re-runs hooks as needed.
Tips, tricks, and troubleshooting
Linker Crashes
If, during the final link stage:
You get an error like:
you are probably running out of memory when linking. You must use a 64-bit system to build. Try the following build settings (see GN build configuration for other settings):
- Build in release mode (debugging symbols require more memory): is_debug = false
- Turn off symbols: symbol_level = 0
- Build in component mode (this is for development only, it will be slower and may have broken functionality): is_component_build = true
More links
- Information about building with Clang.
- You may want to use a chroot to isolate yourself from versioning or packaging conflicts.
- Cross-compiling for ARM? See LinuxChromiumArm.
- Want to use Eclipse as your IDE? See LinuxEclipseDev.
- Want to use your built version as your default browser? See LinuxDevBuildAsDefaultBrowser.
Next Steps
If you want to contribute to the effort toward a Chromium-based browser for Linux, please check out the Linux Development page for more information.
Notes for other distros
Arch Linux
Instead of running install-build-deps.sh to install build dependencies, run:
For the optional packages on Arch Linux:
- php-cgi is provided with pacman
- wdiff is not in the main repository but dwdiff is. You can get wdiff in AUR/ yaourt
Crostini (Debian based)
First install the file and lsb-release commands for the script to run properly:
Then invoke install-build-deps.sh with the —no-arm argument, because the ARM toolchain doesn’t exist for this configuration:
Fedora
Instead of running build/install-build-deps.sh , run:
The fonts needed by Blink’s web tests can be obtained by following these instructions. For the optional packages:
- php-cgi is provided by the php-cli package.
- sun-java6-fonts is covered by the instructions linked above.
Gentoo
You can just run emerge www-client/chromium .
OpenSUSE
Use zypper command to install dependencies:
(openSUSE 11.1 and higher)
For 11.0, use libnspr4-0d and libnspr4-dev instead of mozilla-nspr and mozilla-nspr-devel , and use php5-cgi instead of php5-fastcgi .
The Ubuntu package sun-java6-fonts contains a subset of Java of the fonts used. Since this package requires Java as a prerequisite anyway, we can do the same thing by just installing the equivalent openSUSE Sun Java package:
WebKit is currently hard-linked to the Microsoft fonts. To install these using zypper
To make the fonts installed above work, as the paths are hardcoded for Ubuntu, create symlinks to the appropriate locations:
Источник
Install Google Chrome on Ubuntu [Beginner’s Tutorial]
Last updated September 2, 2021 By Abhishek Prakash 93 Comments
Google Chrome is the world’s most popular web browser. It is fast, secure and full of features to give you the best browsing experience.
Ubuntu comes preinstalled with Firefox browser. Firefox has improved a lot lately and is a better choice specially from the privacy point of view. However, if you are an ardent fan of Google Chrome, I won’t force you to ditch Chrome and move to Firefox.
Google Chrome is not open source and if you try to install Google Chrome from Ubuntu Software Center, you won’t find it there. It will probably suggest installing Chromium (the open source project Chrome is derived from). Chromium is similar to Chrome, but it is still not the real Google Chrome.
Then how do you install Google Chrome on Ubuntu? The simple answer is that you download it from their website.
You can do that in two ways:
Installing Google Chrome on Ubuntu Graphically [Method 1]
If you are absolutely new to Ubuntu and Linux, this could be overwhelming for you and I completely understand that. This is why I am going to list each step with proper screenshots here.

You should keep in mind that Google Chrome is not available for 32-bit operating systems. You should make sure that you are using a 64-bit operating system. Read this article to find out if your system is 32-bit or 64-bit.
You need to have an active internet connection, of course.
Now go to Google Chrome’s website.
You’ll see a download link there. Click on this download button.
When you click the download button, it gives two options for downloading files. You have to download the .deb file which is suitable for Ubuntu.
In the next screen, you should opt for saving the file to the computer instead of opening it in software center for installation.
If you don’t do that and there were some issues from the software center, you’ll have to download the deb file again. It’s better to download and save the file itself.
Your downloaded deb file should be in the Downloads folder. Installing deb files is super easy. Go to this folder and double click on the deb file. You can think of these deb files as those exe files in Windows.
It will then open Ubuntu’s software center and you should see an option for installing Google Chrome now. Hit on the install button.
Troubleshoot: In Ubuntu 20.04, you’ll have to right click on the deb file and select top open with Software Center.
It will ask for your password before starting the installation. You should enter your account’s password. It should take less than a minute for completing the Google Chrome installation. You should see a remove option now which indicates that the software is installed.
Once you have installed Chrome on Ubuntu, you can search for it in the menu. Simply press the Windows key and start typing chrome. Here are some other Ubuntu shortcuts you should know.
Click on this Chrome icon to start using Google Chrome.
Install Google Chrome in Ubuntu Terminal [Method 2]
The process you just saw in method 1 can be done in the terminal as well. Many people prefer the GUI way but if you like using the command line, you can install Google Chrome using the terminal.
It’s not as straight forward as using apt-get install chrome though but it’s not super complicated as well.
To install Google Chrome from the terminal, get the DEB file using the wget command:
Now you can use dpkg to install Chrome from the downloaded DEB file:
That’s it. Now you can find Google Chrome in the menu and start it from there.
Few tips about using Google Chrome on Ubuntu
Now that you have installed Google Chrome on Ubuntu 18.04 or some other version, you should know a few tips.
1. Sync Chrome with your Google account
You probably already know this. If you log in to Chrome with Google account (Gmail account), it will allow you to sync your bookmarks, history, browser plugins and extensions from other devices where you use Google Chrome with the same Google account.
2. Add Chrome to favorites
If you use Google Chrome frequently, it would be a good idea to add it to your favorites in Ubuntu 18.04 default GNOME version so that you can quickly access it from the launcher on the left side.
3. Updating Google Chrome browser
The good thing about Google Chrome is that it adds a repository in your sources.list directory.
In other words, Google Chrome will be updated along with the system updates provided by Ubuntu via the Software Updater. I guess you know how to keep your Ubuntu system updated, don’t you?
4. Google Chrome crash (don’t panic)
If you see an error that says:
“The application Google Chrome has closed unexpectedly”
Don’t panic. Your system is safe. Your Chrome browser is safe and perfectly usable.
Perhaps there was a temporary issue and some browser tab or extension crashed for some reason. But it’s not fatal.
If you keep seeing the pop-up every time you start Google Chrome in Ubuntu, you can use the “Ignore future problems of this program version”.

It’s up to you if you want to send the crash report. Even if you don’t send it, it won’t be a problem.
Conclusion
Installing Google Chrome on Ubuntu is a simple task. It’s not available in the software center but you can download and install it pretty much the same way as you do in Windows and macOS. You can also remove Google Chrome from Ubuntu if you want, but you’ll have to use the terminal.
This is still easier than installing Google Chrome on Arch Linux, I believe.
By the way, you can improve your browsing experience by using these Google Chrome keyboard shortcuts.
I hope this tutorial helped you to get Google Chrome on Ubuntu and Linux Mint. If you have any questions or suggestions, please feel free to leave a comment below.
Like what you read? Please share it with others.
Источник


