- How To Compile And Run a C/C++ Code In Linux
- Step #1: Install C/C++ compiler and related tools
- Step #2: Verify installation
- How to Compile and Run C/C++ program on Linux
- How do I compile the program on Linux?
- How do I run or execute the program called demo on Linux?
- Compiling and running a simple C++ program
- How do I generate symbolic information for gdb and warning messages?
- How do I generate optimized code on a Linux machine?
- How do I compile a C program that uses math functions?
- How do I compile a C++ program that uses Xlib graphics functions?
- How do I compile a program with multiple source files?
- The Linux Command Line
- by William Shotts
- What Readers Are Saying About The Linux Command Line!
- Setting up the Build Environment (Linux/Ubuntu)В
- Setup on Ubuntu
- Get git
- Git command line
- Ubuntu
- Windows and other Systems
- Recommended GUI Tools
- Clone ArduPilot repository
- Cloning with the command line
- Install some required packages
- Cleaning
- Setup for other Distributions Using the STM Toolchain
- Add some directories to your search path (Facultative)В
- Compiler
- Permissions
- ccache for faster builds
- Additional Steps for macOS mojave
- Setup using Docker
- Clone ArduPilot repository
- Cloning with the command line
- How to Build the Docker Image
- Run ArduPilot Container
How To Compile And Run a C/C++ Code In Linux
I am a new Linux user and student who used to write C or C++ programs on MS-Windows. Now, I am using Ubuntu Linux. How can I compile a C or C++ program on Linux operating systems using bash Terminal application?
To compile a C or C++ program on any Linux distro such as Ubuntu, Red Hat, Fedora, Debian and other Linux distro you need to install:
| Tutorial details | |
|---|---|
| Difficulty level | Easy |
| Root privileges | No |
| Requirements | GNU C/C++ compiler |
| Est. reading time | 2 minutes |
- GNU C and C++ compiler collection
- Development tools
- Development libraries
- IDE or text editor to write programs
Step #1: Install C/C++ compiler and related tools
If you are using Fedora, Red Hat, CentOS, or Scientific Linux, use the following yum command to install GNU c/c++ compiler:
# yum groupinstall ‘Development Tools’
If you are using Debian or Ubuntu Linux, type the following apt-get command to install GNU c/c++ compiler:
$ sudo apt-get update
$ sudo apt-get install build-essential manpages-dev
Step #2: Verify installation
Type the following command to display the version number and location of the compiler on Linux:
$ whereis gcc
$ which gcc
$ gcc —version
Sample outputs:
Fig. 01: GNU C/C++ compilers on Linux
How to Compile and Run C/C++ program on Linux
Create a file called demo.c using a text editor such as vi, emacs or joe:
How do I compile the program on Linux?
Use any one of the following syntax to compile the program called demo.c:
In this example, compile demo.c, enter:
If there is no error in your code or C program then the compiler will successfully create an executable file called demo in the current directory, otherwise you need fix the code. To verify this, type:
$ ls -l demo*
How do I run or execute the program called demo on Linux?
Simply type the the program name:
$ ./demo
OR
$ /path/to/demo
Samples session:
Animated gif 01: Compile and run C and C++ program demo
Compiling and running a simple C++ program
Create a program called demo2.C as follows:
To compile this program, enter:
To run this program, type:
- No ads and tracking
- In-depth guides for developers and sysadmins at Opensourceflare✨
- Join my Patreon to support independent content creators and start reading latest guides:
- How to set up Redis sentinel cluster on Ubuntu or Debian Linux
- How To Set Up SSH Keys With YubiKey as two-factor authentication (U2F/FIDO2)
- How to set up Mariadb Galera cluster on Ubuntu or Debian Linux
- A podman tutorial for beginners – part I (run Linux containers without Docker and in daemonless mode)
- How to protect Linux against rogue USB devices using USBGuard
Join Patreon ➔
How do I generate symbolic information for gdb and warning messages?
The syntax is as follows C compiler:
cc -g -Wall input.c -o executable
The syntax is as follows C++ compiler:
g++ -g -Wall input.C -o executable
How do I generate optimized code on a Linux machine?
The syntax is as follows C compiler:
cc -O input.c -o executable
The syntax is as follows C++ compiler:
g++ -O -Wall input.C -o executable
How do I compile a C program that uses math functions?
The syntax is as follows when need pass the -lm option with gcc to link with the math libraries:
cc myth1.c -o executable -lm
How do I compile a C++ program that uses Xlib graphics functions?
The syntax is as follows when need pass the -lX11 option with gcc to link with the Xlib libraries:
g++ fireworks.C -o executable -lX11
How do I compile a program with multiple source files?
The syntax is as follows if the source code is in several files (such as light.c, sky.c, fireworks.c):
cc light.c sky.c fireworks.c -o executable
C++ syntax is as follows if the source code is in several files:
g++ ac.C bc.C file3.C -o my-program-name
See gcc(1) Linux and Unix man page for more information.
🐧 Get the latest tutorials on Linux, Open Source & DevOps via
| Category | List of Unix and Linux commands |
|---|---|
| Documentation | help • mandb • man • pinfo |
| Disk space analyzers | df • duf • ncdu • pydf |
| File Management | cat • cp • less • mkdir • more • tree |
| Firewall | Alpine Awall • CentOS 8 • OpenSUSE • RHEL 8 • Ubuntu 16.04 • Ubuntu 18.04 • Ubuntu 20.04 |
| Linux Desktop Apps | Skype • Spotify • VLC 3 |
| Modern utilities | bat • exa |
| Network Utilities | NetHogs • dig • host • ip • nmap |
| OpenVPN | CentOS 7 • CentOS 8 • Debian 10 • Debian 8/9 • Ubuntu 18.04 • Ubuntu 20.04 |
| Package Manager | apk • apt |
| Processes Management | bg • chroot • cron • disown • fg • glances • gtop • jobs • killall • kill • pidof • pstree • pwdx • time • vtop |
| Searching | ag • grep • whereis • which |
| Shell builtins | compgen • echo • printf |
| Text processing | cut • rev |
| User Information | groups • id • lastcomm • last • lid/libuser-lid • logname • members • users • whoami • who • w |
| WireGuard VPN | Alpine • CentOS 8 • Debian 10 • Firewall • Ubuntu 20.04 |
Comments on this entry are closed.
thank you so much ur solution gave a relief…
it made my gcc command to work
Very nice article…..
In Fig. 01, you did “whereis” twice. Shouldn’t it be “which” the second time? Thanks for the tut though. Big fan!
Another mistake, please change the following comment:
## assuming that executable-file-name.c exists ##
to
## assuming that program-source-code.c exists in the current directory ##
how to compile a program that use math functions and other things?
For the sake of supplying an example, let’s say you want to use the cosine function. This is supplied in the Linux math library. The cosine function is called ‘cos()’. Similarly, the sine function is called ‘sin()’.
First, to find information about how to use them, type “man cos” in a terminal session. This gives you the manual page for the cosine function. The output from ‘man’ may vary for your system, but it likely tells you three things: 1. first, include the math.h header, 2. cos() takes a ‘double’ as its argument and it returns a double as its output, 3. to build your program, tell the C compiler to include the math library (-lm).
Here’s a sample program that does all of this:
Love it!
Thank you. I have a trouble in doing step 1 and 2. But they are fixed.
thank u ,
need pdf of the commands guide to access the c/c++/java.
to compile and run a c++ program in ubuntu follow these simple steps:
1 open terminal window.
2 type “gedit” .
3 A gedit window will appear whereyou can write your program.
4 save your program as “filename.cpp” on desktop, “.cpp” is compulsory.
5 open terminal again and type “cd Desktop”.
6 In second line type “g++ filename.cpp”.
7 Type “./a.out”.
NOW YOUR WILL RUN.
very nice to your step.
thanks
Thanks! This article really helped me to find the GNU compiler in a Linux Operating System and showed me how to compile a C program.
dear sir,
what is the procedure to run .cpp program in linux distro debian 5 ?
just about to get around to learning c along with teaching my sons it. i had no idea where to start, the first page i checked is a bumper bonanza.
Источник
The Linux Command Line
by William Shotts
Fifth Internet Edition Available Now!
Designed for the new command line user, this 555-page volume covers the same material as LinuxCommand.org but in much greater detail. In addition to the basics of command line use and shell scripting, The Linux Command Line includes chapters on many common programs used on the command line, as well as more advanced topics.
Released under a Creative Commons license, this book is available for free download in PDF format. Download it here.
The book is available in printed form, published by No Starch Press. Copies may be purchased wherever fine books are sold. No Starch Press also offers electronic formats for popular e-readers.
In addition to English, the printed book is also available in the following languages:
- Korean: available from BJ PUBLIC
- Serbian: available from Mikro Knjiga
- Chinese (Traditional): available from GOTOP
- Chinese (Simplified): available from PT Press
- Russian: available from Piter
- Polish: available from Helion
Find The Linux Command Line at your local library.
Want to translate the Creative Commons version of The Linux Command Line? Please see the Community Translation Policy for details.
The following community translations are now available:
- ArabicTranslation by Abd Allatif Eymsh
- Spanish (in progress). Translation by Adriano Sánchez
- Portuguese (in progress). Translation by Matheus Sales
- Italian (in progress). Translation by Francesco Cargiuli
- Romanian (in progress). Translation by Vlad Paval
- Turkish (in progress). Translation by Herkes için Linux
What Readers Are Saying About The Linux Command Line!
«I have been using Linux for a little over a year. Read as much as I could including Rute, and many others. I have learned more in the first 93 pages of your book than any others. «
«What a great help your book has been for me! I was looking for a book like yours, but I never was able to find one that really walks the reader through the Linux command line in a general sort of way. Do you know of any others? If I recall, there are a lot of books dedicated to shell scripting, but none that are geared to regular command-line use.»
«Fantastic book!! I have recently switched from the legacy OS to Linux and I have been trying to find a distro that mimics this legacy OS in fear of using the terminal. I ran across this book and opened the terminal for the first time. This book teaches you everything you need to know about the shell and does it with ease. It starts by giving you a solid foundation and builds from there. Its simplicity and informative structure is ideal for all new beginners switching to Linux. I am now always on the terminal even for the simplest things. Not only does this build love, but I also get to practice my shell scripting. Great book!!»
«I’ve been enjoying reading the book and have learned a lot from every chapter. Your writing is very clear, and I’ve enjoyed following along with your examples. I’ve skimmed a couple of Linux books before, but never had enough time to really get into them. From those experiences however, I think your book is much clearer and approachable for beginners.»
«WOW! What a great book. It will clearly provide a stepping stone for many people who want to wean themselves off of their GUI habit, or perhaps just «Make the difficult possible.»
«I think one of the greatest assets of the book that most others about Linux don’t have is the conversational tone. I feel like in almost every chapter, there are parts where you lead the reader to ask questions of the material that aren’t necessarily covered.»
© 2000-2021, William E. Shotts, Jr. Verbatim copying and distribution of this entire article is permitted in any medium, provided this copyright notice is preserved.
Linux® is a registered trademark of Linus Torvalds.
Источник
Setting up the Build Environment (Linux/Ubuntu)В
This article shows how to setup your build environment on Linux/Ubuntu machines.
Setup on Ubuntu
Get git
Git is a free and open source distributed version control system that is used to manage ArduPilot codebase. Git is available on all major OS platforms, and a variety of tools exist to make it easier to get started.
Git command line
Ubuntu
Linux/Ubuntu users can install with apt :
- sudo apt-get update
- sudo apt-get install git
- sudo apt-get install gitk git-gui
Windows and other Systems
Recommended GUI Tools
The git command line, gitk and git-gui tools are the basics that all users should have installed and are available from a few places.
A comprehensive list of GUI tools are listed here on git-scm.com but here are a few of the developer favourites:
- GitHub Desktop for Windows and Mac is an easy to use tool with good GitHub integration but has fewer features than other clients.
- Sourcetree for Windows and Mac OSX is a full featured tool with a nice interface with many features including allowing individual lines from a file to be included in a new commit (simpler tools only allow the entire file to be included)
- GitKraken is a a full featured tool for Windows, Mac and Linux
Clone ArduPilot repository
“Cloning” is git’s term for making a local copy of a remote repository (i.e. one held on the GitHub servers).
Developers should clone the main ArduPilot repository (if they simply want to download and compile the latest code) or their own fork (if they want to make changes to the source code and potentially submit changes back).
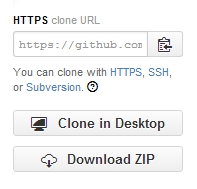
Instructions for commonly used tools are below but whichever tool is used, the URL for the source repo will be required. This can be found on the right side of the screen on each Github repository home page but in general the URL is:
- https://github.com/ArduPilot/ardupilot.git for the main ardupilot repo
- https://github.com/your-github-account/ardupilot for your fork of the ardupilot repo
Cloning with the command line
open a terminal and navigate to the directory where you would like the clone to be stored
clone your fork:
in case some firewalls do not allow ssh access which can cause the above submodule updates to fail, in this instance you can tell git to unilaterally use https through the following command:
to use https protocols instead of the default git:// prefix.
Install some required packages
If you are on a debian based system (such as Ubuntu or Mint), we provide a script that will do it for you. From ardupilot directory :
Reload the path (log-out and log-in to make permanent):
Now you should be able to build with waf as described in BUILD.md.
At this point you have already installed the MAVProxy Ground Control Station (MAVProxy GCS) and are also ready to do Software In the Loop (SITL) simulations of the vehicle code. See SITL Simulator (Software in the Loop) and Setting up SITL on Linux . You are ready to not only build the code, but run your build in the Ardupilot SITL simulator.
Cleaning
If there have been updates to some git submodules you may need to do a full clean build. To do that use:
that will remove the build artifacts so you can do a build from scratch
Setup for other Distributions Using the STM Toolchain
Add some directories to your search path (Facultative)В
ONLY if you didn’t run the install-prereqs script from previous step.
Add the following lines to the end of your “.bashrc” in your home directory (notice the . on the start of that filename. Also, this is a hidden file, so if you’re using a file manager, make sure to turn on “show hidden files”).
Then reload your PATH by using the “dot” command in a terminal
Do not use this if you have already use the install-prereqs-ubuntu.sh script !
To build for a autopilot target on Linux you need the following tools and git repositories:
- The gcc-arm cross-compiler from here (ArduPilot is only built and tested on these specific versions of gcc-arm; if installed with apt-get gcc-arm will not produce a working binary in many cases)
- gnu make, gawk and associated standard Linux build tools
- On a 64 bit system you will also need to have installed libc6-i386.
Also, it’s worth mentioning here that you want to ensure that the modemmanager package is not installed and the modem-manager process is not running.
Compiler
You need the specific gcc-arm cross-compiler linked above. You need to unpack it where you want, for now let’s call this location TARGET_DIR:
and then add the bin directory from the tarball to your $PATH by editing the $HOME/.bashrc file and adding a line like this to the end. TARGET_DIR is the location choose previouly where you unpack the toolchain:
Permissions
You need to make your user a member of the dialout group:
You will need to log out and then log back in for the group change to take effect.
Now you should be able to build with waf as described in BUILD.md.
ccache for faster builds
Installing ccache will speed up your builds a lot. Once you install it (for example with “sudo apt-get install ccache”) you should link the compiler into /usr/lib/ccache like this:
Then add /usr/lib/ccache to the front of your $PATH
Additional Steps for macOS mojave
Due to some changes binutils installed via brew have stopped working for macOS mojave leading to crashing builds. So if installed, remove via following command:
Also you will need to install the c++ include headers to /usr/include to do that. Run the following in commandline and follow the installation routine:
Setup using Docker
Clone ArduPilot repository
“Cloning” is git’s term for making a local copy of a remote repository (i.e. one held on the GitHub servers).
Developers should clone the main ArduPilot repository (if they simply want to download and compile the latest code) or their own fork (if they want to make changes to the source code and potentially submit changes back).
Instructions for commonly used tools are below but whichever tool is used, the URL for the source repo will be required. This can be found on the right side of the screen on each Github repository home page but in general the URL is:
- https://github.com/ArduPilot/ardupilot.git for the main ardupilot repo
- https://github.com/your-github-account/ardupilot for your fork of the ardupilot repo
Cloning with the command line
open a terminal and navigate to the directory where you would like the clone to be stored
clone your fork:
How to Build the Docker Image
Build the docker image and tag it with the name ardupilot:
Run ArduPilot Container
The following command runs the docker container, linking your current directory with the ardupilot source, and launches an interactive shell inside the container. From here you can build ardupilot:
 © Copyright 2021, ArduPilot Dev Team.
Источник


