- Установка и использование подсистемы Linux (WSL 2) в Windows 10
- Windows Subsystem for Linux Installation Guide for Windows 10
- Simplified Installation for Windows Insiders
- Manual Installation Steps
- Step 1 — Enable the Windows Subsystem for Linux
- Step 2 — Check requirements for running WSL 2
- Step 3 — Enable Virtual Machine feature
- Step 4 — Download the Linux kernel update package
- Step 5 — Set WSL 2 as your default version
- Step 6 — Install your Linux distribution of choice
- Install Windows Terminal (optional)
- Set your distribution version to WSL 1 or WSL 2
- Troubleshooting installation
Установка и использование подсистемы Linux (WSL 2) в Windows 10
Windows Subsystem for Linux (WSL) — подсистема ОС Windows 10, позволяющая разработчикам, тестировщикам запускать нативные приложения Linux, писать скрипты, выполнять команды непосредственно из Windows. В обновлённой Windows 10 (2004) появилась 2я версия WSL, в которой используется полноценное ядро Linux с возможностью запуска приложений и контейнеров Docker, реализована высокая скорость загрузки, небольшой объем потребляемых ресурсов, управление в фоновом режиме, обновление ядра. Таким образом вы сможете запускать ELF64 программы, которые могут получать доступ к файловой системе Windows без использования сторонних порто (таких как Cygwin).
Образ ядра Linux (версия ядра 4.19) в Windows 10 представляет собой легкую виртуальную машину, для запуска которой не нужно ставить полноценную роль Hyper-V. Системные вызовы Linux транслируются на лету в вызовы Windows без использования эмулятора (в отличии от WSL1).
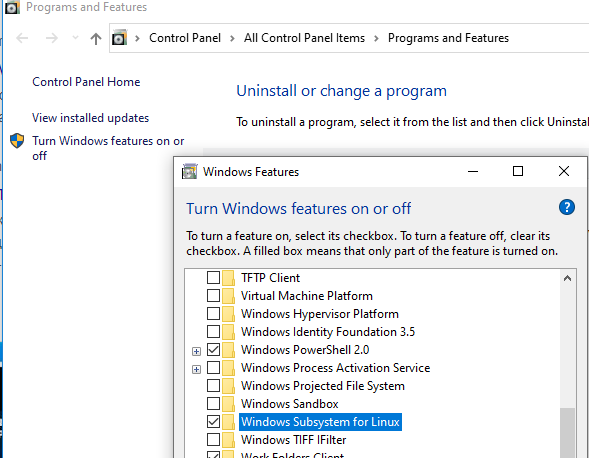
Изначально компонент WSL отключен. Чтобы его включить, вам необходимо зайти в Пуск -> Панель управления -> Программы и компоненты -> Включение и отключение компонентов Windows (Control Panel\All Control Panel Items\Programs and Features\Turn Windows features on or off), активировать галочку Подсистема Windows для Linux (Windows Subsystem for Linux), нажать кнопку ОК, и перезагрузить компьютер.
Вы можете включить компоненты WSL в Windows 10 с помощью dism:
dism.exe /online /enable-feature /featurename:VirtualMachinePlatform /all /norestart
dism.exe /online /enable-feature /featurename:Microsoft-Windows-Subsystem-Linux /all /norestart
Enable-WindowsOptionalFeature -Online -FeatureName Microsoft-Windows-Subsystem-Linux
Enable-WindowsOptionalFeature -Online -FeatureName VirtualMachinePlatform
Install-WindowsFeature -Name Microsoft-Windows-Subsystem-Linux
После этого также необходимо перезагрузить компьютер.
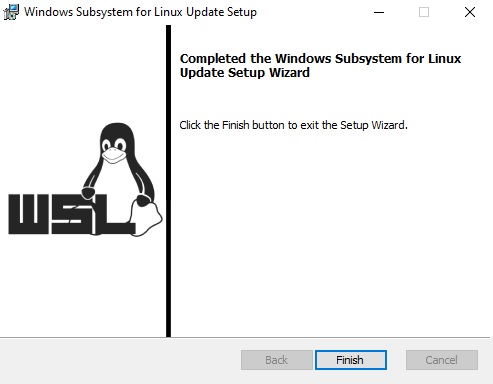
Теперь вам нужно выполнить обновление WSL до версии 2. Для этого требуется зайти на сайт https://docs.microsoft.com/ru-ru/windows/wsl/wsl2-kernel, скачать файл wsl_update_x64.msi, установить его. По завершении увидите картинку
Чтобы сделать WSL2 архитектурой по умолчанию для новых дистрибутивов, в PowerShell выполните команду:
wsl —set-default-version 2
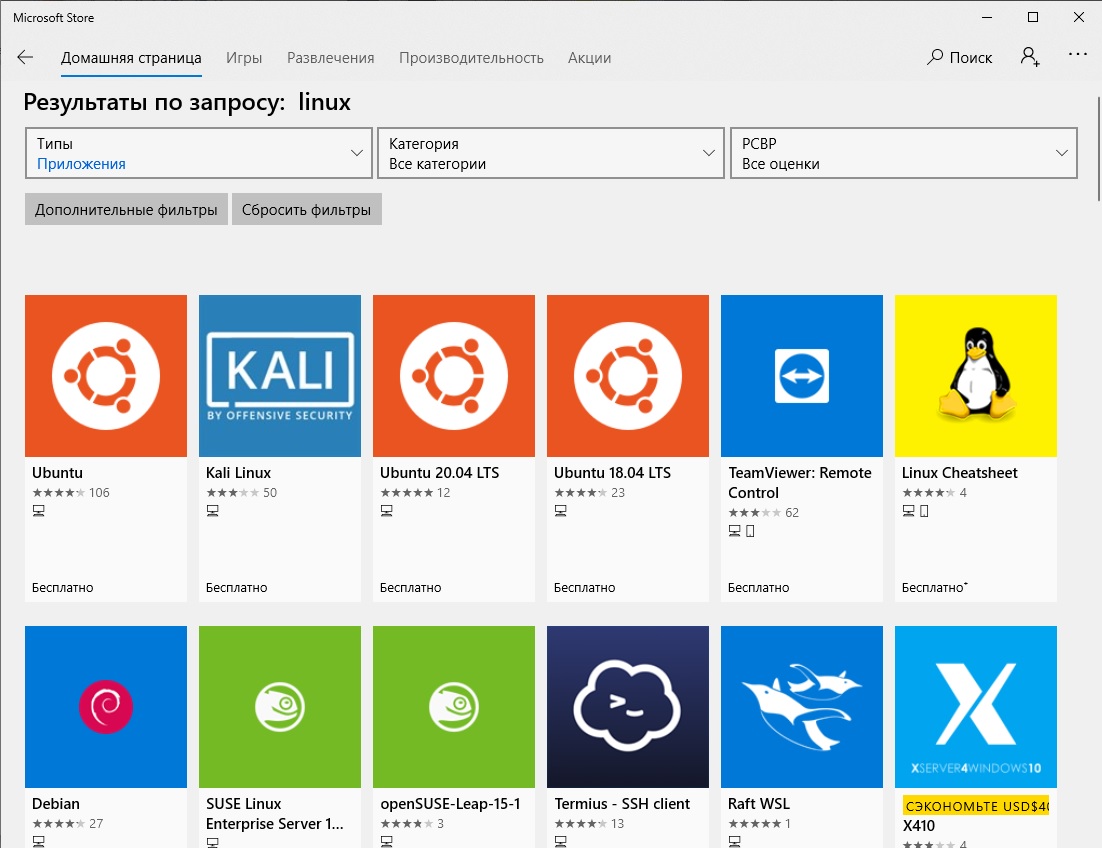
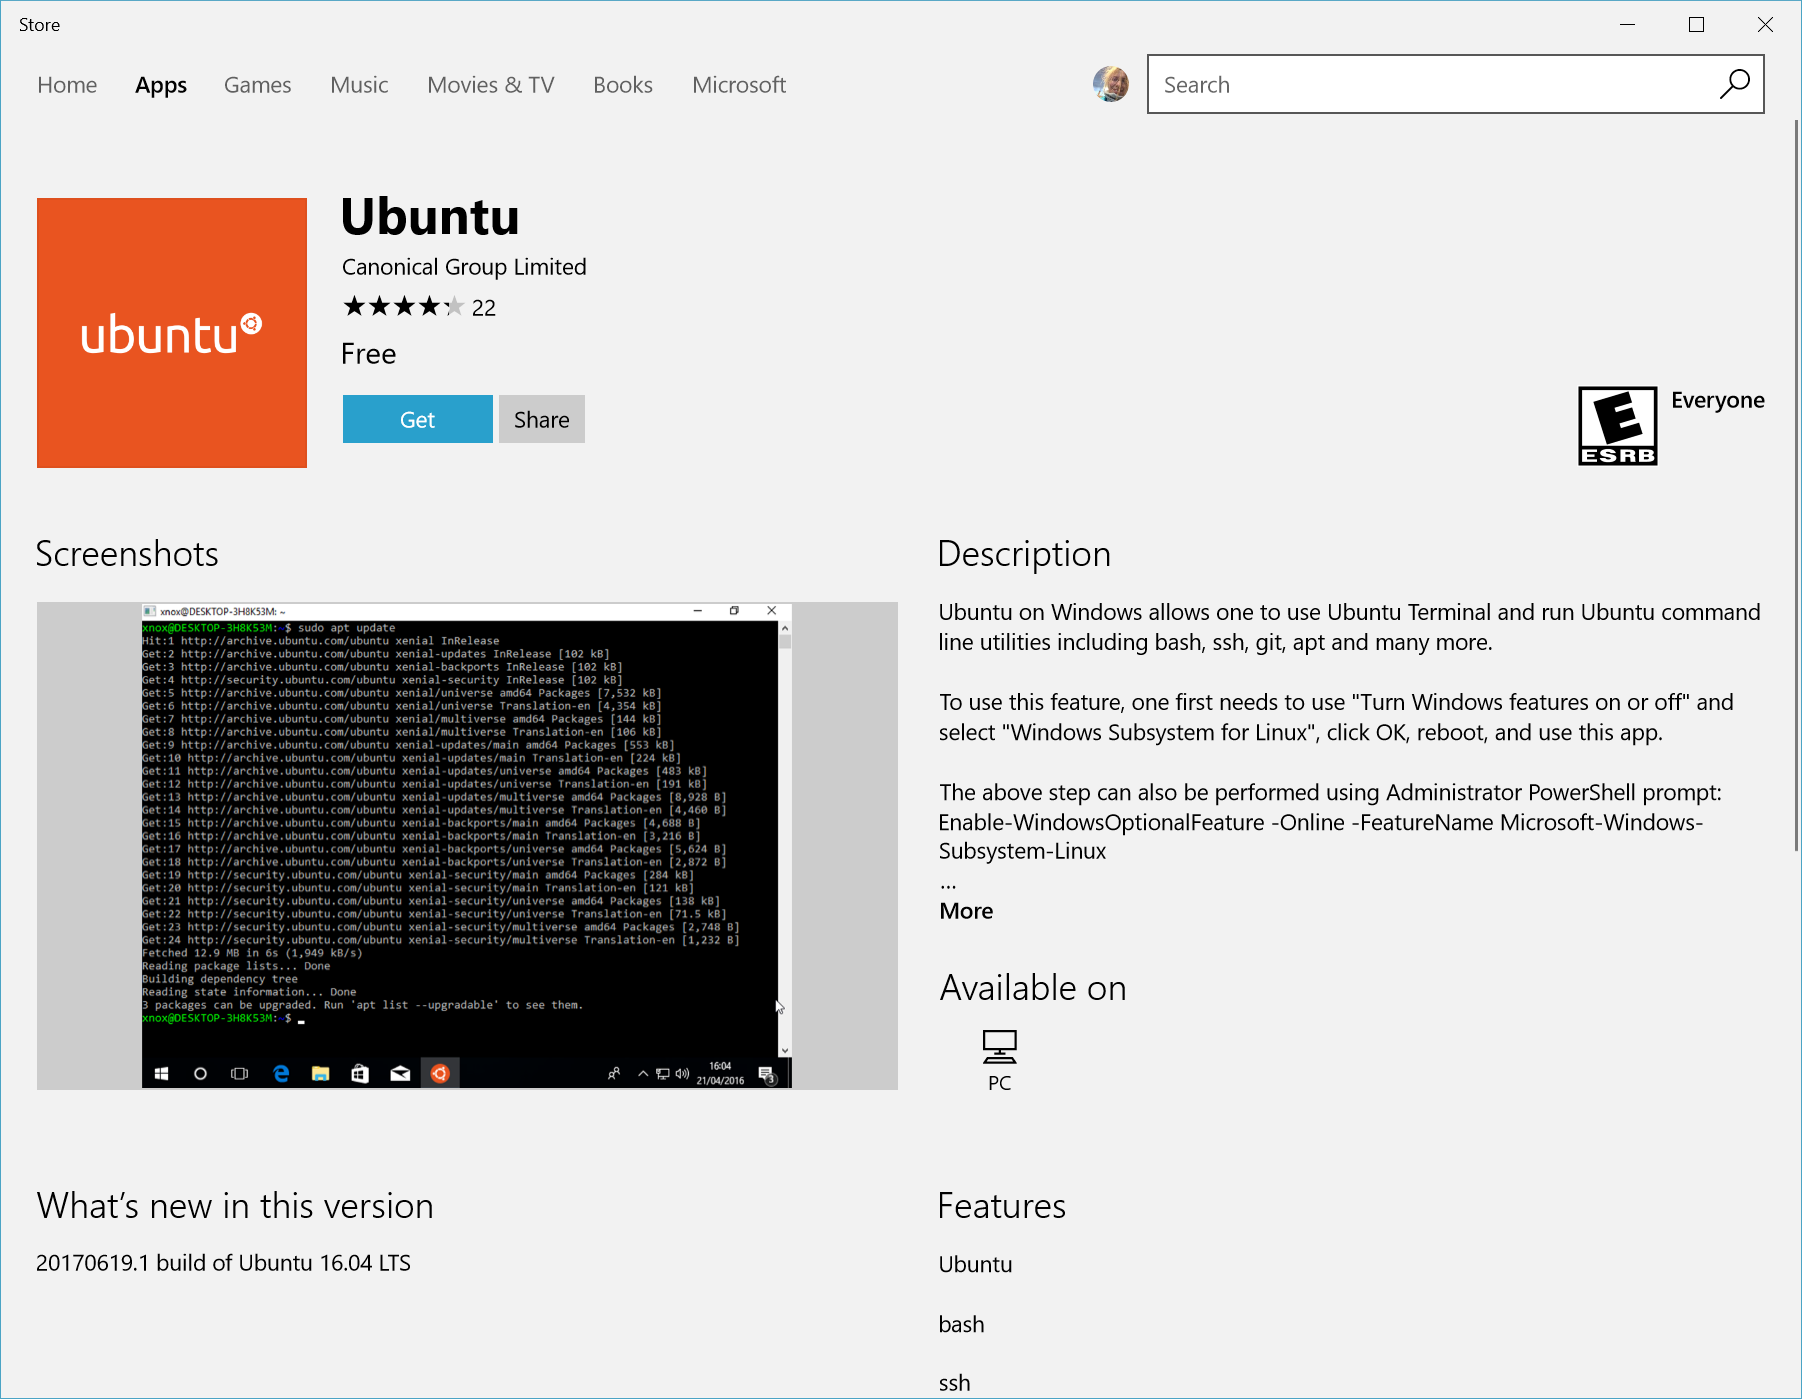
Далее вам необходимо открыть Microsoft Store, в поиске ввести слово “Linux”. В появившемся списке выберите нужный дистрибутив. Доступные Ubuntu, Debian, Kali Linux, Linux Cheatsheet, SUSE Linux Enterprise Server15, openSUSE Leap 15-1, Pengwin Enterprise, Fedora Remix for WSL или другие. В нашем примере мы будем использовать Ubuntu 20.04 LTS, нажмите кнопку Получить.
Invoke-WebRequest https://aka.ms/wslubuntu2004 -OutFile ubuntu-2004.zip –UseBasicParsing
Expand-Archive -Path .\ubuntu-2004.zip
Запустите установку образа Linux с помощью файла Ubuntu.exe.
Также вы можете скачать образ в виде appx файла и установить его с помощью командлета Add-AppxPackage.
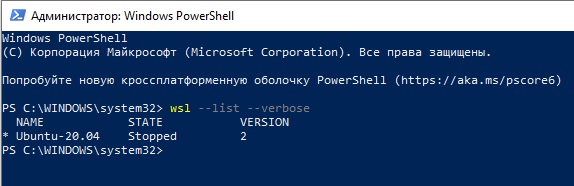
После установки можно проверить используемую версию WSL с помощью команды
wsl —list –-verbose
Если у вашей среды Linux указана версия 1, нужно изменить ее на WSL2 командой:
wsl —set-version Ubuntu-20.04 2
Файл жёсткого диска с образом виртуальной машины ОС Linux Ubuntu 20.04 будет располагаться в профиле пользователя: C:\Users\234\AppData\Local\Packages\CanonicalGroupLimited.Ubuntu20.04onWindows_79rhkp1fndgsc\LocalState.
После установки дистрибутива в стартовом меню появляется ярлык на него. Для запуска Ubuntu зайдите в меню Пуск, нажмите на соответствующем ярлыке и получите в отдельном окне полноценную командную оболочку Bash. Запускать WSL можно и с помощью команды wsl. При первом запуске образа в командной строке Bash вам будет предложено создать пользователя и пароль (которые не должны совпадать с учётной записью Windows). Чтобы выполнять команды с правами root, необходимо использовать дополнительный ключ (префикс) sudo. В WSL есть общие команды для Bash и CMD, и тут нужно не забывать, что система Linux чувствительна к регистру.
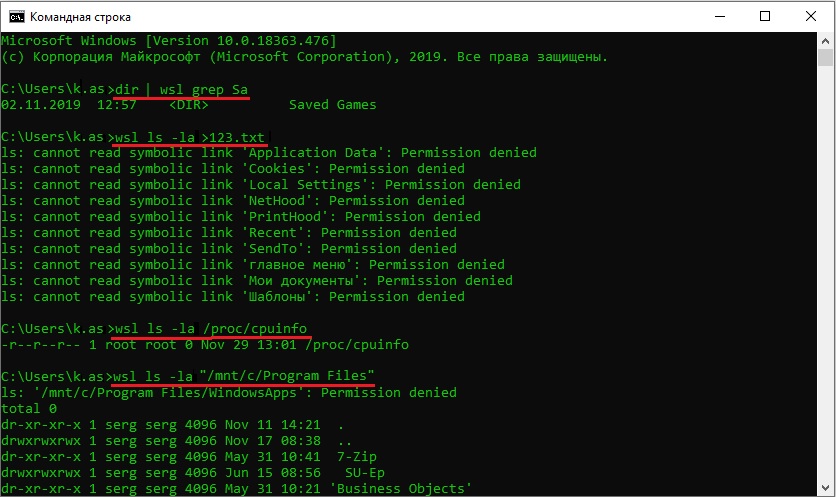
Вы можете выполнить Linux-команды из CMD. Для этого необходимо вначале указать “WSL”. Например, для просмотра списка файлов и папок в каталоге Windows, выполните:
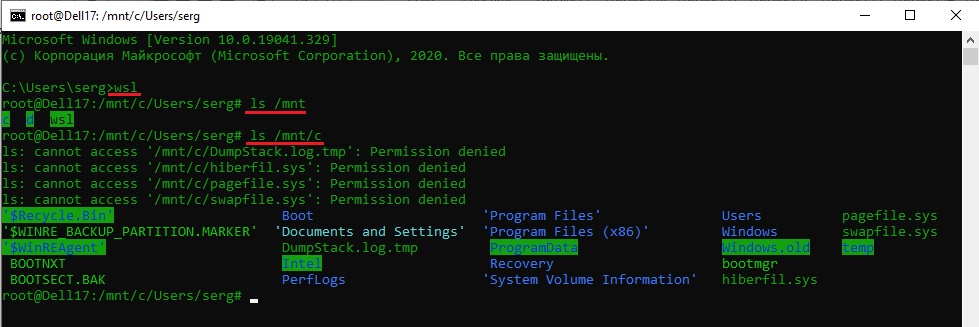
dir | wsl grep Sa
wsl ls ‑la > 123.txt
wsl ls ‑la /proc/cpuinfo
wsl ls ‑la “/mnt/c/Program Files”
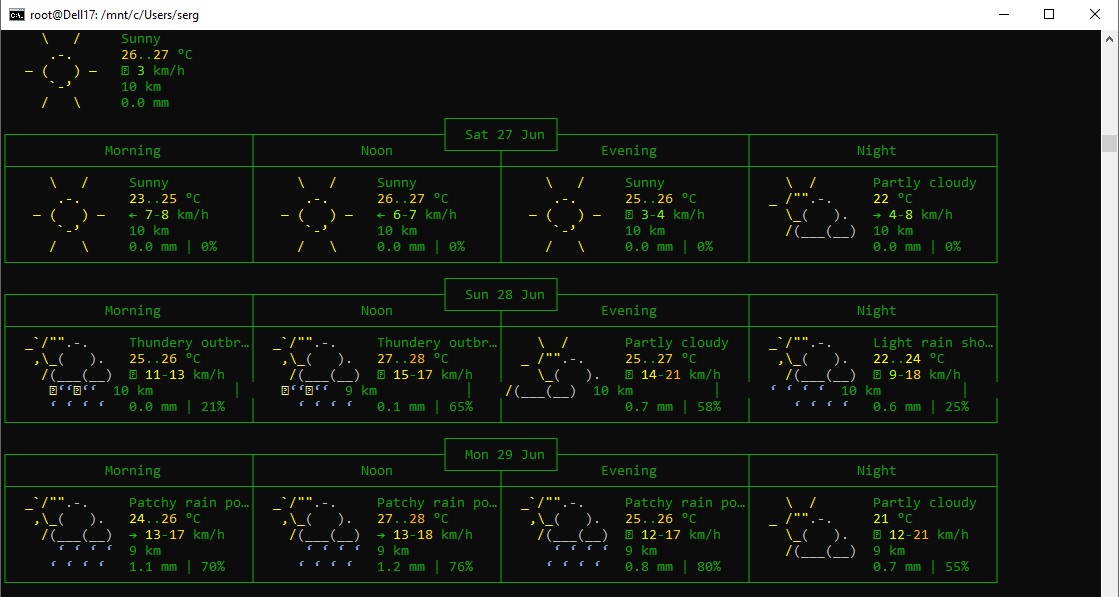
Также вы можете открыть проводник командой explorer.exe, калькулятор – calc.exe, блокнот – notepad.exe, paint – mspaint.exe, календарь – cal, погоду – curl wttr.in
Ещё один пример взаимосвязи 2х систем – вы можете открыть в Windows файл из WSL-дистрибутива по сетевому пути. Для этого в CMD наберите путь к файлу:
notepad \\wsl$\Ubuntu-20.04\home\1122.txt
Из окна консоли вы можете обновить список пакетов в Ubuntu с помощью команд:
sudo apt-get update
sudo apt-get upgrade
После обновления Ubuntu папка …/LocalState будет занимать 1.5 Гб.
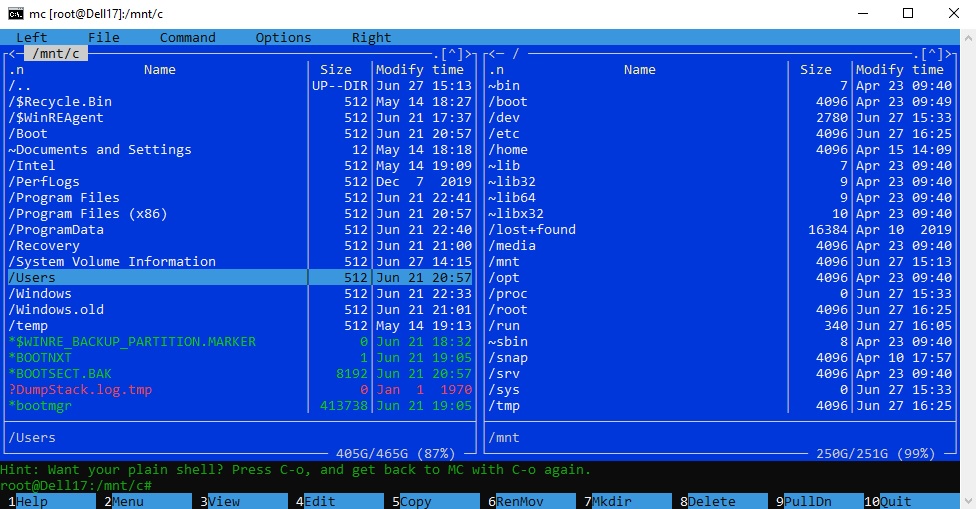
Из командной строки Linux можно не только просмотреть Windows-файлы и каталоги, но и получить к ним доступ. Чтобы удобнее копировать файлы, просматривать директории и их содержимое, установите файловый менеджер Midnight Commander с помощью команды
sudo apt-get install mc
Вы можете запустить Midnight Commander как в командной оболочке Bash, так и внутри CMD. На скриншоте ниже показано, что в двух панелях MC показывается список файлов с обеих ОС.
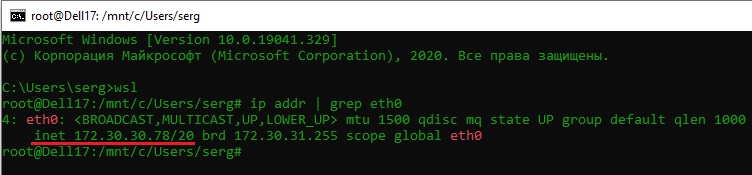
Можно отобрахить сетевые настройки (IP адрес) IP-адрес Linux-системы:
ip addr | grep eth0
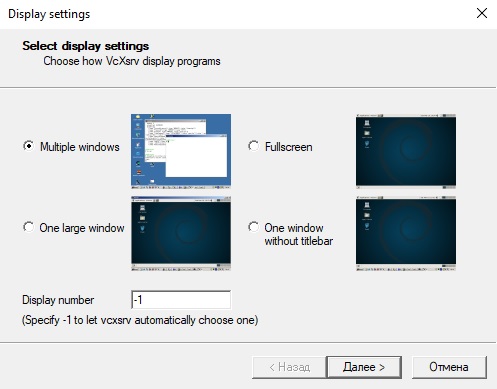
В WSL не предусмотрена работа приложений с графическим интерфейсом. Тем не менее вы можете попробовать их установить и использовать. Чтобы запускать графические приложения в Linux, нужно скачать и установить в Windows программу VcXsrv Windows X Server (https://sourceforge.net/projects/vcxsrv/).
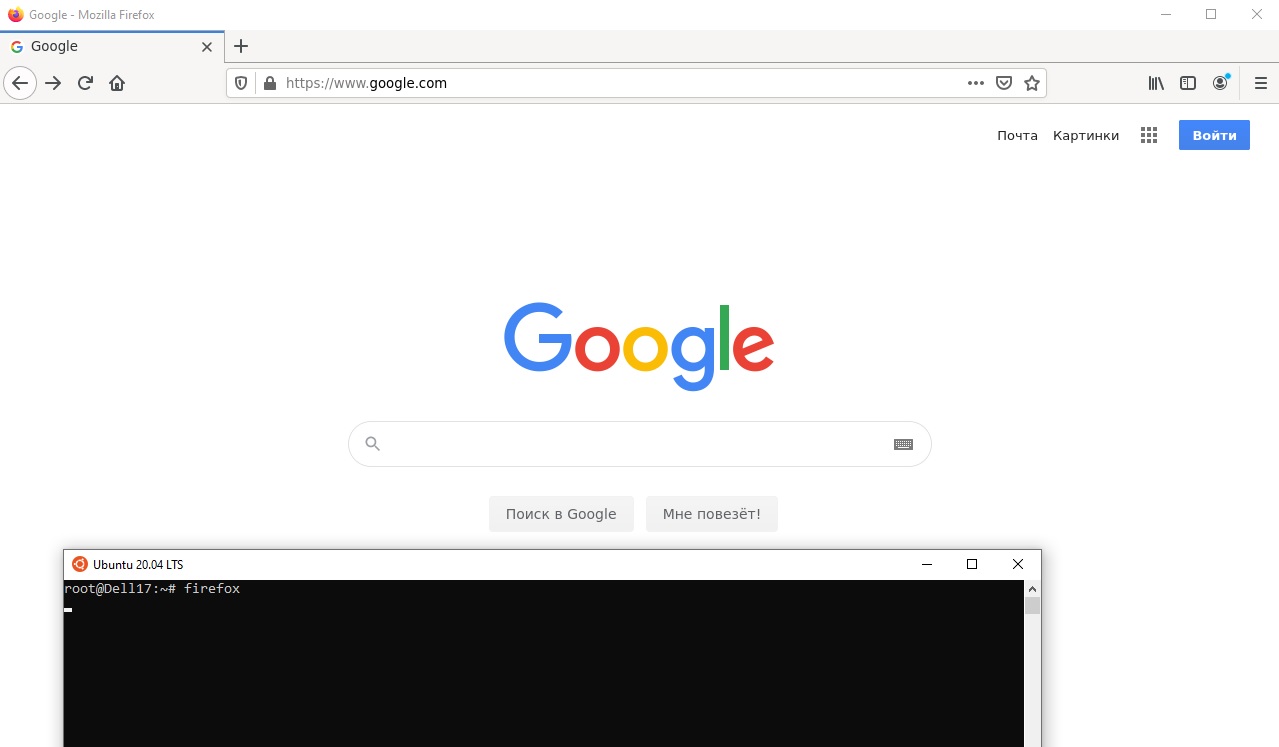
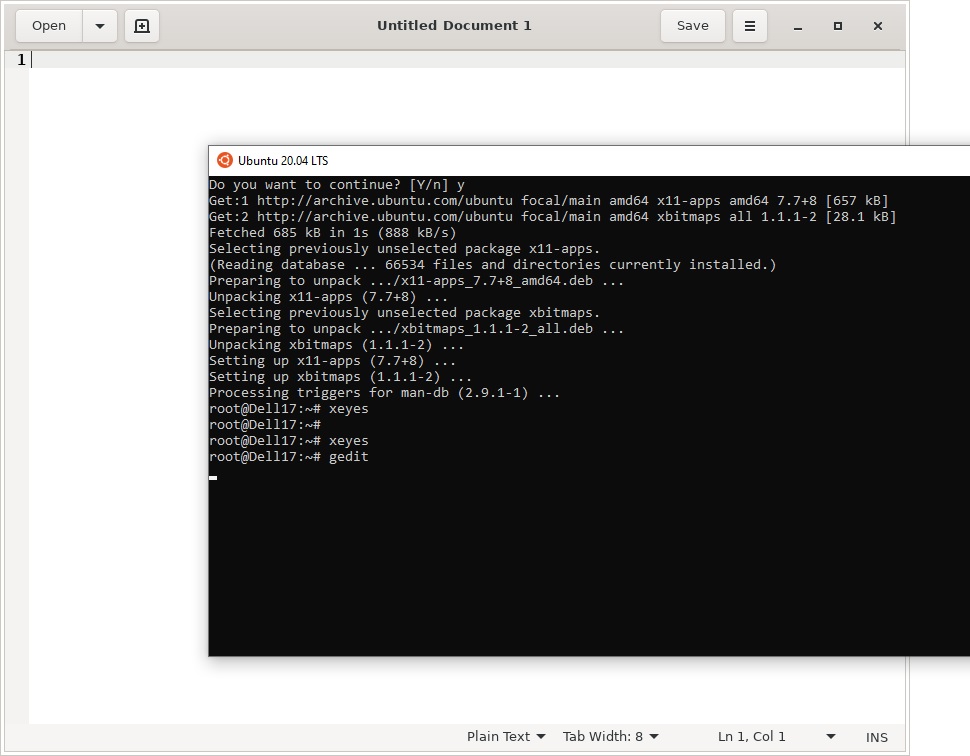
С помощью пакетного менеджера apt-get установим несколько графических программ: например, браузер, текстовый редактор или что-то ещё:
sudo apt-get install gedit
sudo apt-get install firefox
sudo apt-get install x11-app
Затем создайте файл в директории root:
export DISPLAY=$(cat /etc/resolv.conf | grep nameserver | awk ‘
Теперь можете запустить графические программы Linux через WSL командами:
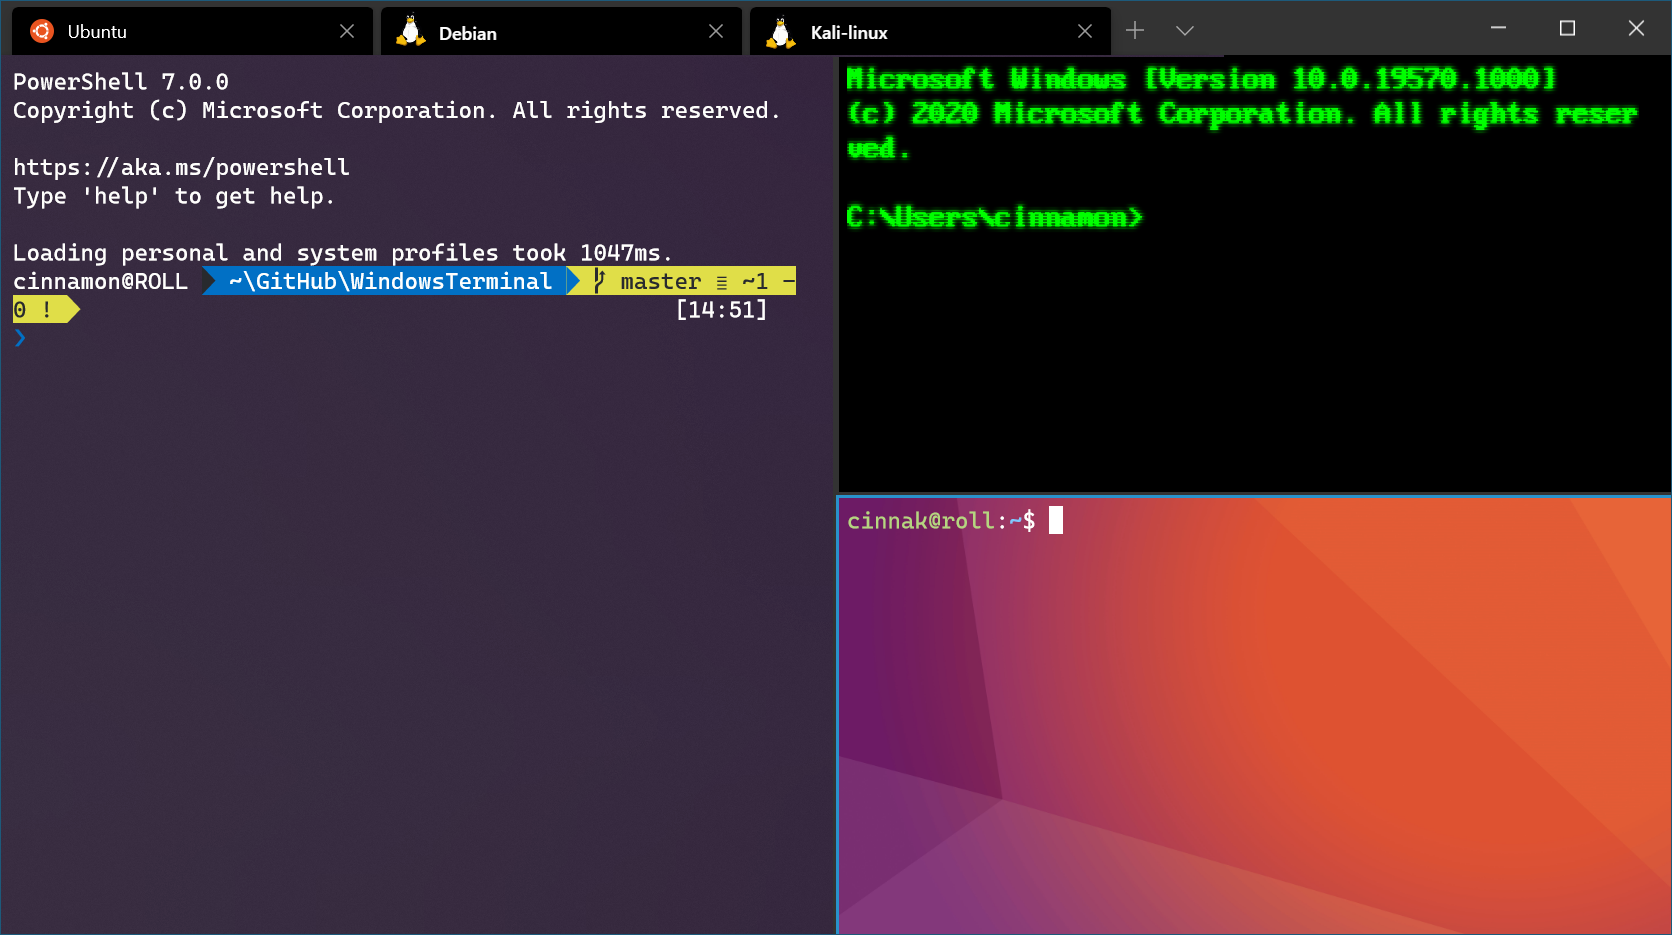
Вы можете установить в Windows 10 несколько дистрибутивов Linux и запускать одновременно в разных окнах WSL. Вывести весь перечень установленных дистрибутивов можете с помощью команды:
чтобы завершить работу всех запущенных дистрибутивов и ядра WSL 2, выполните команду:
Windows Subsystem for Linux Installation Guide for Windows 10
There are two options available for installing Windows Subsystem for Linux (WSL):
Simplified install (preview release): wsl —install
The wsl —install simplified install command requires that you join the Windows Insiders Program and install a preview build of Windows 10 (OS build 20262 or higher), but eliminates the need to follow the manual install steps. All you need to do is open a command window with administrator privileges and run wsl —install , after a restart you will be ready to use WSL.
Manual install: Follow the six steps listed below.
The manual install steps for WSL are listed below and can be used to install Linux on any version of Windows 10.
If you run into an issue during the install process, check the Troubleshooting installation section at the bottom of this page.
Simplified Installation for Windows Insiders
The installation process for Windows Subsystem for Linux has been significantly improved in the latest Windows Insiders preview builds of Windows 10, replacing the manual steps below with a single command.
In order to use the wsl —install simplified install command, you must:
- Join the Windows Insiders Program
- Install a preview build of Windows 10 (OS build 20262 or higher).
- Open a command line windows with Administrator privileges
Once those requirements are met, to install WSL:
- Enter this command in the command line you’ve opened in Admin mode: wsl.exe —install
- Restart your machine
The first time you launch a newly installed Linux distribution, a console window will open and you’ll be asked to wait for files to de-compress and be stored on your PC. All future launches should take less than a second.
CONGRATULATIONS! You’ve successfully installed and set up a Linux distribution that is completely integrated with your Windows operating system!
The —install command performs the following actions:
- Enables the optional WSL and Virtual Machine Platform components
- Downloads and installs the latest Linux kernel
- Sets WSL 2 as the default
- Downloads and installs a Linux distribution (reboot may be required)
By default, the installed Linux distribution will be Ubuntu. This can be changed using wsl —install -d . (Replacing with the name of your desired distribution.) Additional Linux distributions may be added to your machine after the initial install using the wsl —install -d command.
To see a list of available Linux distributions, enter wsl —list —online .
Manual Installation Steps
If you are not on a Windows Insiders build, the features required for WSL will need to be enabled manually following the steps below.
Step 1 — Enable the Windows Subsystem for Linux
You must first enable the «Windows Subsystem for Linux» optional feature before installing any Linux distributions on Windows.
Open PowerShell as Administrator and run:
We recommend now moving on to step #2, updating to WSL 2, but if you wish to only install WSL 1, you can now restart your machine and move on to Step 6 — Install your Linux distribution of choice. To update to WSL 2, wait to restart your machine and move on to the next step.
Step 2 — Check requirements for running WSL 2
To update to WSL 2, you must be running Windows 10.
- For x64 systems: Version 1903 or higher, with Build 18362 or higher.
- For ARM64 systems: Version 2004 or higher, with Build 19041 or higher.
- Builds lower than 18362 do not support WSL 2. Use the Windows Update Assistant to update your version of Windows.
To check your version and build number, select Windows logo key + R, type winver, select OK. Update to the latest Windows version in the Settings menu.
If you are running Windows 10 version 1903 or 1909, open «Settings» from your Windows menu, navigate to «Update & Security» and select «Check for Updates». Your Build number must be 18362.1049+ or 18363.1049+, with the minor build # over .1049. Read more: WSL 2 Support is coming to Windows 10 Versions 1903 and 1909. See the troubleshooting instructions.
Step 3 — Enable Virtual Machine feature
Before installing WSL 2, you must enable the Virtual Machine Platform optional feature. Your machine will require virtualization capabilities to use this feature.
Open PowerShell as Administrator and run:
Restart your machine to complete the WSL install and update to WSL 2.
Step 4 — Download the Linux kernel update package
Download the latest package:
If you’re using an ARM64 machine, please download the ARM64 package instead. If you’re not sure what kind of machine you have, open Command Prompt or PowerShell and enter: systeminfo | find «System Type» . Caveat: On non-English Windows versions, you might have to modify the search text, for example, in German it would be systeminfo | find «Systemtyp» .
Run the update package downloaded in the previous step. (Double-click to run — you will be prompted for elevated permissions, select вЂyes’ to approve this installation.)
Once the installation is complete, move on to the next step — setting WSL 2 as your default version when installing new Linux distributions. (Skip this step if you want your new Linux installs to be set to WSL 1).
Step 5 — Set WSL 2 as your default version
Open PowerShell and run this command to set WSL 2 as the default version when installing a new Linux distribution:
Step 6 — Install your Linux distribution of choice
Open the Microsoft Store and select your favorite Linux distribution.

The following links will open the Microsoft store page for each distribution:
From the distribution’s page, select «Get».
The first time you launch a newly installed Linux distribution, a console window will open and you’ll be asked to wait for a minute or two for files to de-compress and be stored on your PC. All future launches should take less than a second.

CONGRATULATIONS! You’ve successfully installed and set up a Linux distribution that is completely integrated with your Windows operating system!
Install Windows Terminal (optional)
Windows Terminal enables multiple tabs (quickly switch between multiple Linux command lines, Windows Command Prompt, PowerShell, Azure CLI, etc), create custom key bindings (shortcut keys for opening or closing tabs, copy+paste, etc.), use the search feature, and custom themes (color schemes, font styles and sizes, background image/blur/transparency). Learn more.
Set your distribution version to WSL 1 or WSL 2
You can check the WSL version assigned to each of the Linux distributions you have installed by opening the PowerShell command line and entering the command (only available in Windows Build 18362 or higher): wsl -l -v
To set a distribution to be backed by either version of WSL please run:
Make sure to replace with the actual name of your distribution and with the number ‘1’ or ‘2’. You can change back to WSL 1 at anytime by running the same command as above but replacing the ‘2’ with a ‘1’.
The update from WSL 1 to WSL 2 may take several minutes to complete depending on the size of your targeted distribution. If you are running an older (legacy) installation of WSL 1 from Windows 10 Anniversary Update or Creators Update, you may encounter an update error. Follow these instructions to uninstall and remove any legacy distributions.
If wsl —set-default-version results as an invalid command, enter wsl —help . If the —set-default-version is not listed, it means that your OS doesn’t support it and you need to update to version 1903, Build 18362 or higher. If you are on Build 19041 for ARM64, this command may fail when using PowerShell in which case you can use a Command Prompt instead to issue the wsl.exe command.
If you see this message after running the command: WSL 2 requires an update to its kernel component. For information please visit https://aka.ms/wsl2kernel . You still need to install the MSI Linux kernel update package.
Additionally, if you want to make WSL 2 your default architecture you can do so with this command:
This will set the version of any new distribution installed to WSL 2.
Troubleshooting installation
Below are related errors and suggested fixes. Refer to the WSL troubleshooting page for other common errors and their solutions.
Installation failed with error 0x80070003
- The Windows Subsystem for Linux only runs on your system drive (usually this is your C: drive). Make sure that distributions are stored on your system drive:
- Open Settings -> **System —>Storage ->More Storage Settings: Change where new content is saved


WslRegisterDistribution failed with error 0x8007019e
- The Windows Subsystem for Linux optional component is not enabled:
- Open Control Panel ->Programs and Features ->Turn Windows Feature on or off -> Check Windows Subsystem for Linux or using the PowerShell cmdlet mentioned at the beginning of this article.
Installation failed with error 0x80070003 or error 0x80370102
- Please make sure that virtualization is enabled inside of your computer’s BIOS. The instructions on how to do this will vary from computer to computer, and will most likely be under CPU related options.
- WSL2 requires that your CPU supports the Second Level Address Translation (SLAT) feature, which was introduced in Intel Nehalem processors (Intel Core 1st Generation) and AMD Opteron. Older CPUs (such as the Intel Core 2 Duo) will not be able to run WSL2, even if the Virtual Machine Platform is successfully installed.
Error when trying to upgrade: Invalid command line option: wsl —set-version Ubuntu 2
- Enure that you have the Windows Subsystem for Linux enabled, and that you’re using Windows Build version 18362 or higher. To enable WSL run this command in a PowerShell prompt with admin privileges: Enable-WindowsOptionalFeature -Online -FeatureName Microsoft-Windows-Subsystem-Linux .
The requested operation could not be completed due to a virtual disk system limitation. Virtual hard disk files must be uncompressed and unencrypted and must not be sparse.
- Deselect “Compress contents” (as well as “Encrypt contents” if that’s checked) by opening the profile folder for your Linux distribution. It should be located in a folder on your Windows file system, something like: USERPROFILE%\AppData\Local\Packages\CanonicalGroupLimited.
- In this Linux distro profile, there should be a LocalState folder. Right-click this folder to display a menu of options. Select Properties > Advanced and then ensure that the “Compress contents to save disk space” and “Encrypt contents to secure data” checkboxes are unselected (not checked). If you are asked whether to apply this to just to the current folder or to all subfolders and files, select “just this folder” because you are only clearing the compress flag. After this, the wsl —set-version command should work.
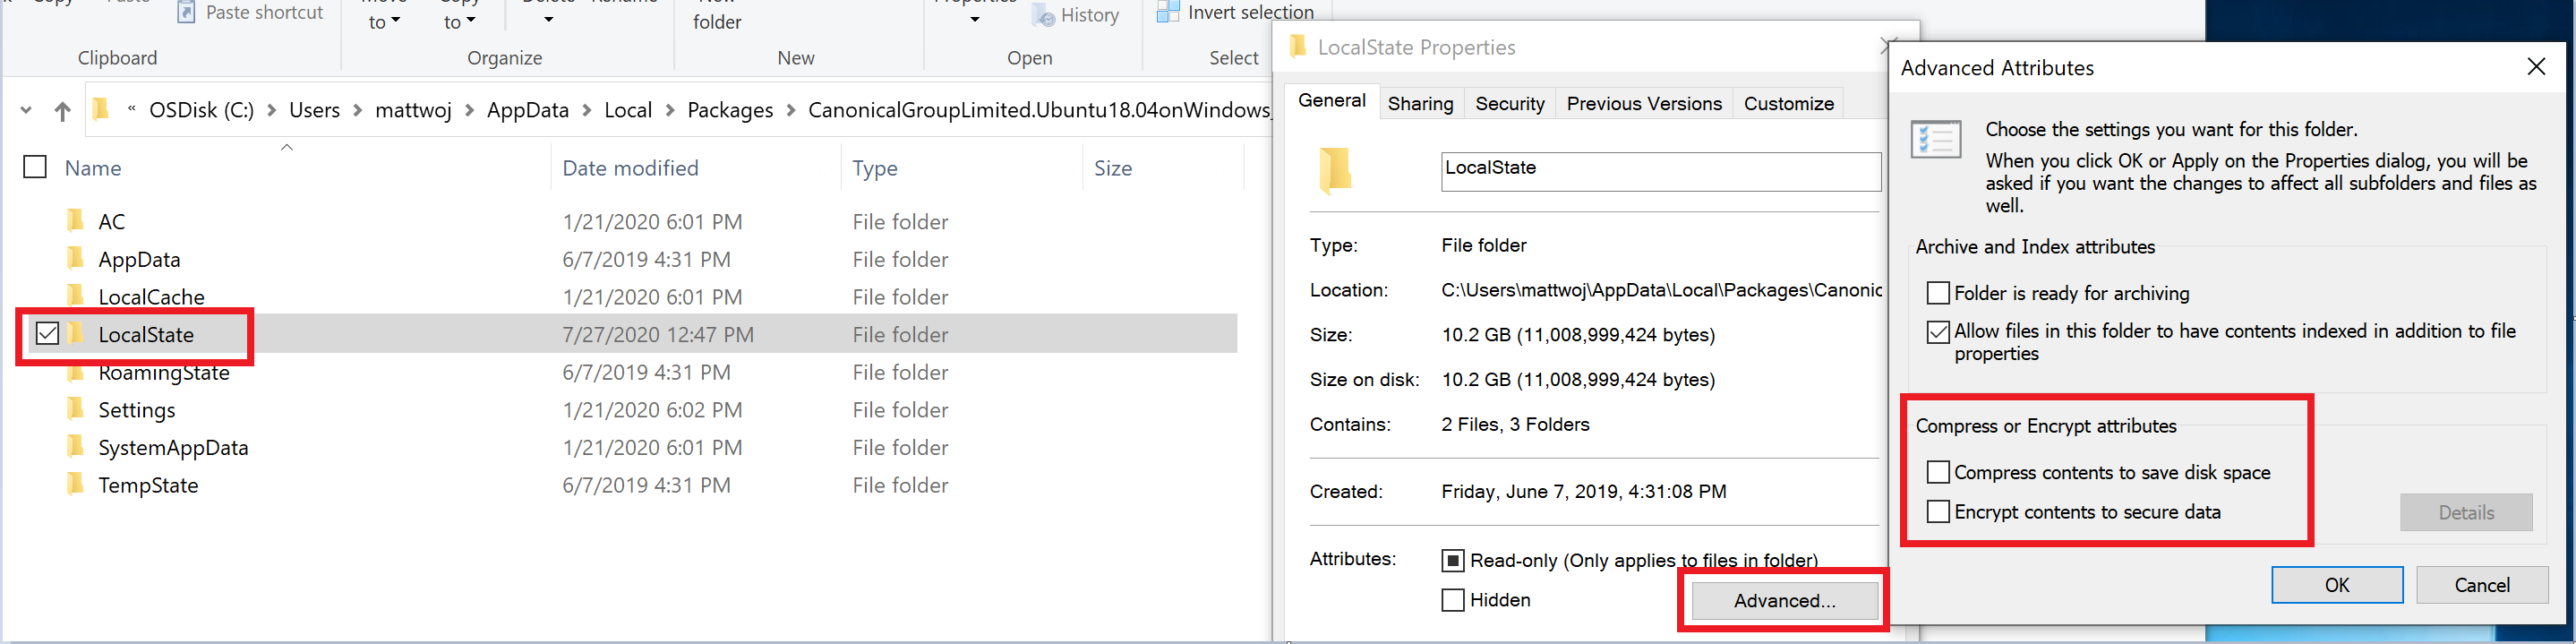
In my case, the LocalState folder for my Ubuntu 18.04 distribution was located at C:\Users \AppData\Local\Packages\CanonicalGroupLimited.Ubuntu18.04onWindows_79rhkp1fndgsc
Check WSL Docs GitHub thread #4103 where this issue is being tracked for updated information.
The term ‘wsl’ is not recognized as the name of a cmdlet, function, script file, or operable program.
- Ensure that the Windows Subsystem for Linux Optional Component is installed. Additionally, if you are using an ARM64 device and running this command from PowerShell, you will receive this error. Instead run wsl.exe from PowerShell Core, or Command Prompt.
Error: This update only applies to machines with the Windows Subsystem for Linux.
- To install the Linux kernel update MSI package, WSL is required and should be enabled first. If it fails, it you will see the message: This update only applies to machines with the Windows Subsystem for Linux .
- There are three possible reason you see this message:
- If the Linux kernel package is missing in the %SystemRoot%\system32\lxss\tools folder, you will encounter this error. Resolve it by installing the Linux kernel update MSI package in step #4 of these installation instructions. You may need to uninstall the MSI from ‘Add or Remove Programs’, and install it again.
You are still in old version of Windows which doesn’t support WSL 2. See step #2 for version requirements and links to update.
WSL is not enabled. You will need to return to step #1 and ensure that the optional WSL feature is enabled on your machine.
After you enabled WSL, a reboot is required for it to take effect, reboot your machine and try again.
Error: WSL 2 requires an update to its kernel component. For information please visit https://aka.ms/wsl2kernel .
—>


