- D esigning Buildings Wiki Share your construction industry knowledge www.designingbuildings.co.uk
- Window
- Contents
- [edit] Introduction
- [edit] Elements of a window
- [edit] Materials
- [edit] Opening type
- [edit] Fixed light
- [edit] Vertical slider/sash
- [edit] Casement
- [edit] Tilt and turn
- [edit] Pivot
- [edit] Bi-fold
- [edit] Louvre
- [edit] Other types
- [edit] Number of panes
- [edit] Related articles on Designing Buildings Wiki:
- [edit] External references
- Comments
- How to Build an Interior Wall
- How to Build a New Wall: Summary
- Building an Interior Wall: Step-by-Step
- Basic Structure
- Contents
- Gameplay [ edit | edit source ]
- Basic Wall [ edit | edit source ]
- Simple Stairs [ edit | edit source ]
- Wall With Door [ edit | edit source ]
- Wall With Window [ edit | edit source ]
- Trivia [ edit | edit source ]
- Update history [ edit | edit source ]
D esigning Buildings Wiki Share your construction industry knowledge www.designingbuildings.co.uk
Search
Window
Contents
[edit] Introduction
Windows are openings fitted with glass to admit light and allow people to see out. They are often openable to allow ventilation.
Although the historic use of glass dates back to the Romans, glass windows only became common domestically in England in the early-17th century, gradually becoming more versatile and widespread as plate glass processes were perfected during the Industrial Age.
England, France, Ireland and Scotland introduced a window tax during the 18th and 19th centuries which was payable based on the number of windows in a house. It is still common to see buildings from that period with windows that were bricked-up to avoid the tax. The tax was repealed in 1851.
[edit] Elements of a window
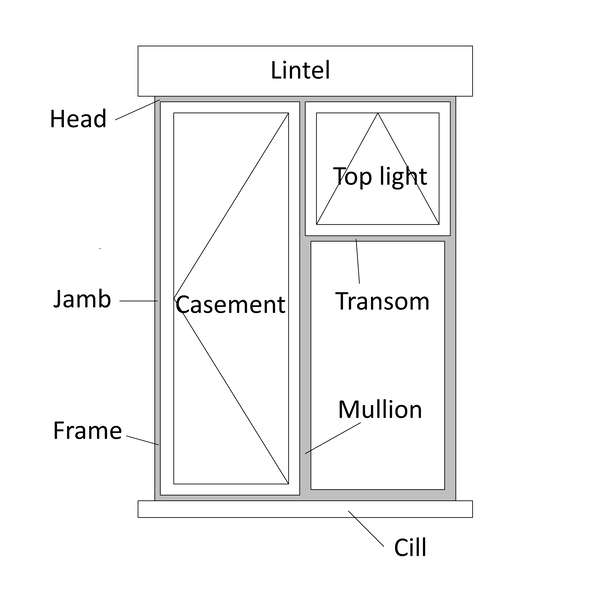
Windows are can include a number of different components:
- Light — The area between the outer parts of a window, usually filled with a glass pane.
- Frame — This holds the light in place and supports the window system.
- Lintel — A beam over the top of a window.
- Jamb — The vertical parts forming the sides of the frame.
- Sill (or cill) — The bottom piece in a window frame, often projecting beyond the line of the wall.
- Mullion — A vertical element between two windowunits or lights.
- Transom — A horizontal element between two windowunits or lights.
- Head — The uppermost member of the frame.
- Sash — The frame holding the glazing.
- Casement — A window (or sash) attached to its frame by one or more hinges.
[edit] Materials
It is important that windows be made of suitable and durable materials:
- With good thermal and sound insulation properties.
- Capable of resisting wind, and rain.
- Easy to clean.
- Providing safety and security.
Most styles of windows are available in a number of different materials. Traditionally, windows were made of timber, either hardwood or softwood, and often protected against decay using paint or a natural wood finish. This finish requires regular maintenance.
Steel and aluminium alloy windows are capable of creating larger areas of glass with a thinner frame. However, historically, these could give rise to condensation on the metal components.
PVC windows are capable of providing excellent heat and sound insulation, as well as requiring little maintenance. However, they may have a shorter life than a well-maintained timber window.
The efficiency of windows is improved by double glazing, treble glazing, low-e coatings, the construction of the frame, the type of glass, the gas used to fill the sealed unit and so on. Generally, more efficient windows are more expensive, but the capital cost may be recovered during the life of the window life through lower energy bills. In addition, the conditions within the enclosed space are likely to be more comfortable.
The BFRC Window Energy Rating (WER) scheme is based on a traffic-light style A-G ratings system for energy efficiency similar to that used for fridges, washing machines, cookers and so on. An A rating indicates a good level of energy efficiency, whilst G is the lowest possible rating.
[edit] Opening type
[edit] Fixed light
A window that is fixed in place and cannot be opened. Often used where light or vision alone is required rather than ventilation, but fixed lights are commonly used in conjunction with other openable types of window.
[edit] Vertical slider/sash
Glass is fitted in ‘sashes’ (moveable panels) that slide vertically past each other:
- Single-hung sash: One sash is moveable and the other is fixed.
- Double-hung sash: Sashes are hung on spring balances or counterweights and made up of two sashes that overlap slightly and slide up and down vertically inside the frame.
- Horizontal sliding sash: Two sashes that overlap slightly and slide horizontally on guide rails within the frame.
[edit] Casement
An opening window fixed to the frame by hinges along one of its edges:
- Side hung casement: The sash side opens outwards.
- Top hung casement: The sash top opens outwards. Also known as awning windows.
- Bottom hung casement: The sash bottom opens inwards. Also known as hopper windows.
Casement windows preceded sash windows in the UK and traditionally opened inwards, although now they more commonly open outwards so as to free space inside and better direct air inwards for ventilation.
Casement windows require a metal bar called a ‘stay’ to hold them open. Different types are available such as the peg type (the stay has holes along it which allow it to fit over pegs), telescopic (tube shaped), and friction (a bent arm allows the window to open to 180-degrees).
[edit] Tilt and turn
Tilt and turn windows Include a mechanism that allows them to tilt inwards from one edge or to open inwards from one side. The stability of the mechanism allows tilt and turn windows to be larger than casement windows. They are also easy to clean from the inside.
[edit] Pivot
Pivot windows are hung on one hinge at centre points on each of two opposite sides. This allows the window to revolve when opened. The pivots can either be vertical, with the hinges mounted top and bottom, or horizontal, with the hinges mounted at each jamb. Pivot hinges incorporate a friction device that enables the window to hold itself open against its own weight. Pivot windows tend to be more expensive than casement windows but can allow for easy cleaning access.
[edit] Bi-fold
These are made up of a number of individual sashes, usually 2, 3 or 4, hinged together. They can be opened up in a concertina style and stacked neatly against each other at the side of the window frame.
[edit] Louvre
These windows use a series of parallel pieces of glazing that are hung on centre pivots positioned at intervals down the vertical jambs that allow them to open and close using a crank or lever. They allow for good ventilation with only small projections.
[edit] Other types
- Tilt and slide window — The sash tilts inwards at the top and slides horizontally behind the fixed pane.
- Toplight — These are usually above doors.
- Sidelight — Positioned beside a door or main window.
- Skylight — These are windows positioned in the roof. The brand name ‘Velux’ has become associated with opening domesticrooflights.
- Clerestory — Bands of windows across the tops of buildings that allow natural light in without compromising privacy or security.
- Bay window — Multi-panel windows that project in front of the external wall line, being supported by a sillheight wall.
- Bow window — A curved bay window.
- Multi-lite window — Windowsglazed with small panes of glass separated by glazing bars, or muntins.They can be arranged decoratively to suit aesthetic needs or architectural styles.
- Stained glass window — Decorative windows made of coloured glass separated by glazing bars, popular in churches and Victorian houses.
- Topguided — Tracks and slides enable the top to slide downwards whist the bottom opens out.
- Sidehung — A variation on a casement window, side opening controlled by tracks and slides.
- Dormer window — A small roofed structure that projects outwards from the main pitched roof of a building. See Dormer window for more information.
- Rooflight — A domelight, lantern light, skylight, ridge light, glazedbarrel vault or other element intended to admit daylight through a roof.
- Roof window — A window that is in the same plane as the surrounding roof, and has a minimum pitch of 15-degrees. See also Velux window.
[edit] Number of panes
Thermal performance and acoustic requirements will typically determine the need for:

[edit] Related articles on Designing Buildings Wiki:
[edit] External references
- https://www.sashwindowslondonltd.co.uk/bespoke-products/double-glazed-sash-windows/
- https://www.planningportal.co.uk/info/200130/common_projects/14/doors_and_windows
- http://www.build.com.au/styles-and-types-windows
- ‘BuildingConstruction Handbook’ (6th ed.), CHUDLEY, R., GREENO, R., Butterworth-Heinemann (2007)
- http://www.rationel.co.uk/windows-doors/
Comments
Great post, really interesting read!
I had my windows installed and maintained by a company called Hugo Carter. They were incredible, truly couldn’t recommend them more!
How to Build an Interior Wall
November 22, 2020
Expert step-by-step instructions on building a wall, with diagrams, tips for framing with wall studs, how to attach drywall and paneling, and more DIY help
An interior wall is typically built from 2-by-4 or 2-by-6 wall studs and framing, covered with panels of gypsum drywall that are nailed or screwed to the framing members.
How to Build a New Wall: Summary
- Locate the new wall.
- Attach a top plate to the ceiling framing.
- Use a plumb bob to position a bottom (“sole”) plate directly beneath the top plate, and nail it to the floor.
- Install wall studs between the top and bottom plates on 16- or 24-inch centers.
- Nail or screw drywall to the studs and plates.
- Apply cornerbead, drywall tape and compound to hide the joints and fasteners.
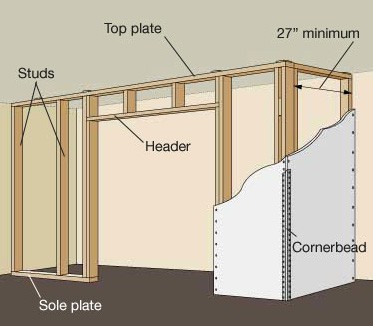 How an Interior Wall Is Built ©Don Vandervort, HomeTips
Many remodeling projects involve building or relocating one or more interior walls. Building a nonbearing interior wall is relatively easy, requiring just basic carpentry skills and tools.
Depending on the nature of your existing floor, walls, and ceiling, you may have to peel away some surface materials to provide for secure attachment at the top, bottom, and ends of the new wall. If the new wall won’t butt into studs at the connecting wall or fall directly beneath a ceiling joist, you must install nailing blocks between the framing pieces.
A typical interior wall has a skeleton of vertical 2-by-4 studs that stand between horizontal 2-by-4 base and top plates. (However, if a wall will contain extensive plumbing, it should be built from 2-by-6 studs and plates.)
The framework is typically covered with gypsum wallboard or lath and plaster; in a bathroom, with water-resistant “green” wallboard and tile backerboard and tile.
Following are the steps for framing a wall. After you finish the framing, refer to the links above right for the techniques used for cutting and attaching drywall or paneling. If this looks like the work will be beyond your skills or if you don’t have the necessary tools, hire a framing contractor or carpenter to do the work.
Building an Interior Wall: Step-by-Step
To begin, mark the center line of the new wall across the ceiling. Then measure and mark half the width of the new wall’s top plate in each direction. Snap a chalk line between these marks. Plan one stud at each end and, if an end meets a wall, measure 15 1/4 inches to locate the inside edge of the first intermediate stud and then 16 inches to the same edge of each additional stud.
1 On the floor, lay the top and bottom plates side by side. Carefully measure where each wall stud will go and mark perpendicular lines across the plates, using a combination square so the studs will align perfectly. 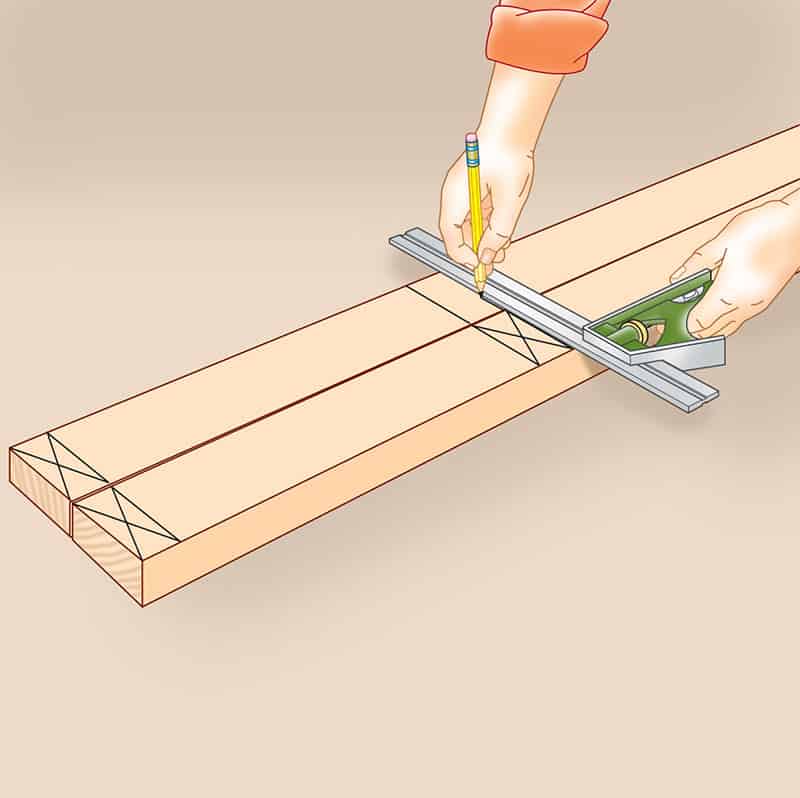 1. Start with the top and bottom plates.
2 Locate the joists in the ceiling (here we’ve shown the drywall on the ceiling removed for clarity’s sake). Hold the top plate in position along the guideline marked on the ceiling and nail through the ceiling material and into each joist with two 3 1/2-inch nails. (If the new wall runs parallel to the joists, fasten the plate to nailing blocks installed between the joists.) 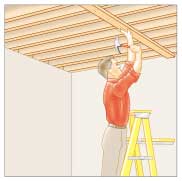 2. Install the top plate.
3 Hang a plumb bob from each end of the top plate on the ceiling to just above the floor and then mark the floor to establish the bottom plate’s location directly below it. Snap a chalk line along the floor between the marks as a guide for the bottom plate’s edge. Nail the plate with 3-inch nails staggered and spaced every 16 inches.  3. Install the bottom plate.
4 Use stud-framing clips to install each wall stud. Lift the stud into position and line it up on its mark, flush with the edges of the top and bottom plates. Check plumb using a carpenter’s level, and nail the stud into place. (Alternatively, you can toenail each stud to both the top and bottom plate with 2 1/2-inch nails, but this is harder to do if you’re inexperienced.) 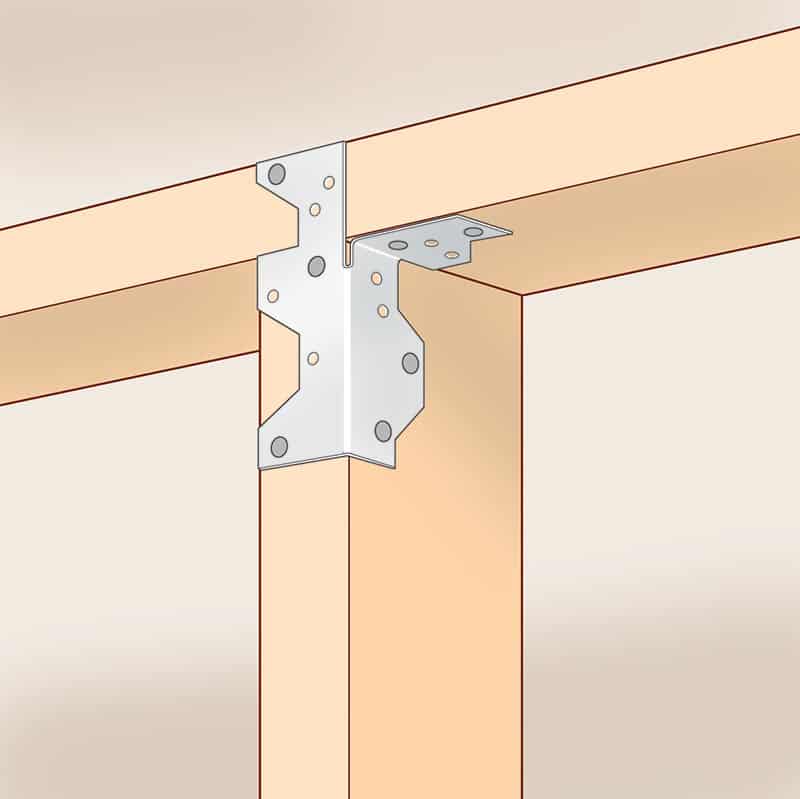 4. Attach each wall stud.
5 Form the connections and corners. Where one wall intersects another, double up studs to receive the intersecting wall. If the wall will turn a corner, frame it with two full-length studs that have blocks sandwiched in between. 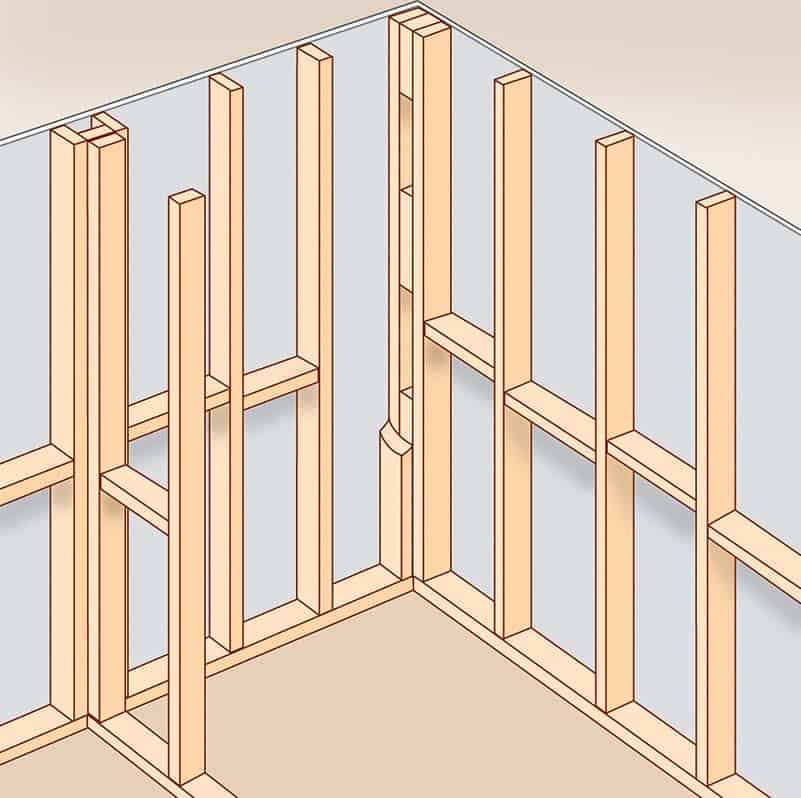 5. Double up studs where walls meet.
Basic Structure
Basic structures are the most earliest forms of building in The Forest
Contents
Gameplay [ edit | edit source ]
Walls can be snapped together on top of one another to create tiers or stories. Cannibals cannot jump two tiered walls. Wall snapping can be avoided by placing a blueprint and finishing it before placing another, rather than making all of the blueprints first and then building them.
They have very limited use since the introduction of Custom Building. It is most likely these structures will be removed in future updates due to their limitations.
Basic Wall [ edit | edit source ]
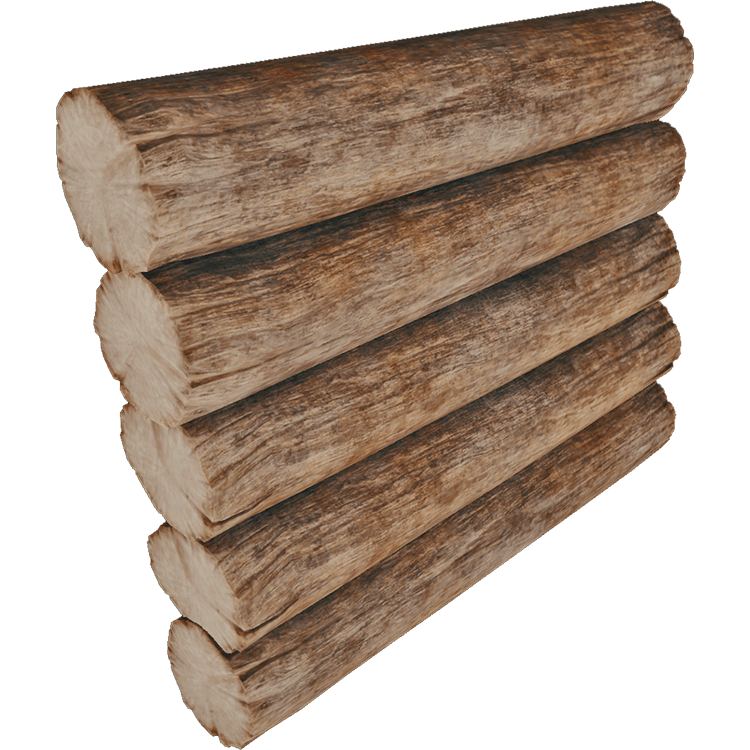
The Basic Wall is a plain wall that can be used for building. Was used in previous patches for custom building though was essentially replaced by the custom wall and its variations. They can be stacked on each other can be locked into place on certain floor types. Climbing ropes and tree bridges can be be attached to the basic wall, it has two anchor points that can both be utilized.

Basic Wall as it appears in the Survival Guide
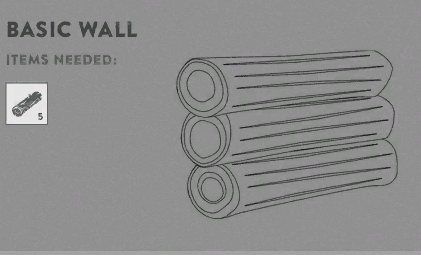
Basic Wall as it appeared in the Survival Guide
Simple Stairs [ edit | edit source ]
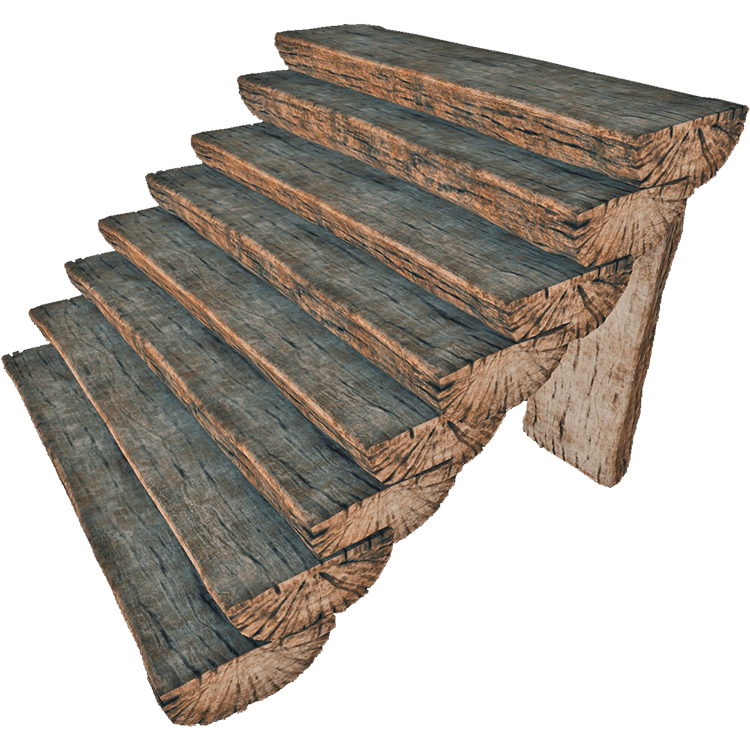
Simple stairs were the first stairs in the game. They have less uses than the Custom Stairs though they can used in some circumstances when the height is perfect for your custom building. They can also be stacked on each very awkwardly, though with practice, the player can make a very impressive staircase. Simple stairs have the appearance of a more professionally built staircase than the Custom Stairs. Climbing ropes and tree bridges can be be attached to the simple stairs, it has two anchor points that can both be utilized.

Simple Stairs as it appears in the Survival Guide
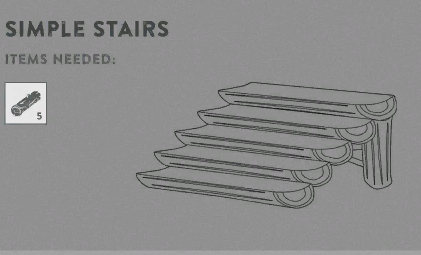
Simple Stairs as it appeared in the Survival Guide
A Basic Wall In Construction
A Basic Wall Constructed
Wall With Door [ edit | edit source ]
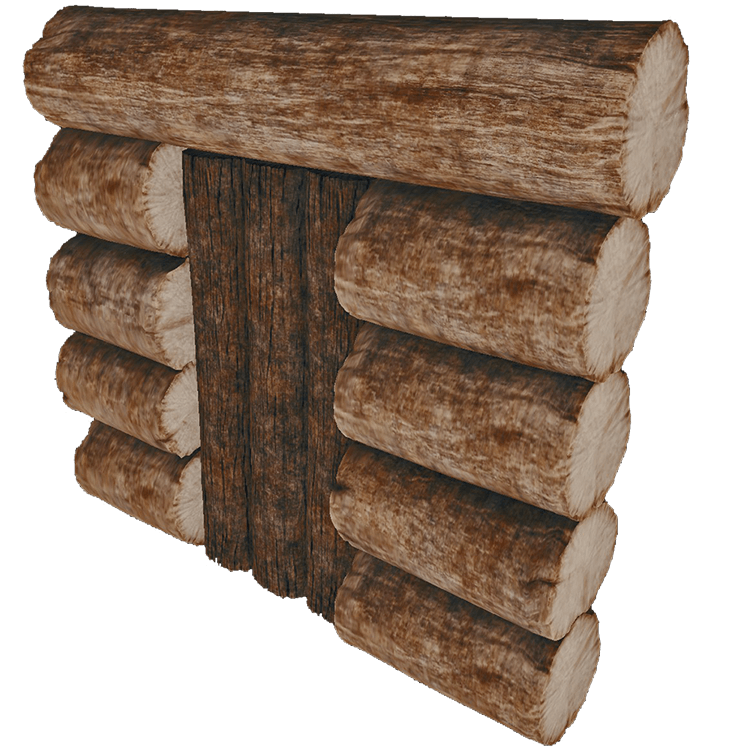
The Wall with Door can be used as an entranceway. The door swings open simply by walking into it. Was used in previous patches for custom building though was essentially replaced by the custom wall and its variations. They can be stacked on each other can be locked into place on certain floor types.Climbing ropes and tree bridges cannot be attached to walls with doors
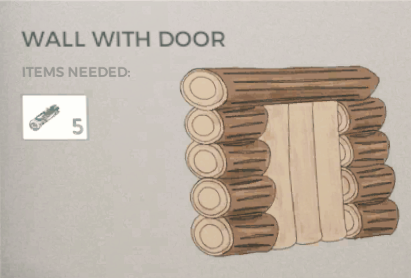
Wall with door as it appears in the Survival Guide
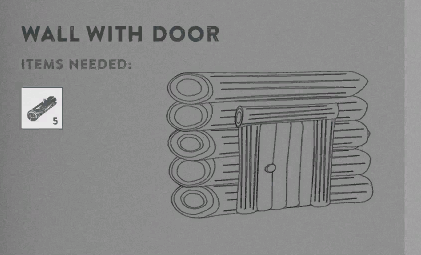
Wall with door as it appeared in the Survival Guide

A Wall With Door In Construction
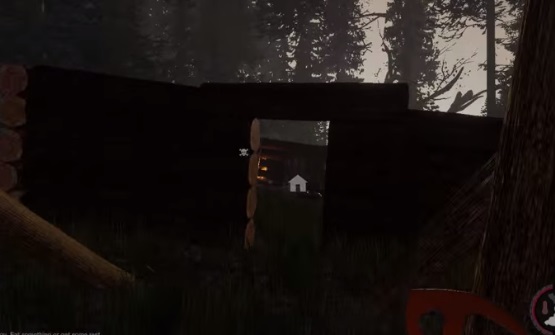
A Wall With Door Constructed
Wall With Window [ edit | edit source ]
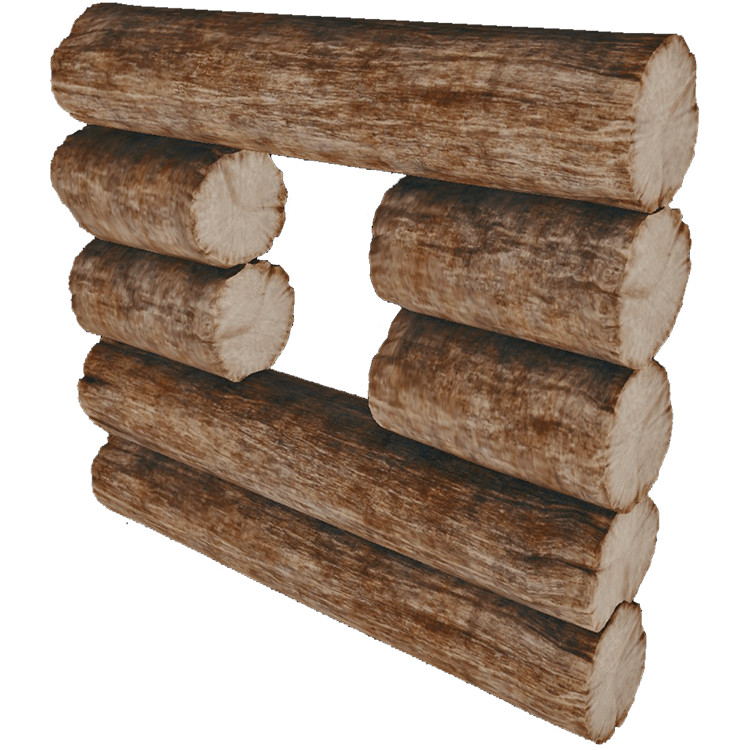
The Wall with Window can be used to provide natural light into a building. Enemies can see inside however. Was used in previous patches for custom building though was essentially replaced by the custom wall and its variations. They can be stacked on each other can be locked into place on certain floor types.Climbing ropes and tree bridges cannot be attached to walls with windows
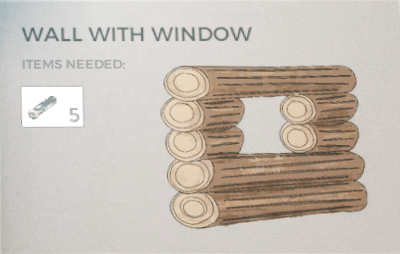
Wall with window as it appears in the Survival Guide
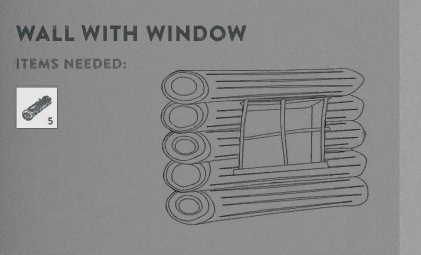
Wall with window as it appeared in the Survival Guide
Trivia [ edit | edit source ]
- All basic structures were added to the game upon release in v0.01
- In older versions of the game, basic walls were used to make bridges. They can still be done though it is quite difficult to do.
- Basic Structures were originally called custom structures when the game was released. Though when the current custom structures came out, these were changed to basic.
- Basic structures often have limited uses. Though they can be made to do some pretty cool things that other buildings cannot do due to the angles they can be placed at.
Update history [ edit | edit source ]
| Version | Changes |
|---|---|
| v1.0 | Fixed procedural wall & derived structures showing place icon while not possible to place due for example to having a tree in the way |
Procedural stairs now display actual shape before locking first point
Now dynamically centering the switch ghost wall type & cancel ghost icons instead of using preplaced position which was not centered in case of unused icons
Fixed following ghost objects not lining up closely with the built model: Basic wall, wall with window, Wall with door
Added door visual to legacy wall doorway ghost
Fixed all walls & fences placing with a slight offset from the placement preview
Added Structure Anchors to: Gazebo (2), Log Cabin (2), Platform (2), Extensible Platform (4), StairCase (2) and Wall (2) [retro-active] (you can now attach bridges or rope to these items) (Single player only)
Fixed small cabin door and custom wall door getting stuck in terrain


