- How to Burn a Windows 10 ISO File to a DVD
- Burning a Windows 10 ISO to a DVD using Windows’ built-in utility
- Burning a Windows 10 ISO to a DVD using ImgBurn
- 3 Ways to Burn DVD on Windows 10 without any software
- How to Burn DVD on Windows 10 ?
- Method 1
- Method 2:
- Video Tutorial: How to burn DVD on Windows 10
- Method 3: Using Windows Media Player
- Conclusion:
- How to Burn Discs in Windows 7/8/10
- Burn CD/DVD in Windows
How to Burn a Windows 10 ISO File to a DVD
To install Windows 10 from scratch on a computer (or to repair an already installed instance of Windows 10 on a computer), the most important ingredient required is a bootable Windows 10 installation media. The installation media can be anything from a USB drive to a CD/DVD – as long as it has all the required Windows 10 setup files on it and is bootable (i.e. computers can boot from it), it will get the job done. In today’s day and age, most users simply create a bootable Windows 10 installation USB when they require a Windows 10 installation media. However, not everyone has a spare USB drive lying around that they can turn into a bootable Windows 10 installation USB. Once you turn a USB drive into a bootable Windows 10 installation media, you can’t use it for any other purpose unless it is no longer a Windows 10 installation medium.
That being the case, some people would actually prefer having a bootable Windows 10 installation DVD instead, since dedicating a DVD to being a bootable installation medium is much more tolerable than dedicating a USB drive to the task. To create a bootable Windows 10 installation DVD, you need to burn a Windows 10 ISO file to it.
Burning a Windows 10 ISO file to a DVD is actually a pretty simple and easy to follow procedure. However, before you can move on to actually burning a Windows 10 ISO to a DVD, you need to acquire a Windows 10 ISO file. To get your hands on a Windows 10 ISO file, simply download the Media Creation Tool from here, run it and use it to create a Windows 10 ISO file that you can later use to create a Windows 10 installation medium.
Once you have your Windows 10 ISO file, you can move on to actually burning the ISO file to a DVD and turning the DVD into a bootable Windows 10 installation DVD. Now you can go about doing so two different ways – you can either use Windows’ built-in disc burning utility for the task or a third-party alternative.
Burning a Windows 10 ISO to a DVD using Windows’ built-in utility
If you would like to burn the Windows 10 ISO file you have to a DVD using the built-in disc burning utility that Windows comes with, simply:
- Insert a blank, writable DVD into your computer’s CD/DVD drive.
- Press the Windows Logo key + E to open the File Explorer.
- In the File Explorer, navigate to the location on your computer where the Windows 10 ISO file is stored.
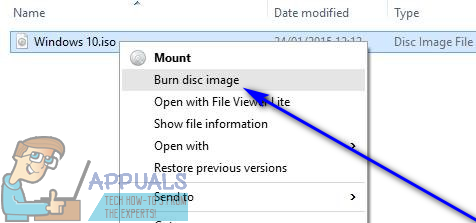
- Locate the Windows 10 ISO file, right-click on it and click on Burn disc image in the resulting context menu. Doing so will bring up the Burn Disc Image utility (if you’re using Windows 7) or the Windows Disc Image Burner utility (if you’re using Windows 8 or later).

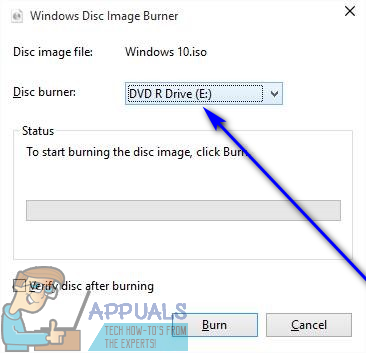
- Open the dropdown menu located directly next to the Disc burner: option and click on your computer’s CD/DVD drive to select it.
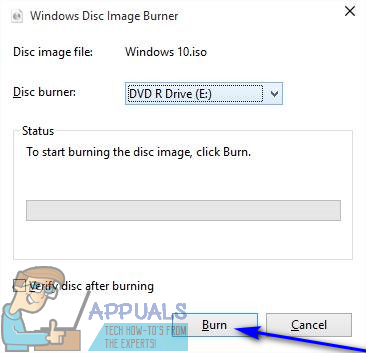
- Click on Burn and let the disc burning utility do the rest.
Once the utility is done burning the ISO file to the DVD, the DVD will become a Windows 10 installation DVD that you can boot computers from.
Burning a Windows 10 ISO to a DVD using ImgBurn
If you are, for some reason, not seeing the Burn disc image option in the context menu for ISO files on your computer, if Windows’ built-in disc burning utility is unable to burn the Windows 10 ISO to a DVD or if you simply want to use an alternative to Windows’ built-in disc burning utility, you can use ImgBurn to get the job done. If you would like to use ImgBurn to burn a Windows 10 ISO to a DVD and create a bootable Windows 10 installation DVD, you need to:
- Go hereand download the installer for ImgBurn.
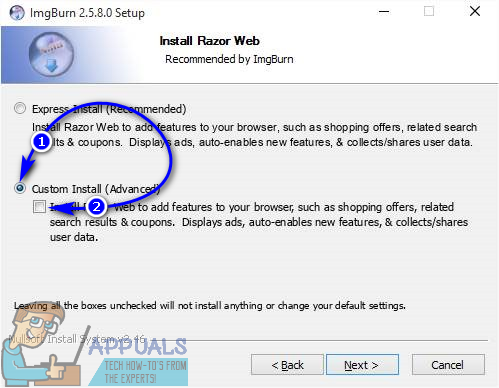
- Launch the installer for the program and follow the onscreen instructions to install it. Be sure to select Custom when the installer asks you what kind of installation you want and disable the Install Razor Web option by unchecking the checkbox located directly beside it during the installation.
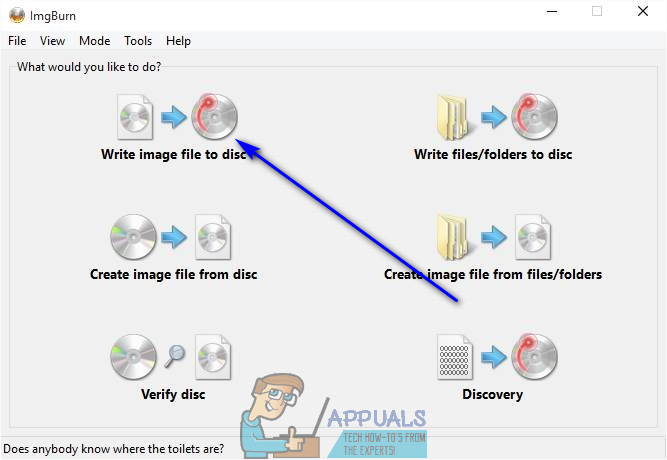
- Once it has been installed, launch ImgBurn.
- Click on Write image file to disc.
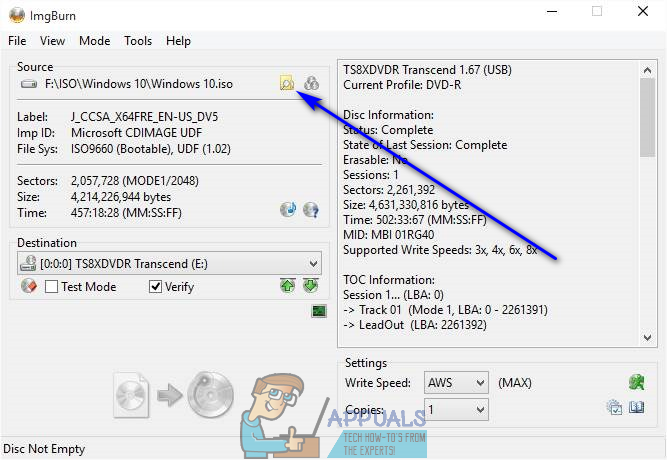
- Click on the Browse button under the Source section, navigate to where the Windows 10 ISO file is stored and select it.
- Click on the Write button. As soon as you do so, ImgBurn will begin burning the Windows 10 ISO to the DVD, turning the DVD into a bootable Windows 10 installation DVD. All you need to do during all this is wait for ImgBurn to complete the process.
3 Ways to Burn DVD on Windows 10 without any software
You can Burn DVD on Windows 10. You don’t need any software to burn CD/DVD in Windows 10. Windows 10 itself includes tools to burn your CD/DVD. You can create audio or Video or Data CD/DVD without using any extra software. In this article, I am showing you methods of how you can burn DVD on Windows 10.
If you are in the video creation profession. And creating CD/DVD is your profession, then you must buy premium software Cyberlink Power2Go. It will give you more advanced features including Blue-ray disc creation. When you are not a professional, you need not buy any premium software. Alternately if you are looking for third-party solutions there are some good DVD burners software for Windows 10 available. OR you can Just read this article for burning CD/DVD without any extra software.
Get quick remote access to your Windows apps and data from anywhere on any device by loading them onto XenDesktop from CloudDesktopOnline. Learn more about QuickBooks Hosting, Microsoft 365 Enterprise E5 Suite, and other business apps by visiting Apps4Rent.
Table of Contents
How to Burn DVD on Windows 10 ?
Method 1
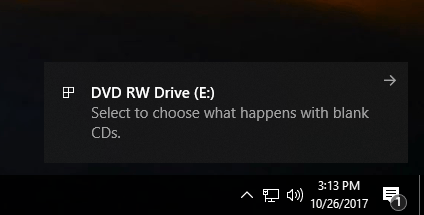
1. Place CD/DVD in CD/DVD drive. Wait for some seconds. You will see the notification at the bottom right. Click on Notification. Sometimes you may miss the notification. In that case, remove the DVD and reinsert DVD. Still, if you miss the notification, then go to method 2 where you will learn about burning DVD without notification.

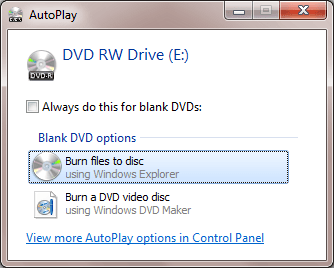
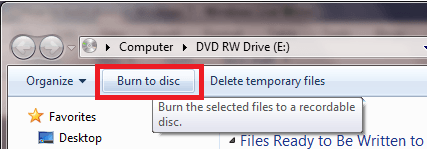
2. You will see another notification with some options. Probably you will see it at the top right corner. Select Burn files to Disc.

3. You will see Burn a Disc Windows shows that in below screenshot. Write any title in the Disc Title field. Select With a CD/DVD player option. And Click Next.

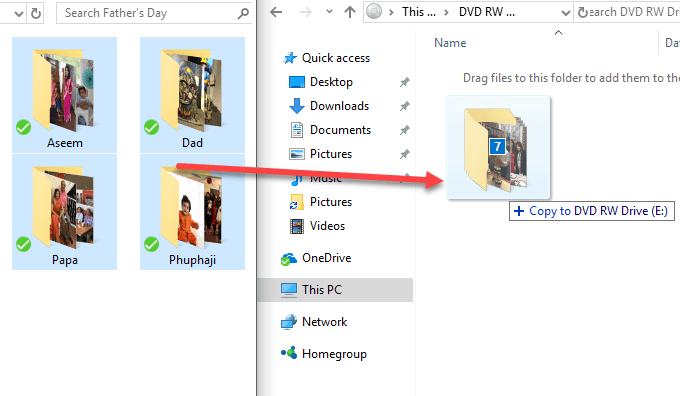
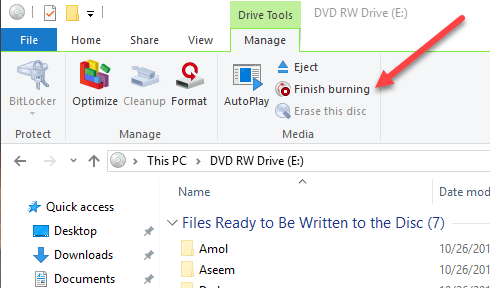
4.1. You will see a window where you need to drag files. Press the Windows button + E. It will open another File explorer. Select your required file. Drag that file to this Explorer window. You can drag more than one file. You can also copy and paste any folder. Now you have files to burn. Click on Drive tools. Select Finish burning.

4.2. (OR) You can also Right-click on Empty space in the Explorer window. Select Burn to Disc.

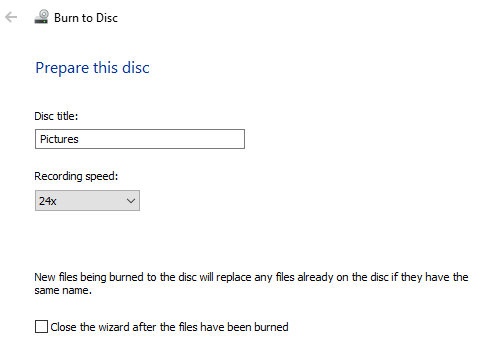
5. You will see Burn to Disc window. If you want, you can change the Disc title and Recording speed. Otherwise, leave them as it is. Select Next.

It will start burning your CD/DVD, Wait until it burns into the disc. After completion of the burning process, your CD will be ejected automatically.
Remember, if your file format is not suitable to your DVD player, that may not play your file. So you need to change your file format which is suitable to your DVD player.
Method 2:
Video Tutorial: How to burn DVD on Windows 10
Disc burning process is a very careful process, you should watch a video, to avoid any mistake. But if you don’t have time for the video, you can always follow the steps mentioned below.
When you are not able to hold notification, you can follow this procedure.
- Insert CD/DVD in your computers CD/DVD driver.
2. Open file explorer. Browse your computer drives. Go to your file. If you want to burn more files, place all files in one folder. Or you can select all files by using the shift key. Right-click on file or folder. Select Send to option. Select DVD RW drive.

You will see Burn a Disc window which is shown in Step 3 in the first method. Just follow from step 3 to step 5 from the above first method.
Method 3: Using Windows Media Player
You can also burn your DVD by using Windows media player in Windows 10.
1. Insert CD/DVD in CD/DVD drive of your computer.
2.Open Windows media player. Select the Burn option in top right. If you don’t see your Disc. Just click on the CD Drive option, it will show your disc. Press Windows + E. It will open another file explorer. Select your file and drag it to the burning list. Click the Start burn option.

It will show Burn a Disc window. Just follow from step 3 in the above methods. It will complete burning and will eject your CD.
Conclusion:
If you create CD/DVD as a hobby or for your personal need, you need not to go for any extra software. Because Windows 10 does very well to create a CD/DVD. But it lacks some effects and features which are in professional software. If you need more effects and features, you need to buy Cyberlink Power2Go.
Hope you like my tutorial about Burn DVD on Windows 10 . If you know any other method, add in the comments section. If you like it please share it with your friends and family.
If you want regular updates on social media, follow us on Facebook or Twitter. Subscribe to WhatVwant channel on YouTube for regular updates.
How to Burn Discs in Windows 7/8/10
Use these data discs just like a USB
Recently, I was searching online for some free software to burn some CDs and DVDs at home, but then I realized Windows already has built-in burning software in Explorer. It’s actually been there for many years, but it’s so inconspicuous that I tend to forget about it altogether.
Windows also gives you a cool option while burning CDs and DVDs called Live File System, which basically makes your CD or DVD act like a USB flash drive, meaning you can edit, add and delete files on the disc just like you do on a flash drive.
In this article, I’ll show you how to burn a data disc easily using just Windows. Read my other post if you want to learn how to burn audio CDs or playable DVDs.
Burn CD/DVD in Windows
To get started, pop a CD or DVD into your Windows PC and you should see a dialog appear either in Notification Center or as an AutoPlay window.
If no dialog box comes up for you, then just open Windows Explorer and double-click on the CD/DVD drive icon. Another box will pop up asking you how you would like to use this disc.
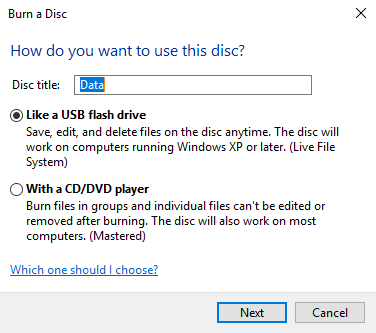
Give the disc a title and then choose whether you want it to act like a USB flash drive or like a mastered disc. The disadvantage to using the flash drive option is that you can only use the disc on computers running Windows XP and higher. Obviously, if you are burning this disc for another device, like a CD or DVD player, then you should choose the second option.
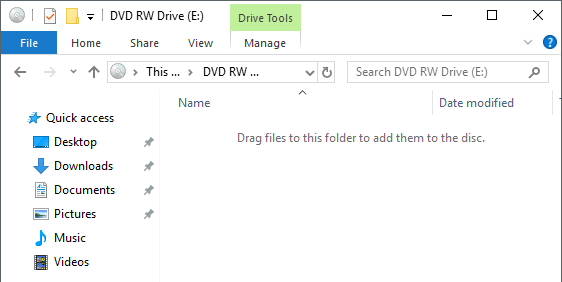
Next, you’ll get an empty Explorer window where you can start to drag and drop the files you want to burn to the disc. The best thing to do here is to open another Explorer window with the files you want to burn.
Once you have copied all the files you want to burn, click on Manage under Drive Tools and you’ll see an option called Finish burning. In Windows 7, you’ll see a Burn to disc option.
The burn wizard will appear and here you can choose the recording speed. By default, it should automatically be set to the fastest speed your drive can support.
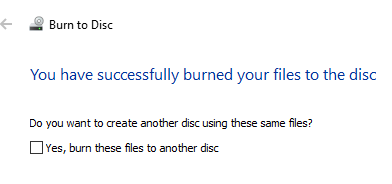
Once the burn is completed, you should get a successful message and the option to burn another disc.
That’s about it! It’s a very simple and straight-forward process to burn a CD or DVD in Windows and you don’t have to worry about finding and installing third-party software anymore just to burn a few discs. Enjoy!
Founder of Help Desk Geek and managing editor. He began blogging in 2007 and quit his job in 2010 to blog full-time. He has over 15 years of industry experience in IT and holds several technical certifications. Read Aseem’s Full Bio


