- Windows 7 and 8: How To Burn an ISO Image to Disc
- ImgBurn для Windows
- How to Mount and Burn ISO Images in Windows 10
- Mount ISOs in Windows 10
- Burning an ISO
- How to Mount or Burn an ISO Image in Windows 8 and Windows 10
- The Windows File Explorer lets you burn disc image files to a DVD
- ISO Burning vs. Mounting
- How to Mount an ISO File in Windows 8 or Windows 10
- How to Unmount an ISO Image in Windows
- How to Burn an ISO File in Windows 8 or Windows 10
- How to Burn Discs in Windows 7/8/10
- Burn CD/DVD in Windows
Windows 7 and 8: How To Burn an ISO Image to Disc

A default feature available in Windows 7 and the Windows 8 Developer Preview now in pre-beta is its Windows Disc Image Burner. It lets you easily create boot discs. You burn ISO images to disc without having to rely on any third-party software. Here’s how to do it.
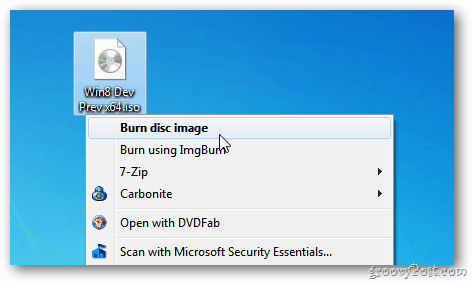
First, pop a blank CD, DVD, or Blu-ray Disc into your drive. Then right-click on the ISO image you want to burn. From the Context menu, select Burn Disc Image.
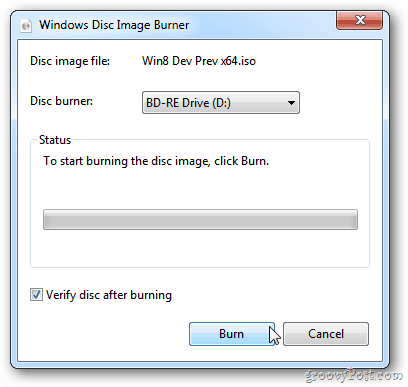
Windows Disc Image Burner displays at this point. If you have multiple optical disc drives on your system, select the right one.
Definitely check the option to Verify Disc After Burning. This will have the system test for errors. Click Burn.
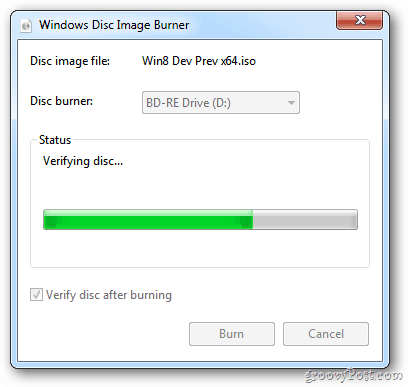
Wait while the utility burns the ISO image to your disc. Time will vary depending on the size of the ISO and the burning speed of your drive. I burned the 4.8GB 64-bit Windows 8 Developer Preview ISO to disc. It took just over 10 minutes to complete. 
After the system finishes burning the ISO to disc, the verification test will begin.
When everything is done, the drive will pop open with your completed disc. Think of a safe place for it. And hit Close.
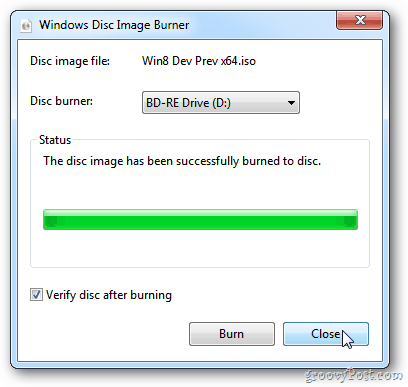
Use your mint Windows 7 or Windows 8 disc on another computer — or label it and store it away safely. It will come in handy.

If you want to mount an ISO image in MS Windows XP or Vista, check out our article on how to do that using Virtual Clone Drive.
ImgBurn для Windows
| Оценка: |
4.28 /5 голосов — 424 |
| Лицензия: | Бесплатная |
| Версия: | 2.5.8.0 | Сообщить о новой версии |
| Обновлено: | 17.06.2015 |
| ОС: | Windows 10, 8.1, 8, 7, XP |
| Интерфейс: | Английский, Русский |
| Разработчик: | LIGHTNING UK |
| Категории: | Запись — Образы дисков |
| Загрузок (сегодня/всего): | 16 / 592 576 | Статистика |
| Размер: | 3,14 Мб |
| СКАЧАТЬ | |

ImgBurn — отличная программа для записи образов CD/DVD дисков. Создана автором популярного, но закрытого в свое время проекта DVD Decrypter, предназначенного для копирования и снятия защиты с DVD дисков.
Главной особенностью программы является поддержка большого количества приводов различных производителей, поддерживает все последние накопители, включая рекордеры с возможностью изменения параметра booktype / bitsetting (от BenQ, LiteOn, NEC, Plextor, Sony).
Программа может записывать большинство типов образов CD/DVD. ImgBurn имеет ряд настроек, где можно задать ассоциацию с поддерживаемыми расширениями файлов-образов (BIN, GCM, LST, UDI, CDI, FI, MDS, CDR, IMG, NRG, DVD, ISO, PDI), выбрать интерфейс записи (ASPI, ASAPI, SPTI).
Помимо всего перечисленного, в ImgBurn можно проводить верификацию данных на носителях, анализировать качество записи и получать различного рода сведения, как о диске, так и о физической его структуре. Присутствует возможность осуществлять поиск в Интернет и последующую загрузку новых версий прошивок для данного привода. Можно изменять метку ISO-образа, блокировать/разблокировать открытие лотка привода и т.д. Очистка дисков поддерживается как быстрая, так и полная.
How to Mount and Burn ISO Images in Windows 10
When Windows 7 was released, a significant new built-in feature was the ability to burn ISO images to disc. When Windows 8 came around, it included the ISO burning and allowed mounting of ISO images natively without third-party software.
If you skipped Windows 8 and upgraded Windows 7 to Windows 10, here’s a look at using both features that are still present in Microsoft’s new OS.
Mount ISOs in Windows 10
First off, we’ll take a look at mounting an ISO file. In previous versions of Windows, you needed to use a third-party tool like Virtual Clone Drive to mount an ISO or a utility like ImgBurn to burn them to disc.
However, since Windows 8, mounting an ISO is a simple as a double click. That will mount the disc image as a virtual drive, and you can see the contents.

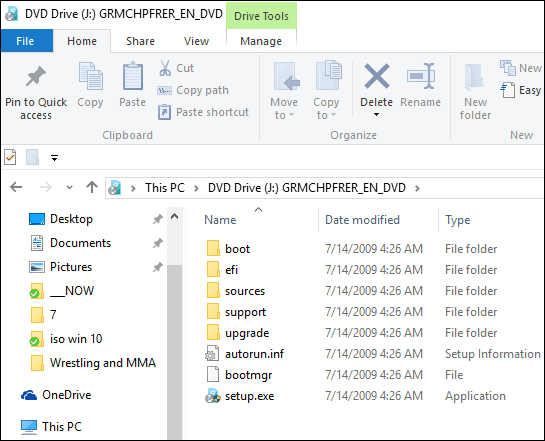
Like in the example below I just double clicked the Windows 7 image to reveal the files on it.
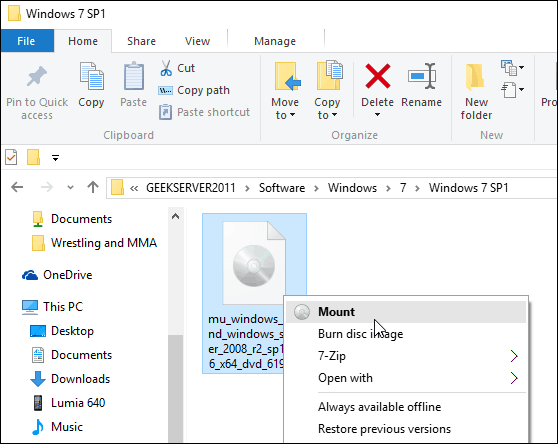
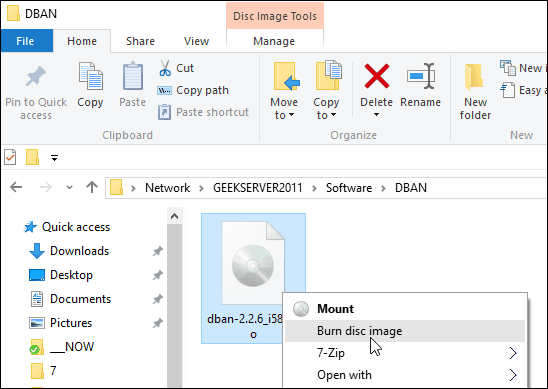
Alternately, you can right-click the ISO file and select Mount from the context menu; note that just below that is the option to Burn disc image.
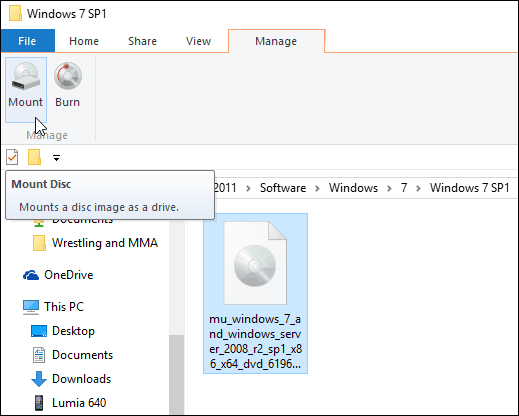
You can also select the ISO file, and from the Ribbon go to Manage > Mount…; note that by using this navigation method you also get the burn icon as well.
No matter how you choose to mount your ISO, it mounts it as a virtual disc, and it will show up in This PC as a drive. For example, in the shot below I have three different ISO files mounted.
Then you can access them just as if there was a physical disc in your drive.

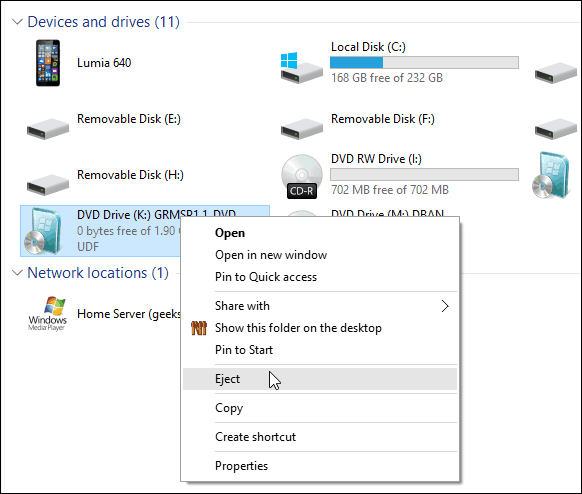
Also, note that if you want to unmount the ISO, just right-click and select Eject.
Burning an ISO
As I explained above, the option to burn an image is either on the Ribbon or the context menu. Burning an ISO to disc is essentially the same as it was in Windows 7. Pop in a blank disc and right-click and select Burn disc image.
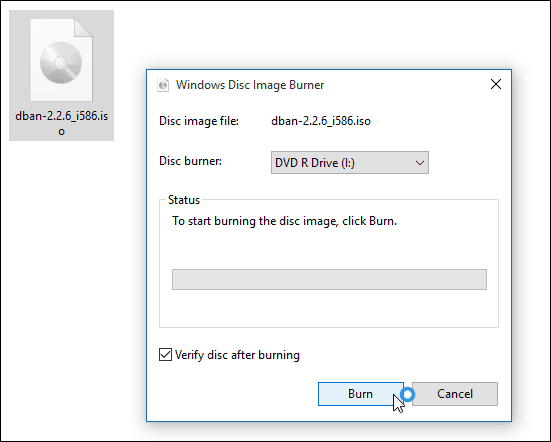
Then the Windows Disc Image Burner tool kicks off. Select the drive with your blank CD or DVD. I also suggest checking Verify disc after burning. That will make sure there are no errors on the disc during the burning process.
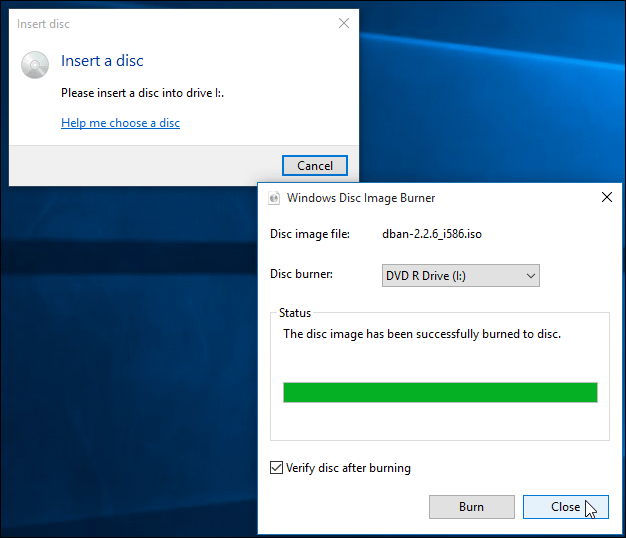
After it’s done, the drive will pop open with your completed disc. That’s all there is to it!
While it’s usually faster to create a USB installation drive for software, some people are just more comfortable using a physical DVD, CD, or Blu-ray disc. Flash drives have a tendency to be lost easily. If you need to burn a retail copy of Windows 7 or higher to disc for any reason, head to the Microsoft Software Download site.
There you will find an ISO for 32 and 64-bit versions of Windows 7, 8.1, and Windows 10.
One more thing. If you have a file compression utility installed, like 7-zip, it might have taken over the file association for ISOs. If so, you will need to change it to Windows Explorer. To do that, head to Settings > System > Default Apps > Choose default apps by file type. Scroll down and make Windows Explorer the default.

And if you have questions, concerns, or suggestions about Microsoft’s new OS, make sure to sign up for our free Windows 10 Forums.
How to Mount or Burn an ISO Image in Windows 8 and Windows 10
The Windows File Explorer lets you burn disc image files to a DVD
Windows offers built-in support for mounting and burning image files using the File Explorer app. Here’s how to mount and burn an ISO file to a DVD in Windows 8 and later.
Instructions in this article apply to Windows 10, Windows 8.1, and Windows 8.
ISO Burning vs. Mounting
ISO files, also called disc image files, contain an exact copy of a disc, whatever that disc may contain. When you burn an ISO file to a DVD, you are creating an exact duplicate of the original disc, not just the files on it. If the original is bootable, the copy will be too; if the original includes copyright protections, the copy will too.
When you mount a disc image file, Windows creates a virtual drive for your ISO file as though it were a physical disc. This allows you to watch the movie, listen to the music, or install the application from the file without ever having to burn the data to a disc.
How to Mount an ISO File in Windows 8 or Windows 10
To mount a disc image file in Windows:
Select the ISO file you want to mount in the File Explorer, then select the Disc Image Tools tab at the top of the window.
The Disc Image Tools tab only shows up when an ISO file is selected.
:max_bytes(150000):strip_icc()/001-mount-burn-iso-windows-8-10-3506971-98bbb48bc1e04764b4a115aaee6f81f6.jpg)
Select Mount in the top-left corner.
:max_bytes(150000):strip_icc()/002-mount-burn-iso-windows-8-10-3506971-58703a1c5c904e878e1690eca56657c4.jpg)
Windows will create a virtual drive and immediately open the contents of the image for you to view.
If you click This PC/My Computer in the left pane of the File Explorer window, you’ll see your virtual disc drive appears right along with any other drives you have installed on the system. At this point, you can copy files from the image to your hard drive, install an application, or do whatever you want.
How to Unmount an ISO Image in Windows
Once done, you’ll want to unmount the image file to take back the system resources used. To do so, right-click the virtual drive in the File Explorer window and select Eject.
:max_bytes(150000):strip_icc()/004_mount-burn-iso-windows-8-10-3506971-243810011ecd4c9e838626c3ae04fe86.jpg)
How to Burn an ISO File in Windows 8 or Windows 10
Insert a disc into your disc drive.
Make sure you pick a disc that matches the original format. For example, don’t try to burn a DVD image to a CD-R.
Select the ISO file you want to mount in the File Explorer, then select the Disc Image Tools tab at the top of the window.
Select Burn in the top-left corner.
:max_bytes(150000):strip_icc()/003-mount-burn-iso-windows-8-10-3506971-fe37bf82eeca46768834085e91f16f18.jpg)
Select your disc burner, then select Burn.
You have the option to select Verify disc after burning to make sure no files were corrupted. This will add considerable time to the process.
How to Burn Discs in Windows 7/8/10
Use these data discs just like a USB
Recently, I was searching online for some free software to burn some CDs and DVDs at home, but then I realized Windows already has built-in burning software in Explorer. It’s actually been there for many years, but it’s so inconspicuous that I tend to forget about it altogether.
Windows also gives you a cool option while burning CDs and DVDs called Live File System, which basically makes your CD or DVD act like a USB flash drive, meaning you can edit, add and delete files on the disc just like you do on a flash drive.
In this article, I’ll show you how to burn a data disc easily using just Windows. Read my other post if you want to learn how to burn audio CDs or playable DVDs.
Burn CD/DVD in Windows
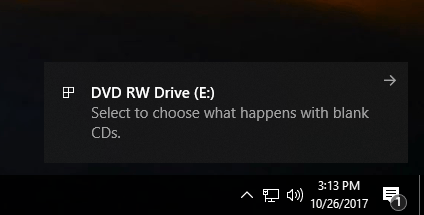
To get started, pop a CD or DVD into your Windows PC and you should see a dialog appear either in Notification Center or as an AutoPlay window.
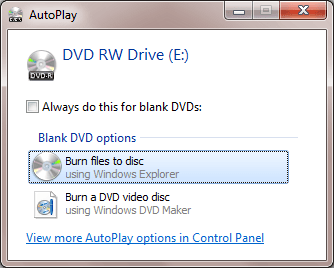
If no dialog box comes up for you, then just open Windows Explorer and double-click on the CD/DVD drive icon. Another box will pop up asking you how you would like to use this disc.
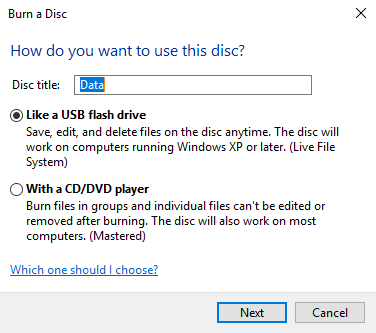
Give the disc a title and then choose whether you want it to act like a USB flash drive or like a mastered disc. The disadvantage to using the flash drive option is that you can only use the disc on computers running Windows XP and higher. Obviously, if you are burning this disc for another device, like a CD or DVD player, then you should choose the second option.
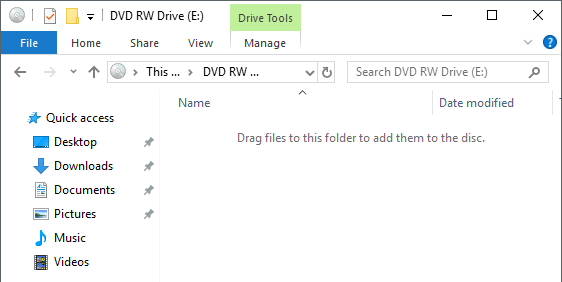
Next, you’ll get an empty Explorer window where you can start to drag and drop the files you want to burn to the disc. The best thing to do here is to open another Explorer window with the files you want to burn.
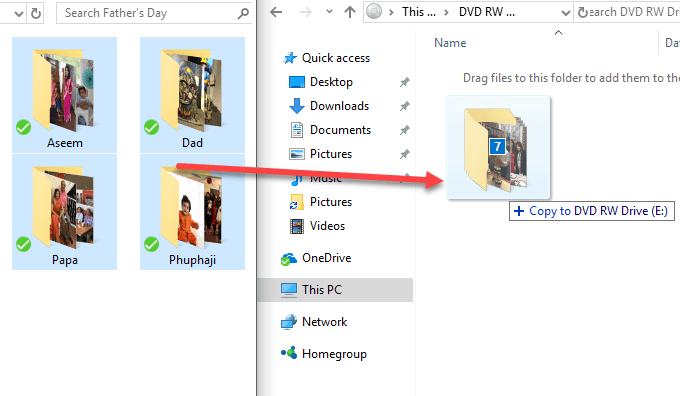
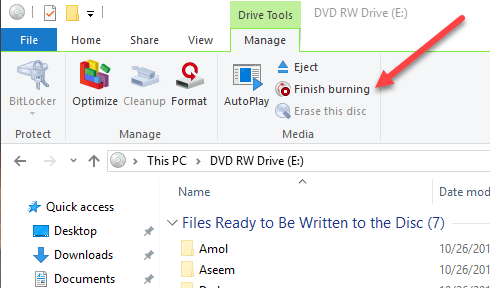
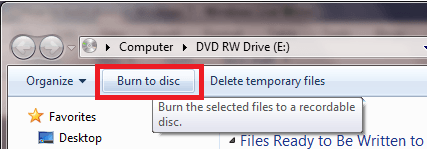
Once you have copied all the files you want to burn, click on Manage under Drive Tools and you’ll see an option called Finish burning. In Windows 7, you’ll see a Burn to disc option.
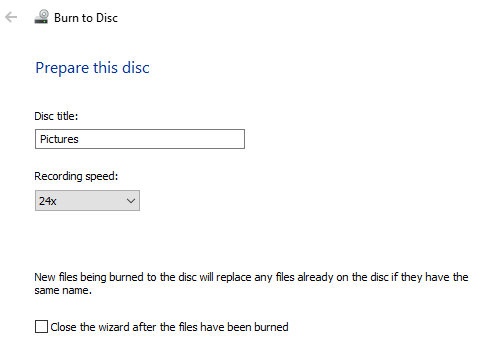
The burn wizard will appear and here you can choose the recording speed. By default, it should automatically be set to the fastest speed your drive can support.
Once the burn is completed, you should get a successful message and the option to burn another disc.
That’s about it! It’s a very simple and straight-forward process to burn a CD or DVD in Windows and you don’t have to worry about finding and installing third-party software anymore just to burn a few discs. Enjoy!
Founder of Help Desk Geek and managing editor. He began blogging in 2007 and quit his job in 2010 to blog full-time. He has over 15 years of industry experience in IT and holds several technical certifications. Read Aseem’s Full Bio


