- Программы для записи образа на флешку Linux
- 2. Unetbootin
- 3. Etcher
- 4. Ventoy
- 5. Multisystem
- 6. Gnome MultiWriter
- Выводы
- Burn ISO to USB in Linux with GUI app
- INTRODUCTION
- VIDEO TUTORIAL
- Install Etcher
- Possible Etcher installation problems
- Burn ISO to USB in Linux using Etcher
- Restore your USB after the installation
- CONCLUSION
- Make a bootable flash drive from an ISO image
Программы для записи образа на флешку Linux
Запись образа на флешку — очень частая задача для тех, кто ещё пытаете выбрать дистрибутив или тестирует новые версии Linux. В Windows мы привыкли к Rufus — это одна из самых лучших, интуитивно понятных и наиболее популярных утилит для записи образов дисков на USB-флешку. Она по праву считается лучшей и используется довольно часто. Но, к сожалению, нет версии этой программы для Linux; если вы новичок и хотите записать образ на флешку, то можете столкнуться с проблемой, чем это можно сделать.
На самом деле в операционной системе Linux есть свои программы для записи образа на флешку Linux, и их достаточно много. В этой статье мы рассмотрим лучшие аналоги Rufus для Linux, а также как ими пользоваться для решения своих задач. Сразу перейдём к списку.
Если вы уже пытались спрашивать на форумах, как записать образ на флешку в Ubuntu, то, наверное, уже слышали совет использовать утилиту dd. Это простая консольная утилита, которая позволяет побайтово переносить данные из одного места в другое, например из файла на флешку.
Несмотря на свою простоту она очень популярна среди опытных пользователей Linux, поскольку может правильно записать данные в большинстве случаев. Использовать эту утилиту очень просто. Нужно указать файл образа откуда будут скопированы данные и раздел на вашей флешке, например:
/ваш_образ.iso of=/dev/sdc bs=5M
Обратите внимание, что есть два возможных способа записи образа на флешку с помощью dd. Это непосредственно на флешку /dev/sdc или на раздел флешки — /dev/sdc1. Обычно работает первый вариант, но вы можете попробовать и второй. Запись образа на флешку займет определённое время, так что вам придется подождать.
После завершения копирования флешка будет готовка к работе. Но это далеко не все способы записи образа на диск, есть программы с графическим интерфейсом, полноценные аналоги Rufus Linux.
2. Unetbootin
Unetbootin — это графическая утилита с открытым исходным кодом для записи образа на USB-флешку. Работает она совсем по-другому. В отличие от dd, здесь флешка должна быть примонтирована к системе и отформатирована в правильную файловую систему. Утилита распакует содержимое образа на флешку, а затем добавит необходимые флаги раздела и установит загрузчик, чтобы всё работало так, как нужно.
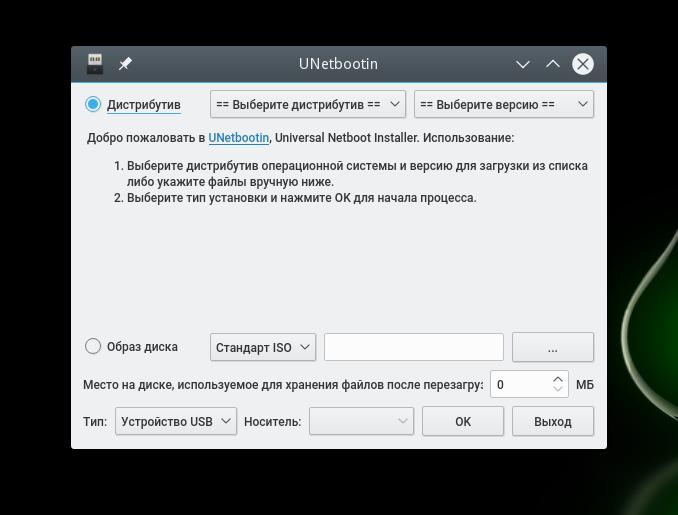
Вы можете выбрать образ из файловой системы или скачать систему автоматически через интернет. Кроме того, вы можете записывать образы дискеты, а также жестких дисков. Еще можно оставить свободное место на флешке, чтобы в будущем записать туда файлы. Это отличная альтернатива Rufus Linux и используется она настолько же часто, как и Rufus в Windows.
Установить программу можно из официальных репозиториев. В Ubuntu для установки наберите:
sudo apt install unetbootin
3. Etcher
Это следующее поколение программ для записи образа на флешку Linux. Etcher — утилита с открытым исходным кодом, которая может работать в Windows, Linux и Mac OS. Но её выгодно отличает ещё одна особенность — это современный графический интерфейс.
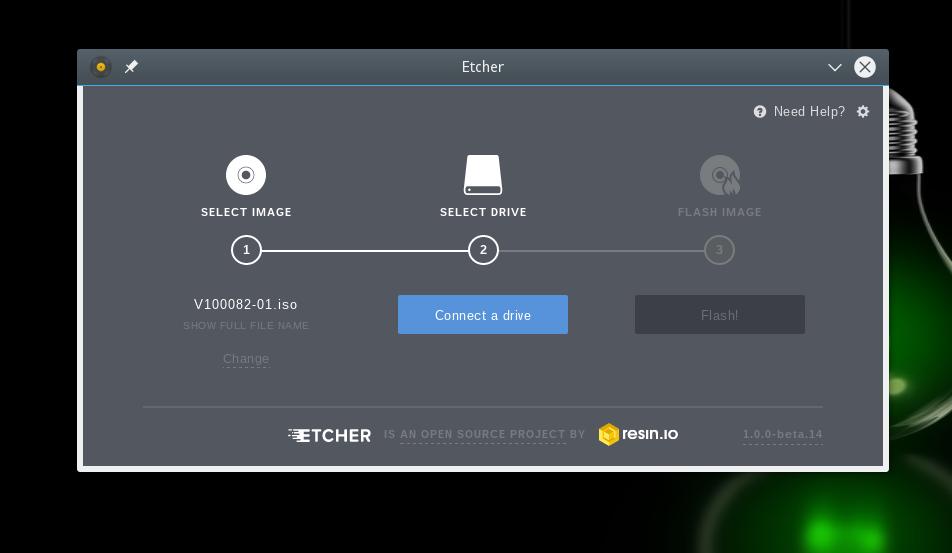
Утилита работает очень просто. Сначала вы выбираете образ диска, который нужно записать, потом флешку, а затем просто нажимаете кнопку Записать (Flash!). Программа сделает всё сама. Она новая, поэтому её ещё нет в официальных репозиториях, но вы можете найти портативный образ AppImage на официальном сайте.
4. Ventoy
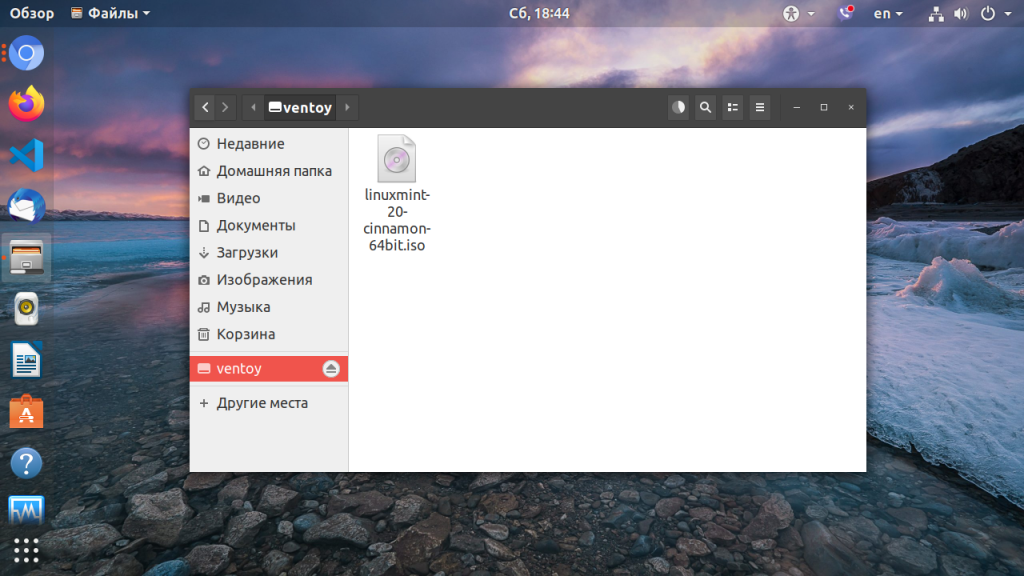
Это утилита, которая позволяет записать образ на флешку не очень стандартным образом. Вам достаточно просто установить программу на флешку, а затем скопировать туда же образ с нужным дистрибутивом. Программа сама разберется как его запустить и какие параметры передать чтобы все работало. Очень удобно. Графического интерфейса у программы нет, но он и не нужен, установку можно выполнить с помощью терминала, а затем копировать нужные образы в файловом менеджере. Более подробно об этой и следующей программе можно прочитать в этой статье.
5. Multisystem
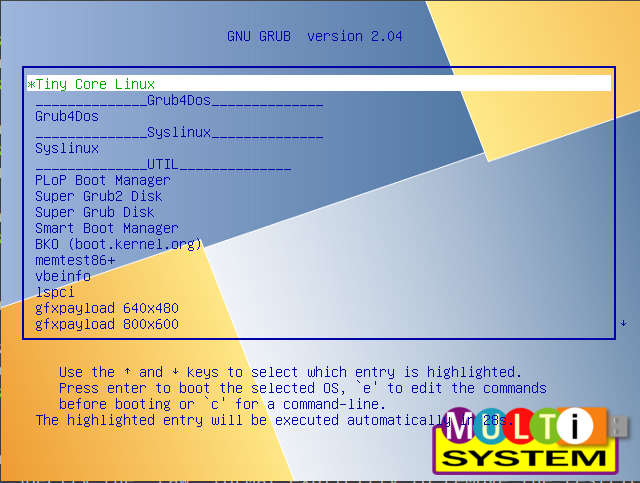
Еще одна утилита с открытым исходным кодом. Она тоже позволяет записывать несколько образов операционных систем на флешку. Всё выполняется быстро и просто. Берёте флешку, выбираете её в программе, далее выбираете несколько образов и записываете их.
Перед тем, как будут добавлены образы, программа установит загрузчик Grub2 на флешку, так что будьте аккуратны при выборе флешки, иначе можно и повредить жёсткий диск.
После этого нам остаётся записать образы и можно пользоваться. Кроме этого, в утилите есть множество настроек загрузчика Grub и Brug, резервное копирование и восстановление флешки, а также поддержка загрузки нужных вам образов из интернета.
6. Gnome MultiWriter
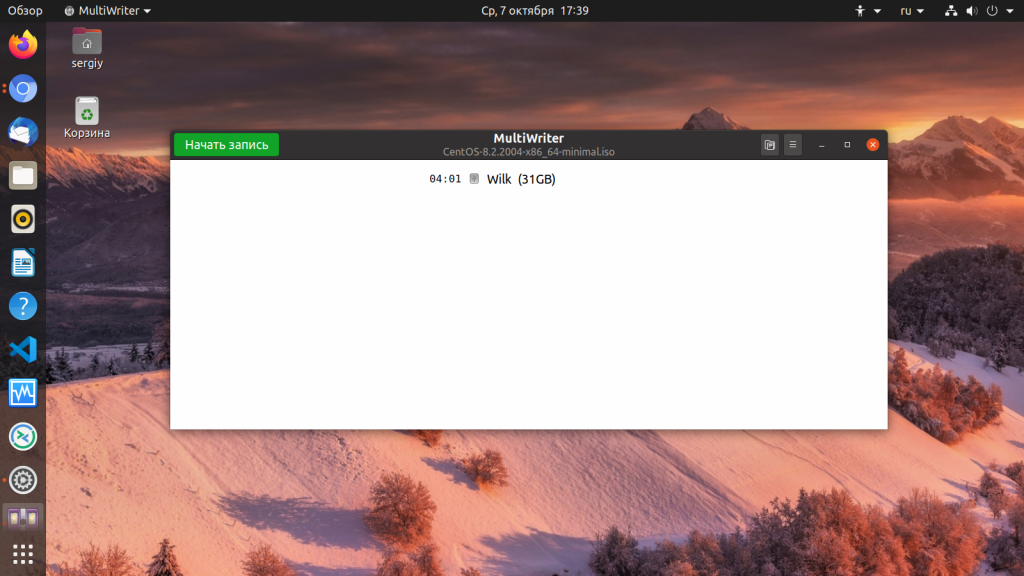
Утилита Gnome MultiWriter — это небольшая программа, разработанная в рамках проекта Gnome. Она позволяет записывать один ISO образ сразу на несколько носителей. Интерфейс программы предельно простой, но свою функцию она отлично выполняет. Для её установки в Ubuntu выполните:
sudo apt install gnome-multi-writer
Выводы
Вот и всё. Мы рассмотрели лучшие аналоги Rufus Linux, с помощью каждой из этих программ вы сможете записать свой образ на USB-флешку. В большинстве случаев всё работает достаточно хорошо. Я для своих целей использую либо dd, либо Unetbootin. А какие программы для записи ISO на флешку Linux используете вы? Напишите в комментариях!
На десерт видео о том, как пользоваться одной из самых популярных программ — Unetbootin:
Источник
Burn ISO to USB in Linux with GUI app
Nowadays it is very common to use USB drives to install Linux distributions. This enables reuse and better installation time with respect to CDs or DVDs. In this post, I will show you how to burn an ISO to a USB drive in Linux using a graphical program called Etcher.
INTRODUCTION
I recently wrote how to make a bootable USB drive on any Linux distribution using a terminal. However, it is true that there are people who do not like using the terminal. Now, I will do the same but using Etcher.
Etcher is a cross-platform graphical application to burn ISO images to USB drives. It is made with JS, HTML, node.js, and Electron. So, it is cross-platform and you can also use it on Windows and Mac OS.
VIDEO TUTORIAL
Install Etcher
First of all, it is necessary to download Etcher. To do this, go to the Etcher website. Usually, it automatically defines your system and offers you to download the version for your system. However, if it does not detect your system, or detects it wrongly, you can click on the arrow next to the download button and select the image you want to use. In my case, I will download the 64-bit Linux.
When the download is complete, open your file manager and extract the archive.
Then, enter the Etcher folder, and you will see a single file with extension .AppImage. If you double-click on it in Ubuntu, it should start automatically.
Possible Etcher installation problems
However, if it does not start automatically, it means there was a problem launched in this program. To check what is wrong, it is necessary to run the program from the terminal. Yes, unfortunately, you may need to use a terminal sometime. But there is nothing too complicated. So, click with the right mouse button in the file manager and select the Open in Terminal option. This will open the terminal in the current working directory.
Next, you need to run the file in the terminal, to see if any error occurs. You run the program in the format ./PROGRAM_NAME . You can also list the available files inside the folders to check the correct file name of the program. In this case, it will be similar to this:
And when I try to launch Etcher from the command line, I see this error message:
So, as you can see in the image, the problem is that the libgconf-2 package is not installed and it is a critical component of Etcher. So, the solution is to install it. You can search for it in your package manager (preferably Synaptic), or run this command:
After that, Etcher should start on double-click on its file in the file manager.
Burn ISO to USB in Linux using Etcher
Once Etcher has opened, the first step is to select the ISO to burn. To do this click on the Select Image button.
Navigate and select the ISO. In this case, I will just use a mini ISO of Ubuntu.
Next, you need to select a USB Drive where to write this ISO file. Etcher usually finds USB flash drive automatically but make sure it has selected the right USB Drive because if you have several USB drives connected to your computer it might select the wrong one. So, you can change the USB drive by clicking on the Change link.
When you have done this, all that is left is to start the burning process. To do this, click on the Flash! button.
If there is no error, at the end of the whole process you will see a window like this one.
And that is it, an ISO has been burned to the flash drive successfully. Now, you can reboot your system and select the USB Drive during the boot process and it will boot the ISO image you have just written to USB flash drive. The next will be the installation of your favorite Linux distribution.
Restore your USB after the installation
It may also happen that after you use your USB as a bootable drive, it does not function as a regular USB for data storage. If this is the case, you simply need to wipe its file system and format it to normal. I have showed this procedure in this post
CONCLUSION
Etcher is a very user-friendly and reliable program to make a bootable USB Drive in Linux with the graphical interface. It is a cross-platform application, so you can also use it in Windows or Mac. Finally, if you value open-source software, Etcher is open source
If you like this post, I recommend you to read about encrypting hard drives in Linux.
Источник
Make a bootable flash drive from an ISO image

We all know that installing an operating system from a USB drive is much faster than installing from DVD. In this article we will look at several ways to create a bootable USB drive.
Before describing how to create a bootable USB drive read the article How to correctly format the USB stick in Linux Mint. In some cases described below, it is desirable to have already formatted the USB flash drive in FAT32 format.
1. LinuxLive USB Creator (only for Windows users)
If you are a user of the Windows operating system and want to make a bootable USB flash drive with a Linux distribution – this program is for you.
It is very simple, select the USB flash drive, please specify the iso image will be copied, turn on the option to format the USB stick and click on the lightning.
You can download the program on the official developer’s website http://www.linuxliveusb.com/en/download.

Rufus is a utility that helps format and create bootable Flash/Pen/Key drives, memory cards, etc.
Rufus will be especially useful in cases where:
-you need to create a bootable USB disk from a bootable ISO image (Windows, Linux, UEFI, and others)
-need to work on systems that have no OS installed
-you need to flash a BIOS or other firmware from DOS
-you need to run a low-level utility
-Despite its small size, Rufus knows how to do everything!

3. UNetbootin (for Linux, Windows, Mac users)
A very common program. The principle of operation is the same as the previous program. Select the image, select the flash drive, and click OK. For details, see the screenshots below.
Installation latest version into Linux Mint 14/15/16/17/17.1:


4. LiveUSB MultiSystem (for Linux users) -To create a bootable USB flash drive with multiple operating systems (windows or linux) read article Create your LiveUSB MultiBoot very simple in Linux Mint.
5. Either – program to burn the iso image with the distro on a USB flash drive or micro SD card (Windows, MacOS and Linux) read article Either – program to record the iso image on a USB flash drive
6. YUMI – Multiboot USB Creator (for Linux, Windows users)
YUMI (Your Universal Multiboot Integrator), is the successor to our MultibootISOs. It can be used to create a Multiboot USB Flash Drive containing multiple operating systems, antivirus utilities, disc cloning, diagnostic tools, and more. Contrary to MultiBootISOs which used grub to boot ISO files directly from USB, YUMI uses syslinux to boot extracted distributions stored on the USB device, and reverts to using grub toBoot Multiple ISO files from USB, if necessary.
Important Note : YUMI was intended to be used to try to run various “LIVE Linux” Operating Systems from USB. Installing Linux from the YUMI created USB Drive to a Hard Drive is not officially supported. If the installer portion of any Live Linux distro does work, consider it a bonus.
Installation latest version into Linux Mint 14/15/16/17/17.1:
Download DEB package “YUMI for Ubuntu Linux” from website

7. USB image writer (for Linux users)
Linux Mint have default utility USB image writer. One time I used this program, but personally I have not always made a bootable USB flash drive.
Locate menu, the program will run. Select the image, select the USB drive and click Write.


Multiboot USB flash drive designed for loading and installing operating systems Windows/Linux and restoration-resuscitation tools directly from the USB drive.
9. WinUSB – Create Windows Usb stick
is a simple tool that allows you to create your own Windows installation on USB stick from an ISO image or DVD disk in Linux Mint.
10. Using the terminal (in my opinion the best 100% of the way)
As is known, the terminal is installed in any Linux distribution by default, so install additional software is not required.
The terminal command to write the iso image, the distribution is as follows:
Where instead of /home/USER/linuxmint.iso you need to specify the path to the iso file. sdb in the end, it’s a stick on which is written the way.
To determine your flash drive, run in terminal:

And if you stick decided differently, change in the command.
To be entered correctly in the command path to the file, open the folder with the file, open next to the terminal and drag the file into the terminal:

Now we are ready to start. I got the command:
The cursor of the terminal is blinking and it seems that nothing happens, but actually being recorded. Wait for the image capture and at the end you should see in the terminal like this:
Источник


