- Burn ISO to USB in Linux with GUI app
- INTRODUCTION
- VIDEO TUTORIAL
- Install Etcher
- Possible Etcher installation problems
- Burn ISO to USB in Linux using Etcher
- Restore your USB after the installation
- CONCLUSION
- Burn an ISO File
- Содержание
- Burning to CD/DVD in Linux
- Burning to a CD/DVD in Windows
- Writing to a USB Stick in Linux
- Using the Terminal
- How you can check ISO
- How create isohybrid
- Using a Burning Application
- ImageWriter
- Writing to a USB Stick in Windows
- Using Rufus
- Как записать ISO образ на USB флешку в Linux Mint?
- Стандартный способ записи ISO образа на USB флешку – самый простой
- Способ записи ISO образа на USB флешку с использованием сторонних программ — UNetbootin
- Способ записи ISO образа на USB флешку с помощью терминала Linux – утилита dd
Burn ISO to USB in Linux with GUI app
Nowadays it is very common to use USB drives to install Linux distributions. This enables reuse and better installation time with respect to CDs or DVDs. In this post, I will show you how to burn an ISO to a USB drive in Linux using a graphical program called Etcher.
INTRODUCTION
I recently wrote how to make a bootable USB drive on any Linux distribution using a terminal. However, it is true that there are people who do not like using the terminal. Now, I will do the same but using Etcher.
Etcher is a cross-platform graphical application to burn ISO images to USB drives. It is made with JS, HTML, node.js, and Electron. So, it is cross-platform and you can also use it on Windows and Mac OS.
VIDEO TUTORIAL
Install Etcher
First of all, it is necessary to download Etcher. To do this, go to the Etcher website. Usually, it automatically defines your system and offers you to download the version for your system. However, if it does not detect your system, or detects it wrongly, you can click on the arrow next to the download button and select the image you want to use. In my case, I will download the 64-bit Linux.
When the download is complete, open your file manager and extract the archive.
Then, enter the Etcher folder, and you will see a single file with extension .AppImage. If you double-click on it in Ubuntu, it should start automatically.
Possible Etcher installation problems
However, if it does not start automatically, it means there was a problem launched in this program. To check what is wrong, it is necessary to run the program from the terminal. Yes, unfortunately, you may need to use a terminal sometime. But there is nothing too complicated. So, click with the right mouse button in the file manager and select the Open in Terminal option. This will open the terminal in the current working directory.
Next, you need to run the file in the terminal, to see if any error occurs. You run the program in the format ./PROGRAM_NAME . You can also list the available files inside the folders to check the correct file name of the program. In this case, it will be similar to this:
And when I try to launch Etcher from the command line, I see this error message:
So, as you can see in the image, the problem is that the libgconf-2 package is not installed and it is a critical component of Etcher. So, the solution is to install it. You can search for it in your package manager (preferably Synaptic), or run this command:
After that, Etcher should start on double-click on its file in the file manager.
Burn ISO to USB in Linux using Etcher
Once Etcher has opened, the first step is to select the ISO to burn. To do this click on the Select Image button.
Navigate and select the ISO. In this case, I will just use a mini ISO of Ubuntu.
Next, you need to select a USB Drive where to write this ISO file. Etcher usually finds USB flash drive automatically but make sure it has selected the right USB Drive because if you have several USB drives connected to your computer it might select the wrong one. So, you can change the USB drive by clicking on the Change link.
When you have done this, all that is left is to start the burning process. To do this, click on the Flash! button.
If there is no error, at the end of the whole process you will see a window like this one.
And that is it, an ISO has been burned to the flash drive successfully. Now, you can reboot your system and select the USB Drive during the boot process and it will boot the ISO image you have just written to USB flash drive. The next will be the installation of your favorite Linux distribution.
Restore your USB after the installation
It may also happen that after you use your USB as a bootable drive, it does not function as a regular USB for data storage. If this is the case, you simply need to wipe its file system and format it to normal. I have showed this procedure in this post
CONCLUSION
Etcher is a very user-friendly and reliable program to make a bootable USB Drive in Linux with the graphical interface. It is a cross-platform application, so you can also use it in Windows or Mac. Finally, if you value open-source software, Etcher is open source
If you like this post, I recommend you to read about encrypting hard drives in Linux.
Источник
Burn an ISO File
Содержание
As outlined in the Download Manjaro page, an ISO is not simply a ‘drag and drop’ or ‘copy and paste’ duplication of Manjaro’s installation files. It is in fact a copy of the raw computer code that makes up the files themselves. This is why it is necessary to use a software burning application to ‘burn’ an ISO file, that is, convert its raw code into the files onto a physical medium such as a DVD or USB flashdrive / datastick in order to use it. Once burned / converted, the files on that medium can then be used to run Manjaro directly without having to install it to your system (referred to as Live-CD or Live-USB mode), and/or install Manjaro on your system. Again however, it will not be necessary to to burn an ISO if you intend on running Manjaro in a virtual machine environment using Oracle’s Virtualbox. This is because Virtualbox is able to read ISO files directly as virtual disks.
Burning to CD/DVD in Linux
Several different software burning applications — if not already installed — should be available for installation from your distribution’s Software Center / Software Manager / Package Manager / repositories. Popular burners include XFBurn, K3b, and Brasero. Which one you may choose is entirely down to personal choice. However, a guide to burning your downloaded Manjaro ISO using Brasero has been provided below:
1. Insert a Blank CD/DVD (use a DVD if burning an ISO for anything other than the NET Edition)
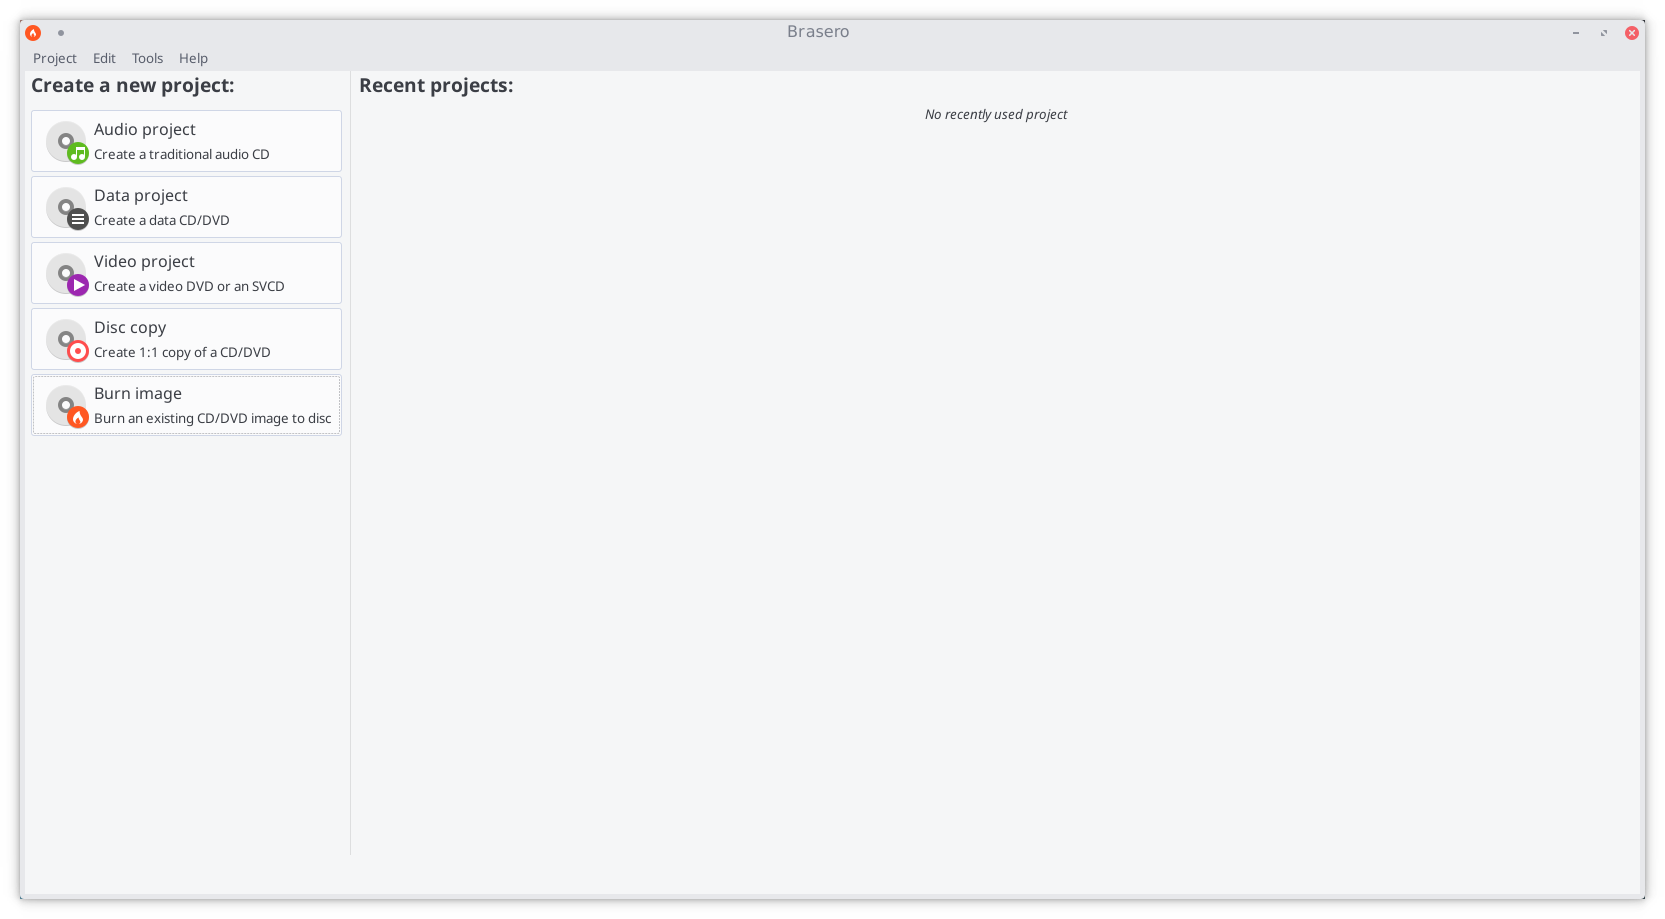
2. Start the Brasero software burner
3. Click the Burn Image — Burn an existing CD/DVD image to disc button to open the Image Burning Setup window.
4. Click the button beneath the title Select a disc image to write to open up your file manager. Locate and double-click the downloaded ISO file to load it. Upon automatically returning to the Image Burning Setup window, note that the ISO file is now listed as the disc image to write.
5. Underneath the title Select a disc to write to the blank CD/DVD inserted should already have been automatically listed. Otherwise, click the button to select it manually.
6. Click the properties button to open the properties window, and then click the button beneath the title Burning Speed. Again, it is strongly recommended to select the slowest speed available. Once selected, click the Close button.
7. Click the Burn button to start the burning process. If necessary, follow any on-screen instructions provided.
Burning to a CD/DVD in Windows
In Windows 7 and later, support for burning an ISO to DVD is built-in. Simply right click on the on .iso file and select «Burn disk image». This will bring up a series of dialogues to walk you through the process.
For Windows Vista or older versions of Windows you will need to download 3rd party software. Several free software burner applications are available for Windows. One such tool is DeepBurner. The portable version can be downloaded from here.
Writing to a USB Stick in Linux
This section describes how to write a Linux ISO file to USB.
Windows ISO files are notoriously difficult and requires special attention. Read the forum post on HowTo create a bootable Windows ISO
Using the Terminal
To burn the iso on an usb stick, enter the following command in a terminal :
Where [drive letter] is the letter of your removable device. Please note that it is the device (e.g. /dev/sdb), and not the partition number (e.g. /dev/sdb1).
To find which drive letter it might be write:
How you can check ISO
Disk manjaro-mate-15.12-x86_64.iso: 7,5 GiB, 8006074368 bytes, 15636864 sectors Units: sectors of 1 * 512 = 512 bytes Sector size (logical/physical): 512 bytes / 512 bytes I/O size (minimum/optimal): 512 bytes / 512 bytes Disklabel type: dos
Disk identifier: 0x00000000 COPY TO CLIPBOARD
Disk manjaro-xfce-16.08-x86_64.iso: 1,5 GiB, 1561657344 bytes, 3050112 sectors Units: sectors of 1 * 512 = 512 bytes Sector size (logical/physical): 512 bytes / 512 bytes I/O size (minimum/optimal): 512 bytes / 512 bytes Disklabel type: dos Disk identifier: 0x06c2dccb . Device Boot Start End Sectors Size Id Type manjaro-xfce-16.08-x86_64.iso1 * 0 3050111 3050112 1,5G 0 Empty
manjaro-xfce-16.08-x86_64.iso2 224 63711 63488 31M ef EFI (FAT-12/16/32) COPY TO CLIPBOARD
Isohybrid have 2 partitions, you can check also with gparted after burn the iso on an usb stick.
How create isohybrid
Using a Burning Application
ImageWriter
ImageWriter should be available for installation from your distribution’s Software Center / Software Manager / Package Manager / repositories. Once Imagewriter has been downloaded and installed, ensure that your USB stick is plugged in before starting it.
A brief guide to writing the Manjaro .ISO image has been provided:
1. Click on the centre icon
2. Navigate to where the ISO image has been saved and select it
3. Ensure that your USB device has been selected from the drop-down menu
4. Click on the Write button
5. After the Write process has finished, reboot your system
Writing to a USB Stick in Windows
Using Rufus
Rufus Rufus is a utility that helps format and create bootable USB flash drives, such as USB keys/pendrives, memory sticks, etc.
When you use Rufus to write a Manjaro Live ISO to USB you must select DD mode when prompted to use standard or DD mode.
Источник
Как записать ISO образ на USB флешку в Linux Mint?
Из данного материала Вы узнаете, как можно записать ISO образ диска на USB накопитель в операционной системе Linux Mint, иными словами, Вы научитесь создавать загрузочную USB флешку из ISO образа (мы разберем несколько способов).
Linux Mint – это один из самых популярных дистрибутивов операционной системы Linux, он активно используется на домашних компьютерах, как начинающими, так и продвинутыми пользователями Linux.
Если Вы начинающий пользователь Linux Mint, и Вам необходимо создать загрузочный USB накопитель из ISO образа, при этом Вы не знаете, как это сделать, можете смело продолжать чтение, так как сейчас я покажу Вам, как можно записать ISO образ диска на USB флешку, причем несколькими способами, включая продвинутый с помощью терминала Linux.
На заметку!
В операционной системе Windows для создания загрузочной USB флешки из ISO образа можно использовать как платные, так и бесплатные программы, их много. Например, очень популярна бесплатная программа Rufus, она действительно удобная и функциональная, а в случае если Вам необходимо записать ISO образ диска дистрибутива Linux, то Вы также можете использовать и программу UNetbootin, она также бесплатная, но чуть менее функциональная (например, не умеет форматировать флешку, однако она создана специально для записи дистрибутивов Linux на USB накопители и умеет скачивать их самостоятельно).
Для Linux Mint так же, как и для Windows, реализовано много программ, в Linux Mint даже с этим попроще, так как по умолчанию в состав дистрибутива включена стандартная программа «Запись образа на USB-накопитель», которая и предназначена для записи ISO образов дисков на USB флешки.
Примечание! В материале используется версия дистрибутива Linux Mint 19 MATE.
Стандартный способ записи ISO образа на USB флешку – самый простой
Сначала мы рассмотрим самый простой способ записи ISO образа на USB флешку в Linux Mint – это с использованием стандартной программы «Запись образа на USB-накопитель».
Данная программа максимально простая, Вам необходимо выбрать только ISO образ и USB накопитель. Давайте рассмотрим этот процесс более подробно.
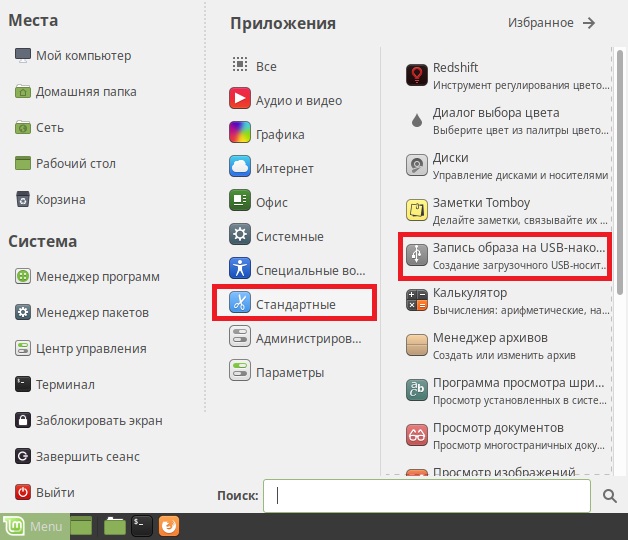
Для запуска программы нажимаем «Меню Mint –> Стандартные -> Запись образа на USB-накопитель».
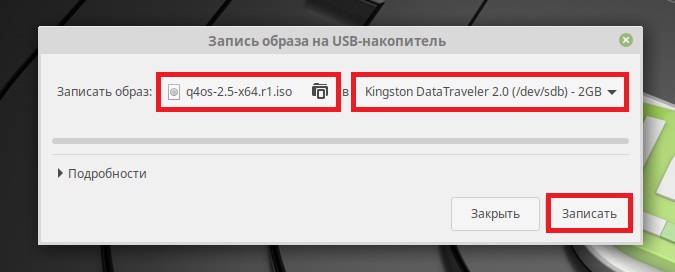
Программа запустится, в поле «Записать образ» выбираем ISO образ для записи, затем в соответствующем поле также выбираем USB устройство.
И нажимаем «Записать».
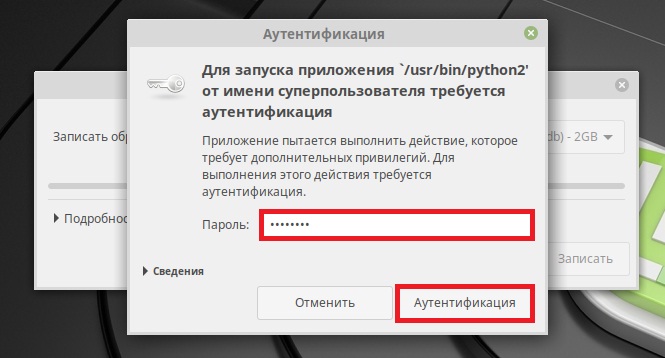
Данная операция требует административных прав, поэтому далее нам необходимо ввести пароль администратора и нажать «Аутентификация».
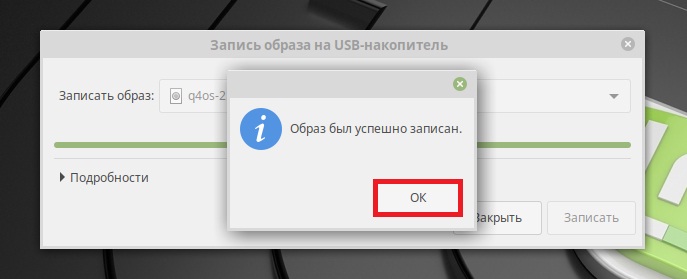
Процесс записи будет завершен, когда появится сообщение «Образ был успешно записан», нажимаем «ОК». После этого USB флешка, на которую был записан ISO образ, станет загрузочной, с нее теперь можно загружаться.
Способ записи ISO образа на USB флешку с использованием сторонних программ — UNetbootin
Сейчас давайте рассмотрим способ, который предполагает создание загрузочной USB флешки из ISO образа с использованием сторонней программы, в качестве примера я покажу, как это делается с помощью программы UNetbootin, которая предназначена для записи ISO образов дисков дистрибутивов Linux.
По умолчанию UNetbootin отсутствует в системе, даже в репозиториях ее нет, поэтому UNetbootin необходимо устанавливать дополнительно, о том, как это делается, можете посмотреть в материале – «Как установить UNetbootin в Linux Mint?», где я подробно описал весь процесс установки, включая подключение необходимого репозитория.
Примечание! Перед тем как приступать к записи ISO образа на флешку, используя программу UNetbootin, необходимо предварительно отформатировать USB устройство в файловую систему FAT32, подробней в статье – «Как отформатировать USB флешку в Linux Mint?».
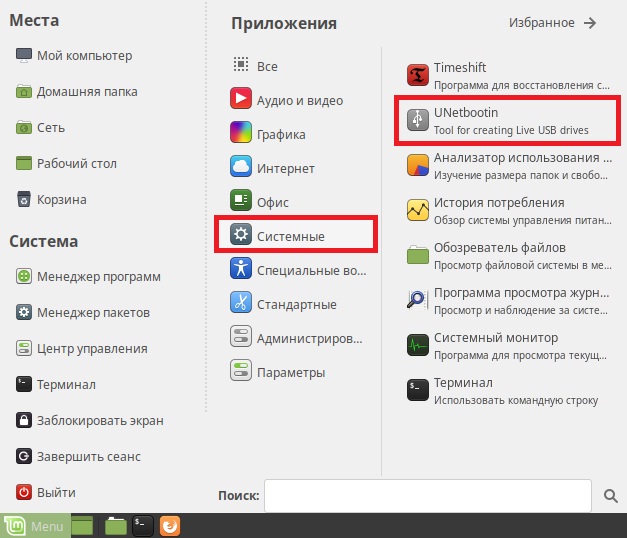
После того как Вы установили UNetbootin и отформатировали USB накопитель, запускайте программу UNetbootin, «Меню -> Системные -> UNetbootin».
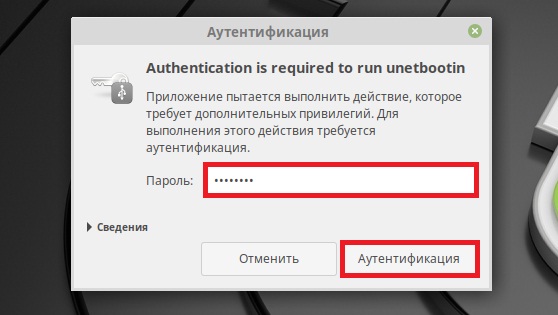
В данном случае программа UNetbootin сразу запросит пароль администратора, так как, я уже отмечал, эта операция требует повышенных привилегий, вводим пароль и нажимаем «Аутентификация».
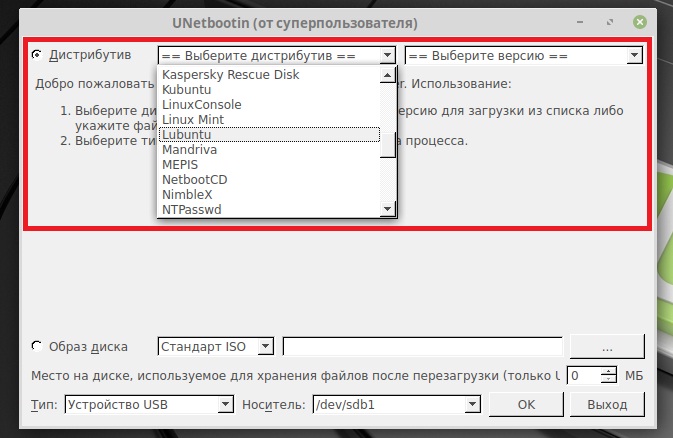
Затем также выбираем ISO образ, для этого используем кнопку с тремя точками, и указываем USB флешку в поле «Носитель», по умолчанию она уже выбрана (Вам стоит только проверить). После ввода всех настроек нажимаем «ОК».
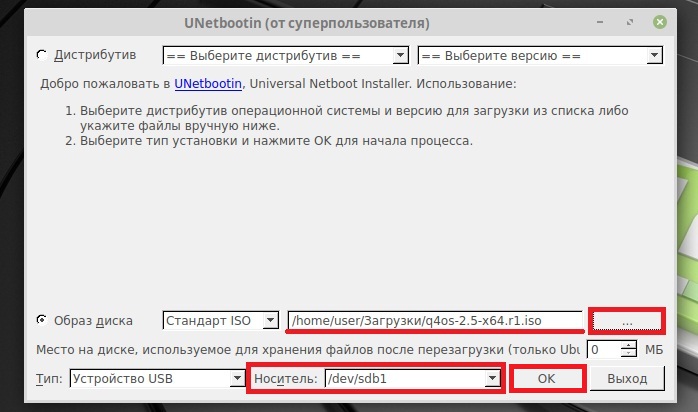
Если Вы не хотите предварительно скачивать ISO образ дистрибутива, Вы можете указать название дистрибутива и его версию в настройках программы, расположенных сверху, тем самым UNetbootin самостоятельно скачает и запишет ISO образ на флешку.
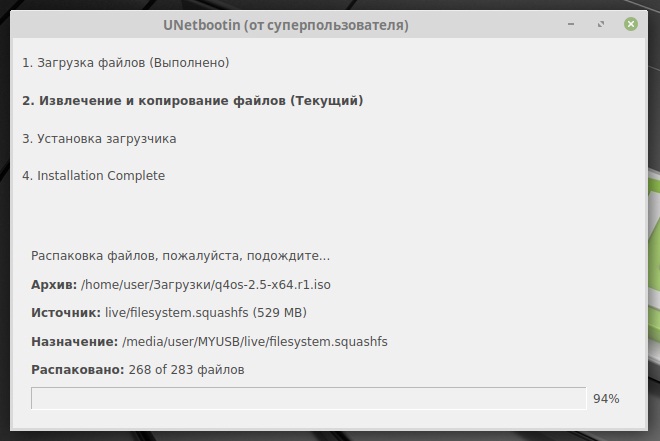
Процесс записи ISO образа программой UNetbootin выглядит следующем образом.
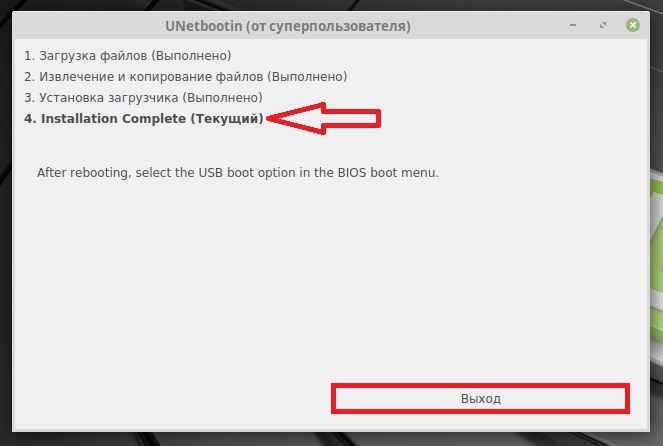
ISO образ будет записан на USB флешку после того, как появится следующее сообщение, нажимаем «Выход».
Способ записи ISO образа на USB флешку с помощью терминала Linux – утилита dd
Еще одним стандартным способом создания загрузочной USB флешки в Linux Mint является использование терминала, в частности утилиты dd.
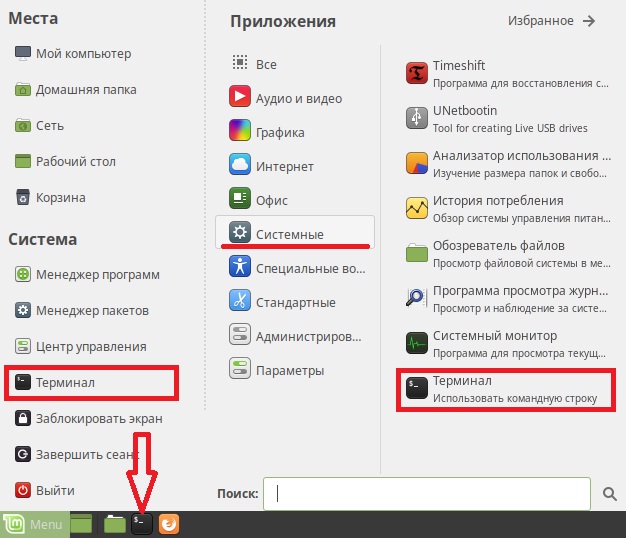
Для того чтобы записать ISO образ на USB устройство, используя утилиту dd, необходимо запустить терминал, например, кликнув на значок на панели, или «Меню-> Mint -> Терминал».
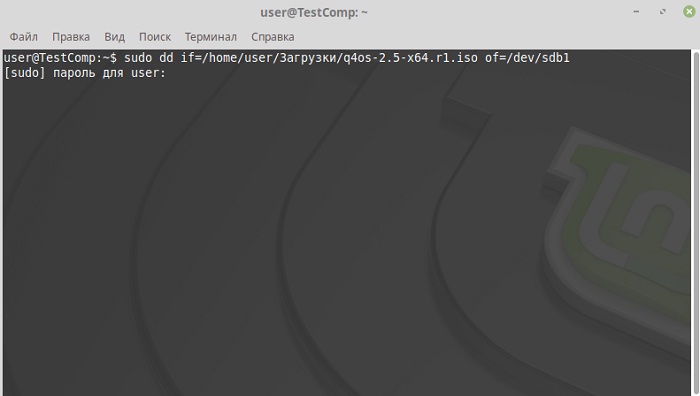
Синтаксис использования этой команды очень прост, необходимо указать, что записывать, т.е. ISO образ, и куда, соответственно USB флешку.
Пример использования команды DD
где вместо «/home/user/Загрузки/q4os-2.5-x64.r1.iso» Вы указываете путь к своему ISO образу, который Вы хотите записать, а вместо «/dev/sdb1» указываете название устройства, то есть, USB флешку (обычно это dev/sdb или dev/sdb1, но уточнить можно с помощью команды df).
Нажимаем «Ввод» (Enter), после этого Вам необходимо ввести пароль администратора.
В этом случае процесс записи не отображается, что, вообще-то, очень неудобно, создание загрузочной USB флешки завершится, когда в терминале отобразятся сведения об окончании записи ISO образа, примерно вот такие
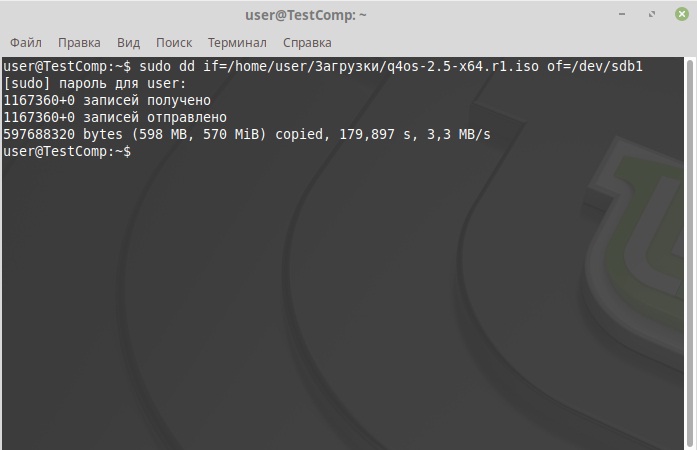
На заметку! Новичкам рекомендую почитать мою книгу «Linux для обычных пользователей» – в ней я максимально простым языком рассказываю про основы Linux и как пользоваться этой операционной системой без командной строки.
Вот мы с Вами и рассмотрели несколько способов записи ISO образа на USB флешку в Linux Mint, у меня все, пока!
Источник


