- How to Burn Discs in Windows 7/8/10
- Burn CD/DVD in Windows
- DVD Burning Software Windows 10: How to Burn DVD on Windows 10/8/7
- Part 1. Best DVD Burner for Windows 10/8/7
- Wondershare DVD Creator
- Video Tutorial to Burn Video and Photo to DVD on Windows 10 with Wondershare DVD Creator
- Steps to burn DVD Windows 10 using Wondershare DVD Creator:
- 1. Steps to Burn Videos to DVD for Windows 10:
- Step 1 Open DVD burning software Windows 10.
- Step 2 Add videos and edit them.
- Step 3 Choose DVD template at DVD burning software Windows 10.
- Step 4 Preview and clone DVD Windows 10.
- 2. Steps to burn photos to DVD on Windows:
- Step 1 Open DVD Creator Windows 10.
- Step 2 Import and edit photos.
- Step 3 Select DVD menu template at DVD burning software Windows 10.
- Step 4 Preview and burn photos to DVD.
- Part 2. DVD Burning Software Windows 8/7 — Windows Media Player
- Steps to Burn DVD with Windows Media Player:
- Part 3. DVD Burning Software for Windows 7 — Windows DVD Maker
- Steps to burn DVD with Windows DVD Maker:
- Part 4. Comparison on These 3 Windows DVD Burners
How to Burn Discs in Windows 7/8/10
Use these data discs just like a USB
Recently, I was searching online for some free software to burn some CDs and DVDs at home, but then I realized Windows already has built-in burning software in Explorer. It’s actually been there for many years, but it’s so inconspicuous that I tend to forget about it altogether.
Windows also gives you a cool option while burning CDs and DVDs called Live File System, which basically makes your CD or DVD act like a USB flash drive, meaning you can edit, add and delete files on the disc just like you do on a flash drive.
In this article, I’ll show you how to burn a data disc easily using just Windows. Read my other post if you want to learn how to burn audio CDs or playable DVDs.
Burn CD/DVD in Windows
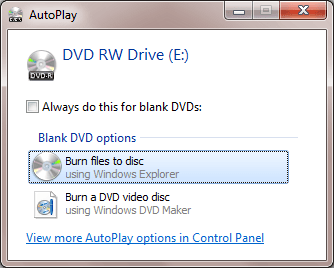
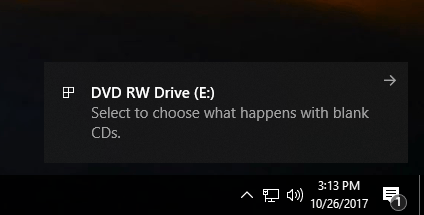
To get started, pop a CD or DVD into your Windows PC and you should see a dialog appear either in Notification Center or as an AutoPlay window.
If no dialog box comes up for you, then just open Windows Explorer and double-click on the CD/DVD drive icon. Another box will pop up asking you how you would like to use this disc.
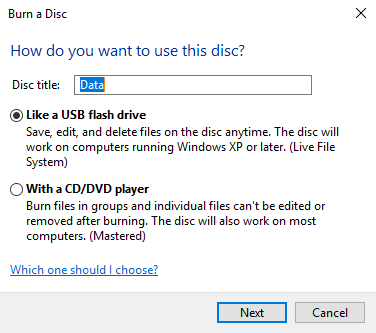
Give the disc a title and then choose whether you want it to act like a USB flash drive or like a mastered disc. The disadvantage to using the flash drive option is that you can only use the disc on computers running Windows XP and higher. Obviously, if you are burning this disc for another device, like a CD or DVD player, then you should choose the second option.
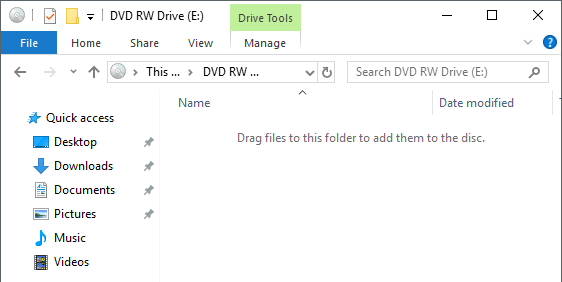
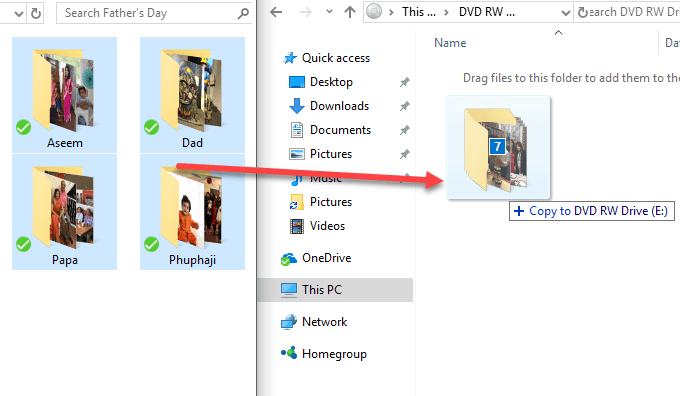
Next, you’ll get an empty Explorer window where you can start to drag and drop the files you want to burn to the disc. The best thing to do here is to open another Explorer window with the files you want to burn.
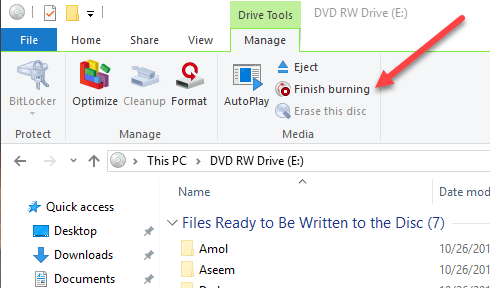
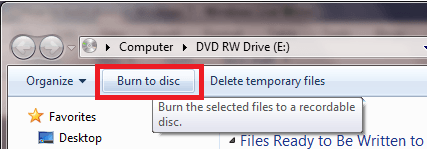
Once you have copied all the files you want to burn, click on Manage under Drive Tools and you’ll see an option called Finish burning. In Windows 7, you’ll see a Burn to disc option.
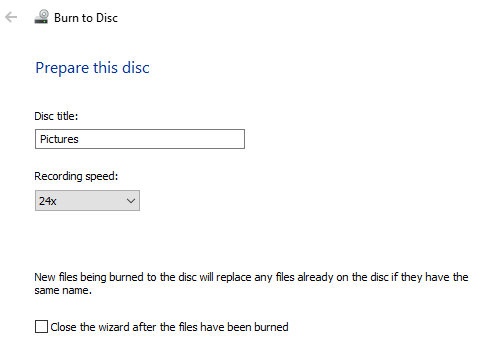
The burn wizard will appear and here you can choose the recording speed. By default, it should automatically be set to the fastest speed your drive can support.
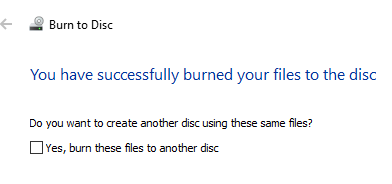
Once the burn is completed, you should get a successful message and the option to burn another disc.
That’s about it! It’s a very simple and straight-forward process to burn a CD or DVD in Windows and you don’t have to worry about finding and installing third-party software anymore just to burn a few discs. Enjoy!
Founder of Help Desk Geek and managing editor. He began blogging in 2007 and quit his job in 2010 to blog full-time. He has over 15 years of industry experience in IT and holds several technical certifications. Read Aseem’s Full Bio
DVD Burning Software Windows 10: How to Burn DVD on Windows 10/8/7
There are a number of reasons when you may need to burn video, image, and other files on a DVD. If you are using a Windows system, you can choose from a wide range of DVD burning software Windows 10 available. Depending on the features, supported videos formats and compatibility with the OS version, pick up the most suitable Windows DVD burner.
Part 1. Best DVD Burner for Windows 10/8/7
Wondershare DVD Creator is one apt choice for burning DVD on your Windows 10, 8, 7 as well as other OS versions. The Mac version of the program is also available. This expert software allows burning all popular formats of videos and images to DVD disc, Blu-ray disc, DVD folder and ISO image file. There are more than 100 DVD menu templates available to give a professional look to your DVD. You can also create additional chapters, add a background image of music and also edit the thumbnails, buttons, and text of the menu.
Rotate your videos, crop it, trim unwanted parts, add watermark and make other needed changes before burning using built-in video editor. You can also set the aspect ratio of the video in accordance with the player’s screen. Fast DVD burning speed and real-time preview are the additional benefits.
Wondershare DVD Creator
- В· Burn videos and photos in any format to DVD/ISO/DVD Folder/Blu-ray DVD with super fast burning speed and high-quality output.
- В· Create photo slideshow with music and transition effects to DVD easily.
- В· Customize DVD menu with different parameters like title, music, image, etc.
- В· Windows 10/8/7 DVD burner with 100+ free static and dynamic menu templates.
- В· Built-in editor to personalize videos and photos by Trim, Crop, Rotate, Effects, Text, etc.
- В· Additional toolbox with functions of ISO to DVD, Data Disc, DVD to DVD, DVD to video conversion, One-click to burn Blu-ray Disc, and others.
- В· Supported OS: Windows 10/8/7/XP/Vista/2003, Mac OS X 10.14 (Mojave), 10.13 (High Sierra), 10.12, 10.11, 10.10, 10.9, 10.8, 10.7, 10.6.
Video Tutorial to Burn Video and Photo to DVD on Windows 10 with Wondershare DVD Creator
Steps to burn DVD Windows 10 using Wondershare DVD Creator:
There are a little differences between burning video DVD Windows 10 and burning photos. Below shows both of the steps for you.
1. Steps to Burn Videos to DVD for Windows 10:
Step 1 Open DVD burning software Windows 10.
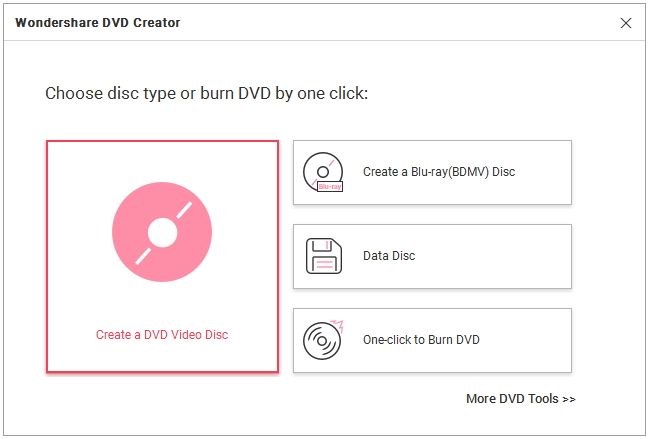
After successfully downloading and installing Wondershare DVD Creator on your Windows PC, click its icon and open it. From the window, select the Create a DVD Video Disc option.
Step 2 Add videos and edit them.
Click the » + » button on the Source tab to browse and open videos from your PC. Or simply drag and drop files to the program. Multiple files can be added.
The successful added videos will display as thumbnails and click the pencil icon to open Video Editor window. Crop, trim, rotate, and perform other editing functions and click OK to save your changes. If the editing is not needed, you can skip this part.

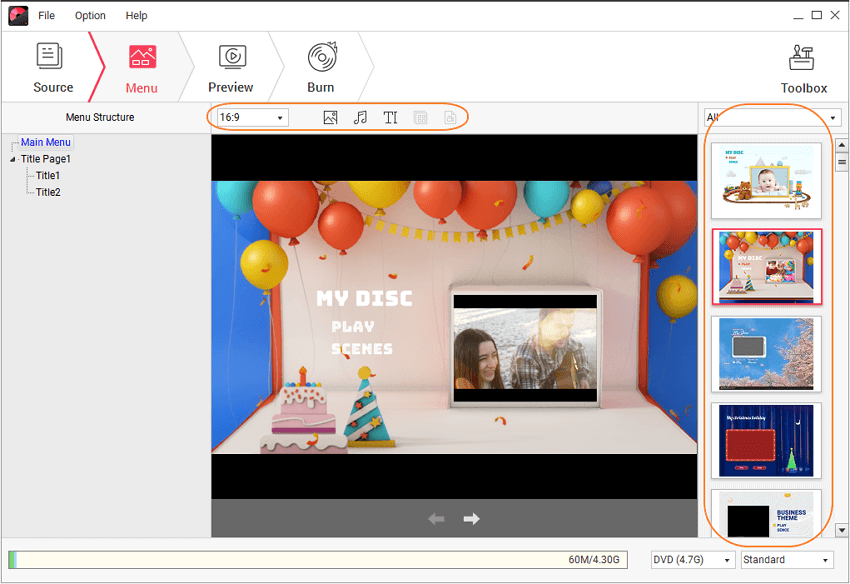
Step 3 Choose DVD template at DVD burning software Windows 10.
The Menu tab shows the available DVD menu template designs on the right interface. Choose the most appropriate one and double-click to apply. Click the icons at the top of the screen to customize the menu further for adding chapters, background image or music, setting aspect ratio and others.
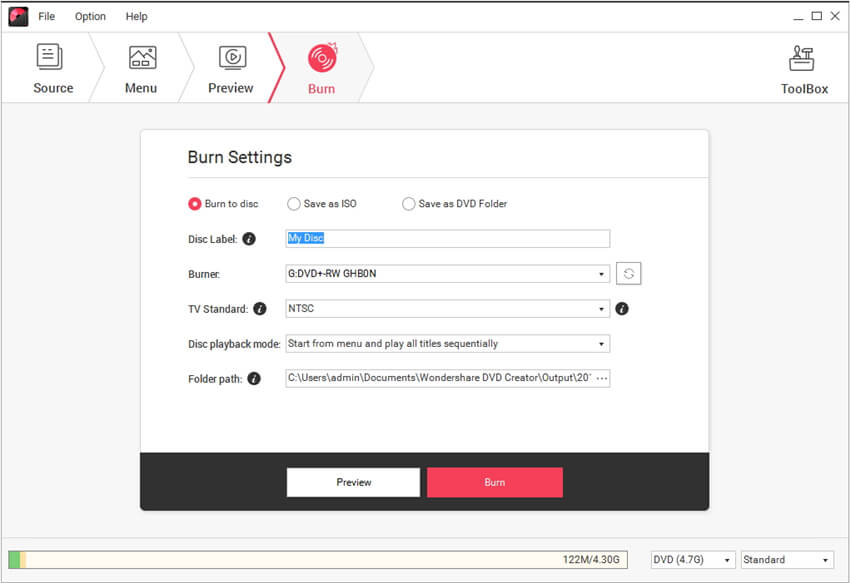
Step 4 Preview and clone DVD Windows 10.
To check the created disc, click the Preview tab. Just back to previous operations to make changes if you’re not so satisfied. Next, move on to the Burn tab and then select Burn to disc option. Set disc parameters like Disc Label, TV standard, Disc playback mode and others from this Burn Settings window. Hit Burn to start burning process.
2. Steps to burn photos to DVD on Windows:
Step 1 Open DVD Creator Windows 10.
Run Wondershare DVD Creator and select the Create a DVD Video Disc option.
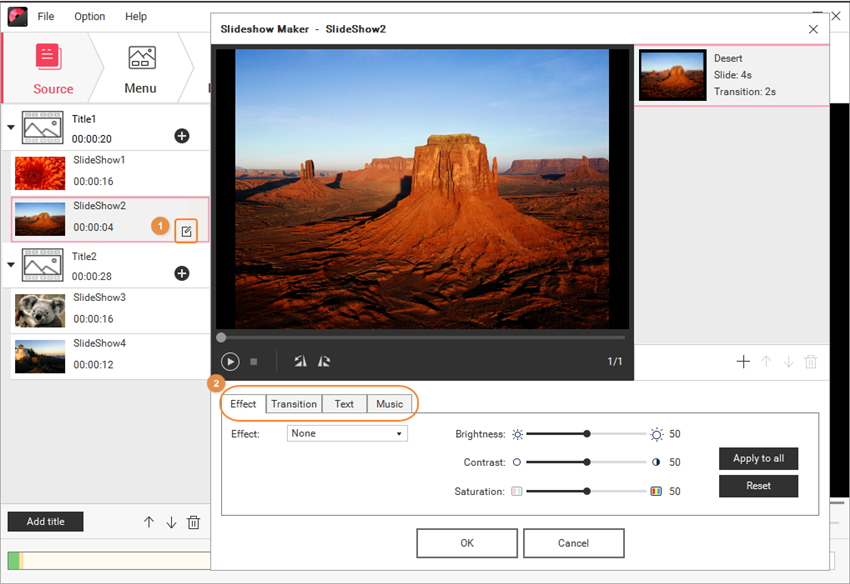
Step 2 Import and edit photos.
Hit the » + » icon under the Source tab to browse and add images present on your Windows 10 system. You can also drag and drop the files. Once photos are added, you can customize the same. Either click pencil-like icon or select the image, right click and select Edit option to open Slideshow Maker window. Add effect, text, music, or do the transition and click OK to confirm.
Step 3 Select DVD menu template at DVD burning software Windows 10.
From the Menu tab, you can select the desired DVD menu template and also customize using the icons at the top of the screen.
Step 4 Preview and burn photos to DVD.
The Preview tab allows you to check if the created DVD is as desired. If needed, go back to respective function and make changes. Move to the Burn tab when all are fine. Select Burn to disc option, give a DVD label and select other parameters. Hit Burn to start burning your photos to a DVD disc.
Considering quick and simple steps for burning videos as well as photos to a DVD, Wondershare DVD Creator can be considered as the best DVD burning software for Windows 10 and other OS versions.
Part 2. DVD Burning Software Windows 8/7 — Windows Media Player
Developed by Microsoft, Windows Media Player is a media library app and a media player that also supports additional functions, including burning videos, photos, and music to CD and data DVD. Windows Media Player in Windows 10 version comes with disc burning feature that can be used without any third-party software. The software allows burning your files to data DVD and not feature- rich discs. Thus, you can use the created discs only for storage as these are not compatible with the majority of the home DVD players.
Supported video file types: Popular formats including AVI, MKV, MP4, FLV, WMV, VIDEO_TS, and others.
Supported Audio formats: MP3, WAV, and WMA
Supported Photo formats: PNG, JPG, GIF, and others
Supported documents: TXT, PDF, DOCX, ODT, DOC, XLS, and others
Supported OS: Windows 8, Windows 10, Windows 7, and other versions of the OS.
Steps to Burn DVD with Windows Media Player:
Step 1: Insert blank DVD into the driver or your PC. Open Windows Media Player on your PC.
Step 2: At the top menu bar, click the Burn tab and select Data CD or DVD option.

Step 3: Open the File Explorer, select the files that you want to burn and drag them to the burn list of Windows Media Player.

Step 4: Arrange the sequence of the files in the order you want to burn them to a DVD. Click Start Burn to create DVD Windows 10.

Part 3. DVD Burning Software for Windows 7 — Windows DVD Maker
If you are using Windows 7 version of the OS, Windows DVD Maker can be used for burning your files to a DVD disc to play them on a home/portable DVD player. The program features Aero Wizard type of interface that facilitates user through the process of Video DVD creation. Using the software you can also create photo slideshows with background music and transition effects. Options for customizing button and font styles are also there. The preview option is also available.
Supported video formats: ASF, WMV, AVI, DVR-MS, M1V, MP2, MPEG, MPE, MPV2, WM.
Supported Audio formats: MP3, WMA, WAV, and MP2.
Supported picture formats: BMP, JPE, JPEG, PNG, JPG, GIF, PNG, DIB, WMF, WDP, DIB, TIFF, and TIF.
Supported OS: Windows 7, Windows Vista
Steps to burn DVD with Windows DVD Maker:
Step 1: Open disc burner for Windows 7, Windows DVD Maker on your PC. Select the Choose Photos and Videos option.
Step 2: From the top menu, click on Add items to insert photos or videos for DVD burning. You can also drag and drop the files to the program interface. Click Next to select Menu and other DVD features.

Step 3: Next, give a title to the disc to be burned. Click Options on the bottom-right corner. A DVD options window will open, from where you can select the DVD playback settings options, aspect ratio, Video format, and burning speed. Click OK to confirm all the settings.

Step 4: Finally click Burn to start the DVD burning process. If a blank disc is not added, the program will prompt you to do so.

Windows DVD Maker is simple and easy to use DVD burning software for Windows 7 with basic needed features.
Part 4. Comparison on These 3 Windows DVD Burners
Above listed are 3 different Windows DVD burners. Each of these software comes with different set of functions and features. Depending on what features you need while burning a DVD, you may select a program. The comparison table will below will also help you with your selection.
| Features/Software | Wondershare DVD Creator | Windows Media Player | Windows DVD Maker |
| Supported OS | Windows 10/8/7/Vista/XP/2003 | Windows 7/8.1/10 | Windows 7/Windows Vista |
| Supported file formats | Almost all types of video and image formats | Popular formats of documents, audio, and picture | Popularly used video, picture and audio formats |
| DVD Menus | Yes , 100+ static and dynamic menu templates to choose from | No | Yes, comes with basic menu themes to choose from |
| DVD and Blu-ray discs | Yes, supports creating all types of DVDs and Blu-ray discs | Can create CDs and data discs | Types of DVD discs |
| Burn video to ISO image files |  | ||
| DVD menu customization | Yes, with an array of features | No | Yes, with basic features |
| Add and create new chapters | | ||
| Video Editor | Yes, complete editor with all needed features | ||
| Preview functions | | ||
| Download | Free Trial Free Trial |
Considering the table above, it can be concluded that Windows DVD Creator is the best DVD burning software for windows. The program facilitates creating professional looking DVD and Blu-ray discs in an effortless manner.


