- GNU Compiler Collection, первые шаги
- Using C++ on Linux in VS Code
- Prerequisites
- Ensure GCC is installed
- Create Hello World
- Add hello world source code file
- Explore IntelliSense
- Build helloworld.cpp
- Running the build
- Modifying tasks.json
- Debug helloworld.cpp
- Start a debugging session
- Step through the code
- Set a watch
- C/C++ configurations
- Reusing your C++ configuration
GNU Compiler Collection, первые шаги
Эта заметка призвана на простых примерах познакомить начинающего nix-разработчика с инструментами GNU, в частности с компилятором GCC.
С его помощью мы и создадим простейшую программу. По большому счету все, как обычно. Заводим специальную папку, в которой будет размещаться проект.
Создаем в ней файл с именем: hello.c
Открываем файл в любом текстовом редакторе и пишем простейший код:
#include
int main(void)
<
printf(«Hello world!»);
return(0);
>
Сохраняем файл и выполняем команду: gcc hello.c
В созданной нами папке появился новый файл — a.out, это название присваивается по умолчанию, если специально не задано другого.
Это и есть исполняемый файл. Попробуем его запустить, для этого в консоли набираем: ./a.out
И радуемся в связи с первой написанной программой в линуксе!
Идем далее. При запуске исполняемого файла, если мы укажем только его название, система будет искать его в каталогах /usr/bin и /usr/local/bin, и, естественно, не найдет. Первый из них предназначен для размещения стабильных версий программ, как правило, входящих в дистрибутив Linux. Второй – для программ, устанавливаемых самим пользователем (за стабильность которых никто не ручается). По умолчанию, при сборке программы, устанавливаются в каталог /usr/local/bin.
Флаги используемые при компиляции
Флаг -o используем чтобы указать определенное имя получаемому исполняемому файлу: gcc hello.c -o say_hello
Флаг -E используем чтобы посмотреть, что получается после работы препроцессора. Этот флаг останавливает выполнение программы, как раз на этапе обработки препроцессором. В результате получается файл исходного кода с включённым в него содержимым заголовочных файлов.
Выподняем/смотрим: gcc -E hello.c -o hello.cpp
Флаг -с используем для создания объектных файлов (аналог *.obj): gcc -c kalkul.c
Название получаемого файла такое же, но компилятор изменяет расширение .c на .o (но указать можно и вручную).
Флаг -x используем, если создаётся объектный файл из исходника, уже обработанного препроцессором (например такого, какой мы получили выше), мы должны обязательно указать явно, что компилируемый файл является файлом исходного кода, обработанный препроцессором, и имеющий теги препроцессора. В противном случае он будет обрабатываться, как обычный файл C++, без учёта тегов препроцессора, а значит связь с объявленными функциями не будет устанавливаться.
Файл C++, обработанный препроцессором обозначается cpp-output:
gcc -x cpp-output -c hello.cpp
Собирается проект следующим образом: gcc hello.o -o say_hello
Запускаем: ./say_hello
Для чего нужна вся эта возня с промежуточными этапами?
Программы редко состоят из одного файла. Как правило исходных файлов несколько, и они объединены в проект. И в некоторых исключительных случаях программу приходится компоновать из нескольких частей, написанных, возможно, на разных языках. В этом случае приходится запускать компиляторы разных языков, чтобы каждый получил объектный файл из своего исходника, а затем уже эти полученные объектные файлы компоновать в исполняемую программу.
Источник
Using C++ on Linux in VS Code
In this tutorial, you will configure Visual Studio Code to use the GCC C++ compiler (g++) and GDB debugger on Linux. GCC stands for GNU Compiler Collection; GDB is the GNU debugger.
After configuring VS Code, you will compile and debug a simple C++ program in VS Code. This tutorial does not teach you GCC, GDB, Ubuntu or the C++ language. For those subjects, there are many good resources available on the Web.
If you have trouble, feel free to file an issue for this tutorial in the VS Code documentation repository.
Prerequisites
To successfully complete this tutorial, you must do the following:
Install the C++ extension for VS Code. You can install the C/C++ extension by searching for ‘c++’ in the Extensions view ( ⇧⌘X (Windows, Linux Ctrl+Shift+X ) ).

Ensure GCC is installed
Although you’ll use VS Code to edit your source code, you’ll compile the source code on Linux using the g++ compiler. You’ll also use GDB to debug. These tools are not installed by default on Ubuntu, so you have to install them. Fortunately, that’s easy.
First, check to see whether GCC is already installed. To verify whether it is, open a Terminal window and enter the following command:
If GCC isn’t installed, run the following command from the terminal window to update the Ubuntu package lists. An out-of-date Linux distribution can sometimes interfere with attempts to install new packages.
Next install the GNU compiler tools and the GDB debugger with this command:
Create Hello World
From the terminal window, create an empty folder called projects to store your VS Code projects. Then create a subfolder called helloworld , navigate into it, and open VS Code in that folder by entering the following commands:
The code . command opens VS Code in the current working folder, which becomes your «workspace». As you go through the tutorial, you will create three files in a .vscode folder in the workspace:
- tasks.json (compiler build settings)
- launch.json (debugger settings)
- c_cpp_properties.json (compiler path and IntelliSense settings)
Add hello world source code file
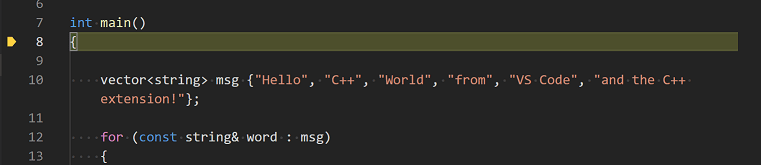
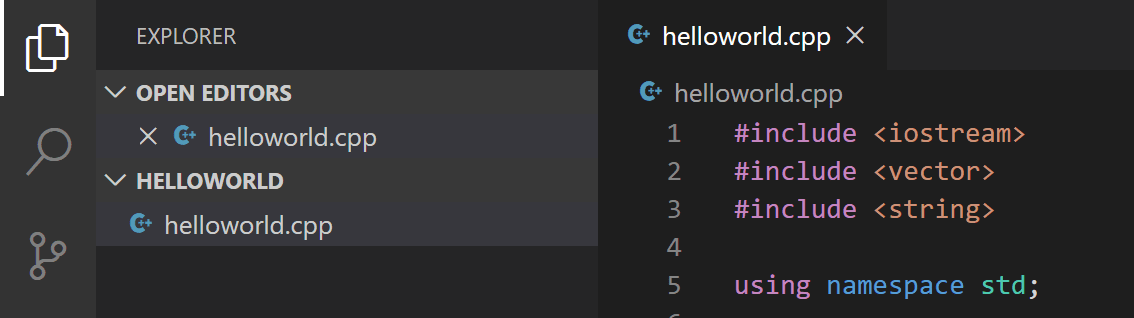
In the File Explorer title bar, select New File and name the file helloworld.cpp .
Paste in the following source code:
Now press ⌘S (Windows, Linux Ctrl+S ) to save the file. Notice that your files are listed in the File Explorer view ( ⇧⌘E (Windows, Linux Ctrl+Shift+E ) ) in the side bar of VS Code:
You can also enable Auto Save to automatically save your file changes, by checking Auto Save in the main File menu.
The Activity Bar on the edge of Visual Studio Code lets you open different views such as Search, Source Control, and Run. You’ll look at the Run view later in this tutorial. You can find out more about the other views in the VS Code User Interface documentation.
Note: When you save or open a C++ file, you may see a notification from the C/C++ extension about the availability of an Insiders version, which lets you test new features and fixes. You can ignore this notification by selecting the X (Clear Notification).
Explore IntelliSense
In the helloworld.cpp file, hover over vector or string to see type information. After the declaration of the msg variable, start typing msg. as you would when calling a member function. You should immediately see a completion list that shows all the member functions, and a window that shows the type information for the msg object:
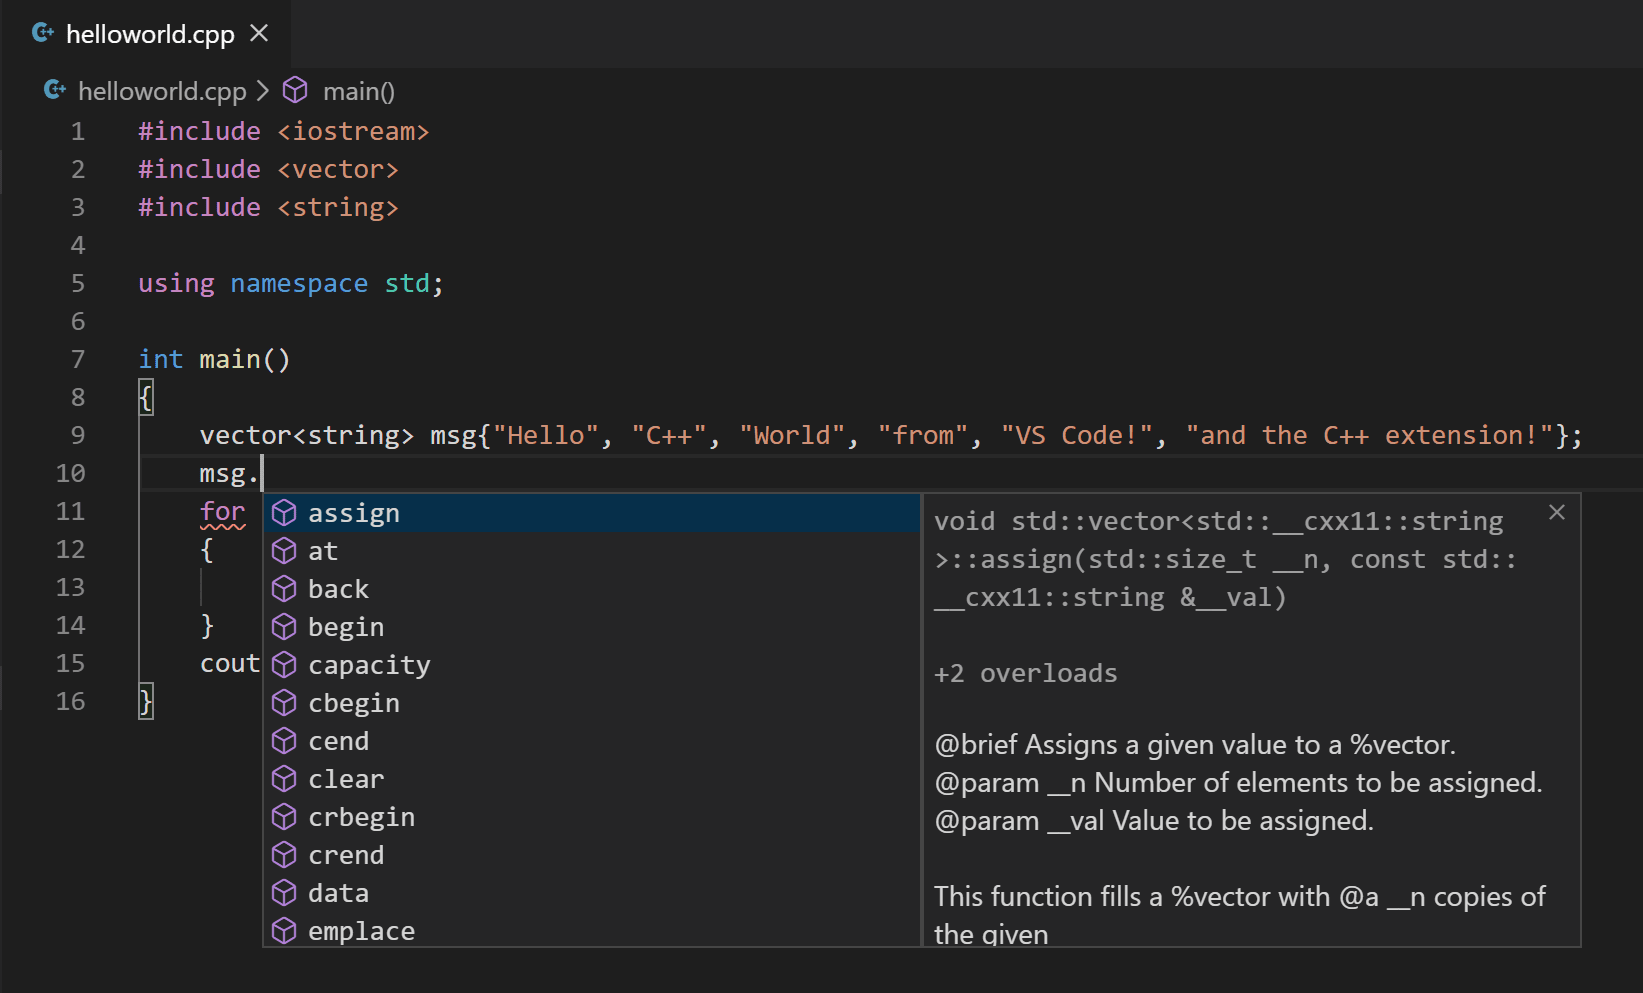
You can press the Tab key to insert the selected member. Then, when you add the opening parenthesis, you’ll see information about arguments that the function requires.
Build helloworld.cpp
Next, you’ll create a tasks.json file to tell VS Code how to build (compile) the program. This task will invoke the g++ compiler to create an executable file from the source code.
It’s important to have helloworld.cpp open in the editor because the next step uses the active file in the editor for context to create the build task in the next step.
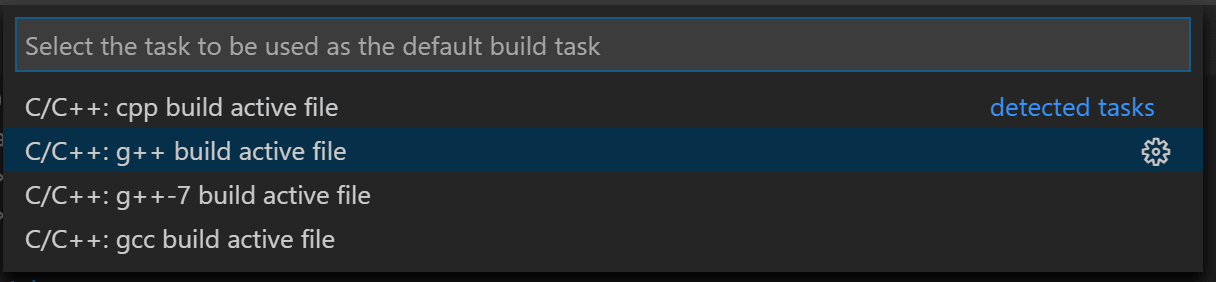
From the main menu, choose Terminal > Configure Default Build Task. A dropdown appears showing various predefined build tasks for C++ compilers. Choose C/C++: g++ build active file.
This will create a tasks.json file in a .vscode folder and open it in the editor.
Your new tasks.json file should look similar to the JSON below:
Note: You can learn more about tasks.json variables in the variables reference.
The command setting specifies the program to run; in this case that is g++. The args array specifies the command-line arguments that will be passed to g++. These arguments must be specified in the order expected by the compiler.
This task tells g++ to take the active file ( $
The label value is what you will see in the tasks list; you can name this whatever you like.
The «isDefault»: true value in the group object specifies that this task will be run when you press ⇧⌘B (Windows, Linux Ctrl+Shift+B ) . This property is for convenience only; if you set it to false, you can still run it from the Terminal menu with Tasks: Run Build Task.
Running the build
Go back to helloworld.cpp . Your task builds the active file and you want to build helloworld.cpp .
To run the build task defined in tasks.json , press ⇧⌘B (Windows, Linux Ctrl+Shift+B ) or from the Terminal main menu choose Run Build Task.
When the task starts, you should see the Integrated Terminal panel appear below the source code editor. After the task completes, the terminal shows output from the compiler that indicates whether the build succeeded or failed. For a successful g++ build, the output looks something like this:

Create a new terminal using the + button and you’ll have a terminal running your default shell with the helloworld folder as the working directory. Run ls and you should now see the executable helloworld (no file extension).
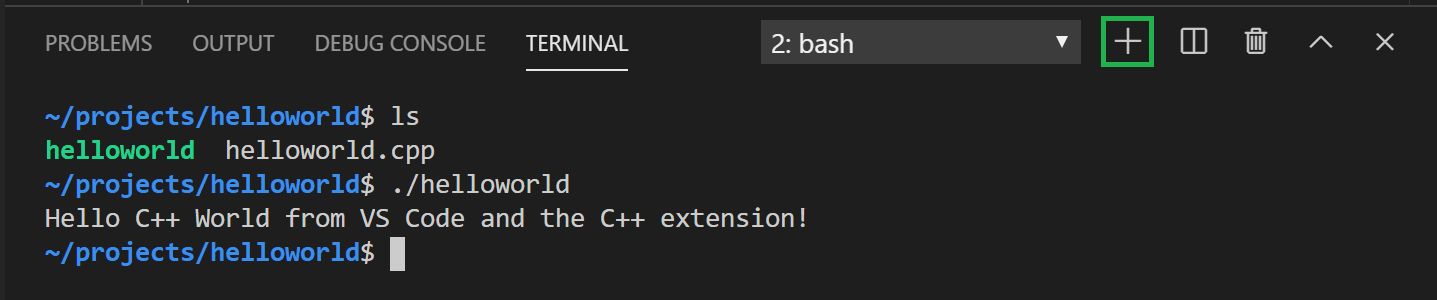
You can run helloworld in the terminal by typing ./helloworld .
Modifying tasks.json
You can modify your tasks.json to build multiple C++ files by using an argument like «$
Debug helloworld.cpp
Next, you’ll create a launch.json file to configure VS Code to launch the GDB debugger when you press F5 to debug the program.
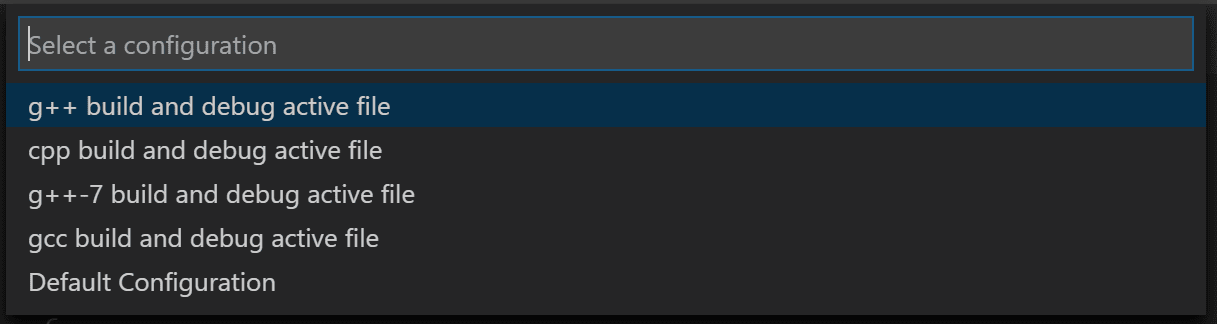
From the main menu, choose Run > Add Configuration. and then choose C++ (GDB/LLDB).
You’ll then see a dropdown for various predefined debugging configurations. Choose g++ build and debug active file.
VS Code creates a launch.json file, opens it in the editor, and builds and runs ‘helloworld’.
In the JSON above, program specifies the program you want to debug. Here it is set to the active file folder $
By default, the C++ extension won’t add any breakpoints to your source code and the stopAtEntry value is set to false .
Change the stopAtEntry value to true to cause the debugger to stop on the main method when you start debugging.
Start a debugging session
- Go back to helloworld.cpp so that it is the active file.
- Press F5 or from the main menu choose Run > Start Debugging. Before you start stepping through the code, let’s take a moment to notice several changes in the user interface:
-
The Integrated Terminal appears at the bottom of the source code editor. In the Debug Output tab, you see output that indicates the debugger is up and running.
The editor highlights the first statement in the main method. This is a breakpoint that the C++ extension automatically sets for you:

The Run view on the left shows debugging information. You’ll see an example later in the tutorial.
At the top of the code editor, a debugging control panel appears. You can move this around the screen by grabbing the dots on the left side.
Step through the code
Now you’re ready to start stepping through the code.
Click or press the Step over icon in the debugging control panel.
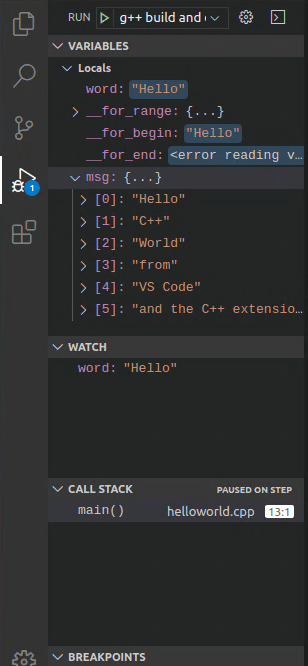
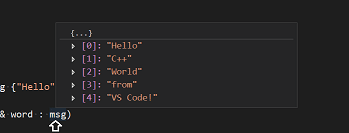
This will advance program execution to the first line of the for loop, and skip over all the internal function calls within the vector and string classes that are invoked when the msg variable is created and initialized. Notice the change in the Variables window on the side.
Press Step over again to advance to the next statement in this program (skipping over all the internal code that is executed to initialize the loop). Now, the Variables window shows information about the loop variables.
Press Step over again to execute the cout statement. (Note that as of the March 2019 release, the C++ extension does not print any output to the Debug Console until the last cout executes.)
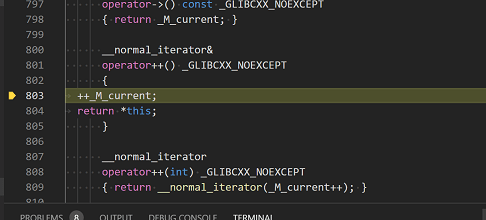
If you like, you can keep pressing Step over until all the words in the vector have been printed to the console. But if you are curious, try pressing the Step Into button to step through source code in the C++ standard library!
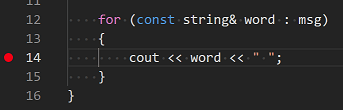
To return to your own code, one way is to keep pressing Step over. Another way is to set a breakpoint in your code by switching to the helloworld.cpp tab in the code editor, putting the insertion point somewhere on the cout statement inside the loop, and pressing F9 . A red dot appears in the gutter on the left to indicate that a breakpoint has been set on this line.
Then press F5 to start execution from the current line in the standard library header. Execution will break on cout . If you like, you can press F9 again to toggle off the breakpoint.
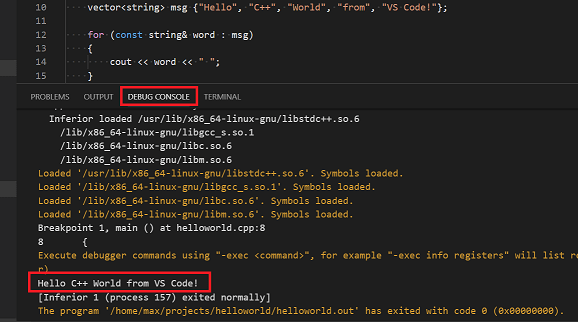
When the loop has completed, you can see the output in the Debug Console tab of the integrated terminal, along with some other diagnostic information that is output by GDB.
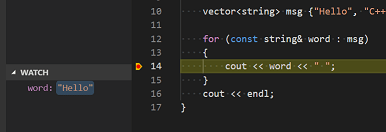
Set a watch
To keep track of the value of a variable as your program executes, set a watch on the variable.
Place the insertion point inside the loop. In the Watch window, click the plus sign and in the text box, type word , which is the name of the loop variable. Now view the Watch window as you step through the loop.
To quickly view the value of any variable while execution is paused on a breakpoint, you can hover over it with the mouse pointer.
C/C++ configurations
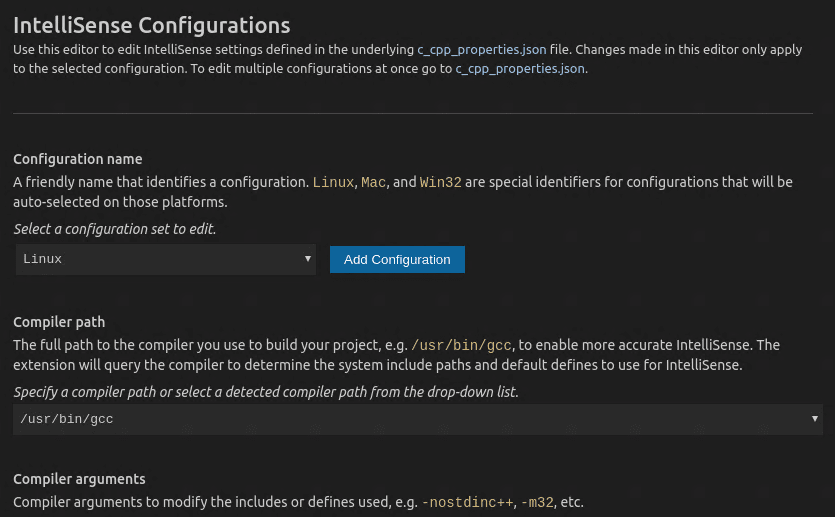
If you want more control over the C/C++ extension, you can create a c_cpp_properties.json file, which will allow you to change settings such as the path to the compiler, include paths, C++ standard (default is C++17), and more.
You can view the C/C++ configuration UI by running the command C/C++: Edit Configurations (UI) from the Command Palette ( ⇧⌘P (Windows, Linux Ctrl+Shift+P ) ).
This opens the C/C++ Configurations page. When you make changes here, VS Code writes them to a file called c_cpp_properties.json in the .vscode folder.
You only need to modify the Include path setting if your program includes header files that are not in your workspace or in the standard library path.
Visual Studio Code places these settings in .vscode/c_cpp_properties.json . If you open that file directly, it should look something like this:
Reusing your C++ configuration
VS Code is now configured to use gcc on Linux. The configuration applies to the current workspace. To reuse the configuration, just copy the JSON files to a .vscode folder in a new project folder (workspace) and change the names of the source file(s) and executable as needed.
Источник