- Fix Windows Update errors by using the DISM or System Update Readiness tool
- Symptom
- Resolution for Windows 8.1, Windows 10 and Windows Server 2012 R2
- Resolution for Windows 7 Service Pack 1 (SP1) and Windows Server 2008 R2 SP1
- Resolution — Download the package from Microsoft Update Catalog directly
- Description of the common corruption errors
- What does the System Update Readiness tool do
- Verify the integrity of resources
- Logging
- How to fix errors that are found in the CheckSUR log file
- Dism /Online /Cleanup-Image /RestoreHealth — всё о команде
- Что это за команда DISM?
- Dism /Online /Cleanup-Image /RestoreHealth – особенности функционала
- Как пользоваться командой Dism /Online /Cleanup-Image /RestoreHealth
- Заключение
Fix Windows Update errors by using the DISM or System Update Readiness tool
Original product version: В Windows 10, version 1809 and later versions, Windows 8.1, Windows Server 2012 R2, Windows 7 Service Pack 1, Windows Server 2008 R2 Service Pack 1
Original KB number: В 947821
Symptom
Windows updates and service packs may fail to install if there are corruption errors. For example, an update might not install if a system file is damaged. The DISM or System Update Readiness tool may help you to fix some Windows corruption errors.
This article is intended for Support agents and IT professionals. If you are home users and looking for more information about fixing Windows update errors, see Fix Windows Update errors.
Resolution for Windows 8.1, Windows 10 and Windows Server 2012 R2
To resolve this problem, use the inbox Deployment Image Servicing and Management (DISM) tool. Then, install the Windows update or service pack again.
Open an elevated command prompt. To do this, open Start menu or Start screen, type Command Prompt, right-select Command Prompt, and then select Run as administrator. If you are prompted for an administrator password or for a confirmation, type the password, or select Allow.
Type the following command, and then press Enter. It may take several minutes for the command operation to be completed.
When you run this command, DISM uses Windows Update to provide the files that are required to fix corruptions. However, if your Windows Update client is already broken, use a running Windows installation as the repair source, or use a Windows side-by-side folder from a network share or from a removable media, such as the Windows DVD, as the source of the files. To do this, run the following command instead:
Replace the C:\RepairSource\Windows placeholder with the location of your repair source. For more information about using the DISM tool to repair Windows, reference Repair a Windows Image.
Type the sfc /scannow command and press Enter. It may take several minutes for the command operation to be completed.
Close the command prompt, and then run Windows Update again.
DISM creates a log file (%windir%/Logs/CBS/CBS.log) that captures any issues that the tool found or fixed. %windir% is the folder in which Windows is installed. For example, the %windir% folder is C:\Windows.
Resolution for Windows 7 Service Pack 1 (SP1) and Windows Server 2008 R2 SP1
To resolve this problem, use the System Update Readiness tool. Then, install the Windows update or service pack again.
Download the System Update Readiness tool.
select the download link in the following table that corresponds to the version of Windows that is running on your computer. For more information about how to find the version of Windows that you installed, see Find out if your computer is running the 32-bit or 64-bit version of Windows.
This tool is updated regularly, we recommend that you always download the latest version. This tool is not available in every supported language. Check the link below to see if it is available in your language.
| Operating system | Download link |
|---|---|
| x86-based (32-bit) versions of Windows 7 SP1 | Download the package now. |
| x64-based (64-bit) versions of Windows 7 SP1 | Download the package now. |
| x64-based (64-bit) versions of Windows Server 2008 R2 SP1 | Download the package now. |
| Itanium-based versions of Windows Server 2008 R2 SP1 | Download the package now. |
Install and run the tool.
Select Download on the Download Center webpage, then do one of the following:
- To install the tool immediately, select Open or Run, and then follow the instructions on your screen.
- To install the tool later, select Save, and then download the installation file to your computer. When you’re ready to install the tool, double-select the file.
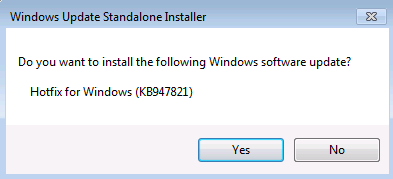
In the Windows Update Standalone Installer dialog box, select Yes.
When the tool is being installed, it automatically runs. Although it typically takes less than 15 minutes to run, it might take much longer on some computers. Even if the progress bar seems to stop, the scan is still running, so don’t select Cancel.
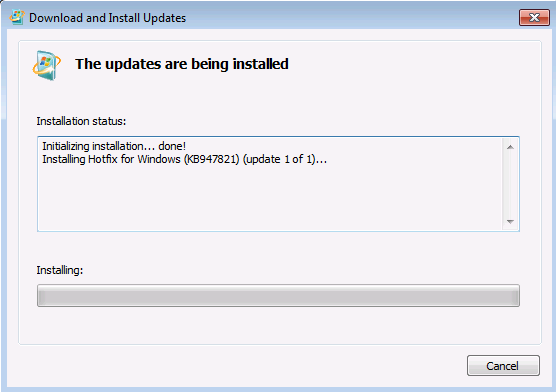
When you see Installation complete, select Close.

Reinstall the update or service pack you were trying to install previously.
To manually fix corruption errors that the tool detects but can’t be fixed, see How to fix errors that are found in the CheckSUR log file.
Resolution — Download the package from Microsoft Update Catalog directly
You can also try to directly download the update package from Microsoft Update Catalog, and then install the update package manually.
For example, you may have problems when you try to install updates from Windows Update. In this situation, you can download the update package and try to install the update manually. To do this, follow these steps:
Open Microsoft Update Catalog in Internet Explorer.
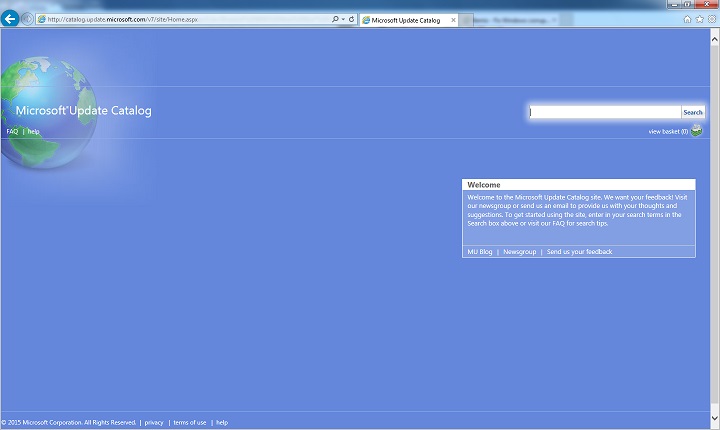
In the search box, input the update number that you want to download. In this example, input 3006137. Then, select Search.

Find the update that applies to your operating system appropriately in the search results, and then select Add to add the update to your basket.

Select view basket to open your basket.

Select Download to download the update in your basket.

Select Browse to choose a location for the update you are downloading, and then select Continue.

Select Close after the download process is done. Then, you can find a folder that contains the update package in the location that you specified.
Open the folder, and then double-select the update package to install the update.
If the Windows update or service pack installed successfully, you are finished. If the problem is not fixed, or if System Update Readiness Tool cannot find the cause, contact us for more help.
Description of the common corruption errors
The following table lists the possible error code with Windows Update for your reference:
| Code | Error | Description |
|---|---|---|
| 0x80070002 | ERROR_FILE_NOT_FOUND | The system cannot find the file specified. |
| 0x8007000D | ERROR_INVALID_DATA | The data is invalid. |
| 0x800F081F | CBS_E_SOURCE_MISSING | The source for the package or file not found. |
| 0x80073712 | ERROR_SXS_COMPONENT_STORE_CORRUPT | The component store is in an inconsistent state. |
| 0x800736CC | ERROR_SXS_FILE_HASH_MISMATCH | A component’s file does not match the verification information present in the component manifest. |
| 0x800705B9 | ERROR_XML_PARSE_ERROR | Unable to parse the requested XML data. |
| 0x80070246 | ERROR_ILLEGAL_CHARACTER | An invalid character was encountered. |
| 0x8007370D | ERROR_SXS_IDENTITY_PARSE_ERROR | An identity string is malformed. |
| 0x8007370B | ERROR_SXS_INVALID_IDENTITY_ATTRIBUTE_NAME | The name of an attribute in an identity is not within the valid range. |
| 0x8007370A | ERROR_SXS_INVALID_IDENTITY_ATTRIBUTE_VALUE | The value of an attribute in an identity is not within the valid range. |
| 0x80070057 | ERROR_INVALID_PARAMETER | The parameter is incorrect. |
| 0x800B0100 | TRUST_E_NOSIGNATURE | No signature was present in the subject. |
| 0x80092003 | CRYPT_E_FILE_ERROR | An error occurred while Windows Update reads or writes to a file. |
| 0x800B0101 | CERT_E_EXPIRED | A required certificate is not within its validity period when verifying against the current system clock or the time stamp in the signed file. |
| 0x8007371B | ERROR_SXS_TRANSACTION_CLOSURE_INCOMPLETE | One or more required members of the transaction are not present. |
| 0x80070490 | ERROR_NOT_FOUND | Windows could not search for new updates. |
| 0x800f0984 | PSFX_E_MATCHING_BINARY_MISSING | Matching component directory exist but binary missing |
| 0x800f0986 | PSFX_E_APPLY_FORWARD_DELTA_FAILED | Applying forward delta failed |
| 0x800f0982 | PSFX_E_MATCHING_COMPONENT_NOT_FOUND | Can’t identify matching component for hydration |
What does the System Update Readiness tool do
Verify the integrity of resources
The System Update Readiness tool verifies the integrity of the following resources:
- Files that are located in the following directories:
- %SYSTEMROOT%\Servicing\Packages
- %SYSTEMROOT%\WinSxS\Manifests
- Registry data that is located under the following registry subkeys:
- HKEY_LOCAL_MACHINE\Components
- HKEY_LOCAL_MACHINE\Schema
- HKEY_LOCAL_MACHINE\Software\Microsoft\Windows\CurrentVersion\Component Based Servicing
This list may be updated at any time.
When the System Update Readiness tool detects incorrect manifests, Cabinets, or registry data, it may replace the incorrect data with a corrected version.
Logging
The System Update Readiness tool creates a log file that captures any issues that the tool found or fixed. The log file is located here:
How to fix errors that are found in the CheckSUR log file
To manually fix corruption errors that the System Update Readiness tool detects but can’t fix, follow these steps:
%SYSTEMROOT% is an environment variable that saves the folder in which Windows is installed. For example, generally the %SYSTEMROOT% folder is C:\Windows.
Identify the packages that the tool can’t fix. For example, you may find the following in the log file:
In this case, the package that is corrupted is KB958690.
Copy the package (.msu) to the %SYSTEMROOT%\CheckSUR\packages directory. By default, this directory doesn’t exist and you need to create the directory.
Dism /Online /Cleanup-Image /RestoreHealth — всё о команде
Операционная система Виндовс может похвалиться многообразием инструментов, позволяющих восстановить функционал данной ОС при возникновении различных неполадок. Одним из таких инструментов является DISM (акроним от «Deployment Imaging and Servicing Management»), который не только проверяет образ ОС Виндовс на наличие повреждений, но и восстанавливает его функционал с помощью эффективной команды Dism /Online /Cleanup-Image /RestoreHealth. Ниже мы разберём особенности данной команды, а также подробно расскажем, как её использовать.
Что это за команда DISM?
Инструмент «Deployment Image Servicing and Management» (Обслуживание и управление размещениями образов) также известный как DISM появился в функционале семейства Виндовс начиная с версии Виндовс Виста (SP1).
Первоначально DISM позиционировался как инструмент для создания и управления образами Виндовс на основе файлового формата .wim (сокращённо от «Windows image» – образ Виндовс). С внедрением в функционал Виндовс 8 зашифрованного и компрессированного файлового формата .esd (акроним от «Electronic Software Download») DISM получил возможность напрямую работать и с файлами упомянутого формата.
Использования слова «обслуживание» (servicing) в функционале DISM включает широкое разнообразие функций, в частности:
- Захват образов дисков (разделов);
- Использование образов дисков;
- Установка и модификация образов;
- Создание образов 32 или 64-битной Виндовс в едином .wim файле;
- Создание образов сепаратных данных и другие возможности.
Ныне возможности DISM позволяют проводить операции по проверке, сканированию и восстановлению файлов образа Виндовс, уменьшению размеров инсталляционных файлов Виндовс (отмечу работу с компонентом WinSXS), добавление в ручном режиме апдейтов к Виндовс 10, идентификацию образов Виндовс et cetera.
Dism /Online /Cleanup-Image /RestoreHealth – особенности функционала
При появлении на ПК различных ошибок файловой системы, мы часто обращаемся к утилите SFC для анализа и восстановления целостности системных файлов. В некоторых случаях SFC оказывается неэффективна, что может быть связано с повреждением образа Виндовс на жёстком диске нашего ПК. Тогда мы задействуем команду DISM, использующую Центр обновления Виндовс (Windows Update) для загрузки недостающих системных файлов. Обычно после выполнения данной процедуры SFC может далее эффективно работать.
Команда DISM обычно имеет три основные формы:
DISM /Online /Cleanup-Image /CheckHealth – обнаруживает повреждение или модификацию образа Виндовс;
DISM /Online /Cleanup-Image /ScanHealth – сканирует образ Виндовс на наличие повреждений.
Ну и наиболее важная для нас DISM /Online /Cleanup-Image /RestoreHealth используется для восстановления образа ОС Виндовс с помощью Центра обновления. Помимо задействования последнего вы можете сами указать DISM где именно искать файлы для восстановления образа Виндовс.
Как пользоваться командой Dism /Online /Cleanup-Image /RestoreHealth
Для использования команды DISM/RestoreHealth запустите командную строку от админа, и в ней наберите указанную выше команду:

После чего нажмите на ввод. В процессе выполнения процедуры вы будете видеть прогресс выполнения в процентном отображении.
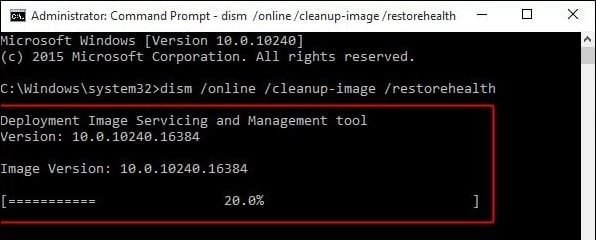
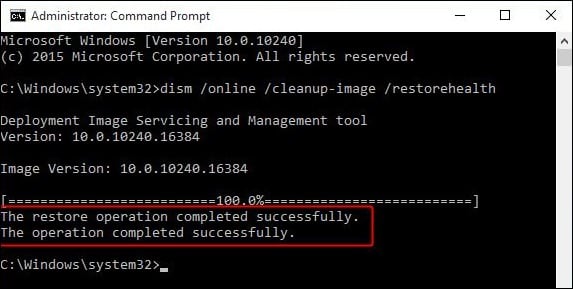
Дождитесь окончания процедуры. Последняя может занять примерно 10-20 минут, после чего вы получите сообщение об удачном окончании операции.
Кроме традиционной формы реализации данной команды, вы можете также указать DISM где брать файлы для восстановления образа Виндовс. Если по умолчанию DISM черпает файлы с Центра обновления Виндовс, то оператор /source позволит вам указать, откуда брать указанные файлы.
Обычно для этого понадобится образ Виндовс той же сборки, что и установленная Виндовс на вашем PC. Из этого образа сделайте копию файла install.wim, и разместите её в удобной директории на вашем жёстком диске.
Далее запустите командную строку от админа, и в ней наберите:
DISM /Online /Cleanup-Image /RestoreHealth /Source:ПАПКА ВОССТАНОВЛЕНИЯ\install.wim
Вместо «ПАПКА ВОССТАНОВЛЕНИЯ» вы должны указать путь к папке, где находится файл install.wim, например, D:\sources\. Теперь команда будет выглядеть как:
DISM /Online /Cleanup-Image /RestoreHealth /Source:D:\sources\install.wim
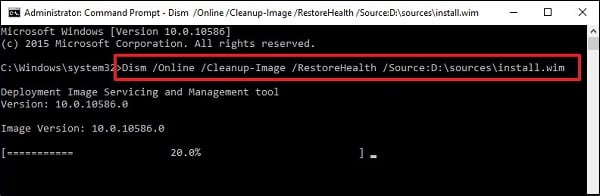 Укажите директорию, в которой находится файл wim
Для блокировки доступа DISM к узлу Виндовс Update вы можете использовать оператор /LimitAccess, тогда команда будет выглядеть как:
DISM /Online /Cleanup-Image /RestoreHealth /Source:ПАПКА ВОССТАНОВЛЕНИЯ\install.wim /LimitAccess
В этом случае DISM будет обращаться только к указанной вами папке восстановления, и не задействует Центр обновления.
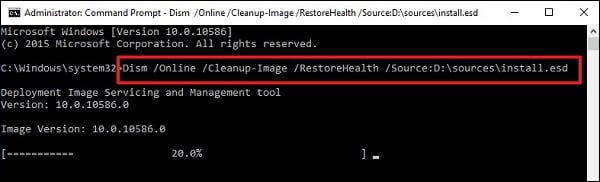
Также вы можете использовать рассматриваемую команду с зашифрованными образами .ESD, в этом случае команда будет иметь следующий вид:
DISM /Online /Cleanup-Image /RestoreHealth /Source:ПАПКА ВОССТАНОВЛЕНИЯ\Install.esd
Учтите, что DISM всегда создаёт log-файл по пути %windir%/Logs/CBS/CBS.log, в котором можно найти перечень обнаруженных и исправленных утилитой проблем.
Заключение
Команда Dism /Online /Cleanup-Image /RestoreHealth используется в функционале ОС Виндовс для восстановления работоспособности образа ОС Виндовс, с которого различные системные инструменты (в частности, SFC) черпают рабочие версии системных файлов. Задействуйте DISM при повреждении системных файлов, осыпании диска и других аналогичных дисфункций, и в большинстве случаев работоспособность вашей системы будет эффективно восстановлена.


