- Switch Calendar views between a 12-hour clock and 24-hour clock
- Change the time settings in Windows
- Windows 10: How to Change to a 12-hour Clock
- You Might Also Like
- Change 24 Hour Clock to 12 Hour Clock in Windows 10
- Change 24 Hour Clock to 12 Hour Clock in Windows 10
- 1. Change 24 Hour Clock to 12 Hour Using Settings
- 2. Change 12 Hour Clock to 24 Hour Clock
- What is Short and Long Time in Windows 10?
- 2 Ways to Change Date and Time on Windows 10
- 2 ways to change date and time on Windows 10:
- Change 24 Hour Clock to 12 Hour Clock in Windows 10, 8.1 & 7
- How to Change the 24 Hour Clock Format to 12 Hour in Windows 10
- Change the AM/PM Symbol and Customize it in Windows 10
Switch Calendar views between a 12-hour clock and 24-hour clock
Microsoft Outlook uses the country/region settings for your computer to determine how the times appear.
For example, in Calendar in the month view, if you are using the default settings for the United States, Outlook displays a 12-hour clock. After 12:59 P.M., the time is displayed as 1 P.M. Other countries/regions use a 24-hour clock.
You can change how the clock appears in your display. However, changing this display is an option provided by the operating system, not Outlook.
Change the time settings in Windows
- Which version of Windows are you using?
- Windows 10
- Windows 8
- Windows 7
- Windows Vista
Start Control Panel, and then under Clock, Language, and Region, click Change date, time or number formats.
On the Formats tab, under Date and time formats, do one of the following:
To change to 24-hour format, on the Short time drop-down list, select HH:mm and on the Long time drop-down list, select HH:mm:ss.
To change to 12-hour format, on the Short time drop-down list, select h:mm:tt and on the Long time drop-down list, select h:mm:ss:tt.
Click Apply and then click OK.
In Windows, click the Start  button.
Click Control Panel, and then click Clock, Language, and Region.
Under Regional and Language, click Change the date, time, or number format.
On the Format tab, under Date and time formats, do one of the following:
To change to 24-hour format, on the Short time drop-down list, select HH:mm and on the Long time drop-down list, select HH:mm:ss.
To change to 12-hour format, on the Short time drop-down list, select h:mm:tt and on the Long time drop-down list, select h:mm:ss:tt.
Click Apply and then click OK.
In Windows, click the Start button.
Click Control Panel, and then click Clock, Language, and Region.
Note: If you are using Control Panel in Classic View, double-click Regional and Language Options, and then skip to step 3.
Click Regional and Language Options.
Click Customize this format.
On the Time tab, do one of the following:
Change Time format to HH:mm:ss for a 24-hour clock.
Change Time format to hh:mm:ss tt for a 12-hour clock.
Windows 10: How to Change to a 12-hour Clock
Posted on April 26, 2020 by Mel Hawthorne 19 Comments
Some people prefer reading digital clocks in the 24-hour “military” format. However, a lot of people instead prefer 12-hour clocks. Windows 10 defaults to using the 24-hour format. This guide will cover how to change the clock to use the 12-hour format.
You can configure the time format settings in the Settings app. The easiest way to get to the right page is to right-click on the clock in the taskbar and then click “Adjust date/time”. This option will be near the top of the drop-down box.
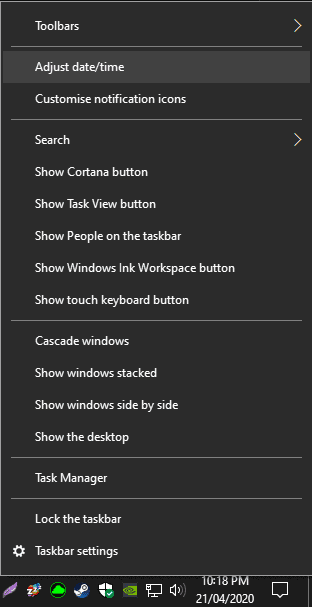 Right-click on the taskbar clock and select “Adjust date and time”.
This will open the Settings app on the “Data & time” page. Here you can set what time zone you’re in, but annoyingly you can’t choose between the 12- and 24-hour clocks. To get to the right page, you can click “Date, time & regional formatting” under “Related settings” in the top right. Alternatively, you can click on the “Region” tab. Both will take you to the same place.
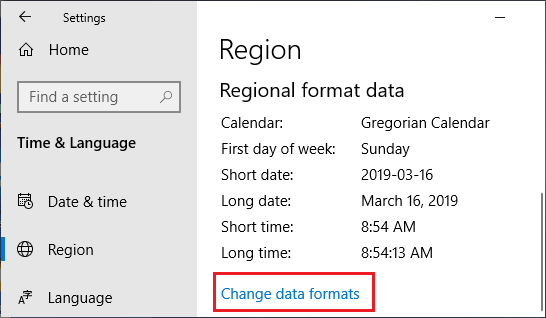
In the Region settings, click the link at the bottom of the page, “Change data formats”.
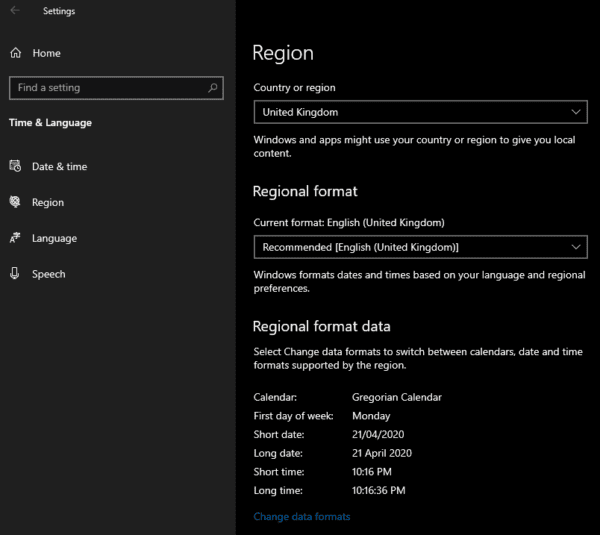 Click “Change data formats” at the bottom of the page.
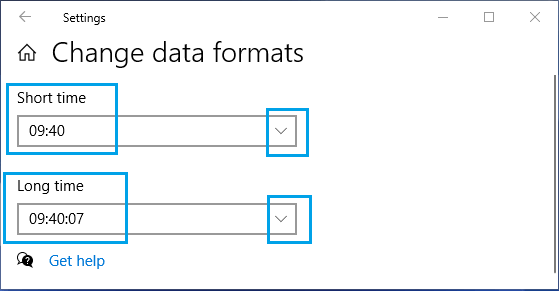
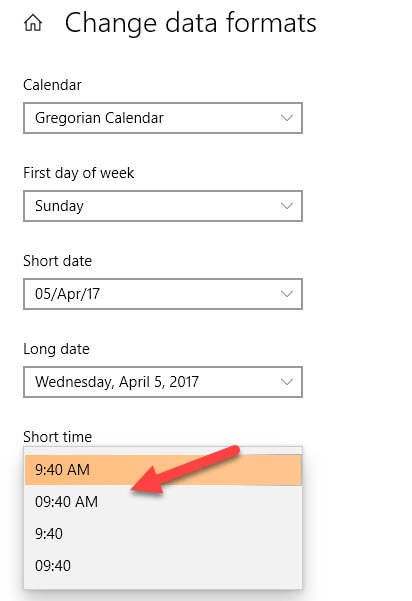
Here you can change the short and the long time displays to be in the 12-hour format. To do so, click on their respective drop-down boxes and select the short format you prefer. The clock options are the 24-hour and 12-hour clocks, both with and without leading 0’s.
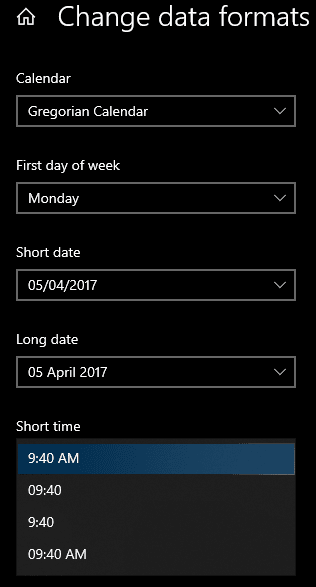 Select the 12-hour clock variant you prefer.
You Might Also Like
Filed Under: Windows Tagged With: Windows 10
Change 24 Hour Clock to 12 Hour Clock in Windows 10
By: Waseem Patwegar
In this article we are taking a look at the steps to Change 24 Hour Clock to 12 Hour Clock format or vice versa on a Windows 10 computer.
Change 24 Hour Clock to 12 Hour Clock in Windows 10
Depending on your preference, you can make your computer show time in either 12 Hour format or 24 Hour time format.
In earlier versions of Windows, change in Date and Time Settings could only be done from the Control Panel.
Currently, the preferred method to Change Time Format in Windows 10 is by going to Settings on your computer.
1. Change 24 Hour Clock to 12 Hour Using Settings
As mentioned above, you can easily change the time format on your computer from 24 to 12 hours by going to “Time and Language” Settings on your computer.
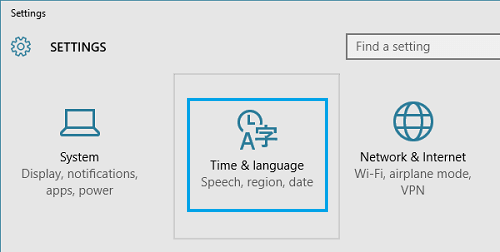
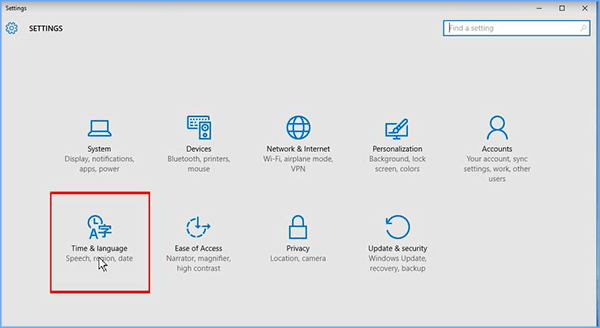
1. Open Settings > click on Time and Language .
2. On the next screen, click on Region in the left pane. In the right-pane, scroll down and click on Change Data Formats link, located under ‘Regional Format Data’ section.
3. On the next screen, use the Down-Arrow to select time with AM/PM suffix for Long Time and Short Time .

The change in the time format will be immediate and you should now find your computer displaying the time in 12 Hour format.

2. Change 12 Hour Clock to 24 Hour Clock
You can follow the steps below to change the time on your computer from 12 hours to 24 hours format.
1. Go to Settings > Time and Language . > click on Region in the left pane. In the right-pane, scroll down and click on Change Data Formats link.
2. On the next screen, use the Down-Arrow to select time without AM/PM suffix for Long Time and Short Time .
The change in the time format will be immediate and you should now find your computer displaying the time in 24 Hour format.
What is Short and Long Time in Windows 10?
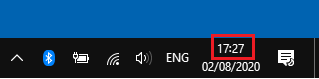
Windows 10 displays the Date and Time at two locations on your computer. The first location of time can be found at the bottom right corner of your screen.
This location, which is the most visible location of time on a computer is known as the Short Time.
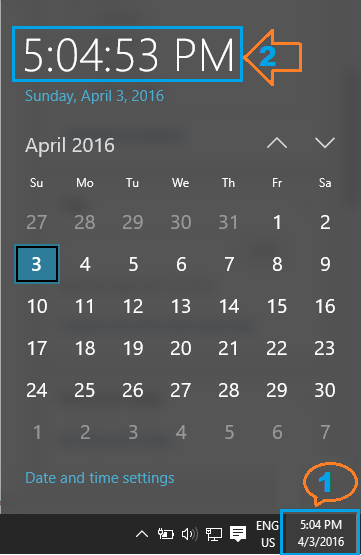
The second clock (Long Time) is hidden on Windows 10 Calendar and can only be accessed by clicking on the first location.
Hope this has helped you in changing the time format on your computer from 12 to 24 hours or from 24 to 12 hours, as required.
2 Ways to Change Date and Time on Windows 10
This article introduces two efficient methods to change date and time in Windows 10 computer.
If you just want to reset the format of date or time, you can change date and time format in Windows 10 here.
2 ways to change date and time on Windows 10:
Way 1:: Change the Date and Time on the taskbar.
Step 1: Click the bottom-right clock icon on the taskbar, and select Date and time settings. Or You can right click the clock icon, click Adjust data /time.
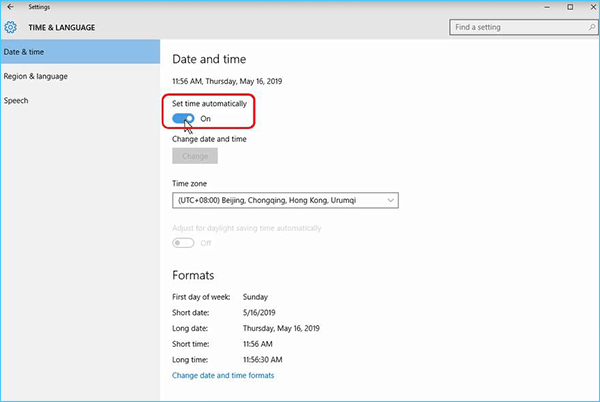
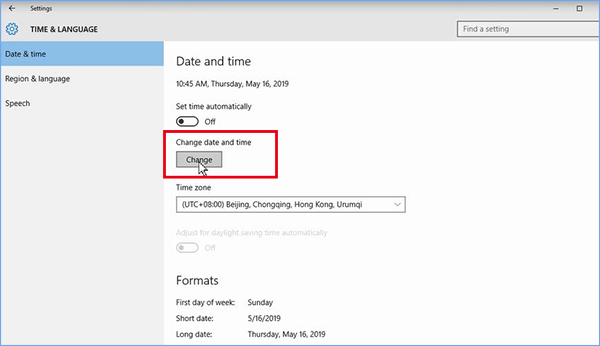
Step 2: As the Date and time Windows opens, you can turn off Set time automatically.
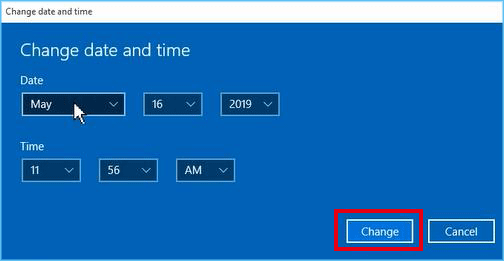
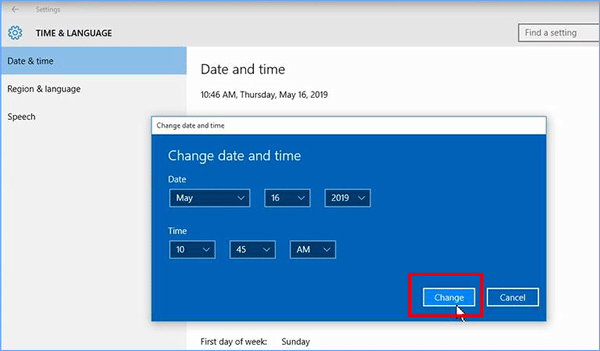
Step 3: In the Date and Time Settings window, respectively change date and time, and then tap OK to confirm the changes.
Way 2: Change date and time in PC settings.
Step 2: Open Time and language.
Step 3: After tutning off the Set time automatically option, click Change blow Change date and time option.
Step 4: Modify date and time, and tap Change to bring the changes into effect.
Now, do not hesitate to put these methods into practice if you want to speedily change the date and time in your Windows 10 PC.
Change 24 Hour Clock to 12 Hour Clock in Windows 10, 8.1 & 7
If you like to change the 24-hour clock to 12 hours format or vice versa, then the below steps going to be useful. Also, you will learn how to display the AM or PM symbol and even customize it in the system tray. We have already published a guide about changing the date format in Windows 10 and other Windows versions, this guide shows how to play around with time format and change 24-hour clock to 12-hour clock in Windows 10, 8.1 and 7.
If you are new to Windows 10 and wondering how to display ‘My Computer’ (This PC) icon on the desktop, here is the guide for that. Changing the 24-hour clock to 12-hour in Windows 10, 8.1 or other versions should be done from the control panel settings. I assume that you already knew how to reach Control panel settings in the latest Windows versions.
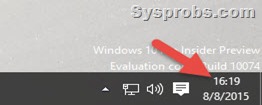
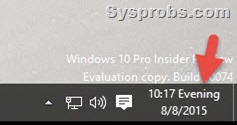
With the 24-hour clock format, the system tray time will look like below.
How to Change the 24 Hour Clock Format to 12 Hour in Windows 10
The below steps and screenshots are taken from Windows 10, but also Windows 8.1/8 and Windows 7 will have similar settings except how you access the control panel. Hence the same steps are applicable for the older version of Windows OS.
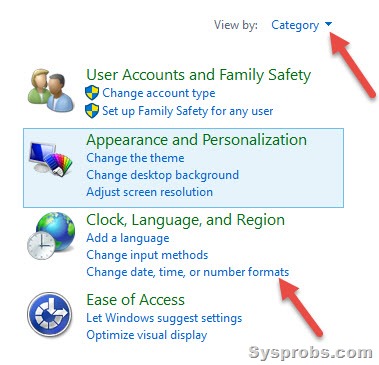
1) Go to Control Panel. You can search for it in Windows 10 search easily to access the classic Control panel.
2) In the category view of the control panel, click on the ‘Change date, time, or number formats’ as shown below.
3) Here you can change the settings of a short and long time. If your Windows 10 computer is showing 24-hour clock then the format settings would be in ‘H’.
‘H’ means 24-hour and ‘h’ means a 12-hour clock format.

Click on the drop-down menu of the short and long-time format and change it to a 12-hour format by selecting the ‘h’ in the hours.
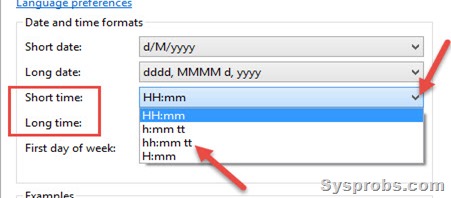
The ‘tt’ means AM or PM. Obviously, when the time format is set to a 24-hour clock, it can’t show the AM or PM. When the 12-hour format set, you can select the ‘tt’ to show the AM or PM in Windows 10 or Windows 8.1/7.
Press Apply to make the changes.
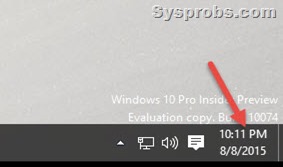
Now your time format will change to 12-hour format and show the AM or PM symbol.
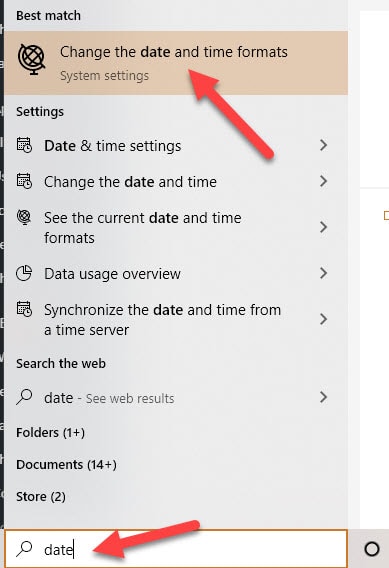
By the way, changing the time format can be done in the normal Windows 10 settings app also. Search for date settings as shown below and select ‘Change the date and time formats’.
In the next screen, select the format which has the AM or PM symbol. The time format with AM/PM is the 12-hour clock and the other one without the symbol is the 24-hour clock.
If you want to customize the AM/PM symbol to any letters, then you need to visit the control panel.
Change the AM/PM Symbol and Customize it in Windows 10
Do you want to change the AM or PM symbol to something else just for fun? If yes, you can do that too. Most of the Windows Operating Systems allow changing this symbol.
Click on the Addition Settings in the formats settings, then select Time.
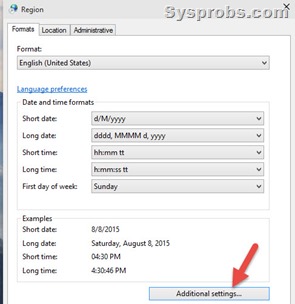
In the Time tab, type the text you want to display in the AM/PM symbol.

Once you pressed Apply, you can see the change in the system tray.
As a recap, the capital ‘H’ in the short or long time format will show the 24-hour clock in Windows 10, 8.1 and 7. To change the 24-hour clock to 12-hour clock format, you need to change and select the format with a small letter ‘h’. Displaying the ‘tt’ in the 12-hour clock will show the AM/PM symbol.
Dinesh
Dinesh is the founder of Sysprobs and written more than 400 articles. Enthusiast in Microsoft and cloud technologies with more than 15 years of IT experience.


