- Change Default Operating System In Boot Menu In Windows 10
- Change Default OS In Boot Menu Using Startup Options
- Change Default OS In Boot Menu Using Bcdedit
- Change Default OS In Boot Menu Using System Properties
- Change Default OS In Boot Menu With MSCONFIG
- About Sergey Tkachenko
- Восстановление MBR загрузчика Windows Vista/7/8/8.1/10 (часть 2).
- Overview of Boot Options in Windows
- Boot Loading Architecture
- Boot Configuration Data
- Editing Boot Options
- Advanced troubleshooting for Windows boot problems
- Summary
- BIOS phase
- Boot loader phase
- Method 1: Startup Repair tool
- Method 2: Repair Boot Codes
- Method 3: Fix BCD errors
- Method 4: Replace Bootmgr
- Method 5: Restore System Hive
- Kernel Phase
- Clean boot
Change Default Operating System In Boot Menu In Windows 10
With Windows 8, Microsoft made changes to the boot experience. The simple text-based boot loader is now disabled by default and in its place, there is a touch-friendly graphical user interface with icons and text. Windows 10 has this as well.
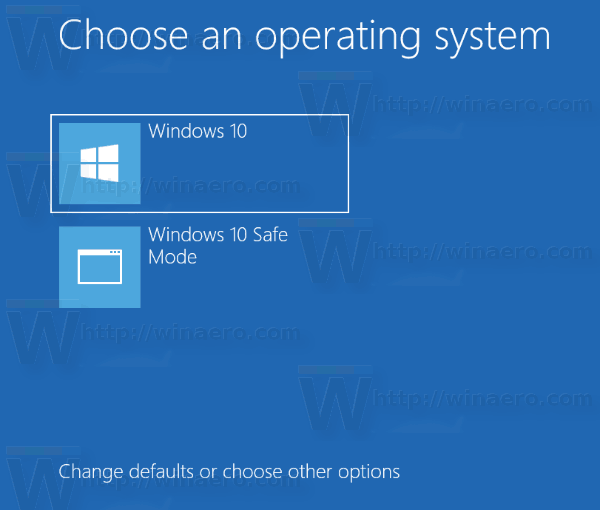
In a dual boot configuration, the modern boot loader shows a list of all installed operating systems. After the specified timeout, if the user has not touched the keyboard, the default operating system will be started. You might want to change the boot entry which is used by default. Let’s see how it should be done.
Change Default OS In Boot Menu Using Startup Options
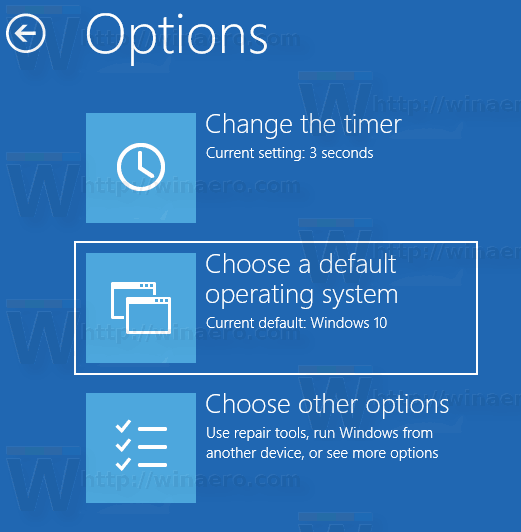
To change the default operating system in the boot menu in Windows 10, do the following.
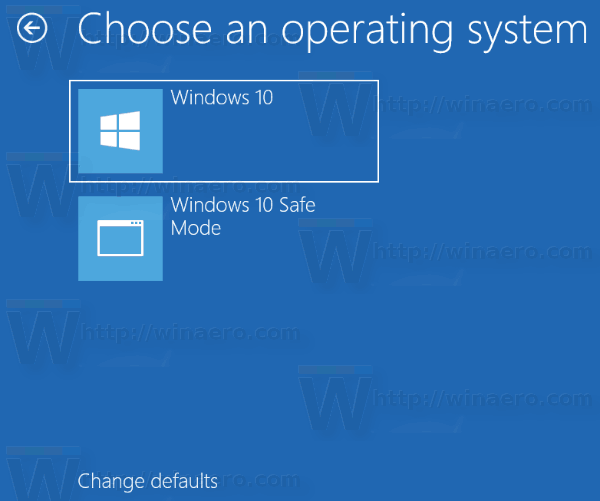
- In the boot loader menu, click the link Change defaults or choose other options at the bottom of the screen.

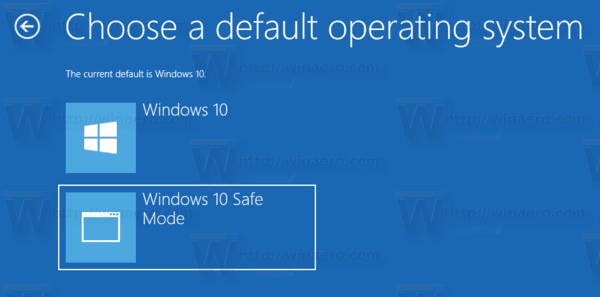
- On the next page, click Choose a default operating system.
- On the next page, select the OS you want to set as the default boot entry.
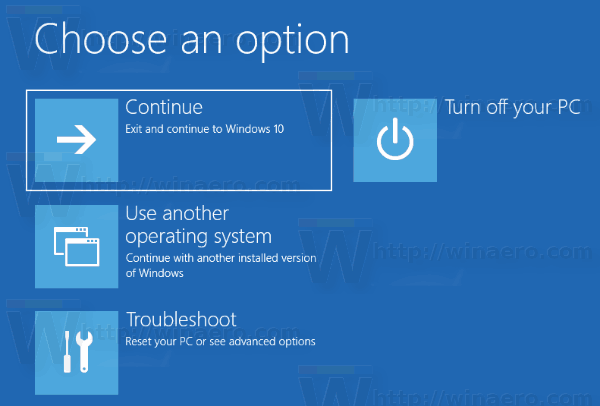
Tip: You can boot Windows 10 into Advanced Startup Options, and pick the item Use another operating system. See the following screenshots.
The same can be done with the built-in console utility «bcdedit».
Change Default OS In Boot Menu Using Bcdedit
Open an elevated command prompt and type the following command:
This will show the list of available boot entries, as follows.
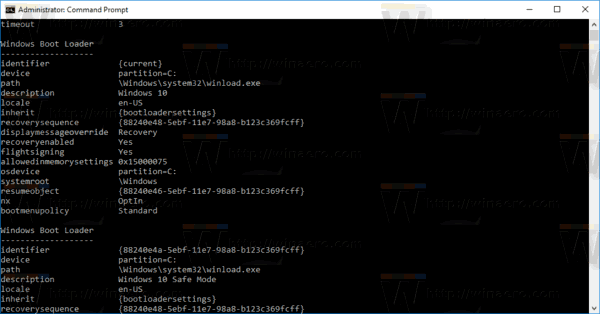
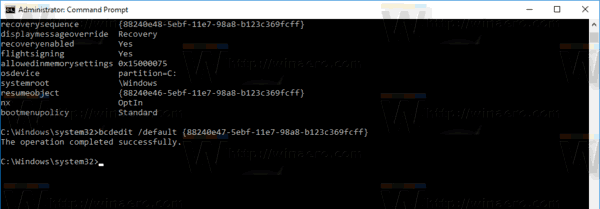
Copy the value of the identifier line and execute the next command.
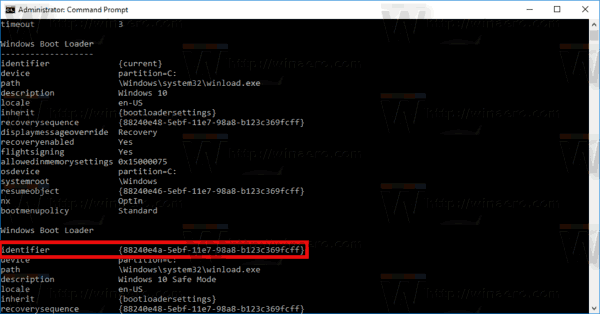
Replace the
Change Default OS In Boot Menu Using System Properties
The classic System Properties applet can be used to change the default OS in the boot menu.
Press Win + R keys together on the keyboard. The Run dialog will appear on the screen. Type the following into the text box and press Enter:
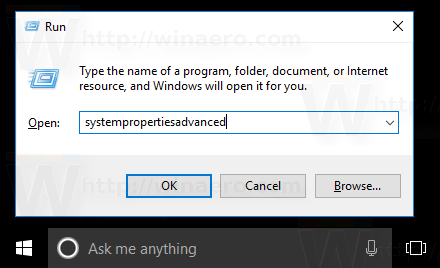
Advanced System Properties will open. Press the Settings button in the Startup and Recovery section on the Advanced tab.
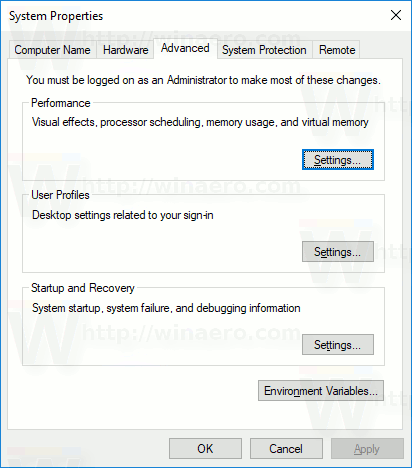 Select the desired item from the Default operating systems drop down list:
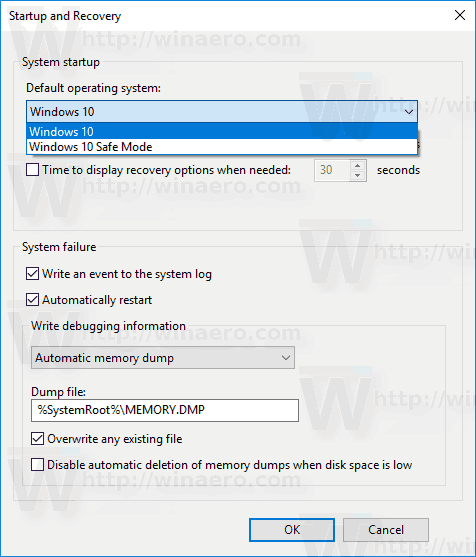
Change Default OS In Boot Menu With MSCONFIG
Finally, you can use the built-in msconfig tool to change the boot timeout. Press Win + R and type msconfig in the Run box.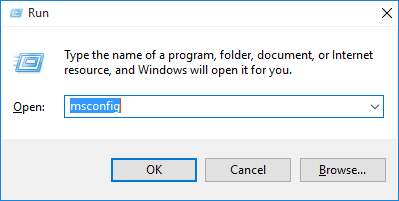
On the boot tab, select the desired entry in the list and click the button Set as default.
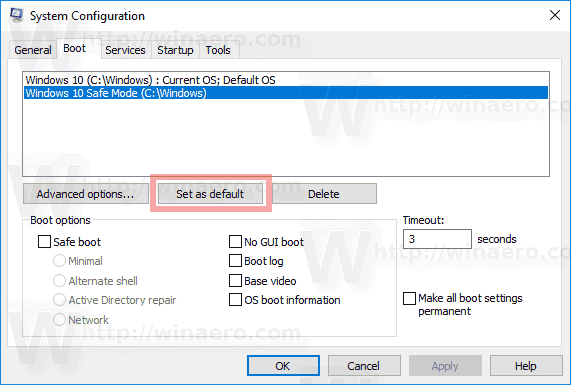
Click the Apply and OK buttons and you are done.
Winaero greatly relies on your support. You can help the site keep bringing you interesting and useful content and software by using these options:
Share this post
About Sergey Tkachenko
Sergey Tkachenko is a software developer from Russia who started Winaero back in 2011. On this blog, Sergey is writing about everything connected to Microsoft, Windows and popular software. Follow him on Telegram, Twitter, and YouTube.
Восстановление MBR загрузчика Windows Vista/7/8/8.1/10 (часть 2).
Автор: STRIDER · Опубликовано 31.12.2017 · Обновлено 02.07.2018
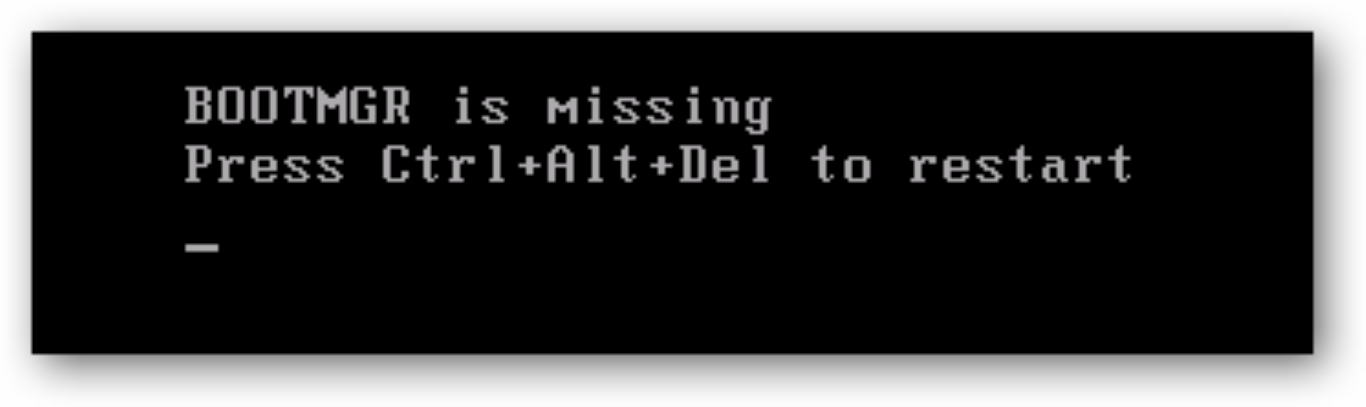
И так, продолжим. В предыдущей статье мы восстанавливали MBR загрузчик средствами BOOTREC.EXE и BOOTSECT.EXE. И если предыдущие инструкции вам не помогли или все закончилось ошибкой bootmgr is missing. Или же вы как раз начали работать именно с этой ошибкой. Милости просим к нашему шалашу!
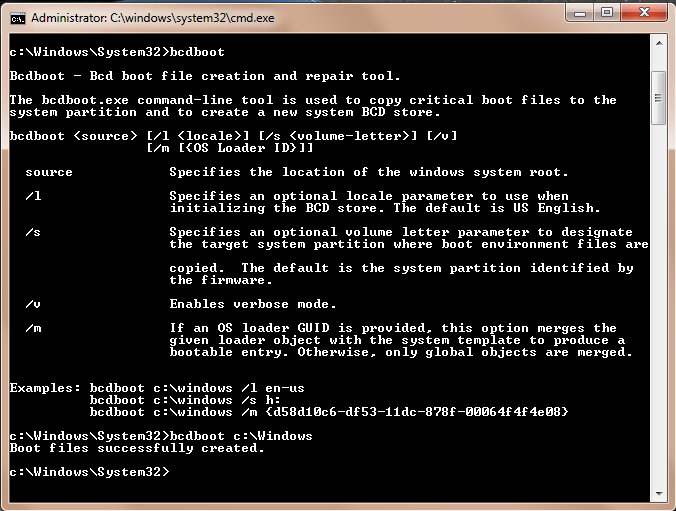
BCDBOOT — средство, которое используется для создания системного раздела или восстановления среды загрузки, расположенной в системном разделе. Системный раздел создается посредством копирования небольшого набора файлов среды загрузки из установленного образа Windows®. Средство BCDBOOT создает хранилище данных конфигурации загрузки (BCD) в системном разделе с новой загрузочной записью, которая позволяет загружать установленный образ Windows.
Наверное не совсем понятно написал, хм. Напишу проще — это средство которое восстанавливает системные, загрузочные файлы в маленьком скрытом разделе. Который создается в самом начале установки Windows. Именно он содержит среду Windows RE, а так же файлы загрузки.
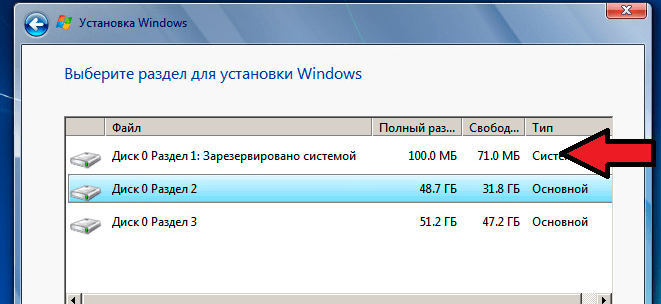
На самом деле не все так категорично, разметка дисков бывает разная и ситуации разные. Бывает что этот раздел отсутствует или поврежден. И непосредственно файл bootmgr отсутствует. Иногда сама загрузочная запись не находит этот файл по причине повреждения файловой системы раздела на котором находятся файлы загрузки. Почему-то это часто стало встречаться в Windows 10. Так что имейте ввиду… В таких случаях всегда хорошо отрабатывает простая команда CHKDSK C: /f /r
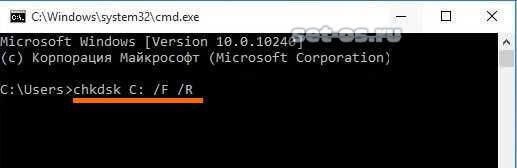
Проверяете этой командой все разделы связанные с операционной системой, либо все разделы по очереди. И вполне вероятно система запуститься.
Но если файлы загрузки остались на другом жестком диске, скажем если вы временно подключали дополнительный жесткий диск для копирования файлов. И совершенно случайно временный диск определился первым в системе на момент установки Windows. А когда отключили, система не смогла корректно запуститься. Или просто запутались в параметрах разделов и что-то пошло не так. Во всех этих случаях поможет BCDBOOT. Именно с ней мы сейчас и попробуем разобраться.
Параметры командной строки средства BCDboot.
| Параметр | Описание | |||||||||||||||||||
|---|---|---|---|---|---|---|---|---|---|---|---|---|---|---|---|---|---|---|---|---|
| /l | Необязательный. Задает язык. По умолчанию используется английский (США). | |||||||||||||||||||
| /s | Необязательный. Указывает букву диска системного раздела. По умолчанию используется системный раздел, заданный микропрограммой. | |||||||||||||||||||
| /v | Необязательный. Включает режим подробного протоколирования. | |||||||||||||||||||
| /m | Необязательный. По умолчанию объединяет только глобальные объекты. Если GUID загрузчика операционной системы задан, для создания загрузочной записи объединяет объект загрузчика с шаблоном системы. Командная строка в данном случае может выглядеть таким образом: bcdboot.exe c:\windows
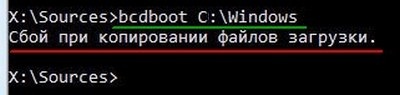
Замените c:\windows на путь, соответствующий вашей системе. Если после ввода команды у вас выйдет ошибка «Сбой при копировании файлов загрузки»
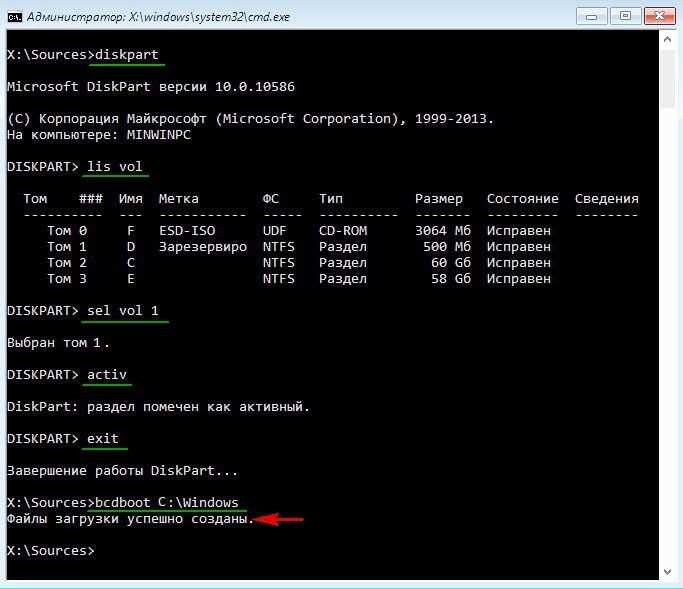
Это обозначает только одно — на жёстком диске нет ни одного активного раздела! Относится это правило к компьютерам с выключенным UEFI, то есть Windows установлена на диске MBR. Для того, чтобы утилита BCDboot восстановила загрузчик, наличие активного раздела на жёстком диске MBR обязательно. Для работы с разделами, в системе имеется достаточно эффективный инструмент — diskpart. Это работающий в текстовом режиме командный интерпретатор в операционных системах Windows Vista/7/8/8.1/10. Средство позволяет управлять объектами (дисками, разделами или томами) с помощью сценариев или команд, вводимых из командной строки. Итак, попробуем сделать системный (который «зарезервировано системой», обычно там находятся файлы загрузки) раздел активным. Для этого в командной строке среды Windows RE вводим поочередно команды:
Об этом я пишу в соответствующей теме далее Восстановление UEFI запуска Windows 8/8.1/10: Overview of Boot Options in WindowsThe Windows boot loader architecture includes a firmware-independent boot configuration and storage system called Boot Configuration Data (BCD) and a boot option editing tool, BCDEdit (BCDEdit.exe). During development, you can use BCDEdit to configure boot options for debugging, testing, and troubleshooting your driver on computers running Windows 10, Windows 8, Windows Server 2012, Windows 7, and Windows Server 2008. Administrative privileges are required to use BCDEdit to modify BCD. Changing some boot entry options using BCDEdit could render your computer inoperable. As an alternative, use the System Configuration utility (MSConfig.exe) to change boot settings. Boot Loading ArchitectureWindows includes boot loader components that are designed to load Windows quickly and securely. The previous Windows NT boot loader, ntldr, is replaced by three components: Windows Boot Manager (Bootmgr.exe) Windows operating system loader (Winload.exe) Windows resume loader (Winresume.exe) In this configuration, the Windows Boot Manager is generic and unaware of the specific requirements for each operating system while the system-specific boot loaders are optimized for the system that they load. When a computer with multiple boot entries includes at least one entry for Windows, the Windows Boot Manager, which resides in the root directory, starts the system and interacts with the user. It displays the boot menu, loads the selected system-specific boot loader, and passes the boot parameters to the boot loader. The boot loaders reside in the root directory of each Windows partition. Once selected, the boot loaders take over the boot process and load the operating system in accordance with the selected boot parameters. Boot Configuration DataWindows boot options are stored in the Boot Configuration Data (BCD) store on BIOS-based and EFI-based computers. BCD provides a common, firmware-independent boot option interface for all computers running Windows 10, Windows 8, Windows Server 2012, Windows 7, and Windows Server 2008. It is more secure than previous boot option storage configurations, because it permits secure lockdown of the BCD store and lets Administrators assign rights for managing boot options. BCD is available at run time and during all phases of setup. You can even call BCD during power state transitions and use it to define the boot process for resuming after hibernation. You can manage BCD remotely and manage BCD when the system boots from media other than the media on which the BCD store resides. This feature is extremely important for debugging and troubleshooting, especially when a BCD store must be restored while running Startup Repair from a DVD, from USB-based storage media, or even remotely. The BCD store, with its familiar object-and-element architecture, uses GUIDs and names such as «Default» to precisely identify boot-related applications. BCD includes its own set of boot options. For more information about these boot options, see BCD Boot Options Reference. Editing Boot OptionsTo edit boot options in Windows, use BCDEdit (BCDEdit.exe), a tool included in Windows. To use BCDEdit, you must be a member of the Administrators group on the computer. You can also use the System Configuration utility (MSConfig.exe) to change boot settings. To change boot options programmatically in Windows, use the Windows Management Instrument (WMI) interface to boot options. This BCD WMI interface is the best method to programmatically change the boot options. For information about the BCD WMI interface, see Boot Configuration Data WMI Provider in the Windows SDK documentation. Advanced troubleshooting for Windows boot problemsThis article is intended for use by support agents and IT professionals. If you’re looking for more general information about recovery options, see Recovery options in Windows 10. SummaryThere are several reasons why a Windows-based computer may have problems during startup. To troubleshoot boot problems, first determine in which of the following phases the computer gets stuck:
1. PreBoot The PC’s firmware initiates a Power-On Self Test (POST) and loads firmware settings. This pre-boot process ends when a valid system disk is detected. Firmware reads the master boot record (MBR), and then starts Windows Boot Manager. 2. Windows Boot Manager Windows Boot Manager finds and starts the Windows loader (Winload.exe) on the Windows boot partition. 3. Windows operating system loader Essential drivers required to start the Windows kernel are loaded and the kernel starts to run. 4. Windows NT OS Kernel The kernel loads into memory the system registry hive and additional drivers that are marked as BOOT_START. The kernel passes control to the session manager process (Smss.exe) which initializes the system session, and loads and starts the devices and drivers that are not marked BOOT_START. Here is a summary of the boot sequence, what will be seen on the display, and typical boot problems at that point in the sequence. Before starting troubleshooting, you have to understand the outline of the boot process and display status to ensure that the issue is properly identified at the beginning of the engagement.
Each phase has a different approach to troubleshooting. This article provides troubleshooting techniques for problems that occur during the first three phases. If the computer repeatedly boots to the recovery options, run the following command at a command prompt to break the cycle: Bcdedit /set If the F8 options don’t work, run the following command: Bcdedit /set BIOS phaseTo determine whether the system has passed the BIOS phase, follow these steps:
If the system is stuck at the BIOS phase, there may be a hardware problem. Boot loader phaseIf the screen is completely black except for a blinking cursor, or if you receive one of the following error codes, this indicates that the boot process is stuck in the Boot Loader phase:
To troubleshoot this problem, use Windows installation media to start the computer, press Shift+F10 for a command prompt, and then use any of the following methods. Method 1: Startup Repair toolThe Startup Repair tool automatically fixes many common problems. The tool also lets you quickly diagnose and repair more complex startup problems. When the computer detects a startup problem, the computer starts the Startup Repair tool. When the tool starts, it performs diagnostics. These diagnostics include analyzing startup log files to determine the cause of the problem. When the Startup Repair tool determines the cause, the tool tries to fix the problem automatically. To do this, follow theseВ steps. For additional methods to start WinRE, see Windows Recovery Environment (Windows RE). Start the system to the installation media for the installed version of Windows. For more information, see Create installation media for Windows. On the Install Windows screen, select Next > Repair your computer. On the System Recovery Options screen, select Next > Command Prompt. After Startup Repair, select Shutdown, then turn on your PC to see if Windows can boot properly. The Startup Repair tool generates a log file to help you understand the startup problems and the repairs that were made. You can find the log file in the following location: %windir%\System32\LogFiles\Srt\Srttrail.txt Method 2: Repair Boot CodesTo repair boot codes, run the following command: To repair the boot sector, run the following command: Running BOOTREC together with Fixmbr overwrites only the master boot code. If the corruption in the MBR affects the partition table, running Fixmbr may not fix the problem. Method 3: Fix BCD errorsIf you receive BCD-related errors, follow these steps: Scan for all the systems that are installed. To do this, run the following command: Restart the computer to check whether the problem is fixed. If the problem is not fixed, run the following command: You might receive one of the following outputs: If the output shows windows installation: 0, run the following commands: After you run the command, you receive the following output:
Method 4: Replace BootmgrIf methods 1, 2 and 3 do not fix the problem, replace the Bootmgr file from drive C to the System Reserved partition. To do this, follow these steps: At a command prompt, change the directory to the System Reserved partition. Run the attrib command to unhide the file: Run the same attrib command on the Windows (system drive): Rename the Bootmgr file as Bootmgr.old: Navigate to the system drive. Copy the Bootmgr file, and then paste it to the System Reserved partition. Restart the computer. Method 5: Restore System HiveIf Windows cannot load the system registry hive into memory, you must restore the system hive. To do this, use the Windows Recovery Environment or use Emergency Repair Disk (ERD) to copy the files from the C:\Windows\System32\config\RegBack to C:\Windows\System32\config. If the problem persists, you may want to restore the system state backup to an alternative location, and then retrieve the registry hives to be replaced. Starting in Windows 10, version 1803, Windows no longer automatically backs up the system registry to the RegBack folder.This change is by design, and is intended to help reduce the overall disk footprint size of Windows. To recover a system with a corrupt registry hive, Microsoft recommends that you use a system restore point. For more details, check this article. Kernel PhaseIf the system gets stuck during the kernel phase, you experience multiple symptoms or receive multiple error messages. These include, but are not limited to, the following: A Stop error appears after the splash screen (Windows Logo screen). Specific error code is displayed. For example, «0x00000C2» , «0x0000007B» , «inaccessible boot device» and so on. The screen is stuck at the «spinning wheel» (rolling dots) «system busy» icon. A black screen appears after the splash screen. To troubleshoot these problems, try the following recovery boot options one at a time. Scenario 1: Try to start the computer in Safe mode or Last Known Good Configuration On the Advanced Boot Options screen, try to start the computer in Safe Mode or Safe Mode with Networking. If either of these options works, use Event Viewer to help identify and diagnose the cause of the boot problem. To view events that are recorded in the event logs, follow these steps: Use one of the following methods to open Event Viewer: Click Start, point to Administrative Tools, and then click Event Viewer. Start the Event Viewer snap-in in Microsoft Management Console (MMC). In the console tree, expand Event Viewer, and then click the log that you want to view. For example, click System log or Application log. In the details pane, double-click the event that you want to view. On the Edit menu, click Copy, open a new document in the program in which you want to paste the event (for example, Microsoft Word), and then click Paste. Use the Up Arrow or Down Arrow keyВ to view the descriptionВ of the previous or next event. Clean bootTo troubleshoot problems that affect services, do a clean boot by using System Configuration (msconfig). Select Selective startup to test the services one at a time to determine which one is causing the problem. If you cannot find the cause, try including system services. However, in most cases, the problematic service is third-party. Disable any service that you find to be faulty, and try to start the computer again by selecting Normal startup. If the computer starts in Disable Driver Signature mode, start the computer in Disable Driver Signature Enforcement mode, and then follow the steps that are documented in the following article to determine which drivers or files require driver signature enforcement: Troubleshooting boot problem caused byВ missing driver signature (x64) If the computer is a domain controller, try Directory Services Restore mode (DSRM). This method is an important step if you encounter Stop error «0xC00002E1» or «0xC00002E2» Examples Serious problems might occur if you modify the registry incorrectly by using Registry Editor or by using another method. These problems might require that you reinstall the operating system. Microsoft cannot guarantee that these problems can be solved. Modify the registry at your own risk. Error code INACCESSIBLE_BOOT_DEVICE (STOP 0x7B) To troubleshoot this Stop error, follow these steps to filter the drivers: Go to Window Recovery Environment (WinRE) by putting an ISO disk of the system in the disk drive. The ISO should be of same version of Windows or a later version. Open the registry. Load the system hive, and name it as «test.» Under the following registry subkey, check for lower filter and upper filter items for Non-Microsoft Drivers: HKEY_LOCAL_MACHINE\SYSTEM\ControlSet001\Control\Class For each third-party driver that you locate, click the upper or lower filter, and then delete the value data. Search through the whole registry for similar items. Process as an appropriate, and then unload the registry hive. Restart the server in Normal mode. For additional troubleshooting steps, see the following articles: To fix problems that occur after you install Windows updates, check for pending updates by using these steps: Open a Command Prompt window in WinRE. Run the command: If there are any pending updates, uninstall them by running the following commands: Try to start the computer. If the computer does not start, follow these steps: Open A Command Prompt window in WinRE, and start a text editor, such as Notepad. Navigate to the system drive, and search for windows\winsxs\pending.xml. If the Pending.xml file is found, rename the file as Pending.xml.old. Open the registry, and then load the component hive in HKEY_LOCAL_MACHINE as a test. Highlight the loaded test hive, and then search for the pendingxmlidentifier value. If the pendingxmlidentifier value exists, delete the value. Unload the test hive. Load the system hive, name it as «test». Navigate to the following subkey: HKEY_LOCAL_MACHINE\SYSTEM\ControlSet001\Services\TrustedInstaller Change the Start value from 1 to 4 Unload the hive. Try to start the computer. If the Stop error occurs late in the startup process, or if the Stop error is still being generated, you can capture a memory dump. A good memory dump can help determine the root cause of the Stop error. For details, see the following articles: For more information about page file problems in Windows 10 or Windows Server 2016, see the following: For more information about Stop errors, see the following Knowledge Base article: If the dump file shows an error that is related to a driver (for example, windows\system32\drivers\stcvsm.sys is missing or corrupted), follow these guidelines: Check the functionality that is provided by the driver. If the driver is a third-party boot driver, make sure that you understand what it does. If the driver is not important and has no dependencies, load the system hive, and then disable the driver. If the stop error indicates system file corruption, run the system file checker in offline mode. To do this, open WinRE, open a command prompt, and then run the following command: If there is disk corruption, run the check disk command: If the Stop error indicates general registry corruption, or if you believe that new drivers or services were installed, follow these steps:
|