- Track file system changes in the background
- Using the change tracker
- Enable the change tracker
- Wait for changes
- Read the changes
- Accept the changes
- Important things to remember
- Buffer overruns
- Changes to a StorageLibrary
- Calling the Enable method
- Putting it together
- How to Convert/Change RAW File System to NTFS Without Data Loss
- What Is RAW File System
- How to Fix a Drive with RAW File System
- Procedure 1. Recover Data from RAW Drive with EaseUS Data Recovery Wizard
- Procedure 2. Convert RAW File System to NTFS by Formatting
- The Bottom Line
- Change File System between NTFS and FAT32 without Formatting in Windows 7
- A brief introduction of File System in Windows
- When do you want to change partition file system without formatting?
- How to change a file system without formatting in Windows 7?
Track file system changes in the background
Important APIs
The StorageLibraryChangeTracker class allows apps to track changes in files and folders as users move them around the system. Using the StorageLibraryChangeTracker class, an app can track:
- File operations including add, delete, modify.
- Folder operations such as renames and deletes.
- Files and folders moving on the drive.
Use this guide to learn the programing model for working with the change tracker, view some sample code, and understand the different types of file operations that are tracked by StorageLibraryChangeTracker.
StorageLibraryChangeTracker works for user libraries, or for any folder on the local machine. This includes secondary drives or removable drives but does not include NAS drives or network drives.
Using the change tracker
The change tracker is implemented on system as a circular buffer storing the last N file system operations. Apps are able to read the changes off of the buffer and then process them into their own experiences. Once the app is finished with the changes it marks the changes as processed and will never see them again.
To use the change tracker on a folder, follow these steps:
- Enable change tracking for the folder.
- Wait for changes.
- Read changes.
- Accept changes.
The next sections walk through each of the steps with some code examples. The complete code sample is provided at the end of the article.
Enable the change tracker
The first thing that the app needs to do is to tell the system that it is interested in change tracking a given library. It does this by calling the Enable method on the change tracker for the library of interest.
A few important notes:
- Make sure your app has permission to the correct library in the manifest before creating the StorageLibrary object. See File Access Permissions for more details.
- Enable is thread safe, will not reset your pointer, and can be called as many times as you like (more on this later).
![]()
Wait for changes
After the change tracker is initialized, it will begin to record all of the operations that occur within a library, even while the app isn’t running. Apps can register to be activated any time there is a change by registering for the StorageLibraryChangedTrigger event.
![]()
Read the changes
The app can then poll for changes from the change tracker and receive a list of the changes since the last time it checked. The code below shows how to get a list of changes from the change tracker.
The app is then responsible for processing the changes into its own experience or database as needed.
![]()
The second call to enable is to defend against a race condition if the user adds another folder to the library while your app is reading changes. Without the extra call to Enable the code will fail with ecSearchFolderScopeViolation (0x80070490) if the user is changing the folders in their library
Accept the changes
After the app is done processing the changes, it should tell the system to never show those changes again by calling the AcceptChangesAsync method.
![]()
The app will now only receive new changes when reading the change tracker in the future.
- If changes have happened between calling ReadBatchAsync and AcceptChangesAsync, the pointer will be only be advanced to the most recent change the app has seen. Those other changes will still be available the next time it calls ReadBatchAsync.
- Not accepting the changes will cause the system to return the same set of changes the next time the app calls ReadBatchAsync.
Important things to remember
When using the change tracker, there are a few things that you should keep in mind to make sure that everything is working correctly.
Buffer overruns
Although we try to reserve enough space in the change tracker to hold all the operations happening on the system until your app can read them, it is very easy to imagine a scenario where the app doesn’t read the changes before the circular buffer overwrites itself. Especially if the user is restoring data from a backup or syncing a large collection of pictures from their camera phone.
In this case, ReadBatchAsync will return the error code StorageLibraryChangeType.ChangeTrackingLost. If your app receives this error code, it means a couple things:
- The buffer has overwritten itself since the last time you looked at it. The best course of action is to recrawl the library, because any information from the tracker will be incomplete.
- The change tracker will not return any more changes until you call Reset. After the app calls reset, the pointer will be moved to the most recent change and tracking will resume normally.
It should be rare to get these cases, but in scenarios where the user is moving a large number of files around on their disk we don’t want the change tracker to balloon and take up too much storage. This should allow apps to react to massive file system operations while not damaging the customer experience in Windows.
Changes to a StorageLibrary
The StorageLibrary class exists as a virtual group of root folders that contain other folders. To reconcile this with a file system change tracker, we made the following choices:
- Any changes to descendent of the root library folders will be represented in the change tracker. The root library folders can be found using the Folders property.
- Adding or removing root folders from a StorageLibrary (through RequestAddFolderAsync and RequestRemoveFolderAsync) will not create an entry in the change tracker. These changes can be tracked through the DefinitionChanged event or by enumerating the root folders in the library using the Folders property.
- If a folder with content already in it is added to the library, there will not be a change notification or change tracker entries generated. Any subsequent changes to the descendants of that folder will generate notifications and change tracker entries.
Calling the Enable method
Apps should call Enable as soon as they start tracking the file system and before every enumeration of the changes. This will ensure that all changes will be captured by the change tracker.
Putting it together
Here is all the code that is used to register for the changes from the video library and start pulling the changes from the change tracker.
How to Convert/Change RAW File System to NTFS Without Data Loss
A RAW file system is a file system that cannot be recognized by your computer. Thus, you cannot access the files on the storage device once it becomes RAW. To make your drive usable again without losing data, you can recover files from the RAW drive using EaseUS Data Recovery Wizard first, and then convert RAW to NTFS or FAT32 by formatting.
Table of Contents
About the Author
Reviews and Awards
What Is RAW File System
A file system, like NTFS, FAT32, and exFAT, controls how data is stored and retrieved. Without a file system, you cannot access and open a storage medium, be it a hard drive, USB flash drive, SD card, and more. RAW file system indicates a state of your hard drive which has no or unknown file system. A disk or drive with a RAW file system is what we called as RAW disk/drive. When a hard drive or external storage device becomes RAW, it could be:
- The file system of the drive is missing or damaged
- The RAW drive has not been formatted with a file system, neither FAT12/FAT16/FAT32 nor NTFS/NTFS5
- The current file system of the storage medium is not recognized by the computerВ
The RAW file system can be caused by a number of reasons such as virus infection, format failure, accidentВ shutdown of the operating system, power outages, etc.В When a hard drive or external storage device becomes RAW, your device is unusable and you cannot access the files stored on it. Besides, there are some error messages you may encounter when you try to open the device or run CHKDSK on it, like «you need to format the disk in drive before you can use it» and «The type of the file system is RAW, CHKDSK is not available for RAW drives.»
How to Fix a Drive with RAW File System
Here’s a video tutorial about how to convert RAW file system to NTFS and how to recover data from a RAW system. Watch the guide and follow the detailed steps below to fix a drive with a RAW file system.
As mentioned above, you may be prompted to format the RAW drive in order to make it ready for data storage and access. Indeed, formatting the device will assign a file system to it and thus make it usable. However, this operation will also erase the existing files on the drive. Thus, to fix a RAW drive without losing data, you need to:
- First, Perform RAW data recovery
- Then, convert RAW to NTFS or another Windows-compatible file system by formatting
Procedure 1. Recover Data from RAW Drive with EaseUS Data Recovery Wizard
Although the RAW drive is inaccessible when you try to open it, you can recover data from the storage medium with the help of hard drive recovery software — EaseUS Data Recovery Wizard. EaseUS data recovery software supports deleted file recovery, formatted file recovery, RAW drive recovery, and more. It will help you recover any existing files on your RAW hard drive, USB flash drive, memory card, etc.
To recover data from a drive with the RAW file system:
Step 1. Locate and scan the RAW hard drive.
On EaseUS Data Recovery Wizard, locateВ the RAW drive and then click «Scan». The program will automatically scan all lost files and data on the RAW drive.
If the RAW drive lost its label, it will be detected as «Lost Partition».

Step 2. Find and preview found data in the RAW drive.В
When the scanning process finishes, find lost RAW drive data in «Deleted Files», «Lost Files» or «Existing Files». Filter and Search features also can locate the found files with ease. Check and double-click each file to preview them.В

Step 3. Restore and save RAW drive data.
Choose the found files from RAW Drive and click «Recover»В to save the items to a new location.

EaseUS Data Recovery Wizard is a powerfulВ data recovery softwareВ toolВ that can help get all data out from the RAW drive.В After you have successfully recovered all files from your hard drive,В you can now format the RAW drive to NTFS, FAT32 or other file systems with no hesitation.
Procedure 2. Convert RAW File System to NTFS by Formatting
There are generally three ways to formatting a drive, using File Explorer, Disk Management, or free format tool. Here we will show you how to format the RAW drive under File Explorer.
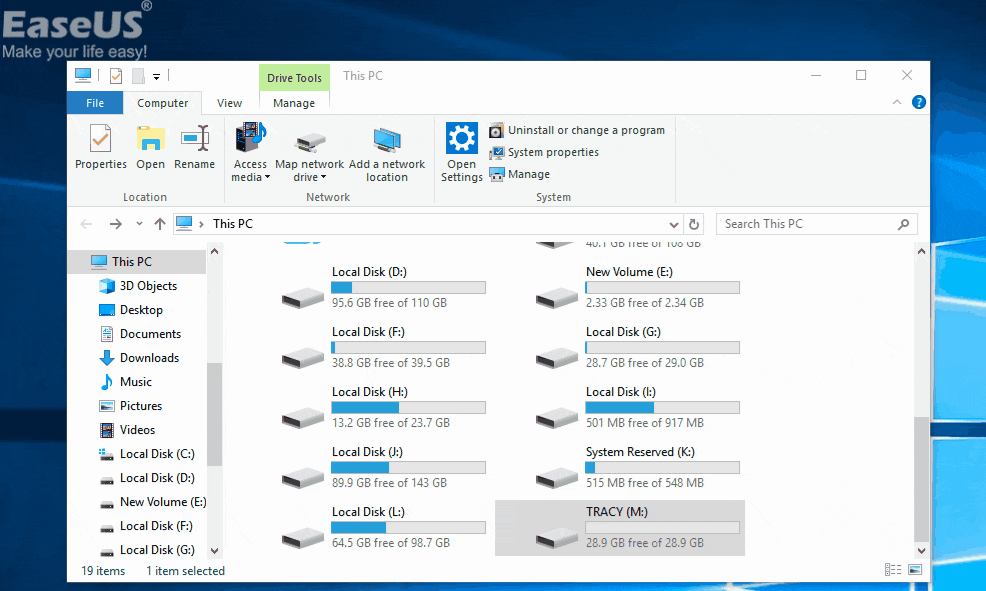
Step 1. Open «This PC», right-click your RAW drive or RAW disk and choose «Formatted».
Step 2. Set a file system (NTFS, FAT32, or exFAT) according to your needs and click «Start».
Step 3. In the Warning window, click «OK» to start formatting your storage medium.
The Bottom Line
Since EaseUS Data Recovery Wizard supports formatted data recovery, you can also use the software toВ recover files from the formatted driveВ if you have formatted the RAW drive before performing data recovery. For more detailed guide, refer to the video below:
Change File System between NTFS and FAT32 without Formatting in Windows 7
Want to convert between NTFS and FAT32 without losing data? Learn to change file system on HDD, external hard drive, USB flash drive or Pen Drive without formatting in Windows.
![]()
By Teresa  / Last Updated February 21, 2019
A brief introduction of File System in Windows
The way computers store files on disk has a close relation with File System which is used to control how data is stored and retrieved. File System separates all data into pieces and gives each piece a name so that the information can be easily isolated and identified. The structure and logic rules used to manage the groups of information and their names are called a file system.
There are several file systems frequently used in Windows OS including File Allocation Table (FAT), Extended File Allocation Table (exFAT) and New Technology File System (NTFS) etc. FAT32 in the first one and NTFS are the most two popular file systems nowadays in Windows operating systems like Windows 7, Windows 10, and Windows XP and so on. Therefore, when people talk about change file system without formatting, they basically talk about converting NTFS to FAT32 or in turn without losing data.
FAT32 is an old file system first introduced by Microsoft in 1996 which used as an extension of FAT16. The standard maximum volume size for FAT32 is 2TB and the maximum single file size is 4GB and compare to former version it has better performance, more flexibility and robustness. However, NTFS, as its name implies, is pretty new with advanced techniques in this field. Comparing to FAT32, NTFS is more powerful in data security, data consistency, read & write and retrieval.
When do you want to change partition file system without formatting?
Although NTFS is more advanced than FAT32 as covered before, it cannot replace FAT32 totally, at least presently. FAT32, as traditional file system, is compatible with many external medium such as XBOX, PS3, and Android and so on. So some users would like to reformat to FAT32 from NTFSsometimes for other purposes. Following real situation illustrates why they want to convert file system.
“All partitions’ file system is NTFS now in my Windows 7. I want to format D drive from NTFS to FAT32 because the program I’ll use does not support backup unless it is FAT32. What can I do to change drive file system without formatting and losing data? ”
What’s more, FAT32 has a deadly limitation that single file should not be larger than 4GB. Thus, converting file system is a must-do event when you have large file say DVD ISO files on FAT32 partition to read, especially on USB flash drive.
Talked about too much on file system and why you want to change. You may ask can I change file system without formatting in Windows. Fortunately, the answer is positive. You need to complete this task with the help of third party software like AOMEI Partition Assistant Professional. You cannot do it without losing data using Windows Disk Management because it will format the partition first. Said software allows you to change file system on HDD, external hard drive, USB drive, and Pen Drive and so on in Windows 7/8/10/XP/Vista without formatting the partition. All operations will be completed within several clicks in user-friendly interface. Don’t worry if you’re new to computer.
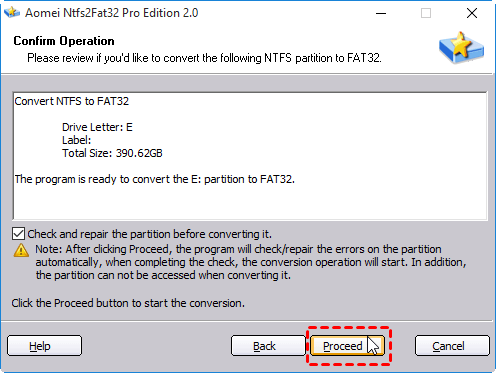
How to change a file system without formatting in Windows 7?
Step1. Download, install and launch AOMEI Partition Assistant on Windows. If you want to change file system on flash drive, external hard drive or like, connect it to computer beforehand. Click on “NTFS to FAT32 Converter” in the left pane.
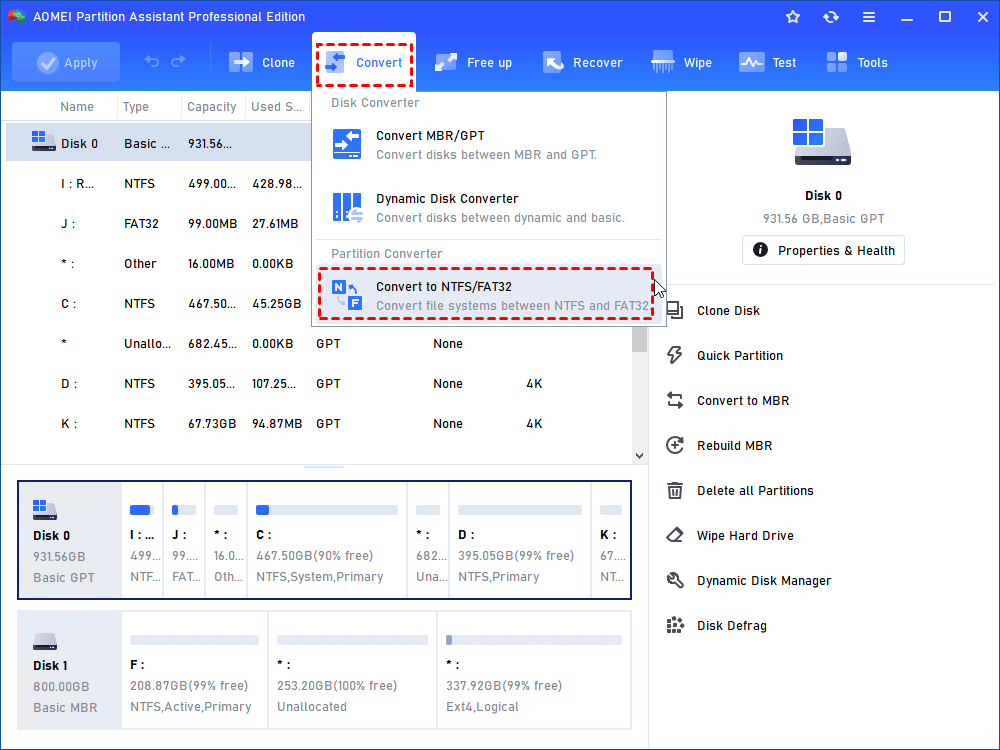
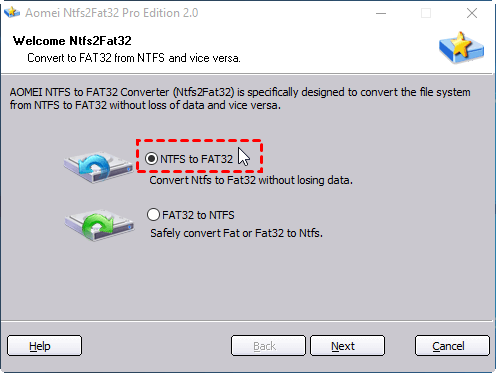
Step2. Select the convert method depending on your condition. Take NTFS to FAT32 for example.
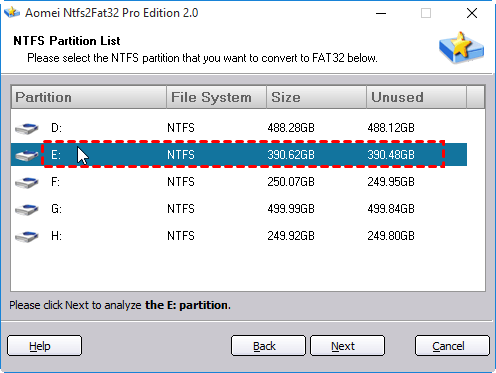
Step3. Select the partition you want to convert from the NTFS partition list.
Step4. Click “Proceed” after confirming. It will check and start the conversion right now.
Note:
If selected NTFS partition contains compressed files, encrypted files or large files over 4GB, you are likely get following notification. After clicking “OK”, it will detect the obstructive files and showing in the box. You can move the file to other places or choose to ignore it.
Four steps involved in, you have changed file system without formatting in Windows 7. Now go and apply it to your plan. Besides, in the first screenshot you may notice that except for converting file system, AOMEI Partition Assistant is capable of converting between dynamic disk and basic disk without data loss. Moreover, you can use it as Gptgen alternative to convert disk between MBR and GPT. If you are Windows Server OS user, AOMEI Partition Assistant Server is suitable for you.


