- Варианты загрузки Windows 10
- Получение доступа к выбору способа загрузки
- «Включить отладку»
- «Включить ведение журнала загрузки»
- «Включить видеорежим с низким разрешением»
- Варианты «Безопасного режима»
- «Отключить обязательную проверку подписи драйверов»
- «Отключить ранний запуск антивредоносной защиты»
- «Отключить автоматический перезапуск после сбоя»
- Startup Settings
- How to Navigate the Startup Settings Menu in Windows 10 and 8
- What Is the Startup Settings Menu Used For?
- How to Access Startup Settings
- Startup Settings
- Enable Debugging
- Enable Boot Logging
- Enable Low-Resolution Video
- Enable Safe Mode
- Enable Safe Mode with Networking
- Enable Safe Mode with Command Prompt
- Disable Driver Signature Enforcement
- Disable Early Launch Anti-Malware Protection
- Disable Automatic Restart After Failure
- Launch Recovery Environment
- Startup Settings Availability
- Windows Startup Settings (including safe mode)
- Get to Windows Startup Settings in PC settings
- Get to Windows Startup Settings in the Windows Recovery Environment
Варианты загрузки Windows 10
Получение доступа к выбору способа загрузки
Чтобы вызвать меню выбора режимов, необходимо выполнить следующее:
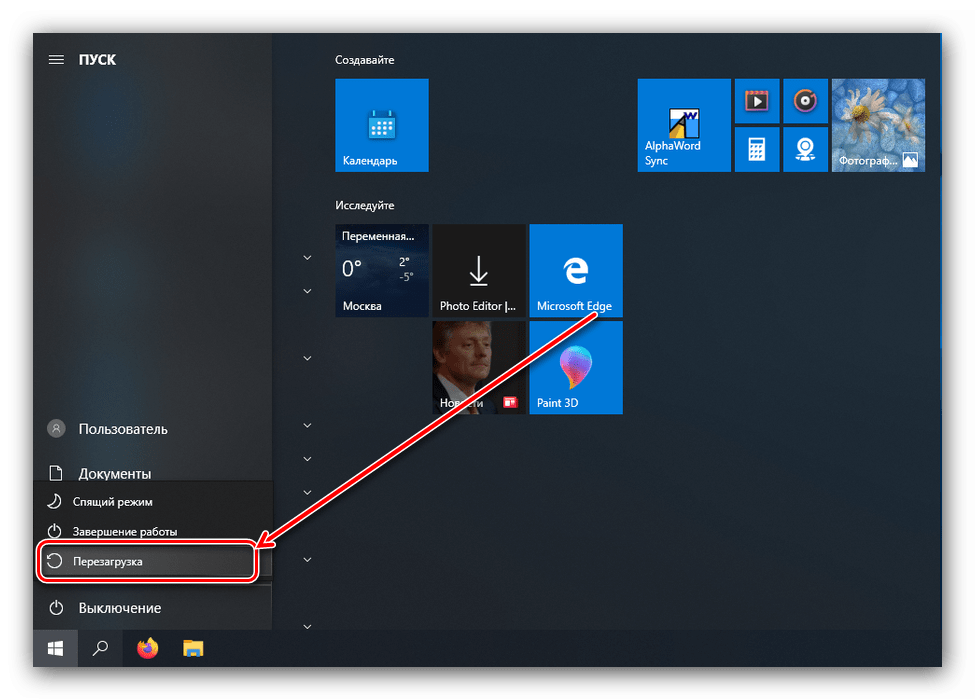
- Если система загружается и работоспособна, воспользуйтесь одним из способов входа в загрузочное меню — например, перейдите по пути «Пуск» — «Выключение», затем зажмите клавишу Shift и кликните «Перезагрузка».
Если система не стартует, при включении компьютера появится соответствующее сообщение, воспользуйтесь в нём кнопкой «Дополнительные варианты восстановления».

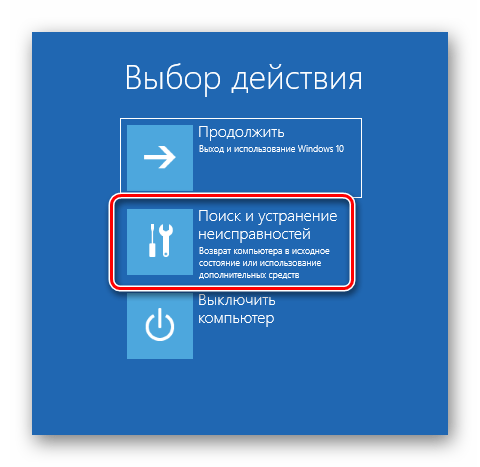
Затем укажите «Дополнительные параметры».

Откройте пункт «Параметры загрузки».
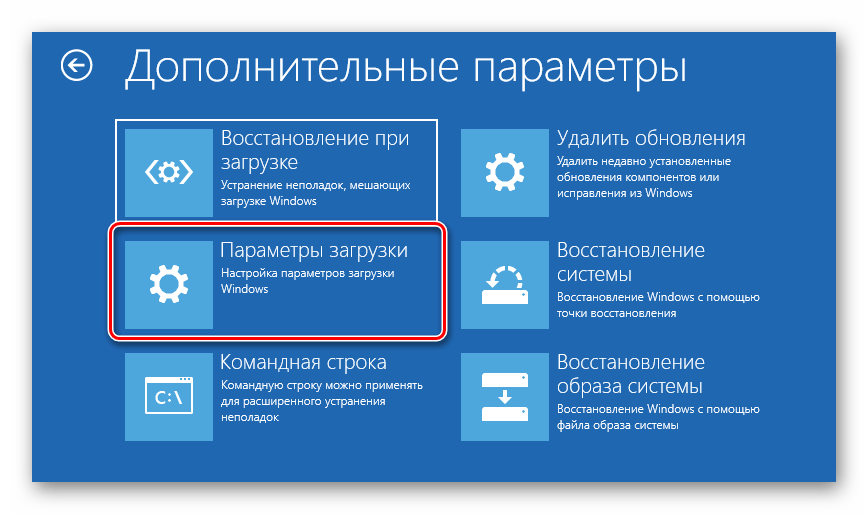
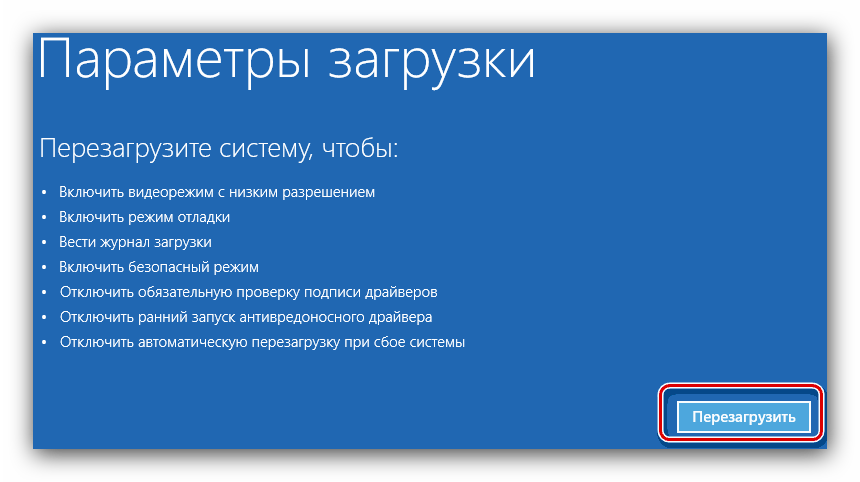
После загрузки появится следующее меню.
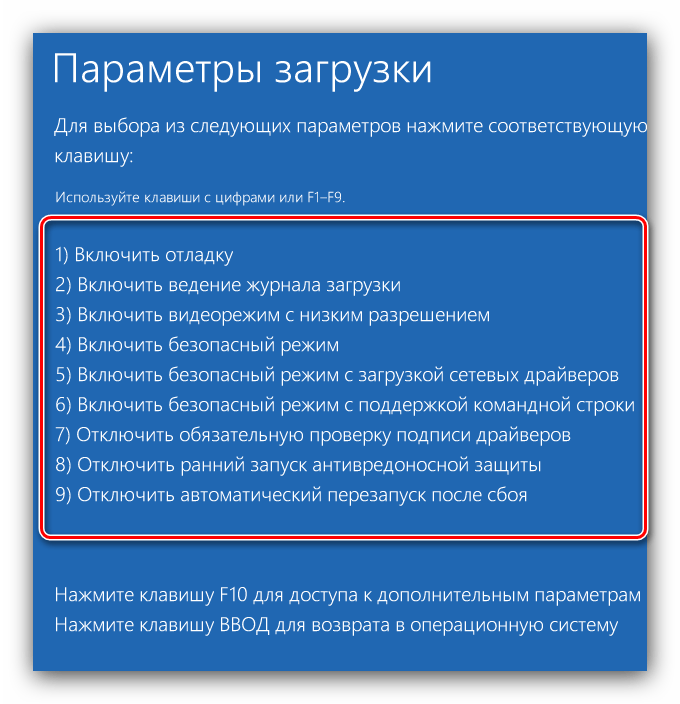
Далее мы рассмотрим каждый из этих пунктов.
«Включить отладку»
Первый из них, доступный по нажатию клавиши F1, активирует отладку ядра: продвинутый метод диагностики, при котором информация о старте Виндовс может быть передана на другой компьютер или устройство с запущенным отладчиком. Этот метод рекомендуется для опытных пользователей.
«Включить ведение журнала загрузки»
Следующий вариант, который активируется нажатием на F2, подразумевает ведение подробного журнала запуска, в частности загруженных драйверов, что поможет определить сбойный элемент ПО. Лог хранится в документе ntbtlog.txt в установочной папке Виндовс – как правило, это C:\Windows . Если ОС запускается корректно, загляните в указанный файл для определения причины проблем. Чтобы просмотреть ntbtlog.txt, если система стартует со сбоями, выберите одну из опций «Безопасного режима», о которых мы поговорим ниже.

«Включить видеорежим с низким разрешением»
Иногда бывает так, что ОС не загружается, поскольку монитор не поддерживают стандартные для «десятки» разрешение и цветовое пространство. В такой ситуации доступ к системе возможен с опцией запуска под названием «Включить видеорежим с низким разрешением» — щелкните F3, чтобы ею воспользоваться.
Варианты «Безопасного режима»
Наиболее часто используемая дополнительная опция загрузки — «Безопасный режим», у которого есть три вариации:
- «Включить безопасный режим» – стандартный вариант, при котором отключаются все изменения в ОС. Для его выбора нажмите F4;

Читайте также: Как войти в «Безопасный режим» в Windows 10
«Отключить обязательную проверку подписи драйверов»
Ещё с Windows Vista компания Microsoft в целях безопасности требует, чтобы все драйвера имели сертифицированную цифровую подпись – в противном случае пакет просто откажется устанавливаться. Однако разработчики знают о том, что для задач тестирования может потребоваться инсталляция неподписанных драйверов, и предлагают особый метод запуска, который активируется нажатием на F7 в окне дополнительных параметров. Обратите внимание, что обычному пользователю этим вариантом стоит пользоваться только в самом крайнем случае.
«Отключить ранний запуск антивредоносной защиты»
В «десятке» Windows Defender стал ещё более продвинутым и запускается одновременно с системой. Данное антивирусное ПО нередко замедляет старт ОС или вовсе мешает ему, если вы столкнулись с ложным срабатыванием. Для устранения подобных проблем следует воспользоваться вариантом без запуска драйвера антивируса, доступным по нажатию клавиши F8.
«Отключить автоматический перезапуск после сбоя»
Виндовс 10, как и предыдущие редакции ОС от Майкрософт, по умолчанию перезапускается, если в процессе её работы произошел сбой. Данная возможность не всегда полезна – например, во время тестирования ПО либо какого-то из новых устройств. Деактивировать автоматический перезапуск можно посредством специального режима — для его использования нажмите на клавишу F9.
Мы кратко рассмотрели дополнительные варианты загрузки Windows 10. Как видим, не все из них будут полезны рядовому пользователю.
Startup Settings
How to Navigate the Startup Settings Menu in Windows 10 and 8
:max_bytes(150000):strip_icc()/tim-fisher-5820c8345f9b581c0b5a63cf.jpg)
Startup Settings is a menu of the various ways by which you can start Windows 10 and Windows 8, including the well-known diagnostic startup option called Safe Mode.
Startup Settings replaced the Advanced Boot Options menu available in previous versions of Windows.
What Is the Startup Settings Menu Used For?
The options available from the Startup Settings menu allow you to start Windows 10 or Windows 8 in some restricted fashion when it won’t start normally.
If Windows does start in the special mode, it’s likely that whatever was restricted is involved in the cause of the problem, giving you some information to troubleshoot from.
The most commonly accessed option available from the Startup Settings menu is Safe Mode.
How to Access Startup Settings
Startup Settings is accessible from the Advanced Startup Options menu, which itself is accessible through several different methods.
When you’re on the Advanced Startup Options menu, touch or click Troubleshoot, then Advanced options, and finally Startup Settings.
Startup Settings doesn’t itself do anything—it’s just a menu. Choosing one of the options will start that mode of Windows 10 or Windows 8, or change that setting.
:max_bytes(150000):strip_icc()/startup-settings-windows-8-56a6f90f3df78cf7729134e1-164619f872dc480fa2a0bd8638e771cd.png)
In other words, using Startup Settings means using one of the available startup modes or features available on the menu.
You must have a keyboard attached to your computer or device to be able to select an option from the Startup Settings menu. Windows 10 and Windows 8 were both designed to work with touch-enabled devices, so it’s disappointing that the on-screen keyboard wasn’t included in the Startup Settings menu.
Startup Settings
Here are the various startup methods you’ll find on the Startup Settings menu in Windows 10 and Windows 8:
Start Windows 10 or Windows 8 in Normal Mode at any time by pressing Enter.
Enable Debugging
The Enable debugging option turns on kernel debugging in Windows. This is an advanced troubleshooting method where Windows startup information can be transmitted to another computer or device that’s running a debugger. By default, that information is sent over COM1 at a baud rate of 15,200.
Enable debugging is the same as Debugging Mode that was available in previous versions of Windows.
Enable Boot Logging
The Enable boot logging option starts Windows 10 or Windows 8 normally but also creates a file of the drivers being loaded during the next boot process. The «boot log» is stored as ntbtlog.txt in whatever folder Windows is installed on, almost always C:\Windows.
If Windows starts properly, take a look at the file and see if anything helps with the troubleshooting of whatever issue you’re having.
If Windows does not start properly, choose one of the Safe Mode options and then look at the file once Windows starts in Safe Mode.
If even Safe Mode doesn’t work, you can restart into Advanced Startup Options, open Control Panel, and view the log file from there using the type command: type d:\windows\ntbtlog.txt.
Enable Low-Resolution Video
The Enable low-resolution video option starts Windows 10 or Windows 8 normally but sets the screen resolution to 800-pixels-by-600-pixels. In some cases, like with older CRT style computer monitors, the refresh rate is also lowered.
Windows won’t start properly if the screen resolution is set out in the range supported by your screen. Since almost all screens support an 800×600 resolution, Enable low-resolution video gives you a chance to correct any configuration problems.
Only display settings are changed with Enable low-resolution video. Your current display driver is not uninstalled or changed in any way.
Enable Safe Mode
The Enable Safe Mode option starts Windows 10 or Windows 8 in Safe Mode, a diagnostic mode that loads the minimum set of services and drivers possible to make Windows run.
If Windows starts in Safe Mode, you may be able to run additional diagnostics and testing to figure out what disabled service or driver is preventing Windows from starting normally.
Enable Safe Mode with Networking
The Enable Safe Mode with Networking option is identical to the Enable Safe Mode option except that drivers and services required for networking are enabled. This a great option to choose if you think you might need access to the internet while in Safe Mode.
Enable Safe Mode with Command Prompt
The Enable Safe Mode with Command Prompt option is identical to Enable Safe Mode but Command Prompt is loaded as the default user interface, not Explorer, which loads the Start screen and Desktop.
Choose this option if Enable Safe Mode doesn’t work and you also have commands in mind that might be helpful in figuring out what’s keeping Windows 10 or Windows 8 from starting.
Disable Driver Signature Enforcement
The Disable driver signature enforcement option allows non-signed drivers to be installed in Windows.
This startup option can be helpful during some advanced driver troubleshooting tasks.
Disable Early Launch Anti-Malware Protection
The Disable early launch anti-malware protection does just that—it disables the Early Launch Anti-malware driver, one of the first drivers loaded by Windows during the boot process.
This option could be useful if you suspect a Windows 10 or Windows 8 startup problem might be due to a recent anti-malware program installation, un-installation, or settings change.
Disable Automatic Restart After Failure
The Disable automatic restart after failure disables Automatic restart in Windows 10 or Windows 8.
When this feature is enabled, Windows forces your device to restart after a major system failure like a BSOD (Blue Screen of Death).
Because Automatic restart is enabled by default in both Windows 10 and Windows 8, your first BSOD will force a restart, possibly before you’re able to jot down the error message or code for troubleshooting. With this option, you can disable the feature from Startup Settings, without needing to enter Windows.
See How To Disable Automatic Restart on System Failure in Windows for instructions on doing this from within Windows, a proactive step that we recommended you do.
Launch Recovery Environment
This option is available on the second page of options in Startup Settings, which you can access by pressing F10.
Choose Launch recovery environment to return to the Advanced Startup Options menu. You’ll see a short Please wait screen while Advanced Startup Options loads.
Startup Settings Availability
The Startup Settings menu is available in Windows 10 and Windows 8.
In previous versions of Windows, like Windows 7, Windows Vista, and Windows XP, the equivalent startup options menu is called Advanced Boot Options.
Windows Startup Settings (including safe mode)
With Windows Startup Settings you can start Windows in different advanced troubleshooting modes to help you find and fix problems on your PC.
Get to Windows Startup Settings in PC settings
Swipe in from the right edge of the screen, tap Settings, and then tap Change PC settings.
(If you’re using a mouse, point to the lower-right corner of the screen, move the mouse pointer up, click Settings, and then click Change PC settings.)
Under PC settings, tap or click Update and recovery, and then tap or click Recovery.
Under Advanced startup, tap or click Restart now.
Once your PC restarts, on the Choose an option screen, tap or click Troubleshoot. If you don’t see the Startup Settings option, tap or click Advanced options.
Tap or click Startup Settings and then Restart.
On the Startup Settings screen, choose the startup setting you want.
Sign in to your PC with a user account that has administrator rights.
Get to Windows Startup Settings in the Windows Recovery Environment
If you can’t start your PC, follow these instructions to get to the Windows Recovery Environment. You’ll need to connect a keyboard to complete the steps.
Do one of the following, depending on whether you have installation media (such as a DVD or USB flash drive):
If you have installation media for Windows 8.1, start your computer from the installation media. Insert the DVD or USB flash drive and restart your computer. If you see a message asking you to “Press any key to boot from DVD,” do so. If you don’t see the message, you might need to change the boot order in your computer’s BIOS settings so that it first starts from the DVD or USB. When you see the Install Windows page, tap or click Repair your computer to start the Windows Recovery Environment.
If you don’t have installation media, use the power button to restart your computer three times. This will start the Windows Recovery Environment.
In the Windows Recovery Environment, on the Choose an option screen, tap or click Troubleshoot.
Tap or click Startup Settings. If you don’t see Startup Settings, tap or click Advanced options, and then tap or click Startup Settings.
Tap or click Restart, and then wait while your computer restarts.
On the Startup Settings screen, choose an option.
Sign in to your computer with a user account that has administrator rights.
Some options, such as safe mode, start Windows in a limited state where only essential programs are started. Other options start Windows with advanced features (typically used by system admins and IT pros). For more info, go to the Microsoft TechNet website for IT pros.
Note: If you’re using BitLocker, you’ll need to suspend it before you can get to Windows Startup Settings. If you’re using Windows RT 8.1, you may be asked to enter your Device Encryption recovery key to get to the Startup settings.
Starts Windows in an advanced troubleshooting mode intended for IT pros and system admins.
Creates a file, ntbtlog.txt, that lists all the drivers that are installed during startup and that might be useful for advanced troubleshooting.
Starts Windows using your current video driver and using low resolution and refresh rate settings. You can use this mode to reset your display settings.
Safe mode starts Windows with a minimal set of drivers and services to help troubleshoot issues. If a problem doesn’t reappear when you start your PC in safe mode, you can eliminate the default settings and basic device drivers and services as possible causes. There are three different safe mode options:
Enable Safe Mode. Starts Windows with a minimal set of drivers and services.
Enable Safe Mode with Networking. Starts Windows in safe mode and includes the network drivers and services needed to access the Internet or other computers on your network.
Enable Safe Mode with Command Prompt. Starts Windows in safe mode with a Command Prompt window instead of the usual Windows interface. This option is intended for IT pros and system admins.
If the problem doesn’t occur when you restart your PC in safe mode, it’s unlikely that the basic settings, files, and drivers in Windows are the cause of the problem. Try starting all of the apps on your desktop that you commonly use one by one (including the apps in your Startup folder) to see if a specific app might be causing the problem. If one of the apps is causing the problem, uninstall it or contact the software publisher. If the problem appears while in safe mode, or you still can’t find the problem, you can try refreshing or resetting your PC. For more info, see How to refresh, reset, or restore your PC.


