- Как изменить экран приветствия в Windows 7
- Изменение экрана приветствия в Виндовс 7
- Способ 1: Windows 7 Logon Background Changer
- Способ 2: Средства Windows
- How to change the logon screen saver in Windows
- IN THIS TASK
- Summary
- How to change the logon screen saver in Windows
- IN THIS TASK
- Summary
- How to change the logon screen saver in Windows
- IN THIS TASK
- Summary
- How To Change Windows 7 Logon Screen Easily [Without Using Hacks & Tools]
- Change the Windows 7 logon screen background picture
Как изменить экран приветствия в Windows 7
Одним из способов кастомизировать свою операционную систему является изменение экрана приветствия. Пользователи путем нехитрых действий могут поставить на заставку любую картинку, которая им по нраву, и в любой момент вернуть все обратно.
Изменение экрана приветствия в Виндовс 7
Любители подстраивать операционную систему под себя не упустят возможности заменить стандартный приветственный фон на более интересное изображение. Это можно сделать в любой современной и относительно современной версии Виндовс, включая «семерку». Это можно сделать как при помощи специальных утилит, так и вручную. Первый вариант зачастую быстрее и удобнее, а второй подойдет более уверенным пользователям, не желающим пользоваться сторонним ПО.
Перед выбором способа настоятельно рекомендуем позаботиться о создании точки восстановления системы и/или загрузочной флешки.
Способ 1: Windows 7 Logon Background Changer
Как понятно из названия, эта программа предназначена специально для пользователей «семерки», желающих изменить приветственный фон. Этот софт имеет очень простой, приятный и современный интерфейс и наделен небольшой галереей собственных фонов.
- Зайдите на официальный сайт программы и кликните по кнопке «Download».
На новой странице нажмите на ссылку «Please click here to start the download».
Скачанный файл ZIP остается извлечь и запустить EXE-файл. Программа не требует установки и работает как portable-версия.
Внизу находится набор обоев, которыми вы можете заменить стандартное изображение. При желании можно просмотреть этот список, прокручивая ее колесом вниз (вперед) и вверх (назад).
Если необходимо, нажмите на кнопку «Full Screen» — это позволит просмотреть изображение на весь экран.
Применить свой выбор можно кнопкой «Apply».
Если вы хотите установить собственное изображение, а не предложенное программой, нажмите на кнопку «Choose a folder».
Откроется проводник, где нужно указать путь к файлу.
Выбранный файл устанавливается по умолчанию так же кнопкой «Apply».
Обратите внимание, что вы всегда можете вернуть стандартную картинку обратно. Для этого нажмите на «Windows 7 Default wallpaper» и сохраните результат на «Apply».
В настройках программы можно выполнить сброс папки по умолчанию, отключить изменение заставки для других учетных записей и добавить тень к тексту на экране загрузки.
Никаких дополнительных возможностей по кастомизации у программы нет, поэтому если вы хотите изменить в системе что-нибудь еще, используйте многофункциональные твикеры для Виндовс 7, в состав которых входит возможность изменения фона загрузки.
Способ 2: Средства Windows
Через инструмент «Персонализация» и какие-либо другие редакторы поменять фон приветствия нельзя, однако заменить изображение можно через редактирование реестра и замену картинки в системной папке. Минус такого способа — невозможно увидеть результат до перезагрузки компьютера.
Для такого способа есть пара ограничений: файл должен быть в формате JPG и иметь вес до 256 КБ. Кроме этого, старайтесь подобрать картинку в соответствии с размером и разрешением своего экрана, чтобы она выглядела качественно и уместно.
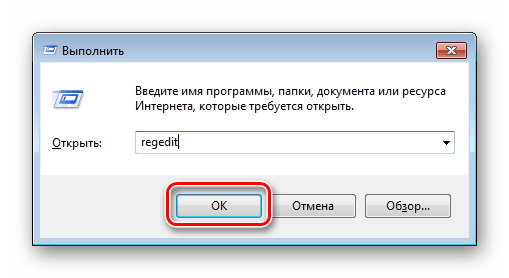
- Откройте редактор реестра сочетанием клавиш Win + R и командой regedit .
Перейдите по пути, указанном ниже:
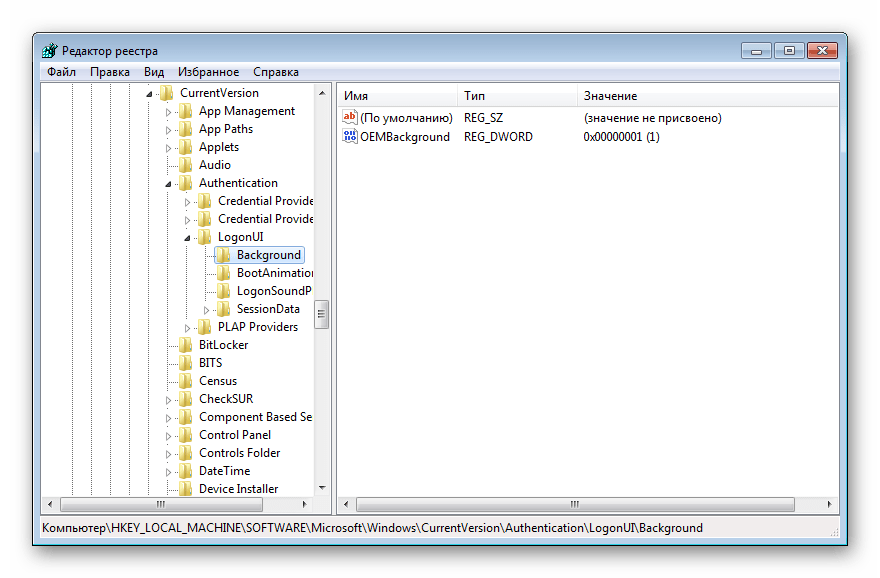
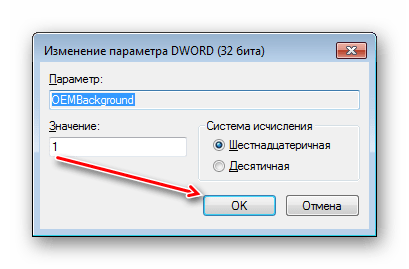
Дважды щелкните по параметру «OEMBackground», поставьте значение 1 и нажмите «ОК».
Если оно уже стоит, просто переходите к следующему пункту.
При отсутствии создайте этот параметр вручную. Находясь по вышеуказанному пути, кликните ПКМ по пустому месту в правой части экрана и выберите «Создать» > «Параметр DWORD (32 бита)».
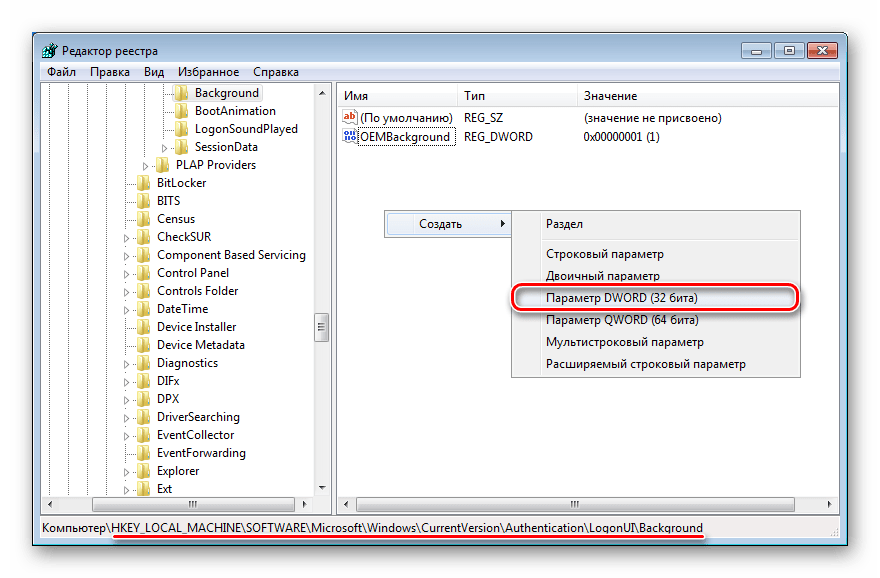
Задайте ему имя OEMBackground, выставьте значение 1 и сохраните результат на «ОК».
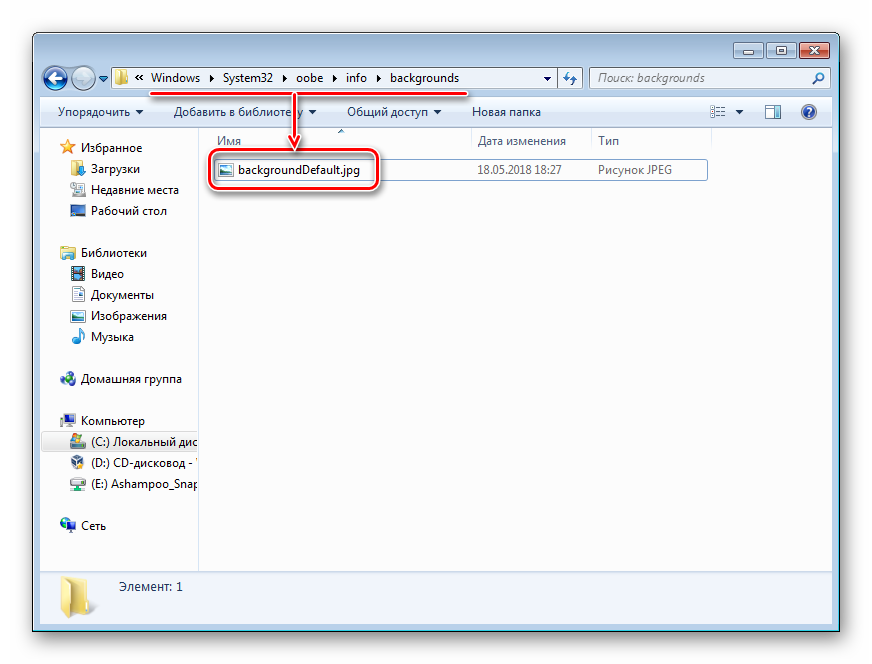
Откройте проводник и перейдите в папку backgrounds, располагающуюся здесь:
В некоторых случаях backgrounds может отсутствовать, как и папка info. В таком случае вам потребуется создать и переименовать 2 папки вручную обычным способом.

Сперва внутри oobe создайте папку и назовите ее info, внутри которой создайте папку backgrounds.
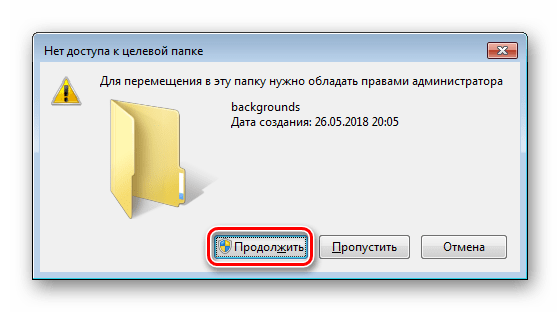
Подберите подходящую картинку с учетом советов выше, переименуйте ее в backgroundDefault и скопируйте в папку backgrounds. Может потребоваться разрешение от учетной записи администратора – нажмите «Продолжить».
Успешно скопированное изображение должно появиться в папке.
Чтобы увидеть измененный фон, перезагрузите ПК.
Теперь вы знаете два несложных метода изменения экрана приветствия в Виндовс 7. Используйте первый, если не уверены в своих силах и не хотите редактировать реестр и системную папку. Второй же удобен тем, кто не желает использовать либо не доверяет стороннему ПО, обладая достаточными навыками для установки фона вручную.
How to change the logon screen saver in Windows
IN THIS TASK
Summary
Important This section, method, or task contains steps that tell you how to modify the registry. However, serious problems might occur if you modify the registry incorrectly. Therefore, make sure that you follow these steps carefully. For added protection, back up the registry before you modify it. Then, you can restore the registry if a problem occurs. For more information about how to back up and restore the registry, click the following article number to view the article in the Microsoft Knowledge Base:
322756 How to back up and restore the registry in Windows This step-by-step article describes how to change the default logon screen saver. When you start Windows, a Begin Logon dialog box prompts you to press CTRL+ALT+DEL to log on. By default, if you do not press a key for 15 minutes, the Windows logon screen saver (Logon.scr) starts.
Click Start, click Run, type regedt32, and click OK.
Locate the following registry key:
In the Details pane, double-click the
SCRNSAVE.EXE string value item.
In the Value data box, type the path and name of the screen saver, and then click OK.
Important Make sure that you specify the path correctly to the screen saver. If the screen saver is located in %SystemRoot%\System32, the explicit path is not required.
You have now changed the logon screen saver.
You can also change the amount of time that elapses before the logon screen saver starts. The default is 900 seconds (15 minutes).
To change the length of time before the logon screen saver starts, follow these steps:
Click Start, click Run, type regedt32, and then click
OK.
Locate the following registry key:
In the Details pane, double-click the
ScreenSaveTimeOut string value item.
In the Value data box, type the number of seconds, and then click OK.
You have now changed the length of time that elapses before the logon screen saver starts.
To disable the logon screen saver, follow these steps:
Click Start, click Run, type regedt32, and then click
OK.
Locate the following registry key:
In the Details pane, double-click the
ScreenSaveActive string value item.
In the Value data box, replace the number 1 with the number 0, and then click OK.
You have now disabled the logon screen saver.
How To Change Windows 7 Logon Screen Easily [Without Using Hacks & Tools]
Last Updated on October 19, 2020 by admin 142 Comments
Are you bored of the default logon screen background image of Windows 7? You can easily change the logon screen background picture with a custom one without using third-party tools.
In previous version of Windows, user had no option but to use third-parry tools like Tune-Up-Utilities to change the logon screen background. But in Windows 7, the case is different. Windows 7 now supports custom logon screen background.
Replacing the old logon screen is as easy as changing desktop wallpaper (desktop background).
Change the Windows 7 logon screen background picture
Step 1: Download the registry file from here. Extract the file and double-click on the file to enable this feature (Alternative method: right-click, select Merge).
Step 2: Now, head over to the following folder:
C:\Windows\System32\oobe (“C” is your Windows Seven Installation drive)
Step 3: Here, create a new folder named Info. Again, create a new folder inside the Info folder and rename it as backgrounds.
Step 4: Copy your favorite image file to this folder and rename it as backgroundDefault. Note that the image must be in JPG format and the size should be less than 256 KB.
Step 5: You are done. Reboot your system and see the change.
The following files (sorted by width-to-height ratio) are supported in C:\Windows\System32\oobe\Info\Backgrounds folder:
* backgroundDefault.jpg
* background768×1280.jpg (0.6)
* background900×1440.jpg (0.625)
* background960×1280.jpg (0.75)
* background1024×1280.jpg (0.8)
* background1280×1024.jpg (1.25)
* background1024×768.jpg (1.33-)
* background1280×960.jpg (1.33-)
* background1600×1200.jpg (1.33-)
* background1440×900.jpg (1.6)
* background1920×1200.jpg (1.6)
* background1280×768.jpg (1.66-)
* background1360×768.jpg (1.770833-)
And users who prefer to use a third-party instead can check out free tools such as Windows 7 Logon Screen Changer and Logon Screen Rotator to set your own picture as logon screen background withe a mouse click.


