- How to change Boot order in Windows 10
- Change Boot Order in Windows 10
- Change Default Operating System In Boot Menu In Windows 10
- Change Default OS In Boot Menu Using Startup Options
- Change Default OS In Boot Menu Using Bcdedit
- Change Default OS In Boot Menu Using System Properties
- Change Default OS In Boot Menu With MSCONFIG
- About Sergey Tkachenko
- How to Change Windows 10 Boot Screen in an Easy Way [Partition Manager]
- Summary :
- Quick Navigation :
- Requirements for Changing Windows 10 Boot Screen
- How to Change Windows 10 Boot Screen
- ABOUT THE AUTHOR
- 4 Ways To Change The Boot Order In Windows 10
- Change the boot order in Windows 10 via System Configuration
- Change the boot order in Windows 10 via advanced options
- Another way to change the boot order in Windows 10
- Change the boot order in Windows 10 using EasyBCD
How to change Boot order in Windows 10
When your PC boots up, the first thing that loads up is the UEFI Firmware or the BIOS. It does a lot of things which also includes the option to which hardware to use to boot the Windows. If you want to boot from a USB drive or an external drive, you need to change the boot order on Windows 10. The usual default is set to the first hard drive connected to the PC.
Prior to Windows 10, it was possible only by rebooting your PC and then press a unique key like F2 or DEL on your keyboard to get into BIOS. In Windows 10, Microsoft has inbuilt a recovery system that allows you to do many things. One of the options is to boot into BIOS making it a lot easier in case you always miss pressing the key.
In this guide, we will show how you can boot into Windows 10 firmware settings (UEFI/BIOS), and change the boot order easily.
Change Boot Order in Windows 10
Windows 10 Recovery System allows you to get into your UEFI/BIOS settings from the OS and change your boot order. You can choose to boot from a USB drive or DVD Drive. This comes in handy during fresh installation or upgrading using an ISO.
Open Windows Settings > Update & Security > Recovery Advanced Startup and click on Restart now.
This feature lets you:
- Boot Windows from a device or disk (such as a USB drive or DVD).
- Change your PC’s Firmware Settings.
- Configure Windows Startup Settings.
- Restore Windows from a System Image.
When you click on Restart Now, it will reboot your PC, and offer you all these Advanced Options. Click, and wait till you get these options. Select Troubleshoot > Advanced Options. This screen offers further options which include System Restore, Startup repair, Go back to the previous version, Command Prompt, System Image Recovery, and UEFI Firmware Settings.
Select UEFI Firmware Settings, and it will let you restart your PC. Once the computer boots up, it will take you to the Firmware settings.
- Switch to Boot Tab.
- Here you will see Boot Priority which will list connected hard drive, CD/DVD ROM and USB drive if any.
- You can use the arrow keys or + & – on your keyboard to change the order.
- Save and Exit.
Now when you boot it will follow the sequence which you have set in your BIOS or UEFI Firmware Settings.
This comes in very handy when you want to boot from a DVD drive that has Windows 10 Installation files or if you have another Windows installed on a secondary hard disk.
Note: It seems if you have a Bluetooth keyboard, it will not work here. You will need a hard-wired keyboard to navigate and change the options. Also, the touch doesn’t work either.
Change Default Operating System In Boot Menu In Windows 10
With Windows 8, Microsoft made changes to the boot experience. The simple text-based boot loader is now disabled by default and in its place, there is a touch-friendly graphical user interface with icons and text. Windows 10 has this as well.
In a dual boot configuration, the modern boot loader shows a list of all installed operating systems. After the specified timeout, if the user has not touched the keyboard, the default operating system will be started. You might want to change the boot entry which is used by default. Let’s see how it should be done.
Change Default OS In Boot Menu Using Startup Options
To change the default operating system in the boot menu in Windows 10, do the following.
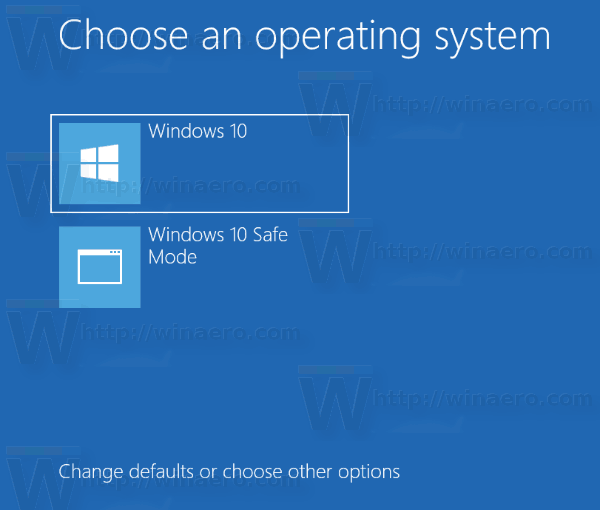
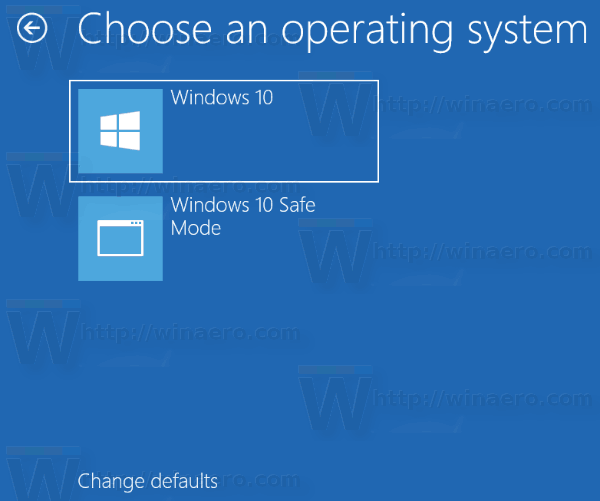
- In the boot loader menu, click the link Change defaults or choose other options at the bottom of the screen.

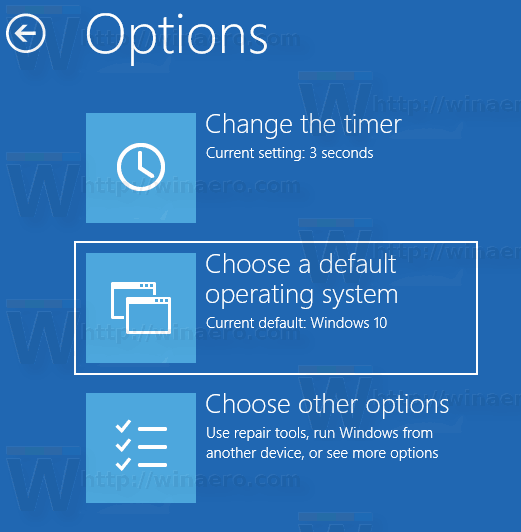
- On the next page, click Choose a default operating system.
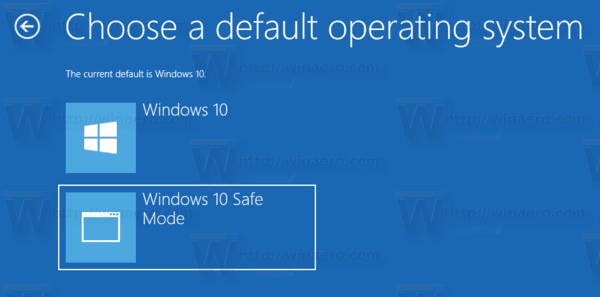
- On the next page, select the OS you want to set as the default boot entry.
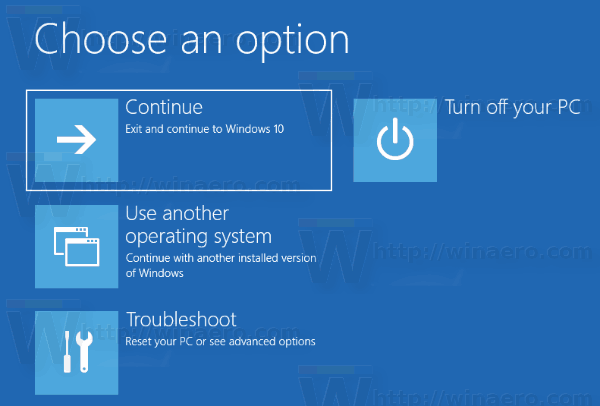
Tip: You can boot Windows 10 into Advanced Startup Options, and pick the item Use another operating system. See the following screenshots.
The same can be done with the built-in console utility «bcdedit».
Change Default OS In Boot Menu Using Bcdedit
Open an elevated command prompt and type the following command:
This will show the list of available boot entries, as follows.
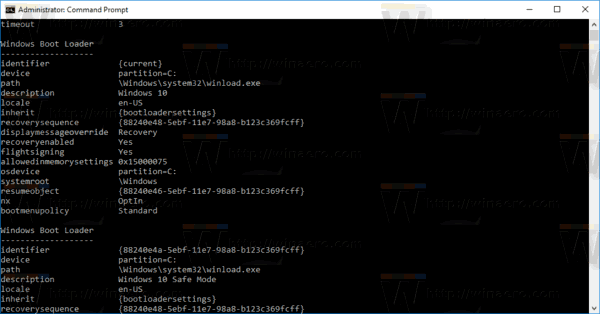
Copy the value of the identifier line and execute the next command.
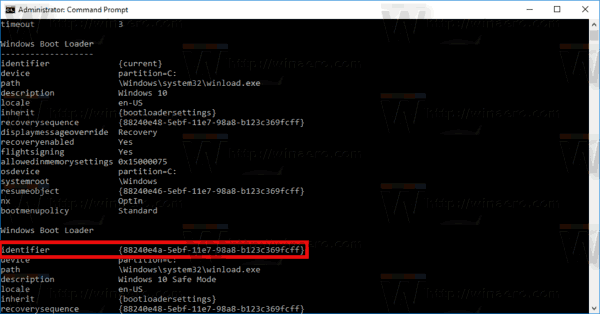
Replace the
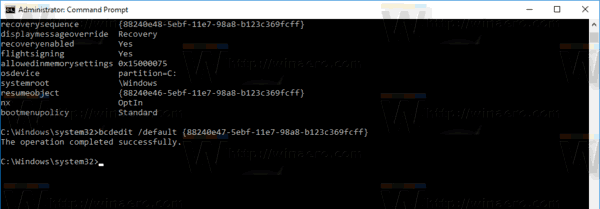
Change Default OS In Boot Menu Using System Properties
The classic System Properties applet can be used to change the default OS in the boot menu.
Press Win + R keys together on the keyboard. The Run dialog will appear on the screen. Type the following into the text box and press Enter:
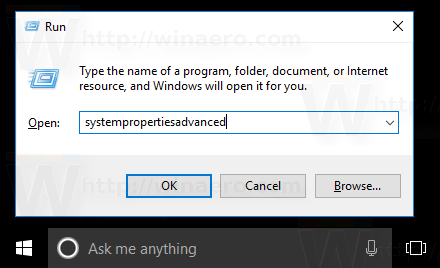
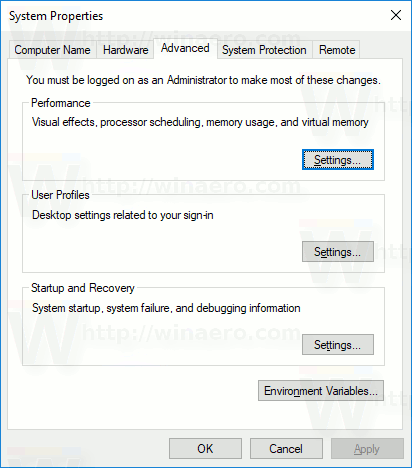
Advanced System Properties will open. Press the Settings button in the Startup and Recovery section on the Advanced tab.
 Select the desired item from the Default operating systems drop down list:
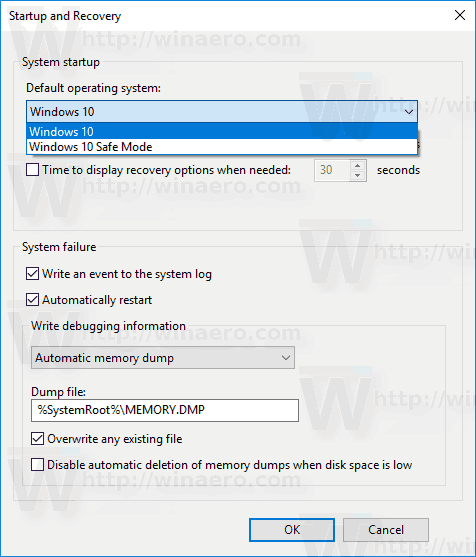
Change Default OS In Boot Menu With MSCONFIG
Finally, you can use the built-in msconfig tool to change the boot timeout. Press Win + R and type msconfig in the Run box.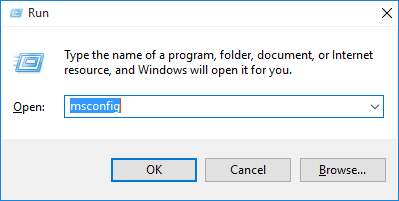
On the boot tab, select the desired entry in the list and click the button Set as default.
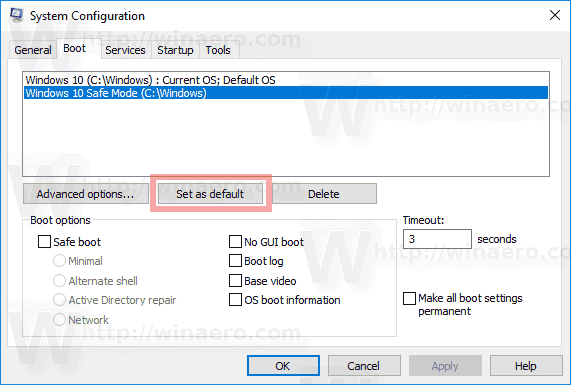
Click the Apply and OK buttons and you are done.
Winaero greatly relies on your support. You can help the site keep bringing you interesting and useful content and software by using these options:
Share this post
About Sergey Tkachenko
Sergey Tkachenko is a software developer from Russia who started Winaero back in 2011. On this blog, Sergey is writing about everything connected to Microsoft, Windows and popular software. Follow him on Telegram, Twitter, and YouTube.
How to Change Windows 10 Boot Screen in an Easy Way [Partition Manager]
By Linda | Follow | Last Updated March 02, 2021
Summary :
Are you bored with the default Windows 10 boot logo? Do you want to change Windows 10 boot screen for further UI customization? In this post, MiniTool Partition Wizard shows you how to do that step by step.
Quick Navigation :
Requirements for Changing Windows 10 Boot Screen
When you boot up a Windows 10 PC, it will show the default Windows 10 boot screen like the following picture:

Do you know you can change Windows 10 boot screen as your will. You don’t need to watch the same screen again and again.
The Windows 10 boot screen is composed of three parts: the Boot Logo (the Windows logo), the Boot Status Indicator (the circle), and the Boot Status Message. The boot status message occurs only when your PC run into problems. And its location is right under the circle.
You can suppress these Windows elements via the Windows Unbranded Boot feature (this feature requires Windows 10 Enterprise, Windows 10 Professional, or Windows 10 Education). After suppressing these elements, you will get a totally black boot screen.
Many people may don’t like this method. They just want to replace the startup logo with a custom logo. In this case, you should use another tool to modify the Boot Graphics Resource Table (BGRT).
Please note that you can modify the BGRT only on devices that use UEFI as the firmware interface. If your PC uses the BIOS firmware, you can’t modify the BGRT.
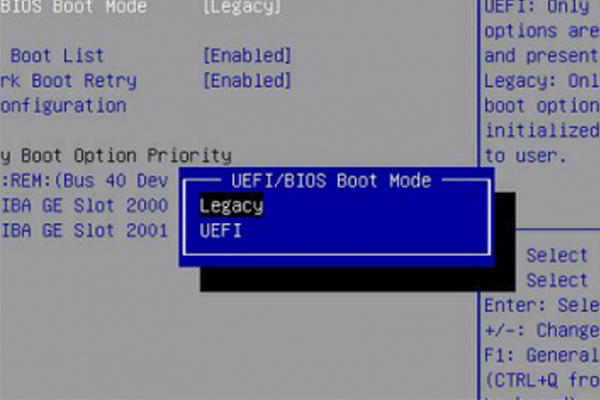
What are UEFI and BIOS? This article will tell you their differences via UEFI vs BIOS and show you how to convert MBR to GPT to support UEFI mode.
How to Change Windows 10 Boot Screen
To change Windows 10 boot logo, you can refer to the following steps:
- Back up important data in advance lest anything goes wrong and your data is lost.
- Boot into UEFI firmware to disable the Secure Boot
- Make an image no bigger than 300px x 300px. This image will be set as the boot logo later. Please note that this image should not be GIF or transparent. If you want to add a transparent logo, you should change the background color of your transparent image to black in advance.
- Download a third-party free and open-source tool called HackBGRT from GitHub platform, since Windows doesn’t offer options to change Windows boot logo.
- Extract the folder and then run the «exe» program as an administrator. This will launch the application’s command-line tool.
- Press the «i» key on your keyboard and this will open the the program’s config file in the Notepad.
- Close the Notepad by clicking on the “X” icon on the top-right corner. Then, the HackBGRT will open the Paint application with its own default boot logo.
- Click on the “Paste” drop-down button and select the “Paste from” option.
- Select the «File >Save» option to save the file.
Through the above steps, you have replaced the Windows 10 boot logo and then you can close the software.
If you want to change Windows 10 boot screen back to the original one later, you can refer to the following steps:
- Open the HackBGRT folder, right-click on the “exe” file and select the “Run as administrator” option.
- Press «R» key to completely remove HackBGRT and restore the original boot logo, or press «D» key to just disable this software and restore the original boot logo.
- Reboot the system and you will see the original Windows boot logo.
ABOUT THE AUTHOR

Position: Columnist
Author Linda has been working as an editor at MiniTool for 1 year. As a fresh man in IT field, she is curious about computer knowledge and learns it crazily. Maybe due to this point, her articles are simple and easy to understand. Even people who do not understand computer can gain something.
By the way, her special focuses are data recovery, partition management, disk clone, and OS migration.
4 Ways To Change The Boot Order In Windows 10
Last Updated on May 29, 2020 by admin 2 Comments
The boot menu shows up every time you turn on a PC where two or more Windows operating systems are installed. For instance, if you have installed Windows 10 and Windows 7 in dual boot setup, you will get the boot menu where you can either select the non-default operating system or let the boot menu to automatically boot into the default operating system.
By default settings, the most recently installed or most recently upgraded operating system is the default operating system in the boot menu.

However, at times, after installing or upgrading an operating system, you might want to change the boot order to set or change the default operating system.
In Windows 10, if you need to change the default boot order, you can do so without the help of third-party tools.
The following are the four ways out there to change the boot order in Windows 10.
Method 1 of 4
Change the boot order in Windows 10 via System Configuration
Step 1: Type msconfig in the Start/taskbar search field and then press the Enter key to open the System Configuration dialog.
Step 2: Switch to the Boot tab. Select the operating system that you want to set as the default and then click Set as default button. Click the Apply button.

Here, you can also change the default 30 seconds waiting period to the time of your choice.
Method 2 of 4
Change the boot order in Windows 10 via advanced options
Step 1: Close all running programs. Restart your PC.
Step 2: When you see the boot menu (Choose an operating system) screen, click the Change defaults or choose others.

Step 3: Next, you will get the Options screen. Here, click Choose a default operating system tile.

Step 4: On the Choose a default operating system screen, you can see the default operating system. The entry at the top of the list is usually the default operating system.

To change the default operating system, simply click on the tile that you want to set as the default operating system in the boot menu. For instance, I am clicking on Windows 10 entry to make it the default operating system.
That’s all! You will not see any confirmation message.
Instead, you will be taken back to the Options screen where you can click Change the timer tile if you wish to change the default 30 seconds of the boot menu to 5, 10, or 15 seconds.

To exit, click the Back icon. You will now get Choose an operating system screen. Here, the default operating system will appear at the top of the list. Click on an entry to boot into it.
Method 3 of 4
Another way to change the boot order in Windows 10
Step 1: Open the Settings app. Navigate to Update & security > Recovery.
Step 2: Click the Restart now button in the Advanced startup section.

Step 3: Your PC will restart, and you will get Choose an option screen after the restart. Click Use another operating system tile.

Step 4: On the Choose an operating system screen, click Change defaults.

Step 5: Next, you will see the Options screen. Here, click Choose a default operating system tile.

Step 6: Finally, click on the OS entry that you want to set as default to make it the default.

You will now see the Options screen. Click the Back icon to go back to Choose an operating system screen. Here, you can see the default operating system. The default one appears at the top of the list.
Click on an entry to boot into it.
Method 4 of 4
Change the boot order in Windows 10 using EasyBCD
EasyBCD is one of the must-have tools for dual-boot PC users. With EasyBCD, you can easily change not just the default boot order but also add a new operating system to the boot menu.
Here is how to use the EasyBCD to change the boot order in Windows 10.
Step 1: Download EasyBCD and install the same. The free version is for personal and non-commercial use only.
Step 2: Run, EasyBCD. Click the Edit Boot Menu button on the left pane.
Step 3: In the Modify Menu Entries section, select an entry and then click the Up or Down icons to move it up or down.

To change the default operating system, simply click the checkbox next to it.
Here you can also change the countdown time from the default 30 seconds to something else, or you can make the boot menu wait until the user selects an entry.
Finally, click the Save settings button.


