- Change the default text color (font color) in Word
- Практическое руководство. Изменение шрифтов и цветов в редакторе в Visual Studio How to: Change fonts and colors for the editor in Visual Studio
- Изменение начертания, размера и цвета шрифта по умолчанию Change the default font face, size, and colors
- Следующие шаги Next steps
- How to: Change fonts, colors, and themes in Visual Studio
- Change the color theme
- Change fonts and text size
- To change the font and text size in the IDE
- To change the font and text size in the editor
- Accessibility options
- Use Windows high contrast
- Use Visual Studio extra contrast
- Next steps
- Как изменить шрифт в Windows 10: 3 способа
- Содержание
- Изменение шрифта в Windows 10 с помощью редактора реестра
- Изменение шрифта в Windows 10 с помощью программы Winaero Tweaker
- Изменение шрифта в Windows 10 с помощью программы Advanced System Font Changer
- Восстановление до стандартных шрифтов
Change the default text color (font color) in Word
Open the template or a document based on the template whose default settings you want to change.
Go to Home and select the Font dialog launcher  .
.
Select the arrow next to Font color, and then choose a color.
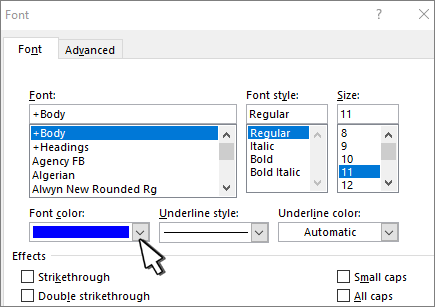
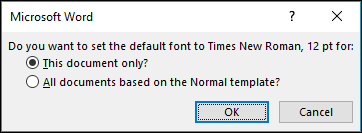
Select Set As Default and then select one of the following:
This document only?
All document based on the Normal.dotm template?
Open the template or a document based on the template whose default settings you want to change.
Go to Format > Font > Font.
You can also press and hold  + D to open the Font dialog box.
Select the arrow next to Font color, and then choose a color.
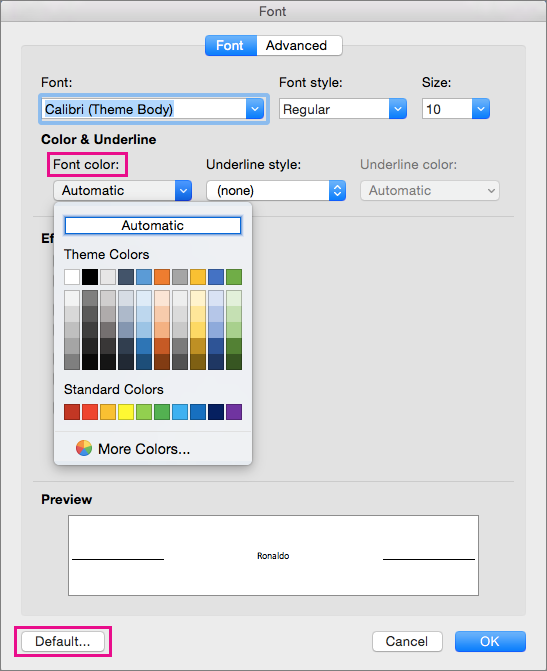
Select Default and then select Yes to apply the change to all new documents based on the template.
In Word for the web you can change the font color in a particular document, but you can’t set it as default.
Практическое руководство. Изменение шрифтов и цветов в редакторе в Visual Studio How to: Change fonts and colors for the editor in Visual Studio
Вы можете изменить стандартное начертание, размер шрифта, а также цвет переднего плана и фона для различных текстовых отображаемых элементов в редакторе кода. You can change the default font face, adjust the font size, and change the foreground and background colors for various text Display items in the code editor. При изменении параметров шрифта учитывайте следующее: When you change font settings, keep the following information in mind:
Значения для параметров Шрифт и Размер применяются глобально для всех текстовых элементов во всех редакторах Visual Studio. The settings for Font and Size are global for all text elements in all Visual Studio editors.
Имена моноширинных шрифтов выделены полужирным шрифтом. The names of fixed width fonts are listed in bold.
Параметры Основной цвет элемента, Фоновый цвет элемента и Полужирный можно задать для каждого типа текстового элемента. Item foreground, Item background, and Bold options can be set for each type of text element. Например, если изменить цвета и выбрать значение Полужирный для параметров Комментарий и Закладки, другие типы текстовых элементов останутся неизменными. For example, if you change colors and select Bold for Comment and Bookmarks, other types of text elements will be unaffected.
Чтобы узнать, как настроить шрифты и цвета для интегрированной среды разработки, а не только для редактора кода, см. статью Практическое руководство. Изменение шрифтов и цветов в Visual Studio . To learn how to customize the fonts and colors for the IDE and not just for the code editor, see the How to: Change fonts and colors in Visual Studio page.
Изменение начертания, размера и цвета шрифта по умолчанию Change the default font face, size, and colors
В меню Сервис выберите пункт Параметры. Select Options from the Tools menu. В разделе Окружение выберите Шрифты и цвета. Under Environment, select Fonts and Colors.
В поле Параметры для выберите Текстовый редактор. In Show settings for, select Text Editor.
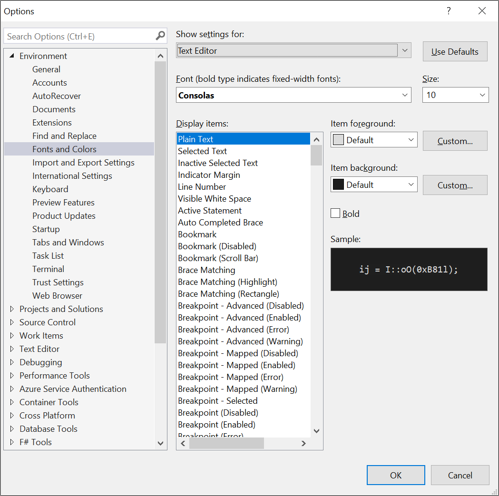
Измените параметры Шрифт и Размер, чтобы настроить начертание и размер для всех текстовых элементов во всех редакторах. Modify the Font and Size options to change the font face and size for all text elements in all editors.
Выберите соответствующий элемент в области Отображаемые элементы и затем измените параметры Основной цвет элемента и Фоновый цвет элемента. Select the appropriate item in Display items, and then modify the Item foreground and Item background options.
Щелкните По умолчанию для сброса параметров до значений по умолчанию. Click Use Defaults to reset to the default settings.
Нажмите кнопку ОК. Click OK.
Следующие шаги Next steps
См. сведения об изменениях шрифта и цвета, которые можно внести в интегрированную среду разработки с помощью диалогового окна Параметры, в статье Страница «Шрифты и цвета», папка «Среда», диалоговое окно «Параметры». To learn more about the font and color changes you can make to the IDE by using the Options dialog box, see the Fonts and Colors, Environment, Options Dialog Box page.
How to: Change fonts, colors, and themes in Visual Studio
You can change the fonts and the colors in Visual Studio in many ways. For example, you can change the default blue color theme to the dark theme (also referred to as «dark mode»). You can also select a extra-contrast theme if that best suits your needs. And, you can change the default font and text size in both the IDE and the code editor.
Change the color theme
Here’s how to change the color theme of the IDE frame and the tool windows in Visual Studio.
On the menu bar, choose Tools > Options.
In the options list, choose Environment > General.
In the Color theme list, choose either the default Blue theme, the Light theme, the Dark theme, or the Blue (Extra Contrast) theme.

When you change a color theme, text in the IDE reverts to the default or previously customized fonts and sizes for that theme.
You can create and edit your own Visual Studio themes by installing the Color Theme Editor for Visual Studio 2017.
You can create and edit your own Visual Studio themes by installing the Visual Studio Color Theme Designer.
Change fonts and text size
You can change the font and text size for all the IDE frame and tool windows, or for only certain windows or text elements. You can also change the font and text size in the editor, too.
To change the font and text size in the IDE
On the menu bar, choose Tools > Options.
In the options list, choose Environment > Fonts and Colors.
In the Show settings for list, choose Environment.

If you want to change the font for tool windows only, in the Show settings for list, choose All Text Tool Windows.
Modify the Font and Size options to change the font and text size for the IDE.
Select the appropriate item in Display items, and then modify the Item foreground and Item background options.
To change the font and text size in the editor
On the menu bar, choose Tools > Options.
In the options list, choose Environment > Fonts and Colors.
In Show settings for list, select Text Editor.

Modify the Font and Size options to change the font and text size for the editor.
Select the appropriate item in Display items, and then modify the Item foreground and Item background options.
Accessibility options
There are color theme options for you if you experience low vision. You can use a high-contrast option for all the apps and UI on a computer, or an extra contrast option for Visual Studio only.
Use Windows high contrast
Use either of the following procedures to toggle the Windows high contrast option:
In Windows or in any Microsoft application, press the Left Alt+Left Shift+PrtScn keys.
In Windows, choose Start > Settings > Ease of Access > High contrast.
The Windows high contrast setting affects all applications and UI on the computer.
Use Visual Studio extra contrast
Use the following procedures to toggle the Visual Studio extra contrast option:
On the menu bar in Visual Studio, choose Tools > Options, and then, in the options list, choose Environment > General.
In the Color theme drop-down list, choose the Blue (Extra Contrast) theme, and then choose OK.
To learn more about other Visual Studio accessibility options available to you, see the Accessibility features of Visual Studio page.
If there is an accessibility option for colors or fonts that you think might be useful but isn’t currently available in Visual Studio, please let us know by selecting Suggest a feature in the Visual Studio Developer Community. For more information about this forum and how it works, see the Suggest a feature page.
Next steps
To learn more details about all the user interface (UI) elements for which you can change font and color schemes, see the Fonts and Colors, Environment, Options Dialog Box page.
Как изменить шрифт в Windows 10: 3 способа
Стандартно в операционной системе Windows 10 для всех элементов используется шрифт Segoe UI. К сожалению, изменить его в настройках параметров ОС нельзя — такой возможности просто нет. Для изменения системного шрифта придётся прибегнуть к работе с реестром или запуску сторонних приложений, созданных специально для этих целей. Эта статья поможет изменить шрифт на компьютере с Windows 10 тремя способами разной степени сложности, плюс имеется отдельный пункт о том, как вернуть шрифт по умолчанию.
Содержание
Изменение шрифта в Windows 10 с помощью редактора реестра
Заменить стандартный шрифт в операционной системе можно при помощи редактора реестра — преимущество данного способа в том, что пользователю не нужно загружать дополнительный софт.
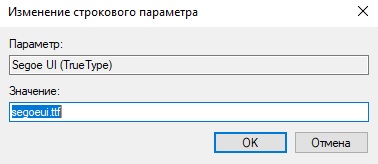
Перед тем, как приступить к процессу замены, пользователю нужно найти название нужного ему шрифта:
- откройте проводник;
- введите в адресную строку C:\Windows\Fonts;
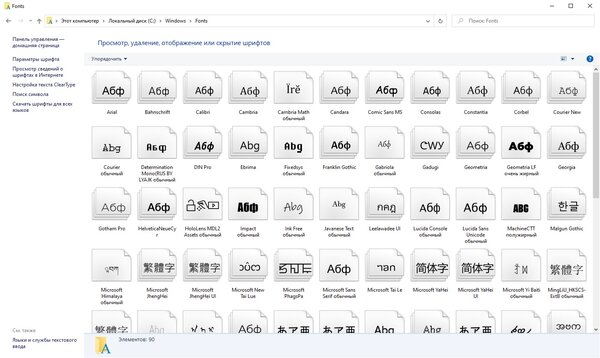
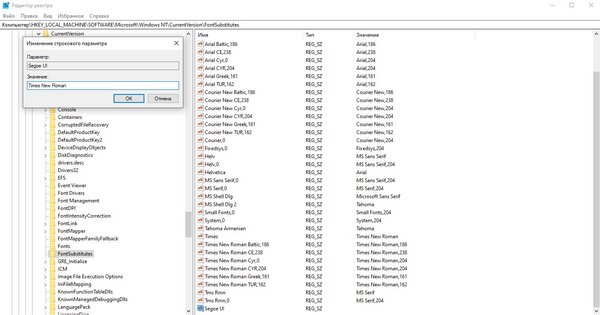
Теперь можно приступать к процессу замены стандартного системного шрифта.
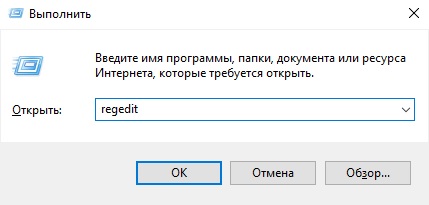
- нажмите клавиши Windows + R на клавиатуре;
- в появившемся окне введите команду regedit, после чего нажмите на кнопку «ОК»;
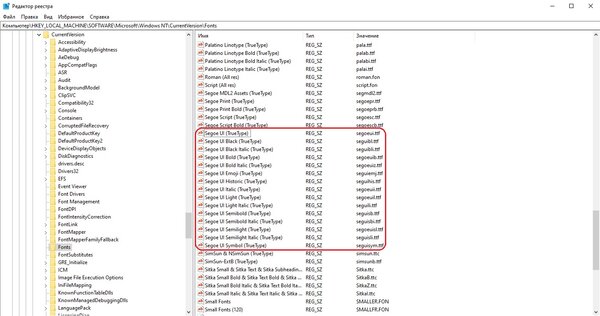
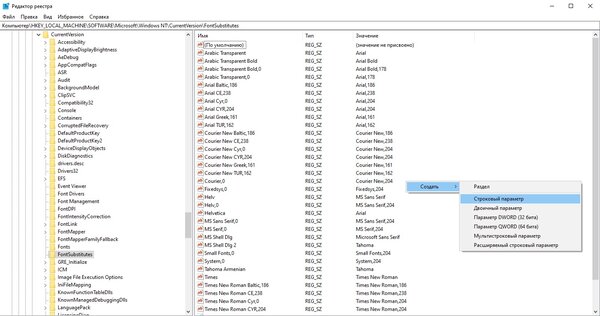
Важное уточнение: шрифт в меню «Пуск» и «Параметры» не меняется, он останется стандартным.
Изменение шрифта в Windows 10 с помощью программы Winaero Tweaker
Если пользователь по каким-то причинам не желает работать с редактором реестра, можно воспользоваться специальной полностью бесплатной программой Winaero Tweaker, которая позволяет настраивать внешний вид операционной системы Windows 10. Важно уточнить, что если предыдущий способ заменял все системные шрифты ОС на один выбранный вариант, то настройка при помощи ПО более гибкая.
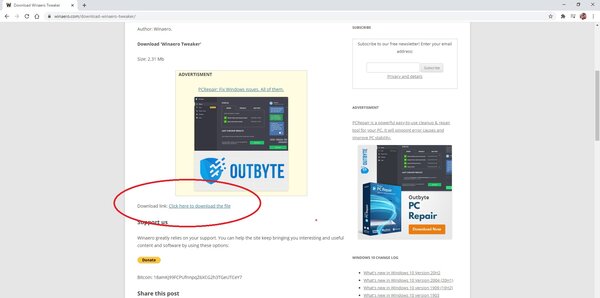
- перейдите на официальный сайт Winaero Tweaker;
- пролистайте вниз до ссылки Download Winaero Tweaker, кликните по ней;


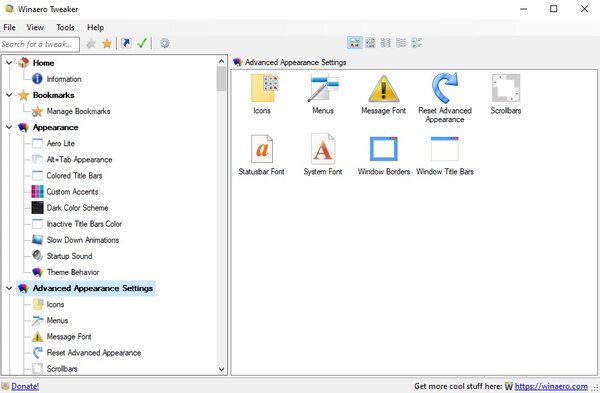
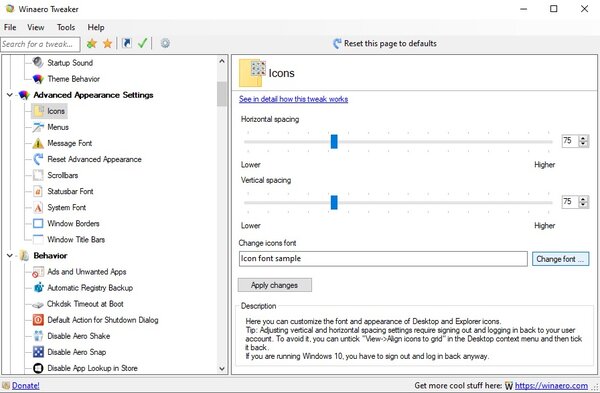
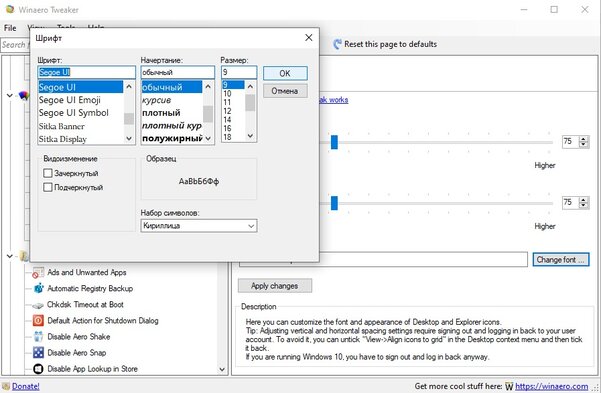
Пункт меню «Advanced Appearance Settings» позволяет настраивать шрифты отдельно для определённых элементов системы. То есть, пользователь может выбрать один шрифт для иконок, другой — для заголовков окон, а третий в качестве системного шрифта.
Список доступных для настройки элементов:
- Icons — подписи иконок;
- Menus — меню программ;
- Message Font — шрифт для сообщений программ;
- Statusbar Font — шрифт для строки состояния;
- System Font — системный шрифт (заменяет Segoe UI на любой другой);
- Window Title Bars — шрифт для заголовка окон.
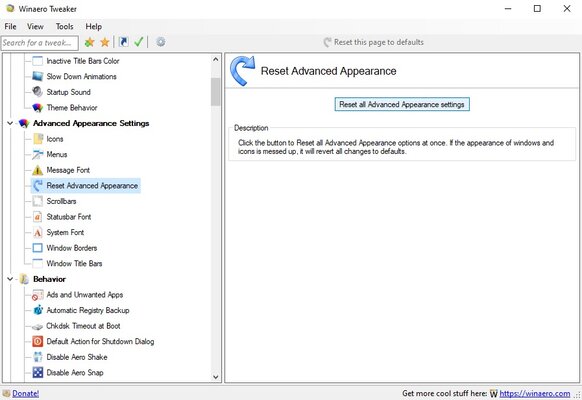
В случае, если пользователь захочет отказаться от изменённых шрифтов, нужно лишь открыть меню «Advanced Appearance Settings», кликнуть по пункту «Reset Advanced Appearance» и в окне справа нажать на единственную кнопку «Reset Advanced Appearance settings». После этого нужно перезагрузить компьютер.
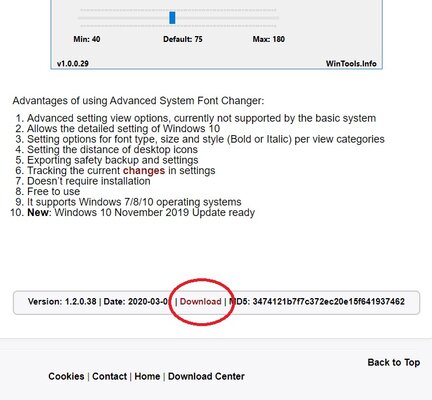
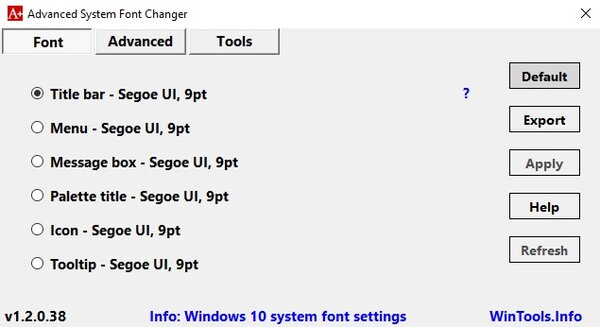
Изменение шрифта в Windows 10 с помощью программы Advanced System Font Changer
Если предыдущее приложение обладает целой россыпью функций для кастомизации операционной системы Windows 10, то программа Advanced System Font Changer создана специально для изменения системных шрифтов. Соответственно, интерфейс и сам процесс работы в данном случае немного проще.
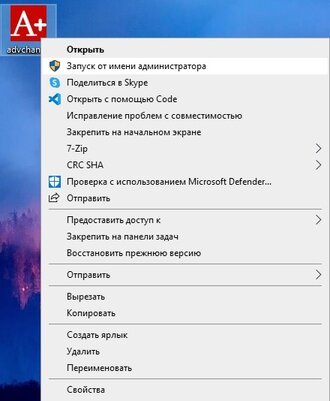
- скачайте программу Advanced System Font Changer с официального сайта разработчика;
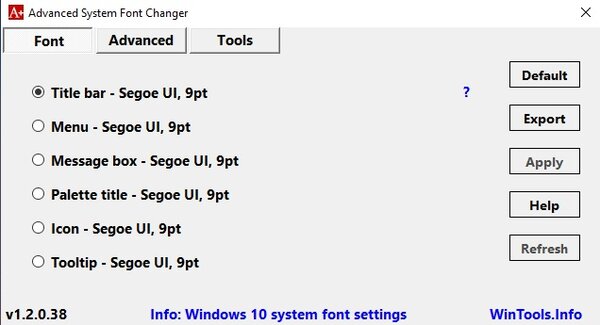
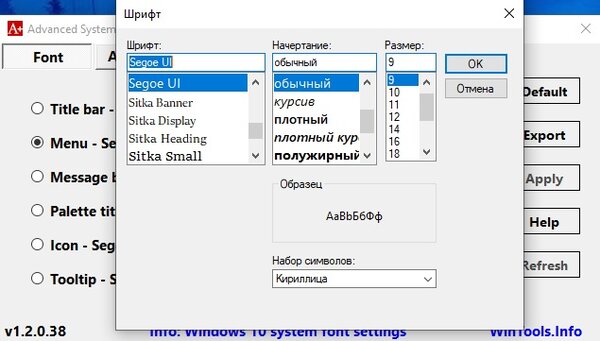
Список доступных для настройки элементов:
- Title bar — шрифт для заголовка окон;
- Menu — меню программ;
- Message box — шрифт для сообщений программ;
- Palette title — шрифт для заголовков панелей в окнах;
- Icon — подписи иконок;
- Tooltip — шрифт для строки состояния.
В случае, если пользователь захочет отказаться от изменённых шрифтов, ему нужно нажать на кнопку «Default» в правом верхнем углу приложения.
Восстановление до стандартных шрифтов
В случае, если после проделанных манипуляций пользователь захочет восстановить стандартный шрифт, нужно будет выполнить лишь несколько простых команд:
- откройте проводник;
- введите в адресную строку C:\Windows\Fonts;
- слева в меню кликните по пункту «Параметры шрифтов»;


