- Настройка внешнего вида меню «Пуск» в Windows 10
- Меняем внешний вид меню «Пуск» в Windows 10
- Способ 1: StartIsBack++
- Способ 2: Start Menu X
- Способ 3: Classic Shell
- Способ 4: Стандартные средства Windows 10
- Quick guide to change Windows 10 Start Menu back to classic
- How do I change the Windows Start menu to classic?
- How do I switch back to the classic view in Windows 10?
- Customize the Start Menu in Windows 10
- Enable full-screen mode
- Change the size of the start menu
- Pin an application to the Start menu
- Unpin an application from the Start menu
- Change application tile sizes
- Add folders to the Start menu
- Move tiles in the Start menu
- Rename groups of tiles
- Change the Start menu color
- Turn off Live Tiles
- Windows 10 Start Menu: Change Design, Disable Bing Search and More
- Ashish Mundhra
- The Windows 7 Look-alike Start Menu
- Get the Windows 8 type Start Screen
- Removing Bing Search Results
- Changing the Look and Feel
- Read Next
- How to Change the Search Engine in Microsoft Edge Chromium
- How to Fix MSN Weather Not Working in Windows 10 Error
- How to Change Backgrounds in Microsoft Teams (And Use Cool Backgrounds)
- 7 Best Ways to Fix Kindle for PC Desktop App Won’t Open on Windows
- What Is Microsoft Power Automate Desktop and Why Do You Need It
- 6 Best Ways to Fix Action Center Greyed Out on Windows 10
- 8 Best Ways to Fix Google Chrome Security Certification Error
- How to Use Paint 3D to Edit Photos
- Did You Know
Настройка внешнего вида меню «Пуск» в Windows 10
«Начальный экран» в Виндовс 10 одолжил из прошлых версий ОС некоторые элементы. С Windows 7 был взят обычный список, а с Windows 8 – живые плитки. Пользователь может легко изменить внешний вид меню «Пуск» встроенными средствами или специальными программами.
Меняем внешний вид меню «Пуск» в Windows 10
В данной статье будут рассмотрены некоторые приложения, которые меняют внешний вид «Начального экрана», а также будет описано то, как сделать это без лишнего софта.
Способ 1: StartIsBack++
StartIsBack++ — платная программа, которая имеет множество инструментов настройки. Открытие «Рабочего стола» происходит без Metro интерфейса. Перед установкой желательно создать «Точку восстановления».
- Закройте все программы, сохраните все файлы и установите StartIsBack++.
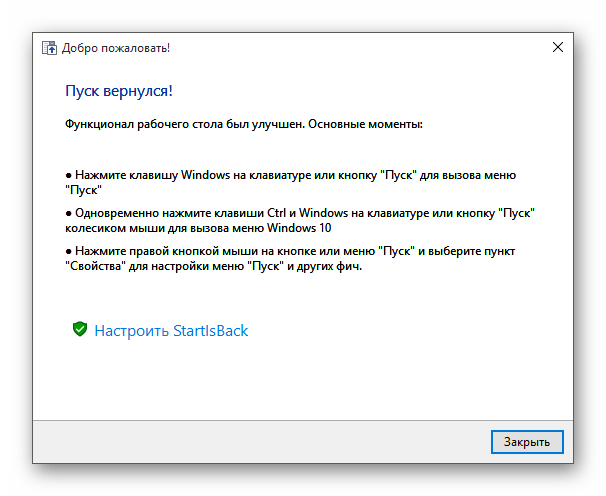
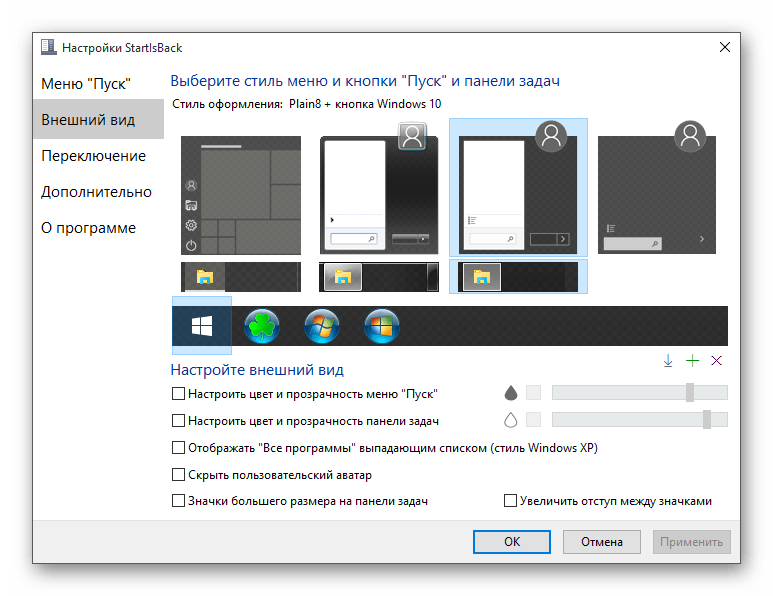
- Через пару минут установится новый интерфейс и вам будет показана краткая инструкция. Перейдите к пункту «Настроить StartIsBack» для изменения параметров внешнего вида.
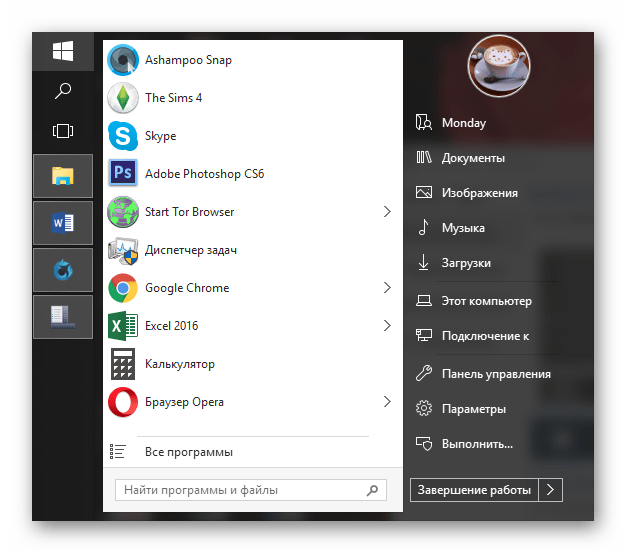
По умолчанию меню и кнопка будут выглядеть так.
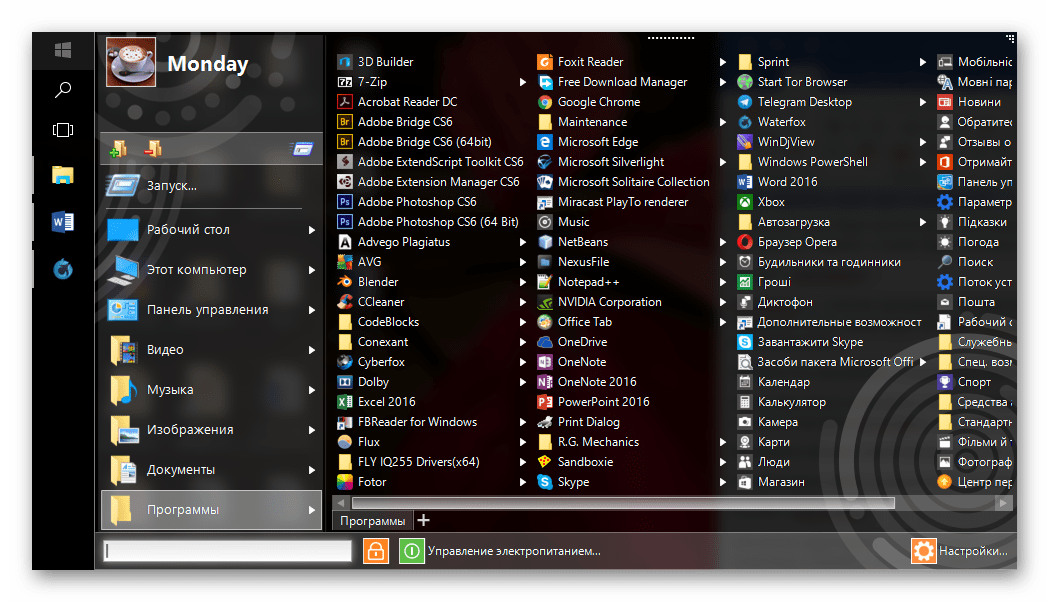
Способ 2: Start Menu X
Программа Start Menu X позиционирует себя как куда более удобное и усовершенствованное меню. Существует платная и бесплатная версии софта. Далее будет рассмотрена Start Menu X PRO.
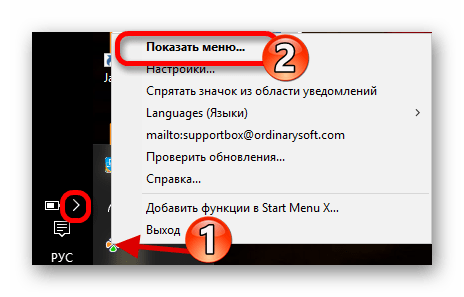
- Установите приложение. В трее появится его значок. Чтобы активировать меню, нажмите на него правой кнопкой мыши и выберите «Показать меню…».

Способ 3: Classic Shell
Classic Shell, как и предыдущие программы, меняет внешний вид меню «Пуск». Состоит из трёх компонентов: Classic Start Menu (для меню «Пуск»), Classic Explorer (изменяет панель инструментов «Проводника»), Classic IE (также меняет панель инструментов, но для стандартного браузера Internet Explorer. Ещё одно преимущество Classic Shell состоит в том, что софт полностью бесплатен.
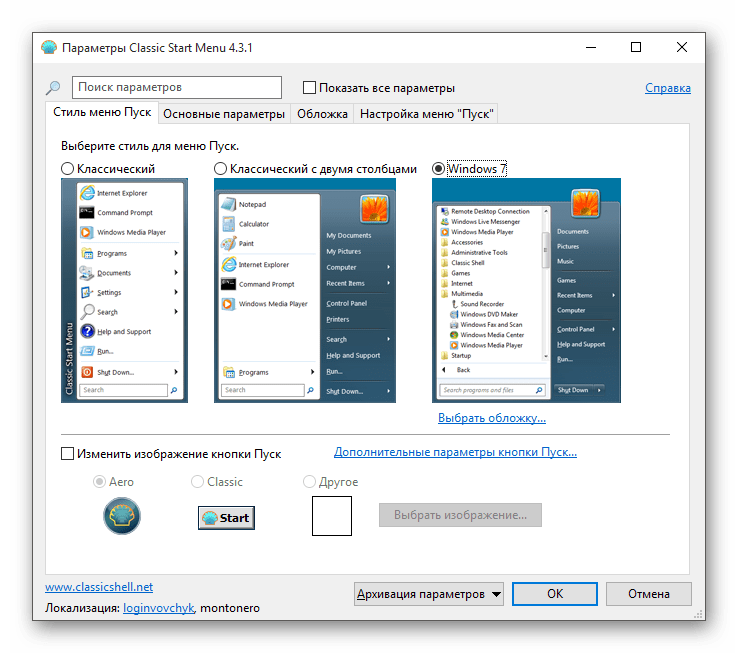
- После установки появится окно, в котором можно всё настроить.
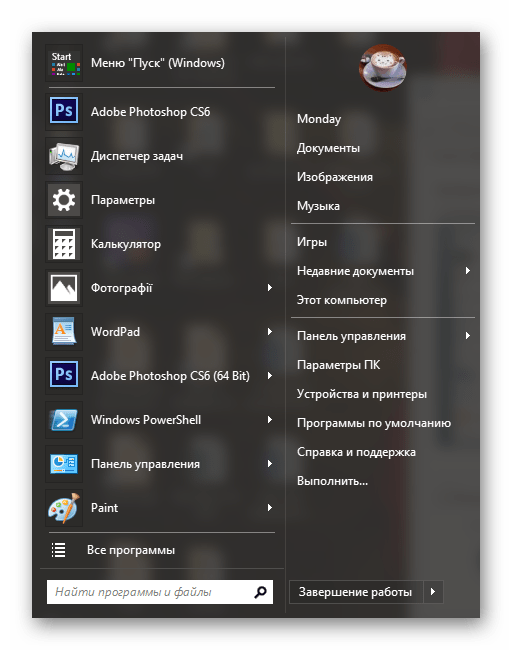
По умолчанию меню имеет такой вид.
Способ 4: Стандартные средства Windows 10
Разработчики предусмотрели встроенные инструменты для изменения внешнего вида «Начального экрана».
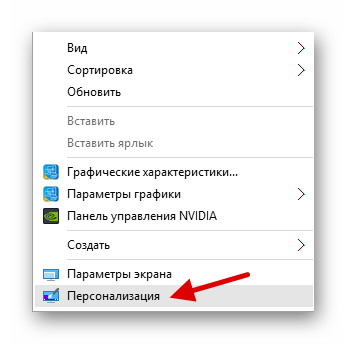
- Вызовите контекстное меню на «Рабочем столе» и кликните на «Персонализация».
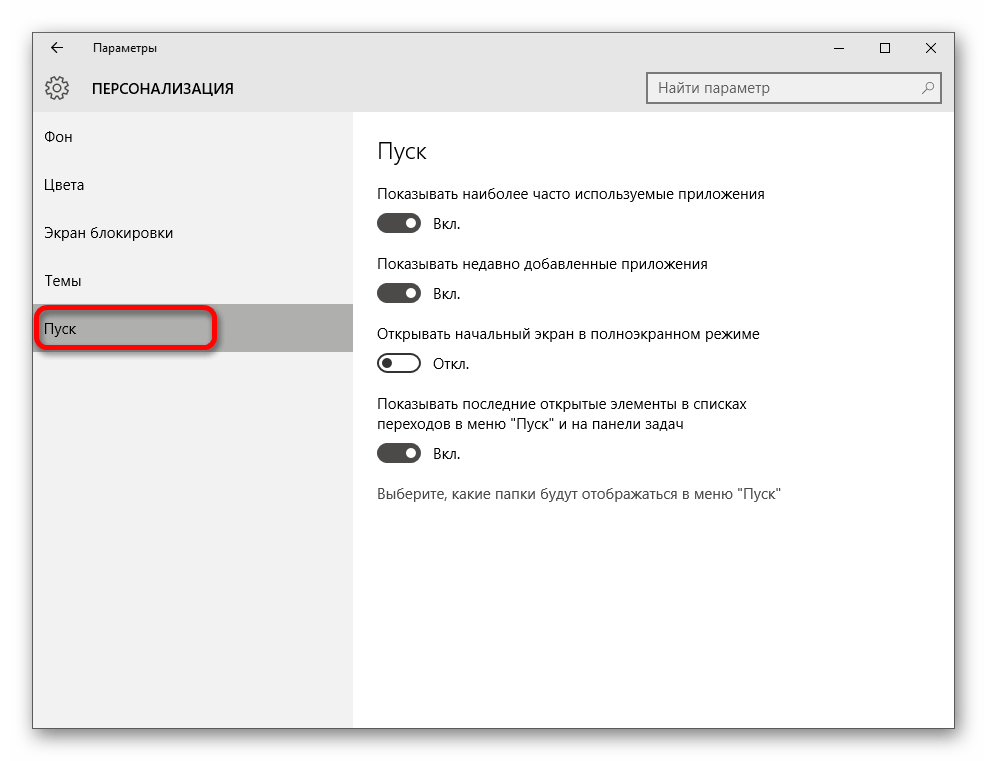
Перейдите во вкладку «Пуск». Здесь есть различные параметры настройки отображения программ, папок и т.д.
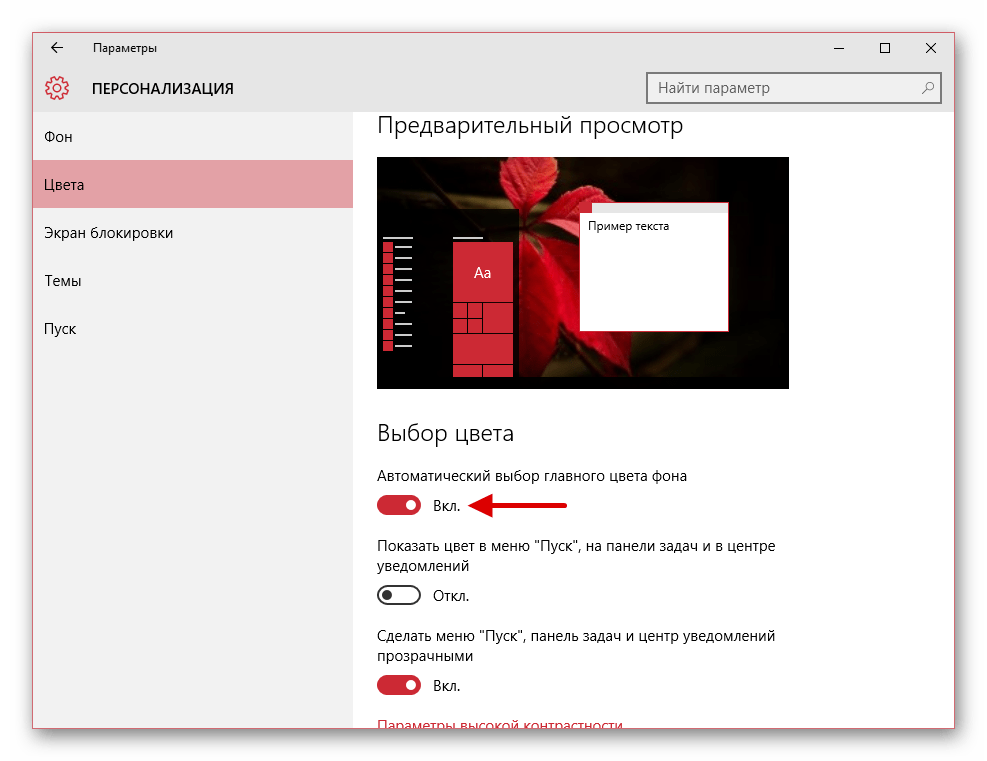
Во вкладке «Цвета» есть параметры изменения цвета. Переведите ползунок «Показать цвет в меню «Пуск»…» в активное состояние.
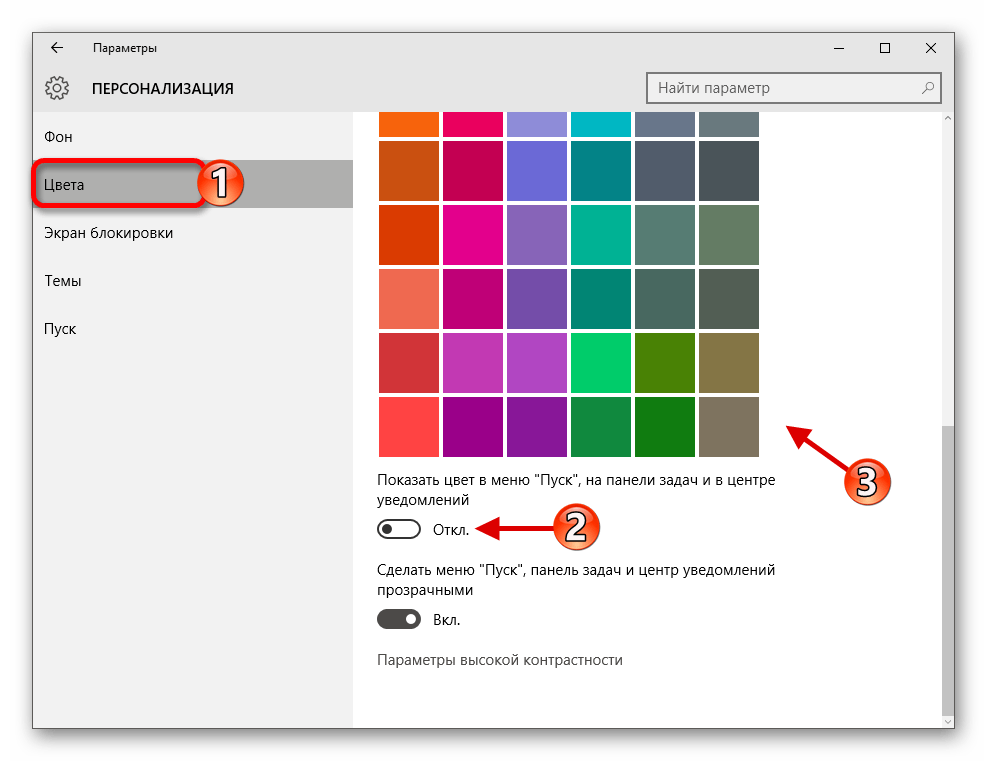
Если вы включите «Автоматический выбор…», то система сама подберёт расцветку. Здесь также есть настройка прозрачности и высокой контрастности.
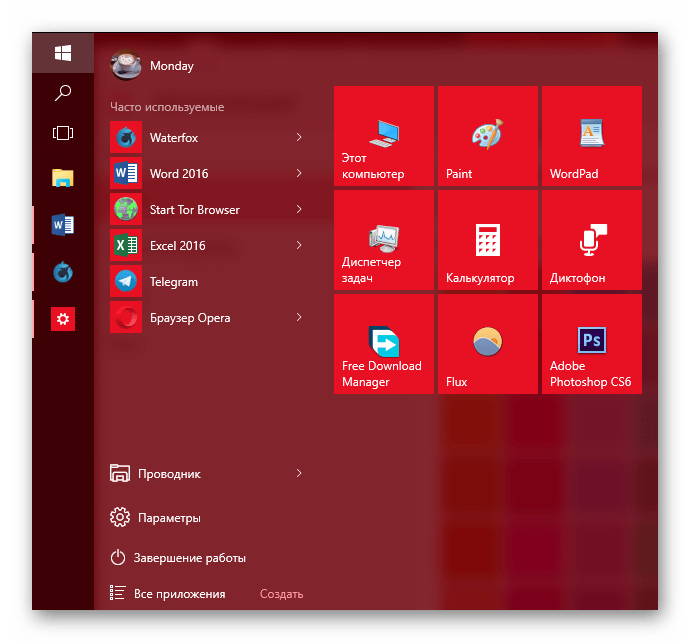
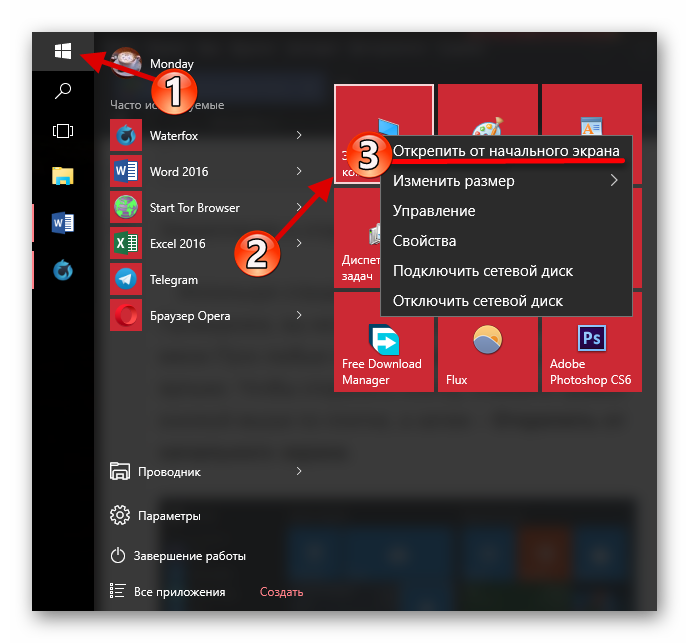
В самом меню есть возможность откреплять или закреплять нужные программы. Просто вызовите контекстное меню на нужном элементе.
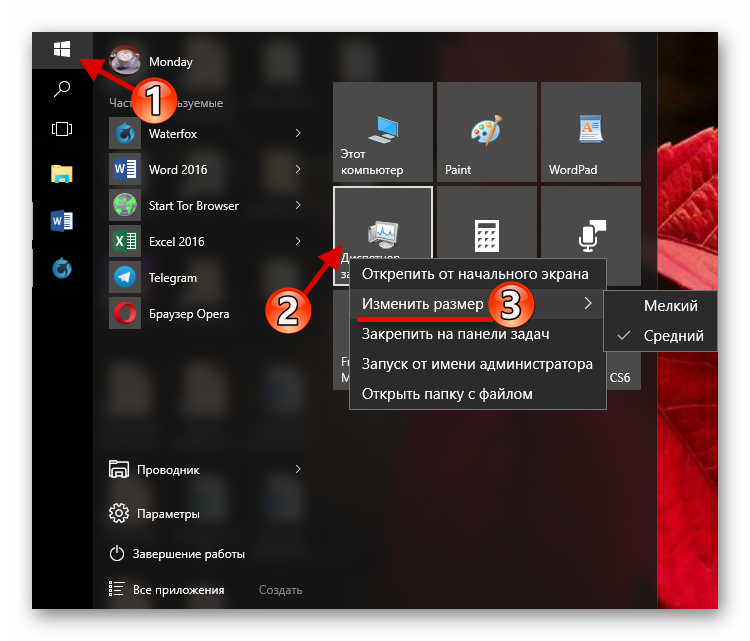
Для изменения размера плитки нужно просто кликнуть по ней правой кнопкой мыши и навести на «Изменить размер».
Здесь были описаны основные методы изменения внешнего вида меню «Пуск» в Windows 10.
Quick guide to change Windows 10 Start Menu back to classic

- The Start menu is where most work begins on your Windows computer.
- The Windows 10 Start menu is a massive improvement from that of Windows 8 /8.1, but many users still prefer the classic Start menu .
- For more easy-to-follow DIY guides on different tech elements, visit our How-To section.
- Windows 10 comes packed with amazing features . Improve your knowledge of the operating system with our Windows 10 articles.
- Download Restoro PC Repair Tool that comes with Patented Technologies (patent available here).
- Click Start Scan to find Windows issues that could be causing PC problems.
- Click Repair All to fix issues affecting your computer’s security and performance
- Restoro has been downloaded by 0 readers this month.
It’s understandable why you may be looking to change Windows 10 start menu to classic. Some people consider the Windows 7 and XP Start menu to be more useful than that of Windows 10.
When Windows 8 dropped, there was an uproar from users regarding the fullscreen Start menu. Despite Microsoft responding by modifying the Start menu in Windows 8.1 and later, fans took things into their hands and devised ways to get back the classic Start menu.
How do I change the Windows Start menu to classic?
How do I switch back to the classic view in Windows 10?
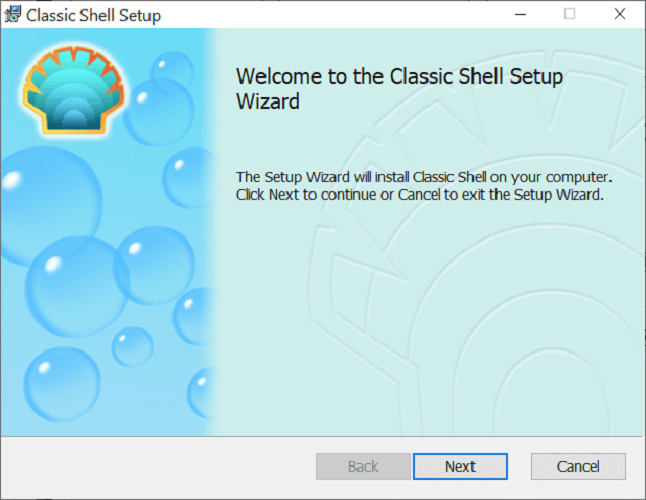
- Download and install Classic Shell.

- Click on the Start button and search for classic shell.
- Open the topmost result of your search.
- Select the Start menu view between Classic, Classic with two columns and Windows 7 style.
- Hit the OK button.
- Back up the selected styles as XML.
- Apply the settings.
Customize the Start Menu in Windows 10
Enable full-screen mode
- Click on the Start.
- Select the Settings icon.
- Select Personalization.
- Hit the Start from the left sidebar.
- Click the Switch button below the Use Start Full-Screen text.
Change the size of the start menu
- Click on the Start button.
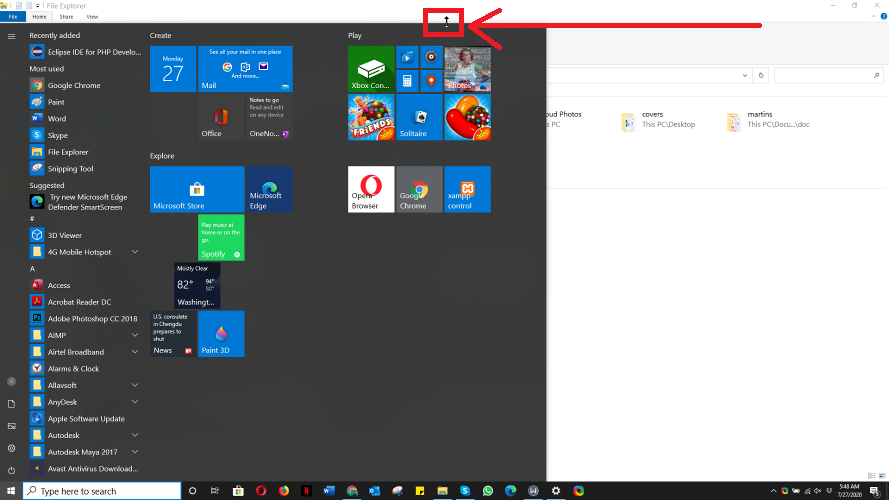
- Take your cursor to the edge of the Start Menu, so it turns to a double-sided arrow.
- Click on it and drag it up or down to resize.
- Release your cursor when you’re done.
Pin an application to the Start menu
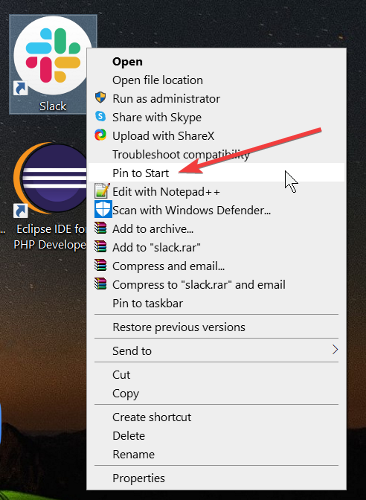
- Locate the application.
- Right-click on the application to be pinned.
- Select the Pin to Start.
Unpin an application from the Start menu
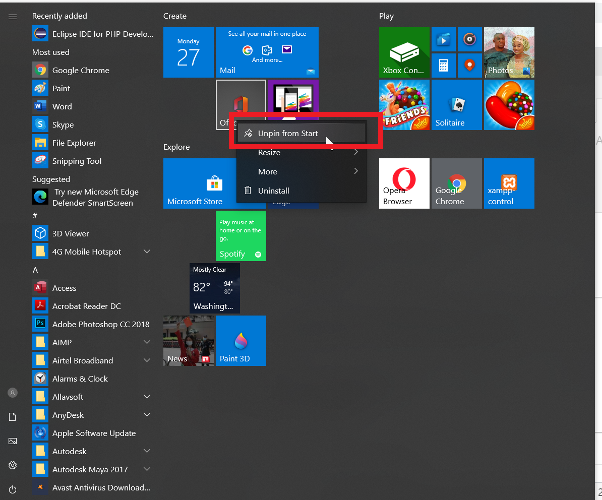
- Open the Start
- Right-click on the application.
- Select Unpin from Start.
Change application tile sizes
- Click on the Start
- Right-click on the application.
- Select Resize.
- Select the option of your choice.
Add folders to the Start menu
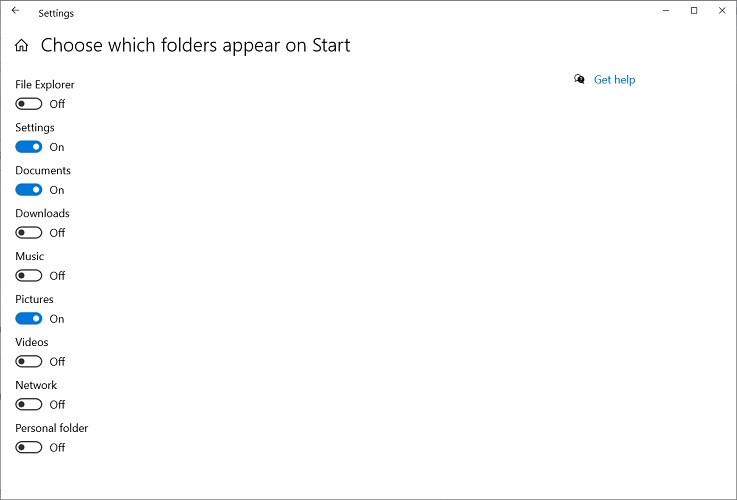
- Click on the Start menu button.
- Select Settings.
- Click the Personalization tile.
- Choose Start from the sidebar.
- Click Choose which folders appear on Start.
- Toggle on or off the applications on the screen.
Move tiles in the Start menu

- Click on the Start button.
- Click and hold on the tile.
- Drag-and-drop the tile to your desired position.
Rename groups of tiles

- Click on the Start
- Select the tile for renaming.
- Delete any text in the Type field
- Rename the tile.
Change the Start menu color

- Click on the Start
- Select Settings
- Click the Personalization
- Pick a color from Windows colors.
- Mark the checkbox for Start, taskbar, and action center under Show accent color on the following surfaces.
Turn off Live Tiles
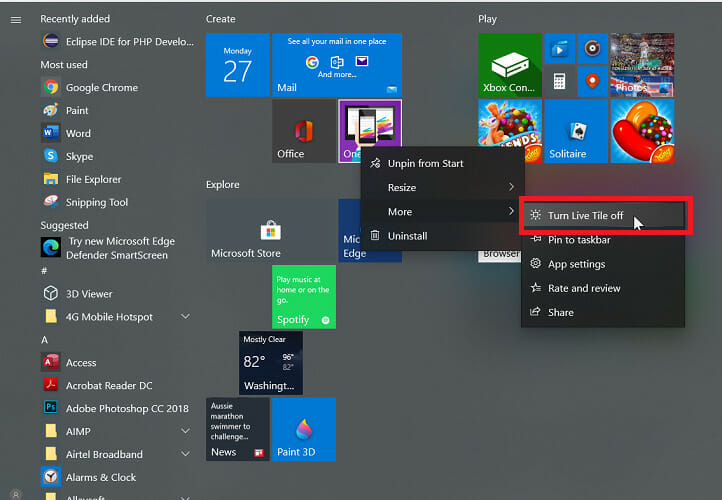
- Click on the Start menu button.
- Right-click on the live tile.
- Click the Move.
- Select the Turn live tile off option
We hope that this guide has proven useful in your case and that you now have the Start Menu and icons in the exact way you wanted.
Feel free to let us know if this guide has helped by using the comment section below.
Windows 10 Start Menu: Change Design, Disable Bing Search and More
Ashish Mundhra
28 Feb 2015

I can’t think or talk about design without thinking about Steve Jobs (and what he said about that). Design is not just what it looks like and feels like. Design is “how it works”. And when you think about it, at the end of the day, it really doesn’t matter how colorful or trendy a thing might appear to be. If it doesn’t work for the consumer, it’s broken.
I feel design, or maybe the ‘design’ perspective changes from person to person. And that’s what brings me to the all-new Windows 10 Start Menu. Addressing user concerns from the previous versions of Windows, Microsoft has made the Windows 10 Start Menu a lot more customizable. Apart from the defacto Start Menu that Windows 10 comes with, you can transform it easily to get a Windows 7 type Start Menu or a fullscreen Windows 8 Start Screen, whatever fits you right.
So in this article I will show you how to fully customize your start menu and design it the way you want it to be.
The Windows 7 Look-alike Start Menu
The new Start Menu combines the small icons of Windows 7 and Live Tiles from Windows 8. In the early builds of the latest variant, a user could simply unpin all the tiles and resize the start menu to make it look like the traditional Start Menu most of us loved. However, in the latest technical preview, the option has been removed as a default feature, so you have to edit a registry file to mend things.

Open the Run command, type in regedit and press OK. Navigate to HKEY_CURRENT_USER –> Software Microsoft –> Windows –> CurrentVersion –> Explorer –> Advanced. Here, create a new DWORD (32-bit) value and name it EnableXamlStartMenu. Once all that’s done, open the task manager in the Advanced view and restart the explorer.
The Start Menu will now be re-sizable again and once you remove all the tiles from the right pane, the menu will shrink and not use unnecessary real estate on your screen. If you wish to bring back the default settings, just delete the new value we created in the registry.

Making Things Easy: Download and execute the one-click registry file to create the necessary DORD Value directly.

If you would like to pin items like Control Panel, Documents, and Computer to a pane in the right, open the Start Menu properties and click on Customize to edit the Jump List. In the dialog box that opens up, you can select any of the special items and add it to the Start Menu and make it more like Windows 7.
Get the Windows 8 type Start Screen
While for Windows 7 fans things might seem a bit complicated, Microsoft has shown a softer side for Start Screen lovers.
Make sure you save all your work, as you will be logged off at the end. Right-click on the Taskbar and open Properties.

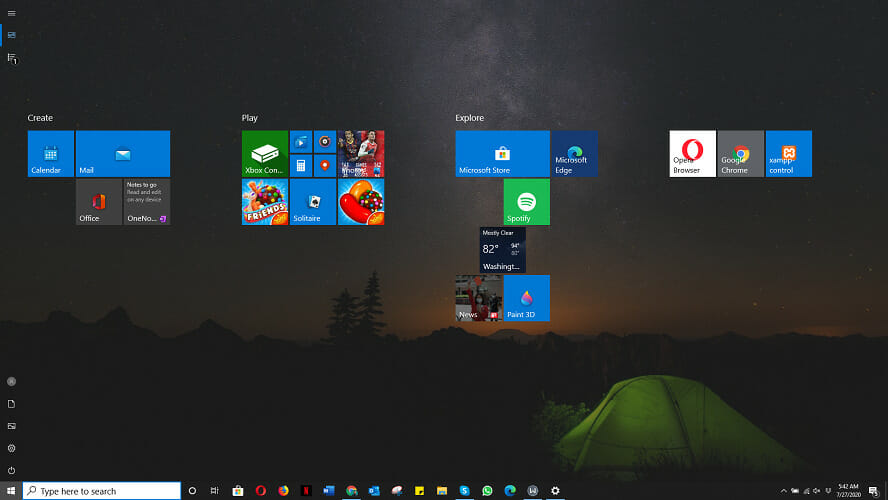
Here, navigate to the Start Menu and uncheck Use the Start menu instead of the Start screen. Windows will ask you for confirmation to log off and log back in for the changes to take effect. Once you are in again, you will get the Windows 8 Start Screen in Windows 10.
Removing Bing Search Results
People like me who know what they are doing might hate the constant Bing Search results that appear every time you search for a program on the Windows 10 start menu. Most of the time, these search predictions make no sense at all and make the search slow. If I wanted to search the web, I would have used Chrome. If I am in the Start Menu, I am there to search for a program and nothing else.

If you think likewise and would like to stop these Bing predictions from showing up, there’s an easy fix for that. Open up the Control Panel and click on Group Policy Editor. Now navigate to Computer Configuration -> Administrative Templates -> Windows Components -> Search. Here, enable these three policies:
- Do not allow web search
- Don’t search the web or display web results in Search
- Don’t search the web or display web results in Search over…
Make sure you enable, not disable the settings.

After, the Start Menu search results will be clean and will not comprise of unnecessary search predictions.
Changing the Look and Feel
So once you set up the Start Menu to work as you would like, let’s personalize the looks a bit. After all, colors work magic when used in correct contrast. By default, the menu is set to change color dynamically along with the Wallpaper and theme you are using on Windows 10.

Right click on any empty space on the Start Menu and click on the Personalize option. Here, you can choose static colors for the Start Menu along with the taskbar.
So that was how you can custom design the Start Menu in the upcoming version of Windows. Don’t forget to share your views about Windows 10 if you had a chance to play with the pre-released version.
Last updated on 8 Feb, 2018
The above article may contain affiliate links which help support Guiding Tech. However, it does not affect our editorial integrity. The content remains unbiased and authentic.
Read Next

How to Change the Search Engine in Microsoft Edge Chromium
Want to change the default # search engine in # Microsoft Edge Chromium? Find out how to do that for both the address bar and new tabs.

How to Fix MSN Weather Not Working in Windows 10 Error
MSN # Weather app not working on # Windows 10 computer? Here are 9 ways to solve that problem. If not, there are a few other ways to get # weather reports too.

How to Change Backgrounds in Microsoft Teams (And Use Cool Backgrounds)
Here’s a simple and effective guide on how to change backgrounds in # Microsoft Teams app and there are some sources for downloading background # images.

7 Best Ways to Fix Kindle for PC Desktop App Won’t Open on Windows
Can’t open the Amazon # Kindle app on your # desktop PC? Here are some solutions to fix that issue so you can get back to reading your books in peace in your free time.

What Is Microsoft Power Automate Desktop and Why Do You Need It
Everything you need to know about # Microsoft # Power Automate Desktop. Where to get it, how to use it, how to create your first workflow, and who should use it. Complete guide.

6 Best Ways to Fix Action Center Greyed Out on Windows 10
Is the Action Center greyed out on your # Windows 10 computer? Here is an in-depth look at all the solutions that can help you fix this issue promptly.

8 Best Ways to Fix Google Chrome Security Certification Error
Learn how to fix the # Google # Chrome # Security certification error by following the post below.

How to Use Paint 3D to Edit Photos
Wondering how to edit pictures using Paint 3D in # Windows 10? Check our detailed guide on how to use various tools in Paint 3D to edit images.
Did You Know
Windows Hello is a biometric authentication feature in Windows 10.


