- Ubuntu Documentation
- Getting Started
- Basic Example
- Advanced Example
- Having Problems?
- How to change mounting point?
- 3 Answers 3
- Linux Mint Forums
- Change the mount point of /home
- Change the mount point of /home
- Re: Change the mount point of /home
- Re: Change the mount point of /home
- Re: Change the mount point of /home
- Re: Change the mount point of /home
- Re: Change the mount point of /home
- Re: Change the mount point of /home
- Подключение файловых систем. Команда mount в Linux
- Вывод списка смонтированных файловых систем(ФС)
- Монтирование файловой системы
- Примеры использования mount
- Монтирование USB-накопителя/жесткого диска
- Монтирование файлов ISO
- Монтирование NFS
- Размонтирование файловой системы
- Сохранение параметров mount после перезагрузки
- Заключение
Ubuntu Documentation
It is sometimes necessary to move mount points, for any number of reasons. Perhaps you keep separate partitions for each folder in the root of the filesystem, or maybe you need to store a large database, or perhaps you just want to change where your second hard disk or data partition mounts.
This guide is for basic changing of mount points. It will help you edit you file systems table configuration file, /etc/fstab, to achieve this. Please refer to this link about fstab; we will not be covering details from that page here, so it is recommended reading to accompany this guide.
If you are using external disks, you do not usually want to create mount points in fstab, but rather let them mount automatically based on their partition label. In this case you can relabel the partitions instead — see RenameUSBDrive.
If you are looking to create a separate /home partition, see Partitioning/Home/Moving.
Getting Started
To change mount points, we must edit the fstab file (see link above), so let’s open it and have it fork to the background with the & symbol. For Ubuntu, open a terminal and run:
Remember, the following are examples. Do not copy and paste them to your system; they will not work for you.
Basic Example
Let’s say we want to change a mount point from /media/disk2 to /mnt/backup. First, unmount the partition, delete the old mount point, and make the new mount point.
You must know which partition you want to change, so find what you are looking for by cross referencing the contents of fstab with the output of this command:
The output may look something like this:
Locate the entry you want to change. Let’s say you discover that the device is /dev/sdb1. Then you will change the line in fstab from something like
What’s that? It has UUID= instead of a /dev location? UUIDs are just newer way of identifying partitions — to view correspending /dev locations, you can run one of these commands: It is recommended that you keep the UUID instead of changing that column of fstab to a /dev location, but either will typically work.
Now that you have changed fstab, save and close the file. You can now remount everything in fstab, including the partition you changed, by running
Advanced Example
Some users have each directory in the root of the filesystem mounted on different partitions. While this isn’t generally recommended to beginners, this method has its purposes, which will not be covered here.
Let’s say your fstab file looks like this:
I have isolated 3 mount points that will be important and surrounded them with «#####».
So now, you want to change /dev/hda6 from /usr/local/mysql to /var/lib/mysql. First, unmount the partition, delete the old mount point, and make the new mount point.
Your first idea would be to simply change the mount point so that the relevant portion of fstab looks as follows:
However, you have a problem. If you reboot the computer, you will get an error like
Why? The main problem is that you are mounting /var/lib/mysql before /var. As the original documenter of this page put it, the mount order must be like trunk first then limbs. You should mount the filesystem in alphabetical order, with subdirectories being mounted after their parent directories. You must move /dev/hda6 down in the file, so that the relevant portion of the file now reads:
Having Problems?
- If your partition won’t initially unmount, make sure all programs using data on that device are closed, including nautilus (the file browser), and try a lazy unmount:
In this case, is either the mount point or the /dev location.
If you get the error rmdir: failed to remove `test': Directory not empty, the partition is not unmounted correctly, see #1.
Getting errors when you try to mount? Be sure that you have created the new mount point and have spelled it correctly in the directory structure and in fstab. Do not use mount points with spaces in the name — while this is possible, it is a pain to deal with and is not worth the trouble. If you have this problem, it is creating issues in your fstab file because the parser thinks that whatever is coming after the space is the next column in fstab.
Getting Mounting Local File System Failed at boot time? Refer to the Advanced Example.
Источник
How to change mounting point?
By some reason Plex Media Manager won’t recognize my partition(/media/radibg2/Radi/). I’ve tried to start
(this is what the plex shortcut which is showing in the search runs) as sudo but it again didn’t find the files? It loads the partition empty. In the Plex forum answered me to change the mounting point to /media/Radi and it will load the files, so how to do?
3 Answers 3
Firstly get to know the partition reference. Run sudo blkid and note the UUID of the partition.
Next you need to modify your /etc/fstab file to point to the desired mount point. Run sudo xdg-open /etc/fstab and add a line or modify the line referencing the partition.
An example line:
Then reboot your computer or run sudo mount -a
Copy all the files and folders from «/media/radibg2/Radi/» to «/media/Radi».
Then unmount your partition
Edit your fstab file:
Change the mount point to «/media/Radi» from «/media/radibg2/Radi/» in fstab file and save the file
Now remount your partition with the mount point «/media/Radi»
Hope this helps!

Are you able to see & read/view the media files at all? And x-www-browser is just a link to a regular web browser (firefox here), but apparently that needs Avahi to be working. And the help webpage below says the link may really be http://localhost:32400/manage/index.html It should work from any connected computer too (replacing localhost with the computer’s ip). But running your web browser with sudo shouldn’t affect the results.
After browsing https://forums.plex.tv/index.php/topic/26727-how-to-plex-media-server-on-ubuntu/ it appears that Plex runs as it’s own user, so maybe the plex user doesn’t have read permission on the media files.
If you want to quickly and temporarily add a second mount point (to test if plex will see the media files mounted somewhere else) you can bind mount it to another directory with mount —bind olddir newdir (kind of like «linking» the two directories)
Then to change the mount point permanently just edit it’s line in /etc/fstab changing the old /media/radibg2/Radi/ into /media/Radi (FYI lsblk will tell you what partition is currently mounted where).
Источник
Linux Mint Forums
Welcome to the Linux Mint forums!
Change the mount point of /home
Change the mount point of /home
Post by mandrake88 » Thu Jan 05, 2012 1:59 pm
I’m using mint lxde 11 in my laptop.
1 HDD with 3 partitions mounted as follow:
a) /
b) /home
c) swap
I want to move the /home directory into the / partition, because i wan’t to use that other partition for other thing. But without loss any data stored in /home
Re: Change the mount point of /home
Post by remoulder » Thu Jan 05, 2012 2:09 pm
[Edit] your original post and add [SOLVED] once your question is resolved.
“The people are my God” stressing the factor determining man’s destiny lies within man not in anything outside man, and thereby defining man as the dominator and remoulder of the world.
Re: Change the mount point of /home
Post by mandrake88 » Thu Jan 05, 2012 2:25 pm
Re: Change the mount point of /home
Post by remoulder » Thu Jan 05, 2012 2:42 pm
[Edit] your original post and add [SOLVED] once your question is resolved.
“The people are my God” stressing the factor determining man’s destiny lies within man not in anything outside man, and thereby defining man as the dominator and remoulder of the world.
Re: Change the mount point of /home
Post by mandrake88 » Thu Jan 05, 2012 3:12 pm
Re: Change the mount point of /home
Post by remoulder » Thu Jan 05, 2012 3:14 pm
[Edit] your original post and add [SOLVED] once your question is resolved.
“The people are my God” stressing the factor determining man’s destiny lies within man not in anything outside man, and thereby defining man as the dominator and remoulder of the world.

Re: Change the mount point of /home
Post by Roken » Thu Jan 05, 2012 6:14 pm
You have to be a little careful with this — you can do it from a livecd most easily, but to do it from a running system you need to make changes in the correct order. There will be a home directory in /, but for the moment this is simply a mount point for your separate partition. To move home into / on a running system you need to prevent your current /home being mounted as /home, and ideally you need to do all this in a recovery environment as root (so that files in /home aren’t needed). SO here goes:
Boot recovery mode and log in to the terminal (as root if you can). You can omit «sudo» in the following if you are able to log in as root:
this should preserve all attributes and ownership when copying.
Источник
Подключение файловых систем. Команда mount в Linux
В ОС Linux команда mount используется для подключения (монтирования) файловых систем и переносных накопителей (например, USB-флешек) к конкретным точкам монтирования в дереве директорий. Команда umount отключает (размонтирует) смонтированную файловую систему от дерева директорий. В данном руководстве мы рассмотрим основы подключения и отключения различных файловых систем при помощи команд mount и umount.
Вывод списка смонтированных файловых систем(ФС)
При выполнении без аргументов команда mount выведет все подключенные в данный момент ФС:
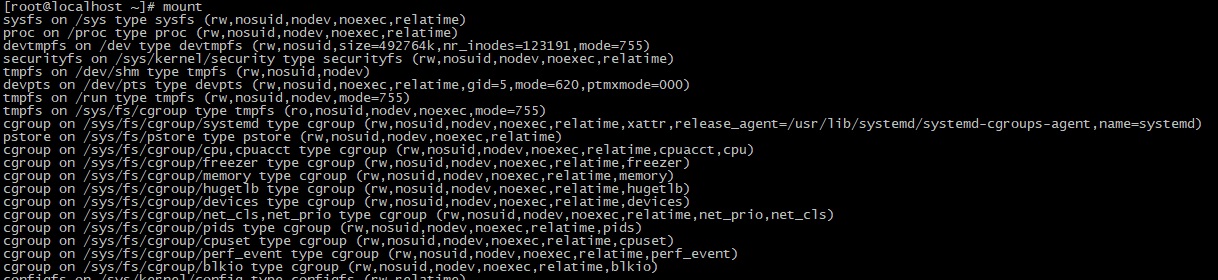
По умолчанию результат будет содержать все ФС, в том числе виртуальные, такие как cgroup, sysfs и т. д. Каждая строка содержит информацию об имени устройства, директории, в которой оно смонтировано, типе и опциях монтирования в следующей форме:
Для отображения только ФС определенного типа используется опция -t. Например, так можно отобразить только разделы ext4:

Монтирование файловой системы
Для подключения файловой системы к конкретному местоположению (точке монтирования) команда mount используется в следующей форме:
После подключения точка монтирования становится корневой директорией смонтированной ФС. Например, смонтировать жесткий диск /dev/sdb1 в директорию /mnt/media можно следующим образом:
Обычно при монтировании устройства с распространенной ФС, например, ext4 или xfs, команда mount автоматически определяет ее тип. Однако, некоторые ФС не распознаются. Их тип нужно указывать в явном виде. Для этого используется опция -t:
Чтобы указать дополнительные опции монтирования, используется флаг -o:
Можно указать несколько опций, разделенных запятыми (после запятых не должно быть пробелов). Ниже предоставлены основные опции команды
-V — вывести версию утилиты;
-h — вывести справку;
-v — подробный режим;
-a, —all — примонтировать все устройства, описанные в fstab;
-F, —fork — создавать отдельный экземпляр mount для каждого отдельного раздела;
-f, —fake — не выполнять никаких действий, а только посмотреть что собирается делать утилита;
-n, —no-mtab — не записывать данные о монтировании в /etc/mtab;
-l, —show-labels — добавить метку диска к точке монтирования;
-c — использовать только абсолютные пути;
-r, —read-only — монтировать раздел только для чтения;
-w, —rw — монтировать для чтения и записи;
-L, —label — монтировать раздел по метке;
-U, —uuid — монтировать раздел по UUID;
-T, —fstab — использовать альтернативный fstab;
-B, —bind — монтировать локальную папку;
-R, —rbind — перемонтировать локальную папку.
Полный список опций можно получить, выполнив команду man mount.
Примеры использования mount
Давайте рассмотрим несколько примеров использования утилиты. Как правило для монтирования нужно выполнить всего два действия
- Создать точку монтирования
- Примонтировать файловую систему
Монтирование USB-накопителя/жесткого диска
В большинстве современных дистрибутивов Linux, например, Ubuntu, USB-накопители автоматически монтируются при подключении, но иногда может потребоваться ручное монтирование устройства. Чтобы смонтировать USB-накопитель, выполните следующие действия.
Создайте точку монтирования
Если USB-накопитель использует устройство /dev/sdd1, его можно смонтировать в директорию /media/usb следующей командой:
Для поиска устройства и типа файловой системы можно воспользоваться любой из следующих команд:
Монтирование файлов ISO
Для монтирования файла ISO используется петлевое (loop) устройство — специальное виртуальное устройство, которое позволяет осуществлять доступ к файлу как к блочному устройству.
Сначала нужно создать точку монтирования в любой желаемой директории:
Смонтируйте файл ISO следующей командой:
Не забудьте заменить /path/to/image.iso на путь к вашему файлу ISO.
Монтирование NFS
Для монтирования системы NFS требуется установить клиент NFS. Установка клиента NFS в Ubuntu и Debian:
Установка клиента NFS в CentOS и Fedora:
Создайте директорию, которая будет точкой монтирования удаленной файловой системы:
Обычно требуется автоматическое монтирование удаленной директории NFS при загрузке. Для этого нужно изменить файл конфигурации /etc/fstab. Откройте его в любом текстовом редакторе, например:
Добавьте в файл следующую строку, заменив сервер:/директория на имя или IP-адрес сервера NFS и экспортируемую директорию:
Смонтируйте ресурс NFS следующей командой:
Размонтирование файловой системы
Для отключения смонтированной файловой системы используется команда umount, в качестве аргумента которой указывается директория, в которую она была смонтирована (точка монтирования) или имя устройства:
Если файловая система используется, umount не сможет ее отключить. В таких ситуациях можно воспользоваться командой fuser, чтобы выяснить, какие процессы осуществляют доступ к файловой системе:
Определив процессы, можно остановить их и размонтировать файловую систему. Также для отключения занятой файловой системы сразу после завершения ее использования можно воспользоваться опцией -l (—lazy, “ленивое” отключение):
Для принудительного размонтирования применяется опция -f (—force). Обычно она используется для отключения недостижимой системы NFS.
Во всех остальных случаях принудительное отключение нежелательно, так как может привести к повреждению данных в файловой системе.
Сохранение параметров mount после перезагрузки
Для того, что бы устройства при перезагрузки системы монтировались автоматически, необходимо прописать инструкции монтирования в файл /etc/fstab. Файл /etc/fstab содержит список записей в следующем формате:
Подключит устройство /dev/sdb1 (например жесткий диск) в директорию /home
После того как инструкция для mount прописаны в /etc/fstab, что бы проверить правильность написания дайте команду
Если команда отработает без ошибок, то все устройства прописанные в /etc/fstab будут подключены, а также изменения не потеряются после перезагрузки.
Заключение
Мы рассмотрели наиболее распространенные примеры подключения различных файловых систем к дереву директорий при помощи команды mount и их отключения командой umount. Для получения более подробной информации об опциях команд mount и umount можно обратиться к соответствующим man-страницам.
Если вы нашли ошибку, пожалуйста, выделите фрагмент текста и нажмите Ctrl+Enter.
Источник


