- How to Change Windows 10, 8 or 7 Logon Screen
- Want to change your Windows logon screen? Here’s how to do it on Windows 10 and Windows 8
- Changing the default logon screen on Windows 8
- Change the default logon screen on Windows 10
- How to change the logon screen saver in Windows
- IN THIS TASK
- Summary
- How To Change The Windows 7 Login Screen Background Image
- Modify a Value To Change The Windows 7 Login Screen Background
- Use Registry Editor To Allow The Windows 7 Login Screen To Be Changed
- Use Local Group Policy Editor To Enable Windows 7 Login Screen Background Changes
- Setting a New Image As The Login Screen Background
- Using a Third-Party App To Change The Login Background In Windows 7
How to Change Windows 10, 8 or 7 Logon Screen

Lots of Windows 8, Windows 10 users are complaining about the lack of customization options that are offered by default. However, Windows 8, Windows 10 does have some notable features that allow users to customize their devices. Changing the Windows 8, Windows 10 logon screen is one of these features, and because many are not quite clear on how to do this, today I’ll show your exactly how you can change your logon screen on any Windows 8, Windows 10 device.
Apart from the classic lock screen, Windows 8, Windows 10 does have some other methods of authentication, like picture passwords. We’ll be taking a look at all of these changes you can make to your Windows 8, Windows 10 computer.
Want to change your Windows logon screen? Here’s how to do it on Windows 10 and Windows 8
Changing logon screen settings is rather simple in Windows 10 and 8.1, and in this article we’re going to cover the following topics:
- Windows logon screen background, picture – If you want to change your logon screen background, you can do that easily from Windows 10. You can choose one of many available backgrounds or you can use your own custom background.
- Windows logon screen blank – Many users reported that their logon screen is blank. This can be a big problem and prevent you from logging in to Windows.
- Windows logon screen upside down – This is an unusual problem that can appear on some PCs. If you have this problem, the cause is most likely your display driver.
- Windows login screen not appearing – Sometimes your logon screen might not appear at all. We already wrote a guide on how to fix a missing Windows 10 login screen, so be sure to check it out.
- Windows login black screen with cursor – According to users, some of them are getting black screen with cursor while trying to login to Windows 10. We already covered this issue in the past, so you should be able to fix it.
- Windows logon screen remove – Some users don’t want to see a login screen while starting Windows. You can’t remove the login screen, but you can always remove your password or set your PC to automatically log in.
- Windows logon screen takes a long time, stuck – Sometimes you might get stuck on Windows logon screen. In one of our previous articles we explained what to do if Windows 10 is stuck on a Welcome screen, so be sure to check it out.
- Windows logon screen flashing, disappears – Several users reported that their logon screen keeps flashing. In some cases, the logon screen can completely disappear. This is most likely caused by a bad driver or a corrupted Windows 10 installation.
- Windows 10 login screen loop – In some rare cases you might get stuck in a Windows 10 login screen loop. This is an unusual problem, but you should be able to fix it by creating a new user account.
Changing the default logon screen on Windows 8
If you’ve recently installed, Windows 8, you will probably have the simple picture lock screen that shows you different apps. This screen ca be customized by adding other pictures and other apps, as well as adding a completely new logon screen.
If you want to change your Windows 8 logon screen picture to another one, you just have to follow these steps:
- Open the Settings charm and click or tap on Change PC Settings.
- From here, navigate to the Personalize tab.
There you will find the option to choose another logon image or browse your computer for a custom picture. In the same window, you have the Start Screen tab, which allows you to change the background style and color of the Modern UI screen.
If you want to change your Windows 8 logon screen to a picture password, all you need to do is to the Users window and click or tap on Create a Picture Password.
From here, you will enter a wizard where you have to browse your computer for the picture you wish to set as your picture password, then add the three actions that will unlock your computer.
These actions can be a line, a point or a circle, and you have to input them in the same order and direction as you originally made them, otherwise it will not allow you to log on to your computer.
As you can see, the process of changing the Windows 8 logon screen is pretty easy. It does not require the users to waste too much time on this task, and it also adds to the feel of the device, making it reflect the user’s personality better.
Another thing you can do is delete the password from your computer. While I strongly advise you to not do this, some users want their computers to open without needing a password. Nevertheless, here’s how you do it:
- Open the Settings Charm
- Click or tap on Change PC Settings
- Click on Users
- Switch to a Local Account
Note: Removing your computer’s password is not possible when using the Microsoft account, therefore you need to use a local account
- Click on Change Password
- After you input your current password, it will prompt you for the new one
- Leave the Password field black and click OK
- Now, you log on to your computer, you will have the Windows 8 logon screen that you’ve modified earlier and in the User screen, you won’t be prompted for a password.
- READ ALSO: Windows 10 will let you reset passwords from the lock screen
Change the default logon screen on Windows 10
On Windows 10 changing the logon screen process is slightly different. If you want to change the background picture on your login screen, you just need to do the following:
- Open the Settings app. You can do that quickly by pressing Windows Key + I shortcut.
- Now navigate to the Personalization section.
- In the left pane, select Lock screen.
Now you can customize the appearance of your lock screen. For example, you can choose a background image that you will use for your lock screen. There are several pictures available to choose from, but you can also browse your PC for your own pictures.
In addition to a single picture, you can also have a slideshow on your PC while your PC is locked. Or if you always want a different picture on your lock screen, you might want to use Windows spotlight feature.
If you want, you can enable fun facts and tips from Windows and Cortana. This is just an optional feature but it might provide you with some interesting information once in a while. Of course, you can see detailed status from certain apps right on your lock screen which is useful if you need to check your calendar or email.
The lock screen also allows you to see quick status of your apps, so you can easily check the number of new emails or missed messages. Speaking of quick statuses, you can see quick statuses from up to 7 different apps on your lock screen.
In addition to visual customization, Windows 10 allows you to change how you sign in to Windows 10. To access these settings, you need to do the following:
- Open the Settings app and go to Accounts section.
- From the left pane, select Sign-in options.
From here you can change various sign-in settings. For example, you can set your PC to automatically lock if you’re away. This feature is rather useful if you want to protect your PC from unauthorized access. By using this feature you’ll prevent your coworkers or roommates from using your PC when you’re not around.
Windows 10 also supports Windows Hello feature, and if you want to configure your PC to sign in with your fingerprint, you can do that from here. In addition to fingerprint, you can also sign in by scanning your face. Keep in mind that in order to use Windows Hello you need to have appropriate hardware.
You can also easily change your account password right from this section. If you want, you can set up a PIN and use it instead of your password to sign in to Windows.
You can also use your PIN to sign in to other applications on your PC. Using a PIN has its advantages, and if you don’t want to memorize your password or if you want to quickly sign in to Windows 10, PIN might be the right choice for you.
Of course, picture password feature is still there and you can unlock your PC by performing gestures on the lock screen.
You can also use a Dynamic lock feature and pair your PC with your smartphone or any other Bluetooth device. By enabling this feature, your PC will automatically lock itself whenever your phone moves out of the Bluetooth range.
This is a great feature because it will automatically lock your PC once you step away from it. Keep in mind that different phones and Bluetooth adapters have a different range, so your PC might not get locked as soon as you move away from it.
Lastly, there’s a privacy option available. If you want to hide your account details, such as your email address, from the lock screen be sure to disable this feature.
As you can see, the process of changing the Windows 8, Windows 10 logon screen is very simple and anyone can do it with next to no effort.
How to change the logon screen saver in Windows
IN THIS TASK
Summary
Important This section, method, or task contains steps that tell you how to modify the registry. However, serious problems might occur if you modify the registry incorrectly. Therefore, make sure that you follow these steps carefully. For added protection, back up the registry before you modify it. Then, you can restore the registry if a problem occurs. For more information about how to back up and restore the registry, click the following article number to view the article in the Microsoft Knowledge Base:
322756 How to back up and restore the registry in Windows This step-by-step article describes how to change the default logon screen saver. When you start Windows, a Begin Logon dialog box prompts you to press CTRL+ALT+DEL to log on. By default, if you do not press a key for 15 minutes, the Windows logon screen saver (Logon.scr) starts.
Click Start, click Run, type regedt32, and click OK.
Locate the following registry key:
In the Details pane, double-click the
SCRNSAVE.EXE string value item.
In the Value data box, type the path and name of the screen saver, and then click OK.
Important Make sure that you specify the path correctly to the screen saver. If the screen saver is located in %SystemRoot%\System32, the explicit path is not required.
You have now changed the logon screen saver.
You can also change the amount of time that elapses before the logon screen saver starts. The default is 900 seconds (15 minutes).
To change the length of time before the logon screen saver starts, follow these steps:
Click Start, click Run, type regedt32, and then click
OK.
Locate the following registry key:
In the Details pane, double-click the
ScreenSaveTimeOut string value item.
In the Value data box, type the number of seconds, and then click OK.
You have now changed the length of time that elapses before the logon screen saver starts.
To disable the logon screen saver, follow these steps:
Click Start, click Run, type regedt32, and then click
OK.
Locate the following registry key:
In the Details pane, double-click the
ScreenSaveActive string value item.
In the Value data box, replace the number 1 with the number 0, and then click OK.
You have now disabled the logon screen saver.
How To Change The Windows 7 Login Screen Background Image
A good way to brighten your morning
The default login screen in Windows 7 looks just as good as any other screen, but in case you don’t like it for some reason, you can have it changed. Unlike Windows 10, the procedure to change Windows 7 login screen background is a bit different and requires a few more steps to get the task done.
There are multiple ways to change the login screen background image, and you can use any of them to have your favorite image set as the background for your login page.
Modify a Value To Change The Windows 7 Login Screen Background
Before you can assign a new image as the Windows 7 login screen background image, you’re going to need to modify a value using either registry editor or local group policy editor.
Use either of the following methods to do it.
Use Registry Editor To Allow The Windows 7 Login Screen To Be Changed
If you use one of the Windows 7 editions that don’t come with the local group policy editor, your only choice will be to use the registry editor to make the change. It’s a bit more complex than the other method but it gets the job done regardless.
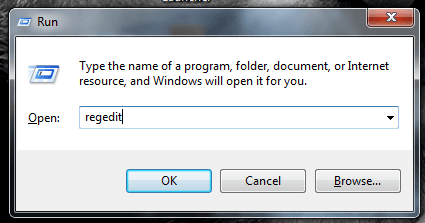
- Press the Windows + R keys at the same time, type regedit in the box on your screen, and hit Enter.
- When it opens, head to the following directory by clicking on the items in the left sidebar.
HKEY_LOCAL_MACHINE\SOFTWARE\Microsoft\Windows\CurrentVersion\Authentication\LogonUI\Background

- Enter OEMBackground as the name of the entry and press Enter.
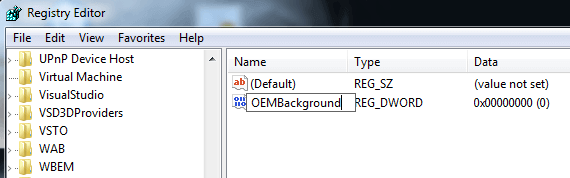
- Double-click on the entry and you should be able to edit it. In the edit box, change the existing value of the Value data field to 1 and click on OK.

- Exit the registry editor as you no longer need it.
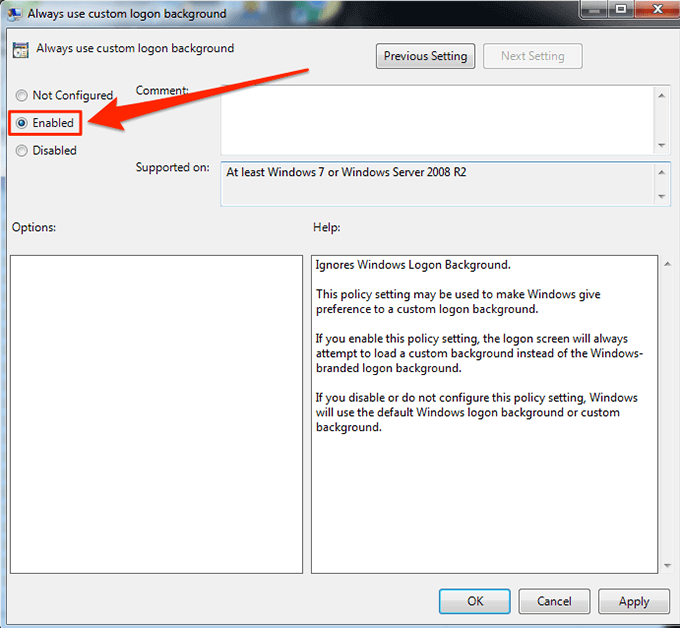
Use Local Group Policy Editor To Enable Windows 7 Login Screen Background Changes
Certain editions of the Windows 7 operating system come built with the local group policy editor. It lets you change many of the settings and values of your computer in a much easier way than a registry editor. This includes the option of changing the Windows 7 login screen background as well.
If you have access to the tool, you can use it as the following to enable the background image option.
- Press the Windows + R buttons simultaneously, enter gpedit.msc in the box, and press Enter.

- When it launches, expand the directories on the left and navigate to the following path.
Computer Configuration\Administrative Templates\System\Logon
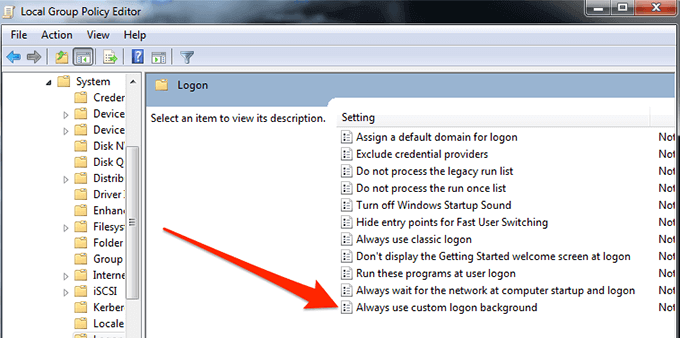
- When the option opens, select Enabled at the top to enable it. Then click on the Apply button followed by OK at the bottom to save your changes.
Setting a New Image As The Login Screen Background
Here comes the part of the procedure that you’re actually going to like. Now that you’ve enabled the option that lets you change your Windows 7 login screen background image, it’s time you choose an image to be used as the background.
Windows offers you the flexibility to use just about any image as your background. You can pick one from your computer, download your favorite from the Internet, or ask your friend to send theirs over to you. Just make sure the image is less than 256KB in size and is in JPG format and you should be all fine.
You’ll then need to place the image in a certain folder so Windows recognizes it as a login screen background image and uses it appropriately.
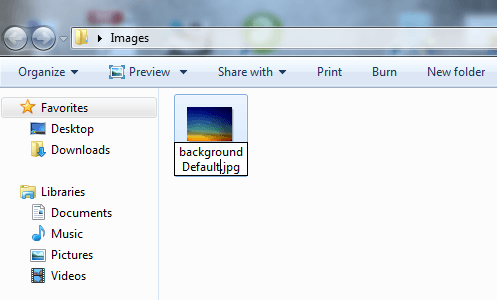
- Right-click on your image and select Rename.
- Enter backgroundDefault as the name of the image. This is a must. Then copy the image.
- Open a File Explorer window and navigate to the following path.
C:\Windows\System32\oobe
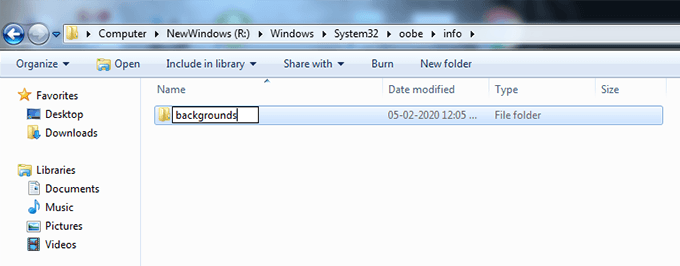
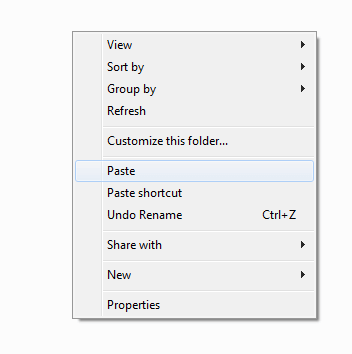
- Open the backgrounds folder, right-click anywhere blank, and choose Paste. Your chosen background image will be copied here.
That’s all there is to it.
From now on, you’ll see your chosen image as the background on your Windows 7 login screen.
Using a Third-Party App To Change The Login Background In Windows 7
Someone who’s never used a registry editor or the local group policy editor will find the above methods to be a bit daunting and may even avoid using them. It’s totally understandable and there’s actually an easier way to change the Windows 7 login screen background image without tinkering around those tools.
There’s a free app called Windows 7 Logon Background Changer that allows you to change your current background image to whatever you like with the click of a button. All it basically requires you to do is select your new image to be used as the background and apply it to your system.
- Head over to the Windows 7 Logon Background Changer website and download the app to your computer.
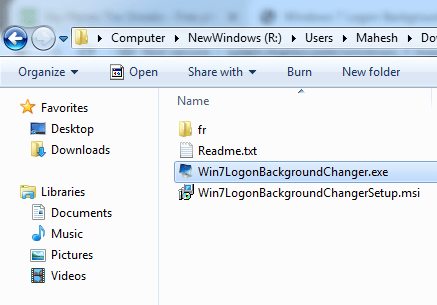
- Extract the app archive and double-click on the executable file to launch it.
- You’ll see several images you can use as the background when it launches. Select the one you’d like to use and click on Apply at the top.
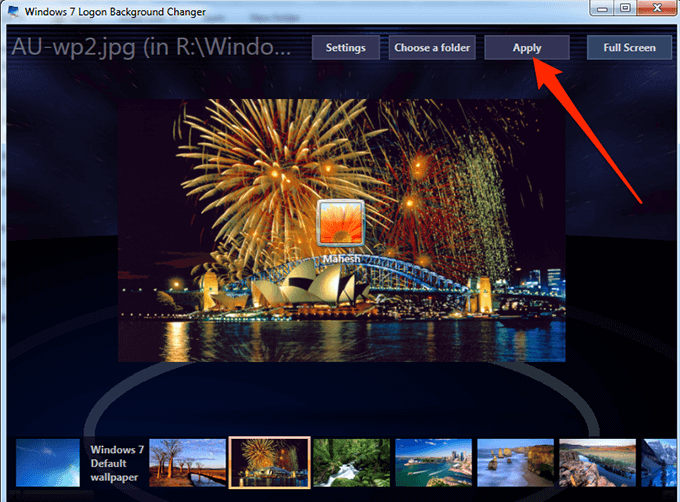
- If you’d like to use a custom image, click on Choose a folder at the top and select the folder containing your image.
It’s good to be able to replace a background you don’t like with something that you like. Let us know what made you change your background in the comments below.
Mahesh has been obsessed with technology since he got his first gadget a decade or so ago. Over the last few years, he’s written a number of tech articles on various online publications including but not limited to MakeTechEasier and Android AppStorm. Read Mahesh’s Full Bio


