- Use the System File Checker tool to repair missing or corrupted system files
- Run the System File Checker tool (SFC.exe)
- More Information
- How to Identify which Windows Process is Locking a File or Folder
- Symptoms
- How to Solve the Issue
- Identify what program is using a file
- Identify which handle or DLL is using a file
- Release the lock on the file or folder
- При запуске Windows 7 появляется ошибка Checking file system on C: что это и что делать
- Что делать при появлении этой ошибки? Для начала нужно проверить диск C на наличие ошибок
- Во-первых, нужно проверить ошибки файловой системы
- Во-вторых, следует проверить диск C на битые сектора
- Теперь можно безопасно остановить проверку файловой системы
- Во-первых, для этого можно использовать редактор реестра
- Во-вторых, для этого можно использовать «Планировщик заданий»
- Вывод
Use the System File Checker tool to repair missing or corrupted system files
If some Windows functions aren’t working or Windows crashes, use the System File Checker to scan Windows and restore your files.
Though the steps below might look complicated at first glance, just follow them in order, step-by-step, and we’ll try to get you back on track.
Run the System File Checker tool (SFC.exe)
To do this, follow these steps:
Open an elevated command prompt. To do this, do the following as your appropriate:
If you are running Windows 10, Windows 8.1 or Windows 8, first run the inbox Deployment Image Servicing and Management (DISM) tool prior to running the System File Checker. (If you are running Windows 7 or Windows Vista, skip to Step 3.)
Type the following command, and then press Enter. It may take several minutes for the command operation to be completed.
DISM.exe /Online /Cleanup-image /Restorehealth
Important: When you run this command, DISM uses Windows Update to provide the files that are required to fix corruptions. However, if your Windows Update client is already broken, use a running Windows installation as the repair source, or use a Windows side-by-side folder from a network share or from a removable media, such as the Windows DVD, as the source of the files. To do this, run the following command instead:
DISM.exe /Online /Cleanup-Image /RestoreHealth /Source: C:\RepairSource\Windows /LimitAccess
Note: Replace the C:\RepairSource\Windows placeholder with the location of your repair source. For more information about using the DISM tool to repair Windows, reference Repair a Windows Image.
At the command prompt, type the following command, and then press ENTER:
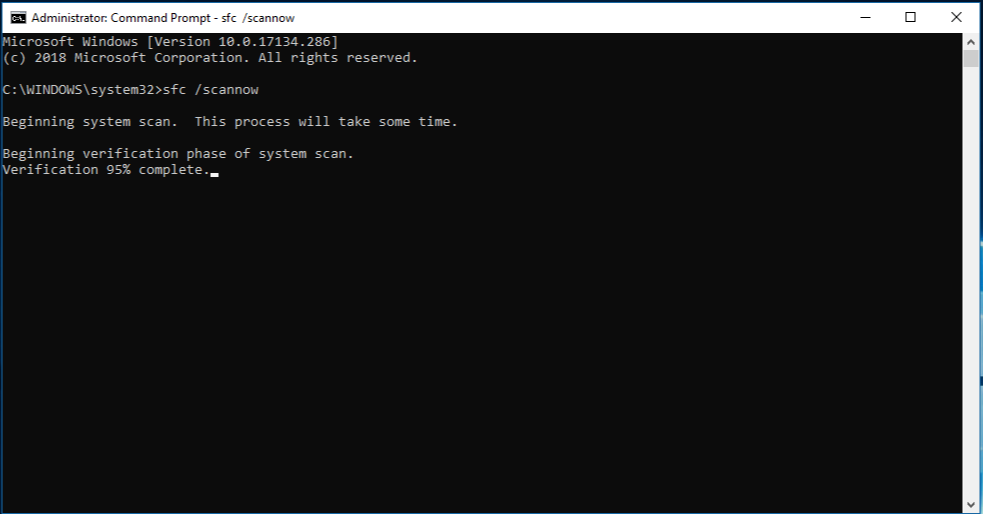
The sfc /scannow command will scan all protected system files, and replace corrupted files with a cached copy that is located in a compressed folder at %WinDir%\System32\dllcache.
The %WinDir% placeholder represents the Windows operating system folder. For example, C:\Windows.
Note Do not close this Command Prompt window until the verification is 100% complete. The scan results will be shown after this process is finished.
After the process is finished, you may receive one of the following messages:
Windows Resource Protection did not find any integrity violations.
This means that you do not have any missing or corrupted system files.
Windows Resource Protection could not perform the requested operation.
To resolve this problem, perform the System File Checker scan in safe mode, and make sure that the PendingDeletes and PendingRenames folders exist under %WinDir%\WinSxS\Temp.
Windows Resource Protection found corrupt files and successfully repaired them. Details are included in the CBS.Log %WinDir%\Logs\CBS\CBS.log.
To view the detail information about the system file scan and restoration, go to How to view details of the System File Checker process.
Windows Resource Protection found corrupt files but was unable to fix some of them. Details are included in the CBS.Log %WinDir%\Logs\CBS\CBS.log.
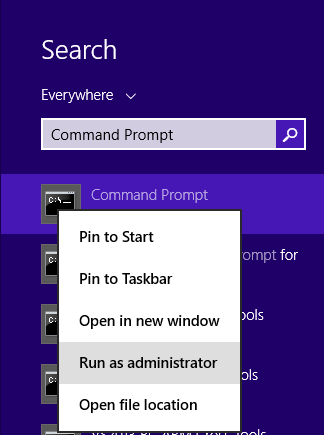
Swipe in from the right edge of the screen, and then tap Search. Or, if you are using a mouse, point to the lower-right corner of the screen, and then click Search. Type Command Prompt in the Search box, right-click Command Prompt, and then click Run as administrator. If you are prompted for an administrator password or for a confirmation, type the password, or click Allow.
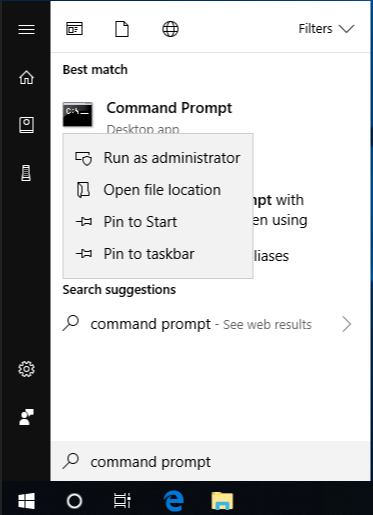
To do this, click Start, type Command Prompt or cmd in the Search box, right-click Command Prompt, and then click Run as administrator. If you are prompted for an administrator password or for a confirmation, type the password, or click Allow.
More Information
To view the details that included in the CBS.Log file, you can copy the information to the Sfcdetails.txt file by using the Findstr command, and then view the details in the Sfcdetails.txt. To do this, follow these steps:
Open an elevated command prompt as described in the previous step 1.
At the command prompt, type the following command, and then press ENTER:
Note The Sfcdetails.txt file contains details from every time that the System File Checker tool has been run on the computer. The file includes information about files that were not repaired by the System File Checker tool. Verify the date and time entries to determine the problem files that were found the last time that you ran the System File Checker tool.
Open the Sfcdetails.txt file from your desktop.
The Sfcdetails.txt file uses the following format:
Date/Time SFC detail The following sample log file contains an entry for a file that could not be repaired: 2007-01-12 12:10:42, Info CSI 00000008 [SR] Cannot repair member file [l:34<17>]»Accessibility.dll» of Accessibility, Version = 6.0.6000.16386, pA = PROCESSOR_ARCHITECTURE_MSIL (8), Culture neutral, VersionScope neutral, PublicKeyToken =
How to manually replace a corrupted system file with a known good copy of the file
After you determine which system file was corrupted and could not be repaired through the detail information in the Sfcdetails.txt file, find where the corrupted file located, and then manually replace the corrupted file with a known good copy of the file. To do this, follow these steps:
Note You may be able to get a known good copy of the system file from another computer that is running the same version of Windows with your computer. You may perform a System File Checker process on that computer to make sure the system file that you intend to copy is a good copy.
Take administrative ownership of the corrupted system file. To do this, at an elevated command prompt, copy and then paste (or type) the following command, and then press ENTER:
takeown /f Path_And_File_Name Note The Path_And_File_Name placeholder represents the path and the file name of the corrupted file. For example, type takeown /f C:\windows\system32\jscript.dll. 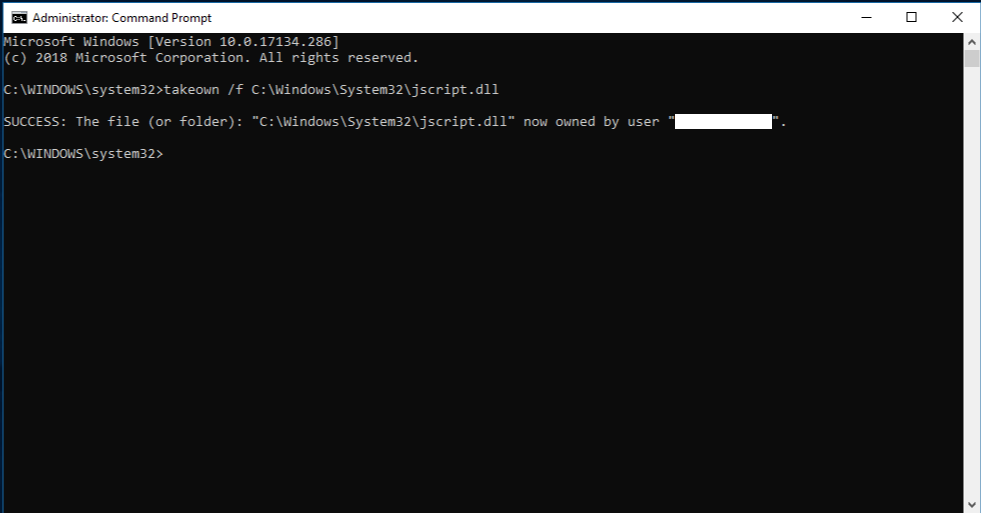
Grant administrators full access to the corrupted system file. To do this, copy and paste (or type) the following command, and then press ENTER:
icacls Path_And_File_Name /GRANT ADMINISTRATORS:F Note The Path_And_File_Name placeholder represents the path and the file name of the corrupted file. For example, type icacls C:\windows\system32\jscript.dll /grant administrators:F.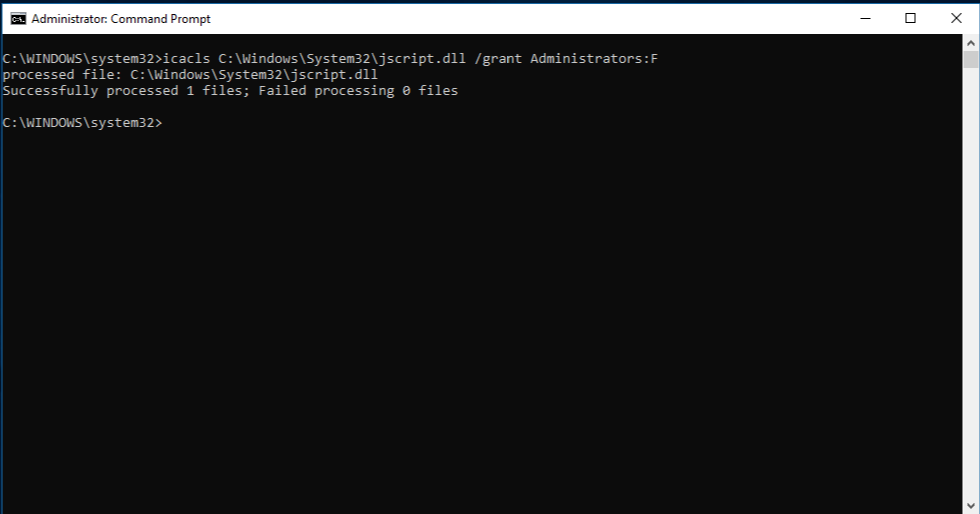
Replace the corrupted system file with a known good copy of the file. To do this, copy and paste (or type) the following command, and then press ENTER:
Copy Source_File Destination Note The Source_File placeholder represents the path and file name of the known good copy of the file on your computer, and the Destination placeholder represents the path and file name of the corrupted file. For example, type copy E:\temp\jscript.dll C:\windows\system32\jscript.dll.
If the steps above don’t work, you may need to reinstall Windows. For more info, see Windows 10 recovery options.
How to Identify which Windows Process is Locking a File or Folder
While attempting to delete, move, or rename a file or folder you get a Windows warning message; the Operating System refuses to complete the operation.
This article helps identifying the process that currently has a handle on the file or folder you are attempting a maintenance operation on.
Symptoms
When trying to delete, move, or rename a file you get a Windows system warning message:
- «Cannot delete file: Access is denied».
- «There has been a sharing violation».
- «The source or destination file may be in use».
- «The file is in use by another program or user».
- «Make sure the disk is not full or write-protected and that the file is not currently in use».
How to Solve the Issue
One of the easiest ways to handle locked files or folders is to use Microsoft Sysinternals Process Explorer.
Identify what program is using a file
Using Process Explorer there is a simple way to find the program:
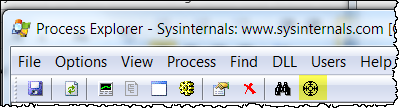
- Open Process Explorer
- Running as administrator.
- On the toolbar, find the gunsight icon on the right.

- Drag the icon and drop it on the open file or folder that is locked.
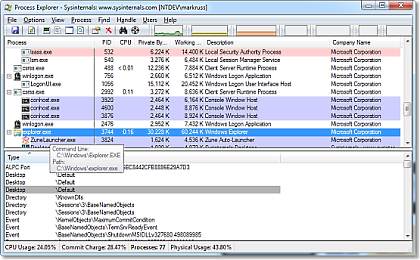
- The executable that is using the file will be highlighted in the Process Explorer main display list.
Identify which handle or DLL is using a file
- Open Process Explorer
- Running as administrator.
- Enter the keyboard shortcut Ctrl+F.
- Alternatively, click the “Find” menu and select “Find a Handle or DLL”.
- A search dialog box will open.
- Type in the name of the locked file or other file of interest.
- Partial names are usually sufficient.
- Click the button “Search”.
- A list will be generated.
- There may be a number of entries.
Release the lock on the file or folder
To release the lock on the file you are attempting the maintenance operation on, you will need to kill the appropriate process. An individual program or handle in the list provided by Process Explorer can be killed by:
- Selecting the process/handle/program entry.
- Pressing the delete key.
Proceed with care when deleting handles as this may generate erratic behavior and instabilities may occur.
При запуске Windows 7 появляется ошибка Checking file system on C: что это и что делать
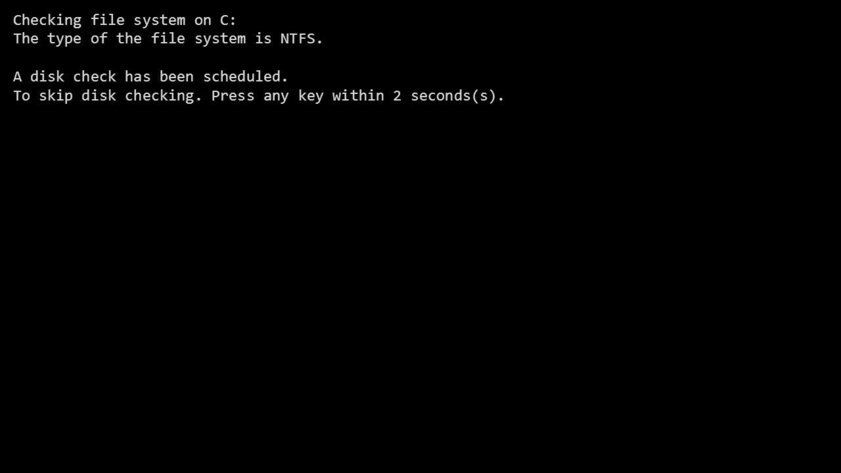
Полагаю, многие сталкивались с ошибкой Checking file system on C (перевод: «Проверка файловой системы на [диске] C») при запуске Windows 7 (или с Checking file system on D). Она обычно случается после сбоя в работе операционной системы. Когда она намертво виснет, многие просто вытягивают из розетки кабель питания или зажимают кнопку включения для принудительного выключения. После повторной загрузки может появиться соответствующий экран с «заветной» надписью (на фото ниже): «Checking file system on C. » — что это и что делать?
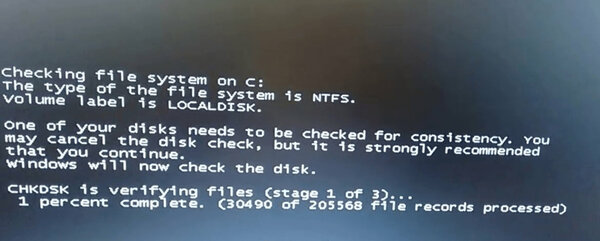
«Checking file system on C. » — эта надпись означает, что Microsoft не советует принудительно выключать питание компьютера — это может нанести вред всему ему в целом, а также жестким дискам в частности. Более того, данный процесс может испортить важные файлы, которые используются для нормальной загрузки операционной системы.
Это нормально, если сообщение Checking file system on C при запуске Windows 7 появляется один раз — как раз после описанных выше инцидентов. Тем не менее, некоторые пользователи отмечают, что эта проверка появляется снова и снова — каждый раз при перезагрузке операционной системы. Это отнимает массу времени и просто тратит нервы, но у данной проблемы есть достаточно простое решение.
Что делать при появлении этой ошибки? Для начала нужно проверить диск C на наличие ошибок
Если сообщение Checking file system on C появляется каждый раз при запуске Windows 7, для начала нужно разобраться, если ли ошибки на диске.
Во-первых, нужно проверить ошибки файловой системы
Шаг 1. Откройте «Проводник» и найдите диск C. Запустите контекстное меню нажатием правой кнопки по значку диска и выберите пункт «Свойства».
Шаг 2. Перейдите на вкладку «Инструменты» и нажмите на кнопку «Проверить».
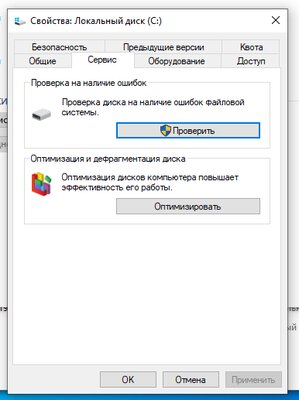
Шаг 3. Переведите в активное положение переключатель «Исправлять ошибки файловой системы автоматически» и нажмите на кнопку «Пуск».
Во-вторых, следует проверить диск C на битые сектора
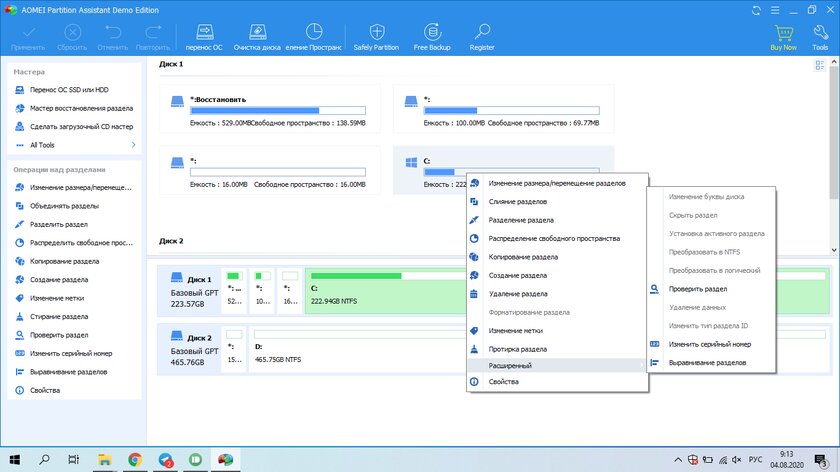
Если на диске C нет ошибок файловой системы, следует проверить поврежденные сектора. В этом, к примеру, я буду использовать приложение AOMEI Partition Assistant Professional — это удобный инструмент для управления жесткими дисками. Но у него есть аналоги: WinDFT, Seagate Seatools, Victoria.
Шаг 1. Установите и запустите приложение AOMEI Partition Assistant. Откройте контекстное меню диска C, перейдите в пункт «Расширенный» и выберите возможность «Проверить раздел».
Шаг 2. Выберите способ проверки ошибок для выполнения «Проверить на наличие плохих секторов на разделе» и нажмите на кнопку OK.
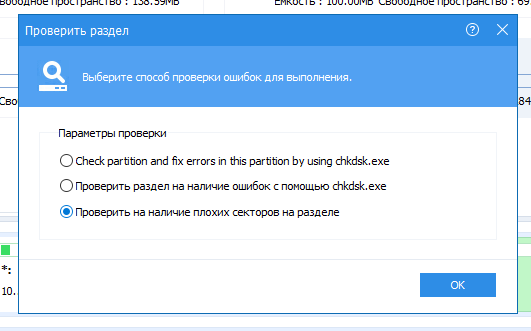
Шаг 3. Нажмите на кнопку «Старт», чтобы начать проверку.
Примечания:
- Если утилита найдет поврежденные сектора, нужно создать резервную копию диска C. Если в поврежденных секторах есть важные данные, отправьте накопитель в профессиональный центр восстановления данных. Браться за этот процесс самостоятельно не стоит — велик риск навсегда лишиться важной информации.
- Учитывайте, что не все поврежденные сектора могут быть восстановлены, поэтому лучше всего приучите себя создавать резервные копии хранилища по расписанию.
Теперь можно безопасно остановить проверку файловой системы
После проверки диска С на ошибки, вы должны задаться вопросом, как остановить этот процесс при каждом запуске операционной системы Windows 7. Вот два эффективных решения, которые для этого можно использовать.
Во-первых, для этого можно использовать редактор реестра
Шаг 1. Воспользуйтесь сочетание клавиш Windows + R, чтобы открыть диалоговое окно «Выполнить». Введите название приложения regedit и нажмите на клавишу Enter или кнопку OK, чтобы открыть редактор реестра.
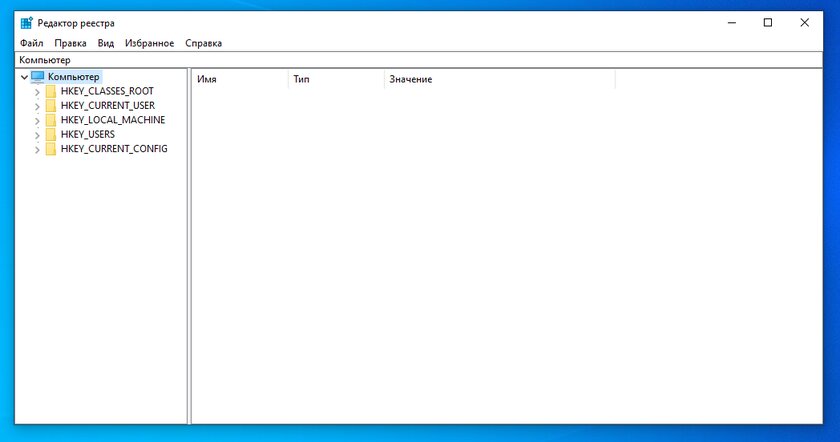
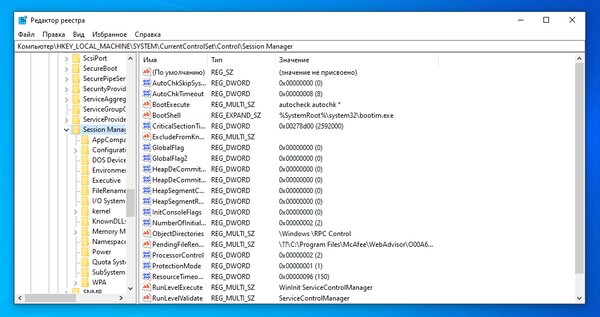
Шаг 2. Используйте левую панель данного приложения, чтобы перейти в следующий каталог:
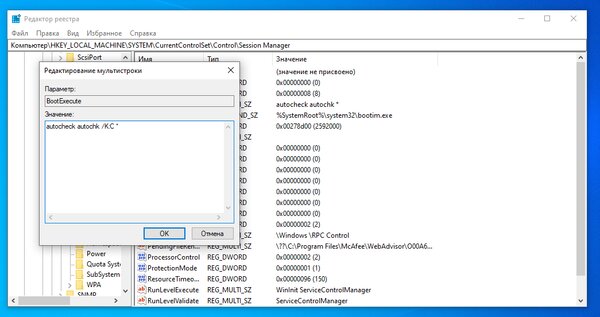
Шаг 3. Откройте файл BootExecute из правой части данного приложения.
Шаг 4. Добавьте значение /K:C в поле ключа перед значком *. Нажмите на кнопку OK, чтобы применить изменение.
Примечания:
- * — этот значок говорит о том, что каждый диск проверяется на согласованность.
- Ключ /K отключает проверку диска при запуске Windows — в данном случае он имеет отношение к диску C.
Шаг 5. Закройте редактор реестра.
Во-вторых, для этого можно использовать «Планировщик заданий»
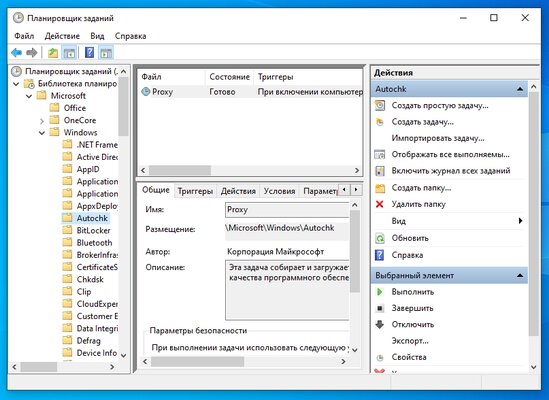
Шаг 1. Нажмите на кнопку «Пуск» и перейдите в «Панель управления», разверните меню «Система и безопасность» и откройте раздел «Администрирование».
Шаг 2. Откройте «Планировщик заданий». Выберите пункт Autochk и нажмите на кнопку «Отключить» в правой панели.
Вывод
В общем, справиться с ошибкой Checking file system on C при запуске Windows 7 достаточно просто. Для начала нужно проверить диск С на ошибки и битые сектора, а после этого можно избавляться от соответствующей проверки с помощью редактора реестра или «Планировщика заданий».


