- База знаний wiki
- Содержание
- Проверка состояния жестких дисков в Linux
- Задача:
- Решение:
- How to Test SSD/HDD Health in Linux
- Test SSD Health using Smartctl
- Test health of SSD/HDD
- Test SSD/HDD Health using Gnome Disks
- Install Gnome Disks
- How to check Hard Drive Disk Health in GNU/Linux
- Checking the hard drive health in Linux
- GUI Tools
- About Mike Turcotte-McCusker
- Related content
- Disabling the Nouveau open-source Nvidia driver to use the proprietary driver in OpenSUSE Leap 15.3
- Linux Mint 20.2 is now available
- Ubuntu 21.04 is now available with native Microsoft Active Directory integration and Wayland as the default
- Microsoft introduces support for Linux GUI apps on Windows 10
- Linux Mint will inform users about important security updates but not enforce them
- Microsoft Edge 91 will be the first to support syncing on Linux
- Comments
База знаний wiki
Продукты
Статьи
Содержание
Проверка состояния жестких дисков в Linux
Слова для поиска: проверка дисков, hdparm, badblocks, smart, smartctl, iostat, mdstat
Задача:
Проверить состояние жестких дисков на выделенном сервере, наличие сбойных блоков на HDD, анализ S.M.A.R.T
Решение:
В этой статье будут рассмотрены способы проверки и диагностики HDD в Linux. Полученная информация поможет проанализировать состояние жестких дисков, и, если это необходимо, заменить носитель до того, как он вышел из строя неожиданно и в самый не подходящий для этого момент.
Задуматься о состоянии HDD следует по некоторым признакам поведения системы в целом: резко выросла общая нагрузка на дисковую подсистему, упала скорость чтения/записи, другие проблемы косвенно указывающие что с HDD что-то не то.
Ниже я приведу основные команды, выполнять их необходимо из-под учётной записи root
Чтобы получить список подключенных HDD в систему, выполнить:
Мы получим листинг всех подключенных накопителей, их размер и имена устройств в системе.
Для того, чтобы посмотреть какие устройства и куда смонтированы, выполнить:
Узнать сколько на каждом из смонтированном носителе занято пространства, выполнить:
Если мы используем софтовых RAID, его состояние мы можем проверить следующей командой:
Если всё в порядке, то мы увидим что-то подобное:
Из вывода видно состояние raid (active), название устройства raid (md0) и какие устройства в него включены (sdb1[0] sdc1[1]), какой именно raid собран (raid1), в нём два диска и они оба работают в raid ([2/2] [UU])
Смотрим скорость чтения с накопителя
Где /dev/sdX — имя устройства которое необходимо проверить.
Полезной программой для анализа нагрузки на диски является iostat, входящей в пакет sysstat Ставим:
Теперь смотрим вывод iostat по всем дискам в системе:
С интервалом 10 секунд:
Или по определённому накопителю:
Полученные данные покажут нам нагрузку на устройства хранения, статистику по вводу/выводу, процент утилизации накопителя.
Переходим непосредственно к проверке накопителей. Проверка на наличие сбойных блоков осуществляется при помощи программы badblocks. Для проверки жесткого диска на бэдблоки, выполнить:
Где /dev/sdX — имя устройства которое необходимо проверить. Если программа обнаружит наличие сбойных блоков, она выведет их количество на консоль. Выполнение данной операции может занять продолжительное время (до нескольких часов) и желательно её выполнение на размонтированной файловой системе, либо в режиме read-only.
Для того, чтобы записать сбойные блоки, выполняем:
Где /tmp/badblock — файл куда программа запишет номера сбойных блоков.
Теперь при помощи программы e2fsck мы можем пометить сбойные блоки и они будут в дальнейшем игнорироваться системой. ВНИМАНИЕ! Данная операция должна проводиться на размонтированной файловой системе, либо в режиме read-only! Проверенное устройство и устройство на накотором будут помечаться сбойные блоки должно быть одно и тоже!
Если были обнаружены сбойные блоки на диске, есть тенденция появления новых бэдблоков, необходимо задуматься о скорейшем копировании данных и замене данного носителя. Приведённые выше команды помогут выявить сбойные блоки и пометить их как таковые, но не спасут «сыпящийся» диск.
Также в своём инструментарии полезно использовать данные полученные из S.M.A.R.T. дисков.
Ставим пакет smartmontools
Получаем данные S.M.A.R.T. жесткого диска:
Где /dev/sdX — имя устройства которое необходимо проверить.
Вы получите вывод атрибутов S.M.A.R.T., значение каждого из которых хорошо описаны в Википедии
Для сохранности данных настоятельно рекомендуем делать backup (резервное копирование). Это поможет в кратчайшие сроки восстановить необходимые данные и настройки в форс-мажорных обстоятельствах.
Источник
How to Test SSD/HDD Health in Linux

SMART (Self-Monitoring, Analysis, and Reporting Technology) is a feature enabled in all modern hard disk drives and SSDs to monitor/test reliability. It checks different drive attributes to detect the possibility of drive failure. There are different tools available in Linux and Windows to perform the SMART tests.
In this tutorial, we will learn how to test SSD/HDD health in Linux from CLI and GUI
Two methods explained here are:
- Using Smartctl
- Using Gnome Disks
Test SSD Health using Smartctl
Smartctl is a command-line utility tool that can be used to check S.M.A.R.T-enabled HDD or SSD status in the Linux system.
Smartctl utility tool comes with the package smartmontools.Smartmontools is available by default in all Linux distributions including Ubuntu, RHEL and Centos and Fedora.
To install smartmontools in Linux:
Ubuntu
Start the service using the following command.
RHEL and CentOS
Fedora
Smartd service will start automatically after the successful installation.
If not started, start smartd service:
Test health of SSD/HDD
To test overall-health of the drive, type:
d — Specifies the type of device.
ata — the device type is ATA, use scsi for SCSI device type.
H — Check the device to report its SMART health status.
The result PASSED indicates that the disk drive is good. If the device reports failing health status, this means either that the device has already failed or could fail very soon.
If it indicates failing use -a option to get more information.
 Smartctl command — SMART attributes
You can monitor the following attributes:
[ID 5] Reallocated Sectors Count — Numbers of sectors reallocated due to read errors.
[ID 187] Reported Uncorrect — Number of uncorrectable errors while accessing read/write to sector.
[ID 230] Media Wearout Indicator — Current state of drive operation based upon the Life Curve.
100 is the BEST value and 0 is the WORST.
Check SMART Attribute Details for more information.
To initiate the extended test (long) using the following command:
To perform a self test, run:
To find drive’s self test result, use the following command.
To evaluate estimate time to perform test, run the following command.
 Calculating estimated time to perform test
You can print error logs of the disk by using the command:
Test SSD/HDD Health using Gnome Disks
With GNOME disks utility you can get a quick review of your SSD drives, format your drives, create a disk image, run standard tests against SSD drives, and restore a disk image.
Install Gnome Disks
In Ubuntu 20.04, the GNOME Disks application comes with the GNOME disk tool installed. If you are unable to find the tool, use the following command to install it.
GNOME Disk is now installed, now you can go to your desktop menu navigate to the application, and launch. From the application, you can overview all your attached drives. You can also use the following command to launch the GNOME Disk application.
 GNOME Disks GUI
Now the test can be performed on the drives. To do so, launch the GNOME disks and select the disk which you want to test. You can find the quick assessment of the drives such as size, partitioning, Serial number, temp, and health. Click on the gear icon and select SMART Data & Self-tests.
 GNOME Disks SMART Data and self tests
In the new window you can find the results of the last test. In the top right of the window, you can find that the SMART option is enabled. If SMART is disabled, it can be enabled by clicking on the slider. To start the new test click on the Start Self-test button.
 GNOME Disks running Self-test
Once the Start Self-test button is clicked, a drop down menu will be appeared to select the type of the tests which are Short, Extended and Conveyance. Select the test type and provide your sudo password to continue the test. From the progress meter, percentage of the test complete can be seen.
 GNOME Disks self test result
Источник
How to check Hard Drive Disk Health in GNU/Linux
So, I recently purchased a new (used, but new to me) laptop, that had a 1TB 5400RPM Hard Disk in it, granted the laptop is fairly powerful and capable of modern gaming, rendering, and number crunching thanks to a 4th generation i7 CPU and a Dedicated 2GB GDDR5 GPU. However, the HDD seemed to be running awfully slowly, even for a 5400RPM drive.
I’ve been using strictly Solid State Drives for a number of years now, so I admit there was always the possibility of me just having become spoiled, but I thought that perhaps I should look into the health of the drive; after all, a laptop with specs like that should in my eyes run faster so better safe than sorry. This raised the thought to me that perhaps I should write a quick how-to on this procedure for the Ghacks.net community.
This tutorial is done via CLI only, however, there are tools that do the job as well I will briefly cover at the end of this.
Checking the hard drive health in Linux
The tool we are going to be using is called smartmontools (which is also available for Windows and OS X).
The smartmontools package contains two utility programs (smartctl and smartd) to control and monitor storage systems using the Self-Monitoring, Analysis and Reporting Technology System (SMART) built into most modern ATA/SATA, SCSI/SAS and NVMe disks. In many cases, these utilities will provide advanced warning of disk degradation and failure. Smartmontools was originally derived from the Linux ​smartsuite package and actually supports ATA/ATAPI/SATA-3 to -8 disks and SCSI disks and tape devices.
Installing smartmontools
- For Ubuntu/Linux Mint users: sudo apt install smartmontools
- For Arch users: sudo pacman -S smartmontools
Generally speaking smartmontools is available on most distributions, just install with your given package manager using the package name “smartmontoolsâ€
The How-To
Once that is installed, we need to figure out which drive our questionable one is:
This will give you a list of all drives and partitions. If you are only using one drive within your machine then it’s going to list /dev/sda and its various partitions. If you have multiple drives, you’ll need to use a little bit of common sense in seeing which drive the one you want to inspect, has what on it, and it’s associated listing such as /dev/sdb or /dev/sdc etc.
Once we know the drive we want to check out, there are three tests that we can run, depending on how concerned you are:
- A short test, usually sufficient at detecting issues
- A longer test if you are more concerned that examines the entire disk surface
- A conveyance test which is used to test if damages occurred during transportation of the device from the manufacturer.
The next step is to find out what types of tests our disk supports, as well as an estimate to how long the tests will take to run.
sudo smartctl -c /dev/sdX (replace X with the appropriate letter)
You’re going to be given a large amount of output as seen in this screenshot. I’ve highlighted the areas that were relevant to me for this test; the time estimates, and the fact that my disk does NOT support a conveyance test.
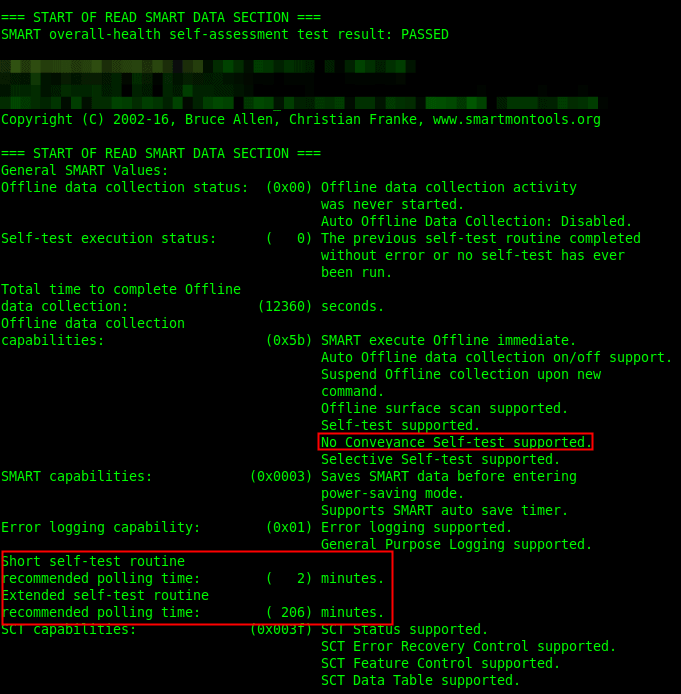
I oped to run the shorter test, just because I heard no clicks or other telltale signs that the hard disk was actually on it’s last legs besides the speed; to which I again state I may just be spoiled by SSDs. You are more than welcome to run that which you feel needed.

The commands for the various tests are (replace sdX with the drive that you want to test)
- Short: sudo smartctl -t short /dev/sdX
- Long: sudo smartctl -t long /dev/sdX
- Conveyance: sudo smartctl -t conveyance /dev/sdX
Note: You will not get any scrolling output for your test beyond being told how long the test will take. If you’re running the long test, you may have to wait an hour or two or longer.
Once the test is finished, it’s time to get out result!
sudo smartctl -H /dev/sdX
Hopefully you’ll see this:

If not, then either some more digging may need to be done, or it might just be time to replace the drive in question.
GUI Tools
There are other options for those of you who avoid the command line, such as the very popular and well known tool gnome-disk-utility (also known as ‘disks’ by some desktop environments.)
There are numerous other free and paid utilities out there, but I’m not here to advertise, as both of these utilities have served me well in the past for doing quick checks.

About Mike Turcotte-McCusker
Related content
Disabling the Nouveau open-source Nvidia driver to use the proprietary driver in OpenSUSE Leap 15.3

Linux Mint 20.2 is now available

Ubuntu 21.04 is now available with native Microsoft Active Directory integration and Wayland as the default
Microsoft introduces support for Linux GUI apps on Windows 10
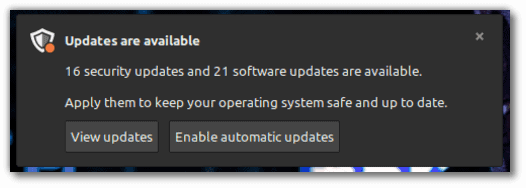
Linux Mint will inform users about important security updates but not enforce them
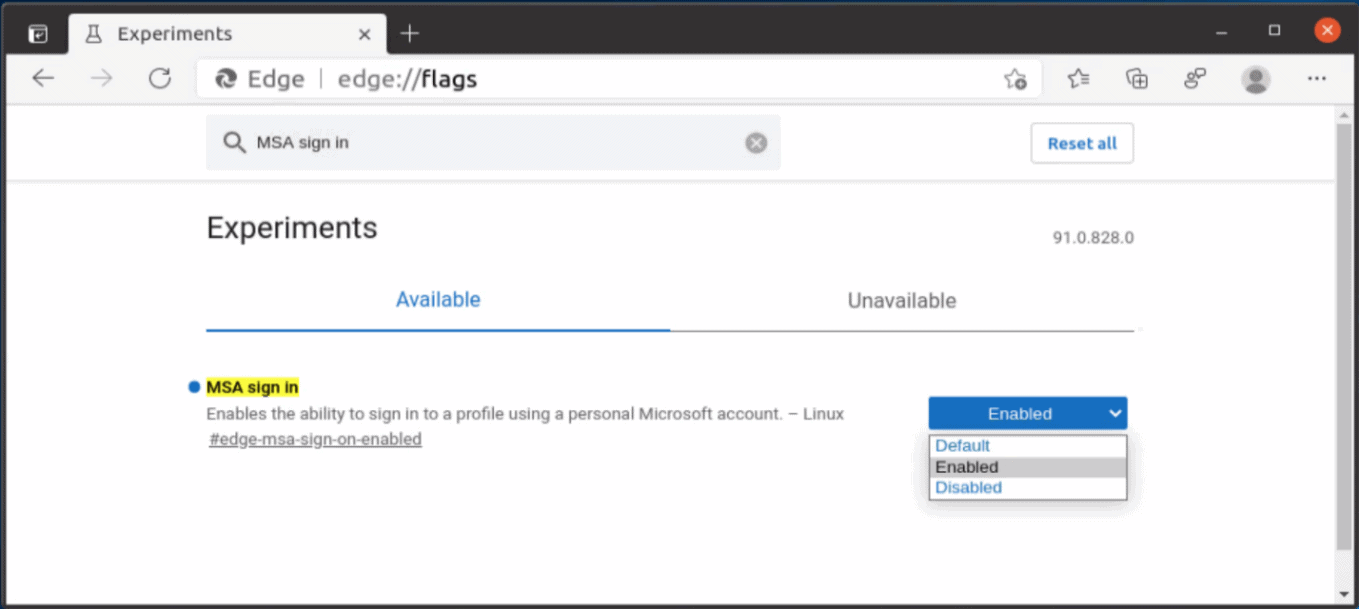
Microsoft Edge 91 will be the first to support syncing on Linux
Comments
I use GSmartControl which is a GUI that runs smartmontools and is available for most distros in their repositories and is very easy to use. Shows you details of the hard drive selected (type, serial number, model, firmware version, etc.), shows all the S.M.A.R.T. attributes and capabilities supported by the drive, and allows to select the short or long tests.
I agree with Richard. Disks (gnome-disks) is good enough for a quick view and check. GSmartControl is more detailed and extensive, an excellent GUI for smartctl in my opinion.
Another GUI for smartmontools is through Webmin, a browser-based system configuration utility. It includes a handy module that taps into a drive’s SMART.
http://www.webmin.com/
If your hdd or partition is formatted with ext2/ext3/ext4 you can also use e2fsprogs which, like these file systems, is developed and maintained by Theodore Ts’o.
The program(s) (it’s actually a number of very small tools) is straightforward to use from the console and has many useful options. I have set mine up to run a thorough hdd-check once each 100 boot-ups …
tune2fs -c 100 /dev/sda1 (change your device accordingly)
… so, each couple of weeks the boot procedure takes a little longer. But that’s ok.
PartEd Magic would be worth a feature, I think it’s indispensable.
I use the gnome disk utility but its alright informing me of bad sectors but can they fix them. these are useless in that respect.
THANK YOU. very helpful. Q. Can I run this utility on more than on hard drive at once, i.e. start it for one, then immediately for another while the first test is running?
In Windows 7 was implemented the best system for checking HDD drives and even Sata 2/3 /, when you go into my computer you right-click on the disk and select the properties, go to the service, perform the scan, the following options are available: 1) Automatically correct system errors 2) Scan and repair damaged sectors. in Windows 10 do you think it’s all included? Removed … you run the Automatically fix system errors – on Windows 2000 / XP / Windows Vista / 7 / test automatically and you will be notified that the system is busy and can not check the disk, enable the next time you restart the computer, check (in the scheduler) and there will be a blue screen with verification depending on the version of Windows / and will check well between others, for which I liked Microsoft, but for some reason I forgot or specially removed it in Windows 10 and maybe in 8 / 8.1 such a function, of course the best way to restore these functions to save many users from the Bad Sector to the At the initial stage, do not you agree? Ð’ Windows 7 была реализована ÑÐ°Ð¼Ð°Ñ Ð»ÑƒÑ‡ÑˆÐ°Ñ ÑиÑтема по проверке HDD диÑков и даже Sata 2/3/ , когда заходишь в мой компьютер нажимаешь правой кнопкой мыши на диÑк и выбираешь ÑвойÑтва, переходишь в ÑервиÑ, выполнить проверку, ДоÑтупны Ñледующие варианты: 1)ÐвтоматичеÑки иÑправлÑÑ‚ÑŒ ÑиÑтемные ошибки 2)ПроверÑÑ‚ÑŒ и воÑÑтанавливать поврежденные Ñектора. в Windows 10 вы думаете вÑÑ‘ включено? Убрали… вы запуÑтите проверку ÐвтоматичеÑки иÑправлÑÑ‚ÑŒ ÑиÑтемные ошибки – на Windows 2000/XP/Windows Vista/7/ и вам выдаÑÑ‚ уведомление о том, что ÑиÑтема занÑта и не может проверить диÑк, включить при Ñледующий перезагрузке компьютера проверку (в планировщик) и будет Ñиний Ñкран Ñ Ð¿Ñ€Ð¾Ð²ÐµÑ€ÐºÐ¾Ð¹ в завиÑимоÑти от верÑии Windows/ и между прочем проверит хорошо, за что Ñ Ð»ÑŽÐ±Ð¸Ð» Microsoft, но почему то забыли или Ñпециально убрали в Windows 10 а то и может и в 8/8.1 такую функцию, конечно лучший вариант воÑÑтановить Ñти функции, чтобы ÑпаÑти многих пользователей от Бад Секторов на начальной Ñтадии, разве вы не ÑоглаÑны?
Источник


