- How to check that .NET is already installed
- Check SDK versions
- Check runtime versions
- Check for install folders
- More information
- How to check your PC’s components in Windows 10
- System Information
- Device Manager
- Task Manager
- System Information
- 3 rd -party Applications
- Everything you need to know
- Check windows components installed
- Answered by:
- Question
- Answers
- All replies
How to check that .NET is already installed
This article teaches you how to check which versions of the .NET runtime and SDK are installed on your computer. If you have an integrated development environment, such as Visual Studio or Visual Studio for Mac, .NET may have already been installed.
Installing an SDK installs the corresponding runtime.
If any command in this article fails, you don’t have the runtime or SDK installed. For more information, see the install articles for Windows, macOS, or Linux.
Check SDK versions
You can see which versions of the .NET SDK are currently installed with a terminal. Open a terminal and run the following command.
You get output similar to the following.
Check runtime versions
You can see which versions of the .NET runtime are currently installed with the following command.
You get output similar to the following.
Check for install folders
It’s possible that .NET is installed but not added to the PATH variable for your operating system or user profile. In this case, the commands from the previous sections may not work. As an alternative, you can check that the .NET install folders exist.
When you install .NET from an installer or script, it’s installed to a standard folder. Much of the time the installer or script you’re using to install .NET gives you an option to install to a different folder. If you choose to install to a different folder, adjust the start of the folder path.
dotnet executable
C:\program files\dotnet\dotnet.exe
.NET SDK
C:\program files\dotnet\sdk\
.NET Runtime
C:\program files\dotnet\shared\
dotnet executable
/home/user/share/dotnet/dotnet
.NET SDK
/home/user/share/dotnet/sdk/
dotnet executable
/usr/local/share/dotnet/dotnet
.NET SDK
/usr/local/share/dotnet/sdk/
More information
You can see both the SDK versions and runtime versions with the command dotnet —info . You’ll also get other environmental related information, such as the operating system version and runtime identifier (RID).
How to check your PC’s components in Windows 10
Now and then, you might need to know what components your PC has installed. In particular, you might need to know specifics of the central processing unit (aka the CPU or processor), the graphics processing unit (aka the GPU or graphics card), the random access memory (RAM), or storage (hard drives or solid-state drives).
Some examples of when this information would come in handy include technical support calls, software requirements and recommendations, and assessing whether your PC is fast and well-equipped enough for your overall needs. Regardless of the reason, there are several tools built into Windows 10 and available from 3 rd -party developers that can tell you everything you need to know about your PC.
System Information
The first place you can look for information on your PC’s configuration is Settings > System > About. The easiest way to get there is to right-click on the Windows icon and select “System” from the menu.
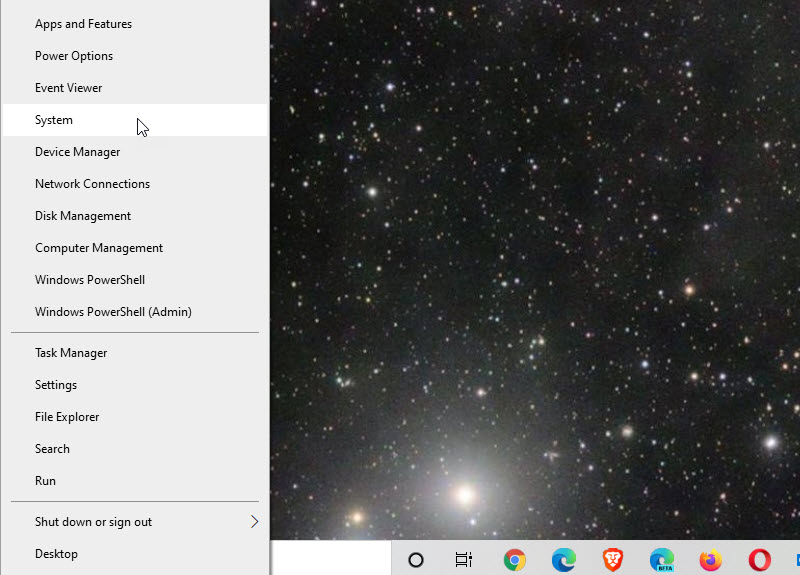
The window that pops up will give you a variety of useful information, including your PC’s name, the CPU it uses, the installed RAM, and information on the version of Windows 10 that’s installed. This information can help you diagnose problems and understand the essential aspects of your PC’s performance.
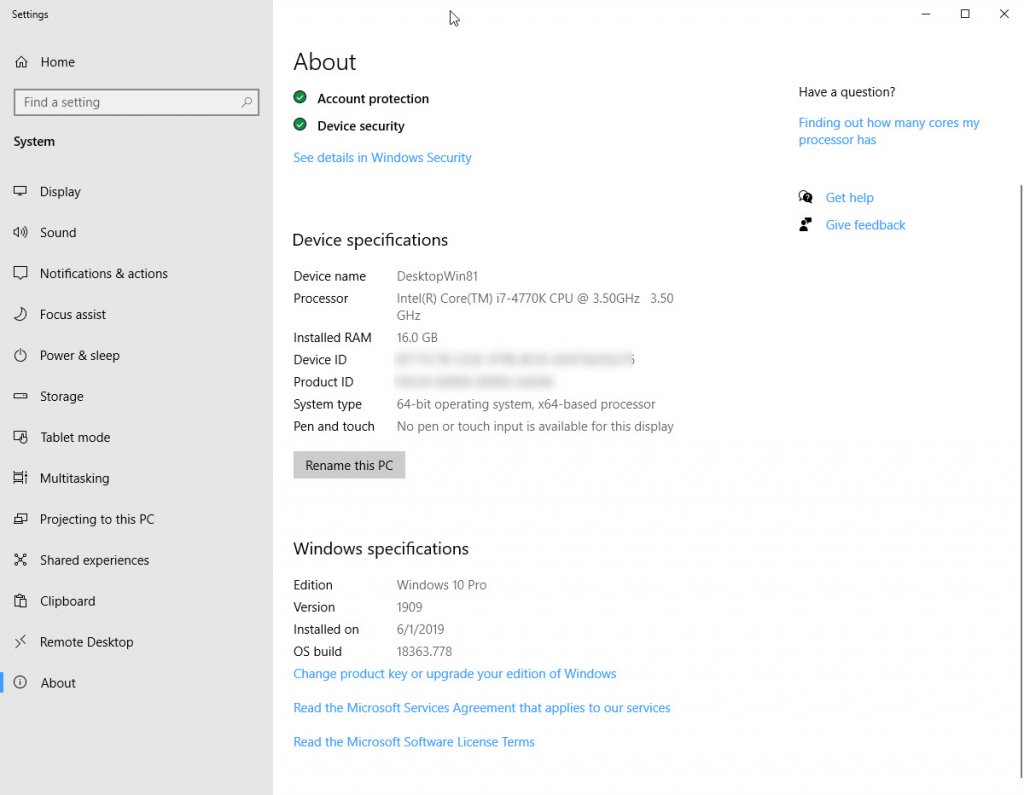
If you scroll through this page, you’ll find opportunities to change your Windows 10 product key, upgrade your edition of Windows 10, and access a different view of the same system information.
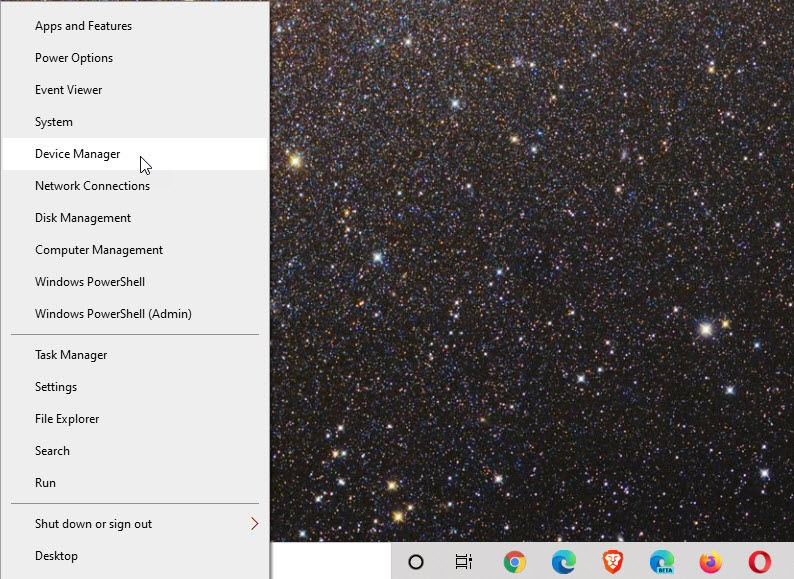
Device Manager
If you want information on more components along with the ability to make changes to installed component drivers, then you can open Device Manager from the Control Panel. You can get there quickly by right-clicking on the Windows icon and selecting “Device Manager” from the menu.
Expand various categories, and you’ll gain access to a great deal of useful information. You can see a list of the storage devices installed in your PC, the display adapters, the monitors, the network adapters, the processors, and much more. Also, if you have any problems with a given component, it will show up here.
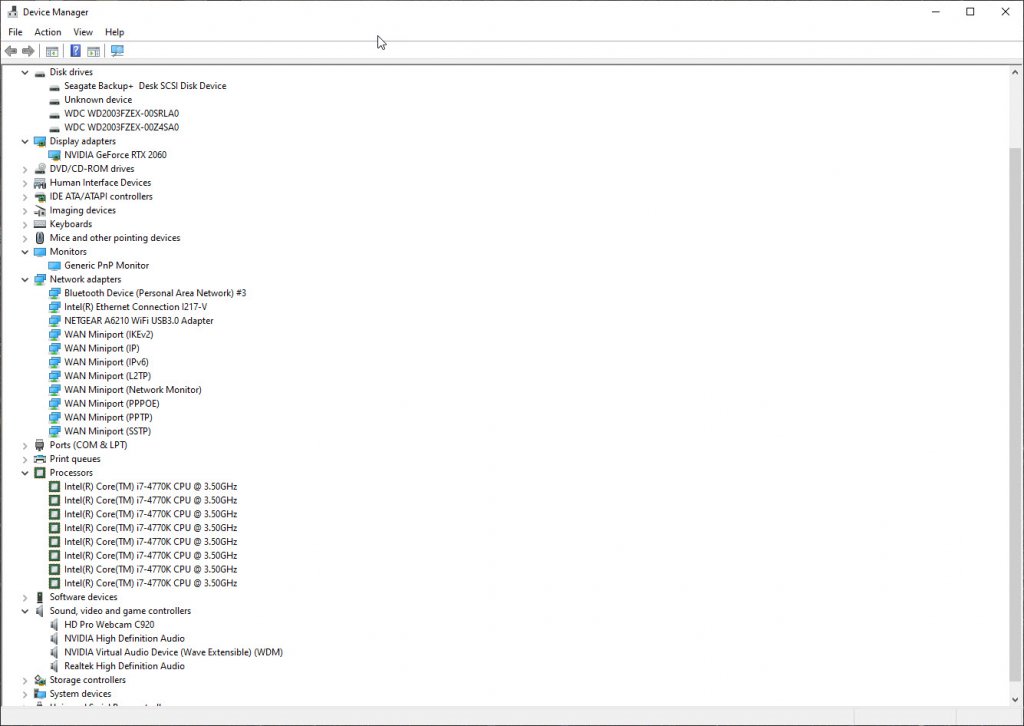
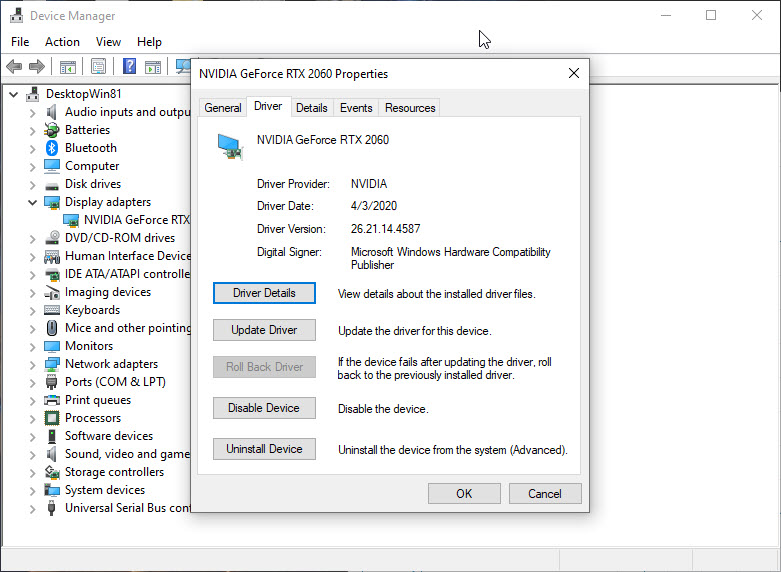
If you double-click on any of the installed devices, then you can get additional technical details, including the opportunity to update drivers and read specific error information.
Task Manager
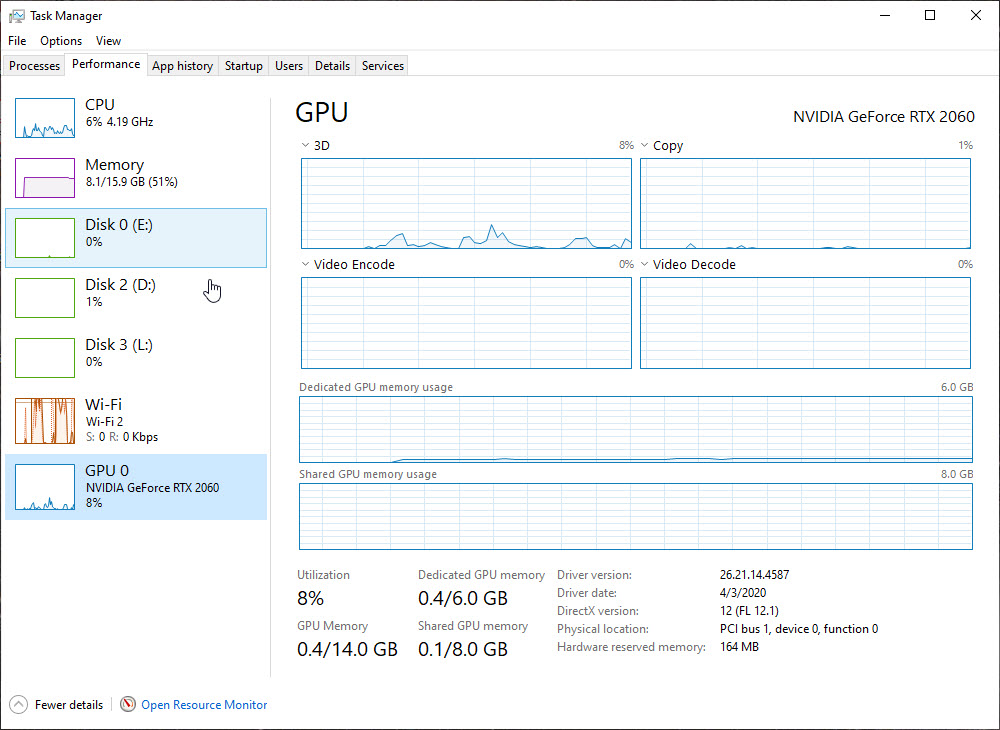
Perhaps you’re more interested in how your various components are performing. For that, you can open the Task Manager and select the Performance tab. There, you can get information on CPU, RAM, storage, and GPU utilization.
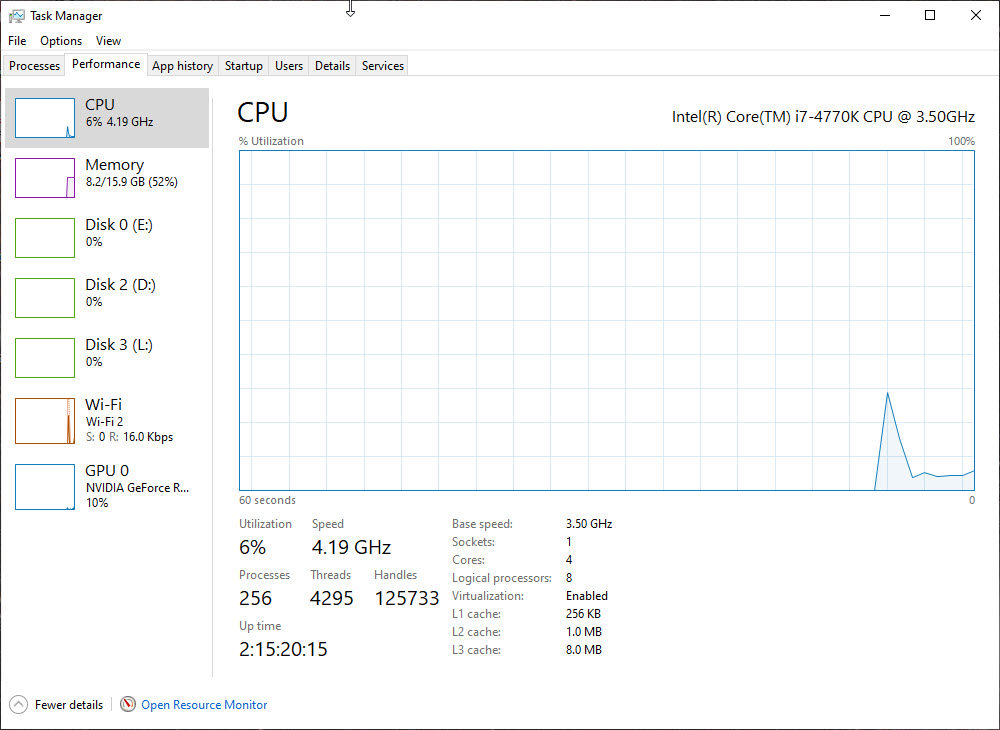
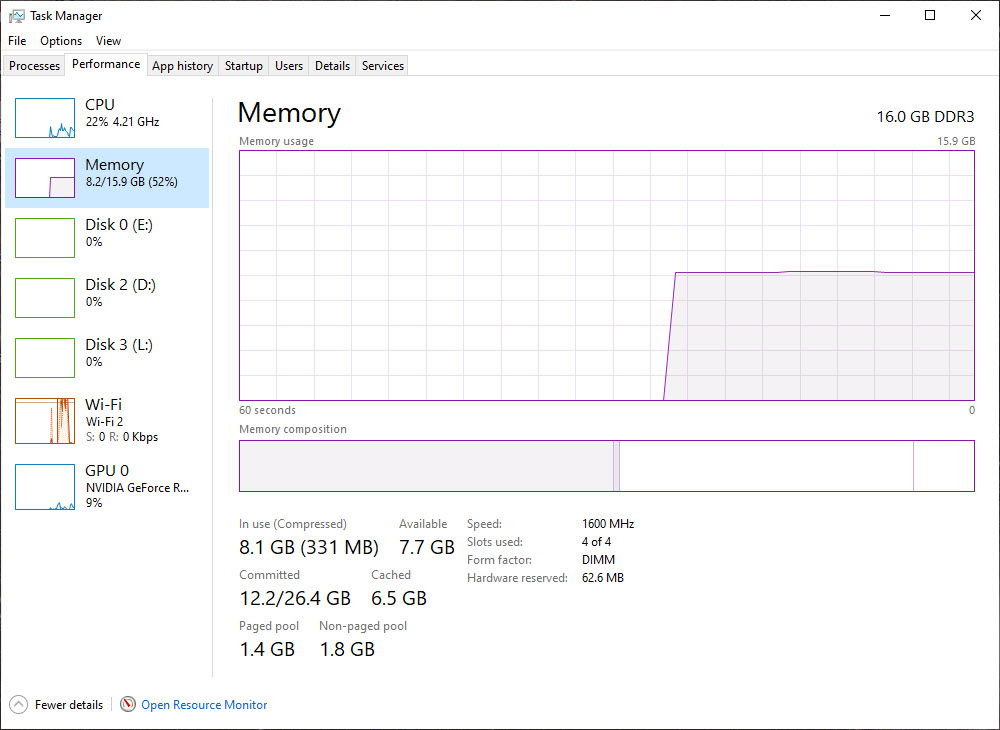
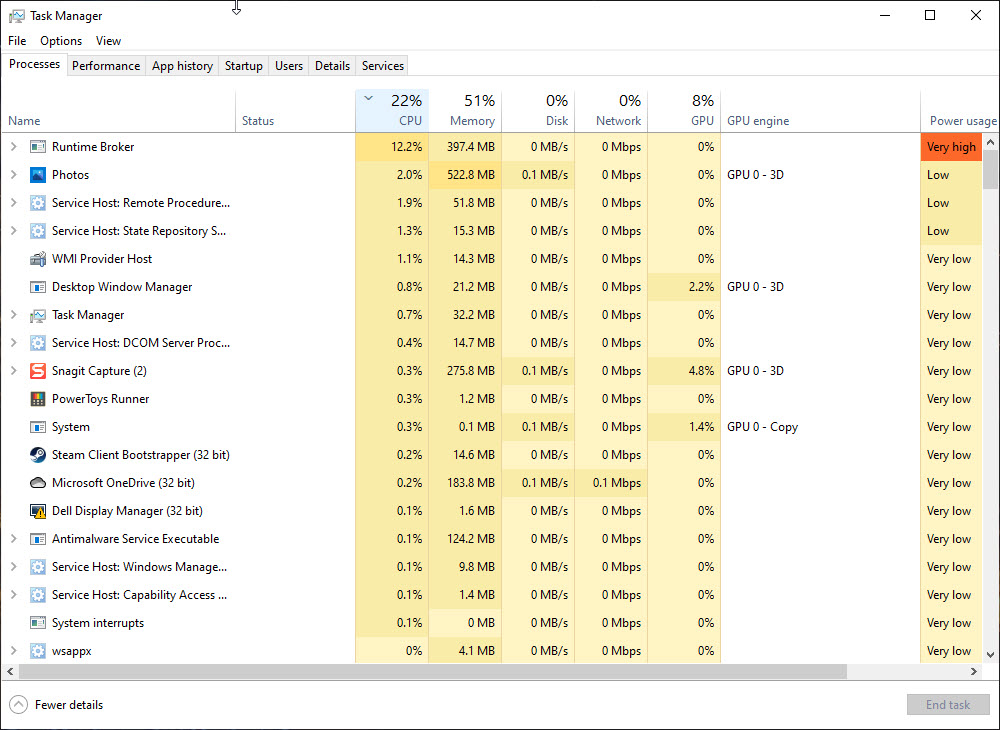
This information can help diagnose problems, such as a CPU that’s running too hard and causing extra heat and fan noise. Check out the Processes tab for information on which applications are using the CPU, RAM, storage, and GPU – that, too, can help diagnose system problems.
Another tool that’s accessible via the Task Manager is the Resource Monitor. Click on the link at the bottom of the Performance tab to access more in-depth information on CPU, RAM, disk, and network utilization.

This tool will show you how many cores your CPU has and how each is being used. Note that in a multithreaded CPU, you’ll see how many threads your processor is capable of running rather than the number of physical cores.
Also helpful is the available information on how your RAM is utilized and how hard your various storage devices are working. Finally, you can see how much network bandwidth your PC is using, which can help you understand any network performance issues you’re experiencing.
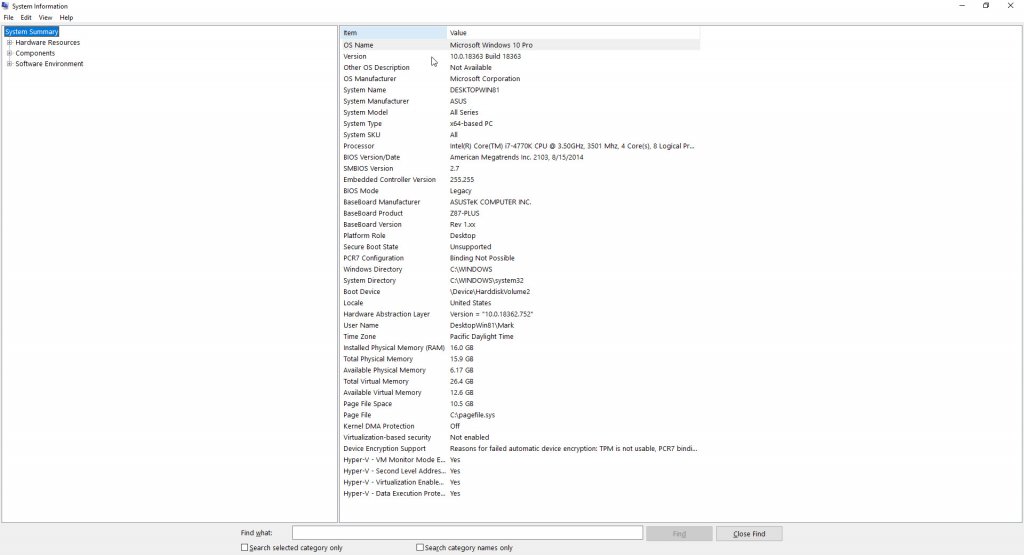
System Information
The final Windows 10 tool we’ll discuss in this guide is the System Information utility. The easiest way to access it is to type “System Information” into the search box, and then select the app when it pops up.
System Information provides perhaps the most information of all of the Windows 10 tools, including a considerable amount of data as a system summary. Here, you can see more information about your Windows 10 installation and your PC, including the system model if it’s available, and specifics on your RAM and its configuration.
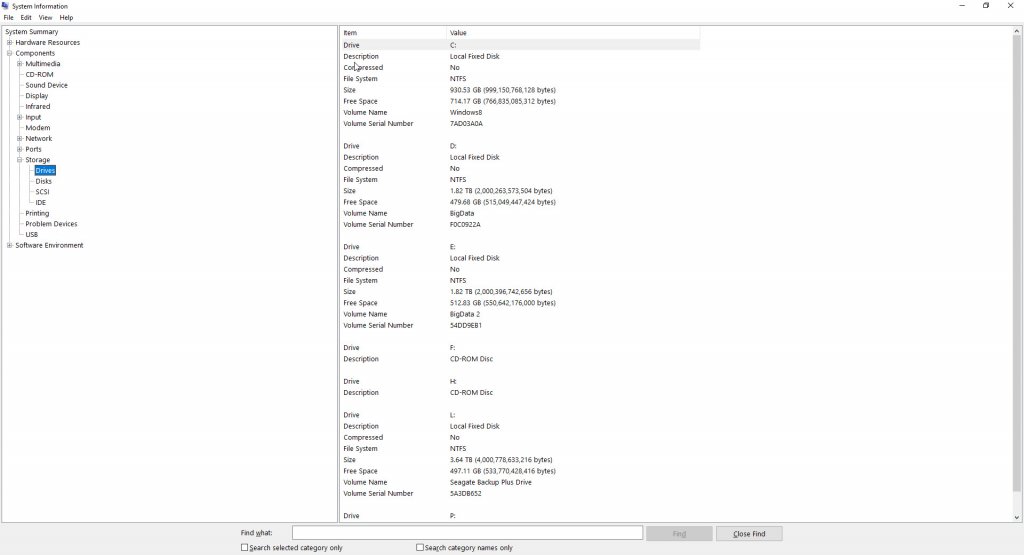
Expand the “Hardware Resources” category, and you can access information on several system components. One particularly valuable bit of information is on your storage devices, which is broken out by device type.
You can also expand the Software Environment category to find out more about your Windows 10 installation. That’s beyond the scope of this guide, but it’s valuable information as well for diagnosing problems.
3 rd -party Applications
In addition to the resources built into Windows 10, there are many 3 rd -party applications that you can install that will give you even more detail about your system configuration. For example, HWiNFO64 is a free application that provides you with more information about your PC than you’ll likely ever need, unless you’re really into the technical details of how your PC is running.
The HWiNFO64 System Summary screen shows you various details about your CPU, your GPU, your RAM, and your storage devices. This screen includes a variety of performance metrics that can help determine if you have the right components installed for your needs.
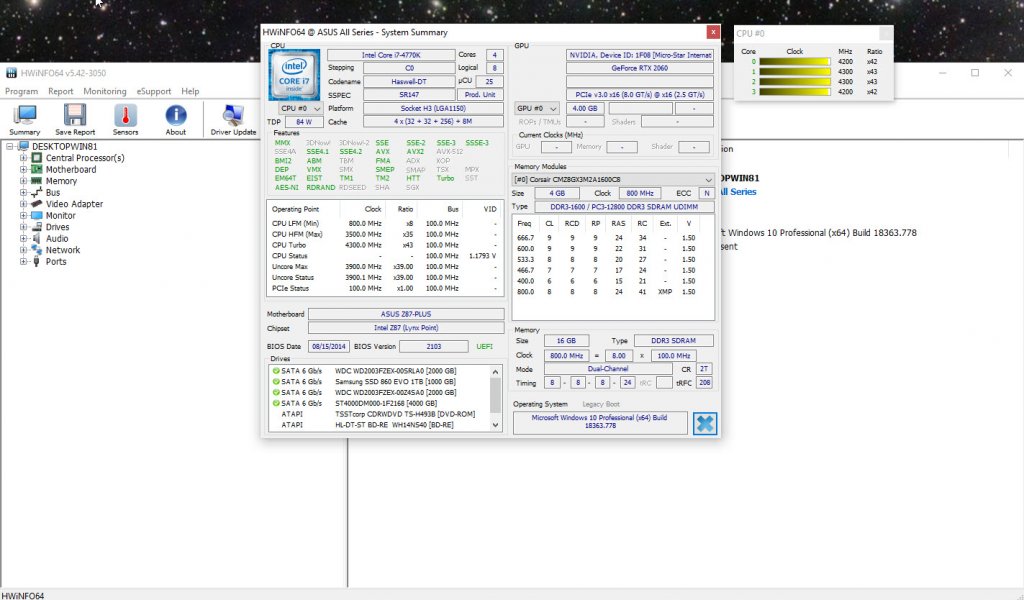
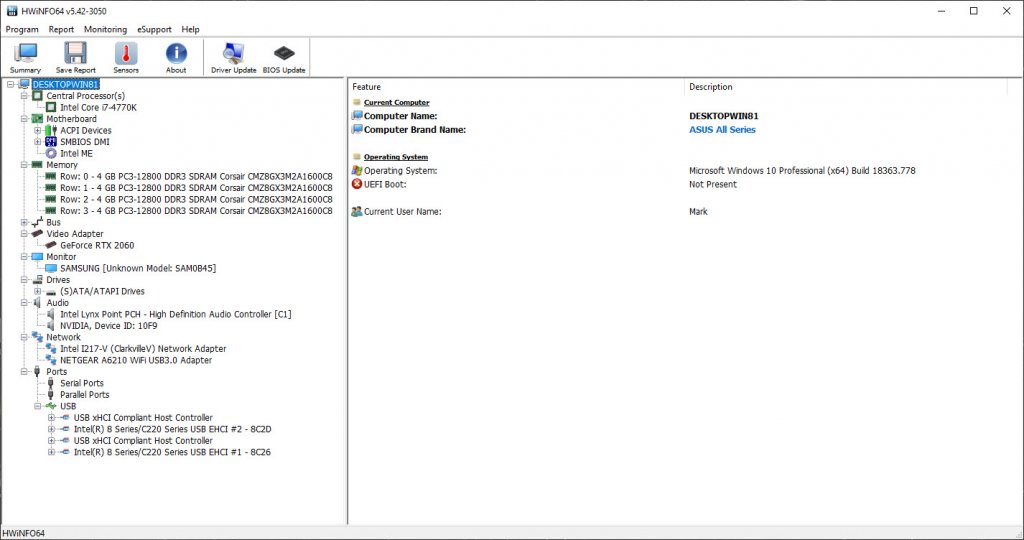
You can close the System Summary screen and access additional information about your PC components.
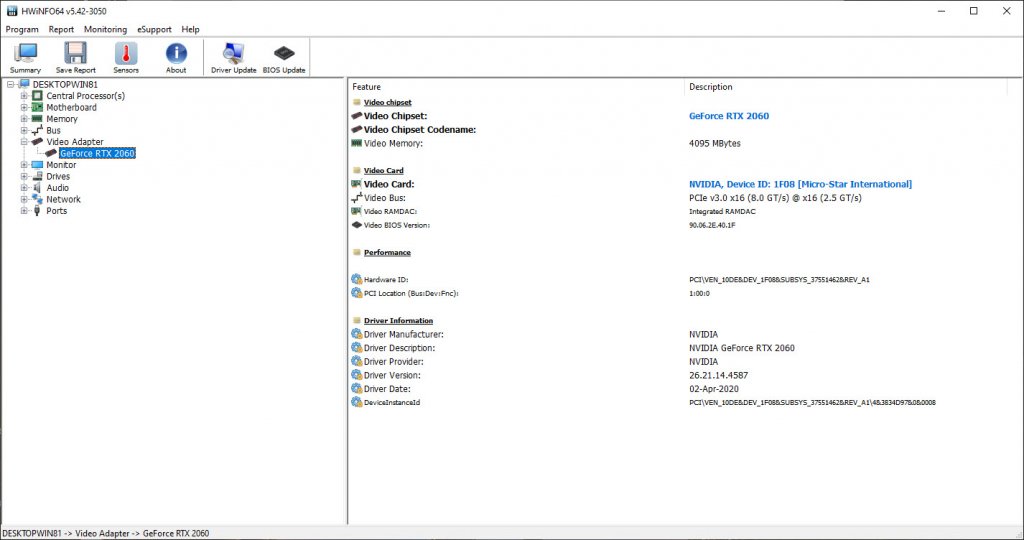
If you click on a component, such as the GPU, you can get even more detailed information. In the case of the GPU, for example, you can find out what bus it’s connected through (PCIe), how much video RAM is installed (4095 megabytes), and what the driver version is (26.21.14.4587).
You can also use HWiNFO64 to track how your components are performing, and how much heat they’re generating. That, too, is beyond the scope of this guide, but if you need to solve issues with heat and fan noise, as well as performance problems, then this information can be invaluable.
HWiNFO64 is just one system information utility that’s available for Windows 10. Search, and you’ll find hundreds. Just be sure to exercise caution when installing any free apps, because they can sometimes come with adware and other unwanted add-ons that install alongside the utility.
Everything you need to know
Between these various utilities, you can find out just about everything you need to know about the components installed inside your PC. Whether it’s your CPU, GPU, RAM, or storage, you can find the brand, configuration, driver level, and more with just the tools built into Windows 10. And if you want to branch out from there, many 3 rd -party applications stand ready to lend a hand.
Check windows components installed
This forum has migrated to Microsoft Q&A. Visit Microsoft Q&A to post new questions.
Answered by:
![]()
Question
![]()
![]()
Is there a simple command that can be used to check the installed Windows Updates from the Command-prompt?
e.g. to check if MS10-066 is installed on the server from the Windows Command-prompt
Answers
![]()
![]()
You’ll need the corresponding KB number (982802) or you’ll need to know if it was part of a rollup or service pack.
wmic qfe list
— Mike Burr
All replies
![]()
![]()
You’ll need the corresponding KB number (982802) or you’ll need to know if it was part of a rollup or service pack.
wmic qfe list
— Mike Burr
![]()
![]()
This worked for me:
wmic qfe | find “982802”
![]()
![]()
![]()
![]()
![]()
![]()
![]()
![]()
Another option if you want to use PowerShell:
To search for a specific hotfix
![]()
![]()
I share my solution here, which list every updates ( some post here only list few updates ) and dump to a file
$Session = New-Object -ComObject «Microsoft.Update.Session»
$Searcher = $Session.CreateUpdateSearcher()
$FormatEnumerationLimit=-1
$historyCount = $Searcher.GetTotalHistoryCount()
$Searcher.QueryHistory(0, $historyCount) | Select-Object Title, Description, Date,
>>> -ExpandProperty Title > C:/Maintenance/ListOfWindowsUpdates.txt
![]()
![]()
Thank you for sharing this script. I’m starting to use saltstack for automated configuration management and their Windows Updates module has been unable to find a specific KB that I was interested in verifying was installed on computers. I’ve been unable to track down why the module doesn’t display this KB (and probably others). The Windows GUI shows it installed, however, but the get-hotfix command does not. Your script DOES show it, though.
KB4012215 is the KB in question.
Are you able to explain to me what part of your script is exposing this otherwise hidden KB? That might help me in figuring out how to filter it in with saltstack.


