- Use the System File Checker tool to repair missing or corrupted system files
- Run the System File Checker tool (SFC.exe)
- More Information
- Checking the Installation of Features, Components, Files
- Windows cannot copy files required for installation. Make sure all files required for installation are available, and restart the installation. Error code: 0x80070570
Use the System File Checker tool to repair missing or corrupted system files
If some Windows functions aren’t working or Windows crashes, use the System File Checker to scan Windows and restore your files.
Though the steps below might look complicated at first glance, just follow them in order, step-by-step, and we’ll try to get you back on track.
Run the System File Checker tool (SFC.exe)
To do this, follow these steps:
Open an elevated command prompt. To do this, do the following as your appropriate:
If you are running Windows 10, Windows 8.1 or Windows 8, first run the inbox Deployment Image Servicing and Management (DISM) tool prior to running the System File Checker. (If you are running Windows 7 or Windows Vista, skip to Step 3.)
Type the following command, and then press Enter. It may take several minutes for the command operation to be completed.
DISM.exe /Online /Cleanup-image /Restorehealth
Important: When you run this command, DISM uses Windows Update to provide the files that are required to fix corruptions. However, if your Windows Update client is already broken, use a running Windows installation as the repair source, or use a Windows side-by-side folder from a network share or from a removable media, such as the Windows DVD, as the source of the files. To do this, run the following command instead:
DISM.exe /Online /Cleanup-Image /RestoreHealth /Source: C:\RepairSource\Windows /LimitAccess
Note: Replace the C:\RepairSource\Windows placeholder with the location of your repair source. For more information about using the DISM tool to repair Windows, reference Repair a Windows Image.
At the command prompt, type the following command, and then press ENTER:
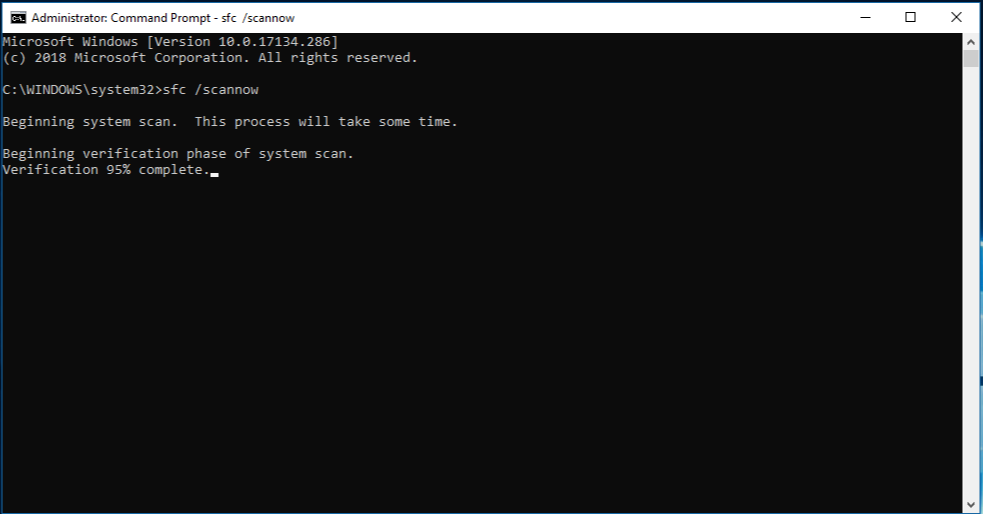
The sfc /scannow command will scan all protected system files, and replace corrupted files with a cached copy that is located in a compressed folder at %WinDir%\System32\dllcache.
The %WinDir% placeholder represents the Windows operating system folder. For example, C:\Windows.
Note Do not close this Command Prompt window until the verification is 100% complete. The scan results will be shown after this process is finished.
After the process is finished, you may receive one of the following messages:
Windows Resource Protection did not find any integrity violations.
This means that you do not have any missing or corrupted system files.
Windows Resource Protection could not perform the requested operation.
To resolve this problem, perform the System File Checker scan in safe mode, and make sure that the PendingDeletes and PendingRenames folders exist under %WinDir%\WinSxS\Temp.
Windows Resource Protection found corrupt files and successfully repaired them. Details are included in the CBS.Log %WinDir%\Logs\CBS\CBS.log.
To view the detail information about the system file scan and restoration, go to How to view details of the System File Checker process.
Windows Resource Protection found corrupt files but was unable to fix some of them. Details are included in the CBS.Log %WinDir%\Logs\CBS\CBS.log.
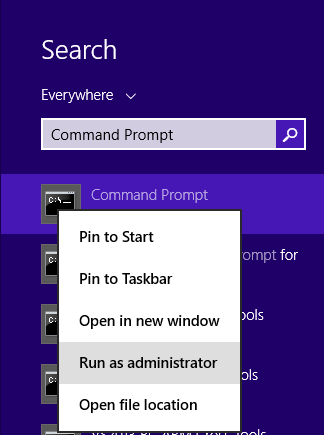
Swipe in from the right edge of the screen, and then tap Search. Or, if you are using a mouse, point to the lower-right corner of the screen, and then click Search. Type Command Prompt in the Search box, right-click Command Prompt, and then click Run as administrator. If you are prompted for an administrator password or for a confirmation, type the password, or click Allow.
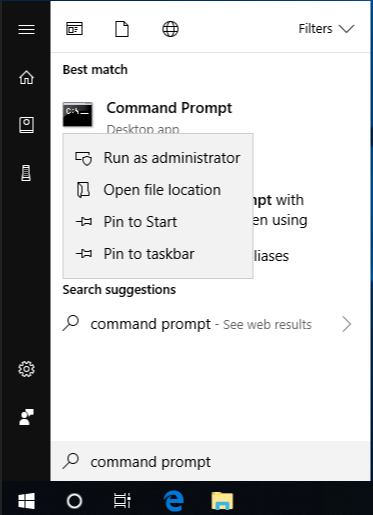
To do this, click Start, type Command Prompt or cmd in the Search box, right-click Command Prompt, and then click Run as administrator. If you are prompted for an administrator password or for a confirmation, type the password, or click Allow.
More Information
To view the details that included in the CBS.Log file, you can copy the information to the Sfcdetails.txt file by using the Findstr command, and then view the details in the Sfcdetails.txt. To do this, follow these steps:
Open an elevated command prompt as described in the previous step 1.
At the command prompt, type the following command, and then press ENTER:
Note The Sfcdetails.txt file contains details from every time that the System File Checker tool has been run on the computer. The file includes information about files that were not repaired by the System File Checker tool. Verify the date and time entries to determine the problem files that were found the last time that you ran the System File Checker tool.
Open the Sfcdetails.txt file from your desktop.
The Sfcdetails.txt file uses the following format:
Date/Time SFC detail The following sample log file contains an entry for a file that could not be repaired: 2007-01-12 12:10:42, Info CSI 00000008 [SR] Cannot repair member file [l:34<17>]»Accessibility.dll» of Accessibility, Version = 6.0.6000.16386, pA = PROCESSOR_ARCHITECTURE_MSIL (8), Culture neutral, VersionScope neutral, PublicKeyToken =
How to manually replace a corrupted system file with a known good copy of the file
After you determine which system file was corrupted and could not be repaired through the detail information in the Sfcdetails.txt file, find where the corrupted file located, and then manually replace the corrupted file with a known good copy of the file. To do this, follow these steps:
Note You may be able to get a known good copy of the system file from another computer that is running the same version of Windows with your computer. You may perform a System File Checker process on that computer to make sure the system file that you intend to copy is a good copy.
Take administrative ownership of the corrupted system file. To do this, at an elevated command prompt, copy and then paste (or type) the following command, and then press ENTER:
takeown /f Path_And_File_Name Note The Path_And_File_Name placeholder represents the path and the file name of the corrupted file. For example, type takeown /f C:\windows\system32\jscript.dll. 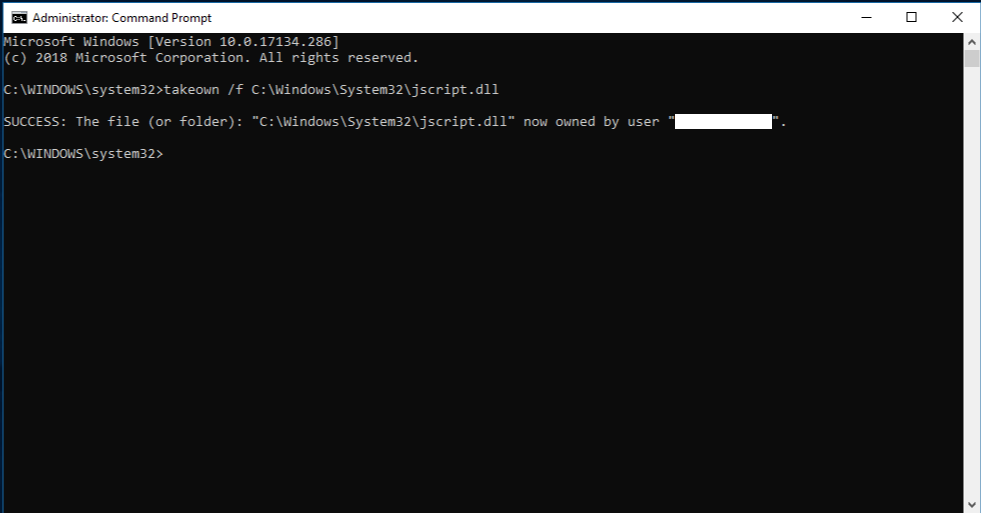
Grant administrators full access to the corrupted system file. To do this, copy and paste (or type) the following command, and then press ENTER:
icacls Path_And_File_Name /GRANT ADMINISTRATORS:F Note The Path_And_File_Name placeholder represents the path and the file name of the corrupted file. For example, type icacls C:\windows\system32\jscript.dll /grant administrators:F.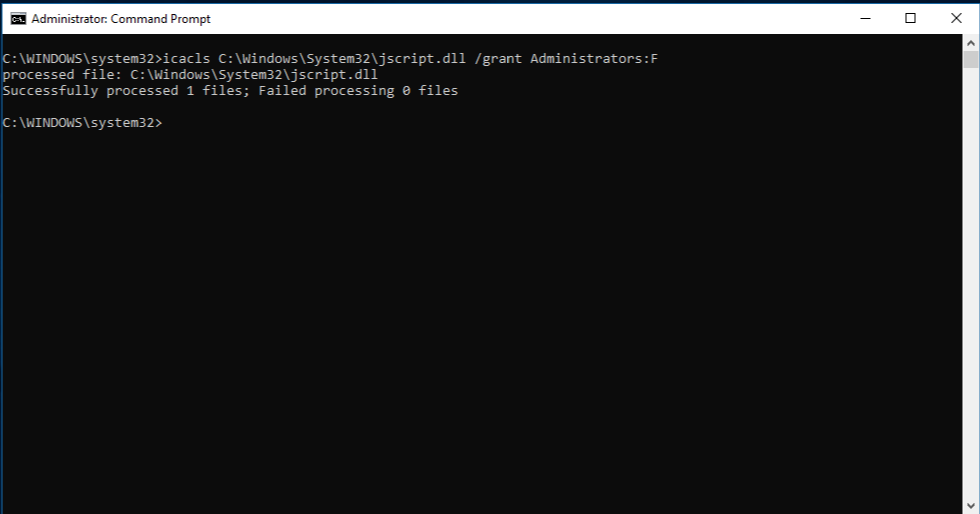
Replace the corrupted system file with a known good copy of the file. To do this, copy and paste (or type) the following command, and then press ENTER:
Copy Source_File Destination Note The Source_File placeholder represents the path and file name of the known good copy of the file on your computer, and the Destination placeholder represents the path and file name of the corrupted file. For example, type copy E:\temp\jscript.dll C:\windows\system32\jscript.dll.
If the steps above don’t work, you may need to reinstall Windows. For more info, see Windows 10 recovery options.
Checking the Installation of Features, Components, Files
If after running an installation, you need to verify that a particular feature, component, or file has been installed, turn on the verbose logging option during the installation. See Windows Installer Logging and Command Line Options.
The verbose log includes an entry for each feature and component the installation package may install. The log tells what the state of that feature or component was prior to the installation, what state was requested by the installation, and in what state the installer left the feature or component. Feature and component entries in the log appear as the following examples.
This verbose log indicates that:
- the installation state of the QuickTest feature and component was absent before running the package
- the package requested a local installation of these
- the feature and component were both left in the locally installed state after running the package.
The label «Installed» in the log refers to the current install state of the feature or component, «Request» refers to the requested install state of the feature or component. «Action» refers to the actual action state of the feature or component.
The following table lists the possible component or feature states that can appear in the log.
| Log Entry | Description |
|---|---|
| Request: Null | No request. |
| Action: Null | No action taken. |
| Installed: Absent | Component or feature is not currently installed. |
| Request: Absent | Installation requests component or feature be uninstalled. |
| Action: Absent | Installer actually uninstalls component or feature. |
| Installed: Local | Component or feature is currently installed to run local. |
| Request: Local | Installation requests component or feature be installed to run local. |
| Action: Local | Installer actually installs component or feature to run local. |
| Installed: Source | Component or feature is currently installed to run from source. |
| Requested: Source | Installation requests that component or feature be installed to run from source. |
| Action: Source | Installer actually installs the component or feature to run from source. |
| Installed: Advertise | Feature is currently advertised. Components are never advertised. |
| Request: Advertise | Installation requests feature be installed as an advertised feature. |
| Action: Advertise | Installer actually installs the feature as an advertised feature. |
| Request: Reinstall | Installation requests feature be reinstalled. Components do not use reinstall state. |
| Action: Reinstall | Installer actually reinstalls feature. |
| Installed: Current | Feature is currently installed in the default authored install state. |
| Request: Current | Installation requests feature be installed in the default authored install state. |
| Action: Current | Installer actually installs the feature in the default authored install state. |
| Action: FileAbsent | Installer actually uninstalls component’s files and leaves all other resources of the component installed. |
| Action: HKCRAbsent | Installer actually removes component’s HKCR information. File and non-HKCR information remain. |
| Action: HKCRFileAbsent | Installer actually removes component’s HKCR information and files. All other resources of the component remain. |
The verbose log has an entry for each file that may be installed by the package. The log tells what was done to the file and provides some explanation. File entries in the log appear as in the following example.
This log indicates that the installer will not overwrite the existing Testdb.exe file because the existing file is the same as the version being installed.
If you need to author an installation package that searches for an existing file or directory on the user’s computer during an installation, use the method described in Searching for Existing Applications, Files, Registry Entries or .ini File Entries.
Windows cannot copy files required for installation. Make sure all files required for installation are available, and restart the installation. Error code: 0x80070570
original title: Error code: 0x80070570
So, I received my launch party pack today. Went to install Windows 7 Ultimate 32 bit. Went to it’s first reboot and I realized I had a display problem. My montior is connected via HDMI and the display was out of range, so I couldn’t tell what the computer was doing or if it was asking for input. Tried switching to VGA and it didn’t display, so I had to do a system reset. Of course, Win7 install failed. Got back into Vista Ultimate and attempted to reupgrade. Went through the T&C, compatibility check, and a few seconds after it started to copy files (still at 0%) I received the error:
Windows cannot copy files required for installation. The files may be corrupt or missing. Make sure all files required for installation are available, and restart the installation. Error code: 0x80070570
I did a disk cleanup and got rid of temp files and installation files with no success. When I searched the web for a solution, the only common one I found was to wipe a 100mb partition, which I don’t have. I remembered from installs eons ago, there might have been something in add/remove programs. No dice.
Where do I go from here? I do not want to do a clean install. I attempted to contact the Windows 7 Launch Party support line and the mailbox is full.
116 people found this reply helpful
Was this reply helpful?
Sorry this didn’t help.
Great! Thanks for your feedback.
How satisfied are you with this reply?
Thanks for your feedback, it helps us improve the site.
How satisfied are you with this reply?
Thanks for your feedback.
For the person who asked the question, yes it was. It’s not the only answer.
Does this mean the CD is corrupted? I just wasted $200 f***ing $$$ for nothing.
If the DVD is bad you can return it, or replace it.
i tried Rob_Z suggestion and it didn’t work.
Try these other possible solutions. And calm down.
This is common for a Dell computer, but can happen on non Dell computers. It appears that the built-in SATA drivers aren’t recognized during the Windows 7 extraction portion of setup (when your BIOS is set with RAID Autodetect/AHCI). This can work for Dell PC and a non Dell computer:
Note: you should install the latest BIOS update from Dell’s support.dell.com website first, or your manufacturers website for a non-Dell computer.
1. Boot into the BIOS (for Dell press F2 while the Dell splash screen is showing, other computers may use a different button).
2. Go to Drives > SATA Operation. (will be different for a non-Dell)
3. Change from «RAID Autodetect / AHCI» to «RAID Autodetect / ATA» (or something similar)
4. Press escape, choose Save / Exit.
Play it safe, shut down your PC and disconnect all USB devices (except the keyboard/mouse) before trying to reinstall.
This can also sometimes be caused by bad RAM, you can use the memory test feature on the Windows 7 DVD.
This error might also occur if the hardware is not compatible, you may check if your computer meets the hardware requirements for Windows 7 from the two links below:
If the above doesn’t work run chkdsk in Windows Recovery Environment [RE] which might help to fix the issue. You can access Windows RE using the Windows 7 installation disc or a system repair disc you created earlier. To use this method, you need to restart (boot) your computer using the disc.
1. Insert the disc.
2. Restart your computer using the computer’s power button.
3. If prompted, press any key to start Windows from the installation disc.
• If your computer isn’t configured to start from a CD or DVD, check the information that came with your computer. You may need to change your computer’s BIOS settings. For more information, see BIOS: frequently asked questions.
4. Choose your language settings, and then click Next.
5. If you are using the Windows installation disc, click Repair your computer.
6. Select the Windows installation you want to repair, and then click Next.
7. On the System Recovery Options menu, click command prompt to open it.
8. In the command prompt window, type the following command and press enter Chkdsk /F /R
9. Press Y when you are prompted to check the disk the next time that the system restarts.
Note: During the restart process, Windows checks the disk for errors, and then Windows starts. Now run the check disk in command prompt, follow the steps below:


