- chrome.notifications
- Summary
- Types
- NotificationButton
- Properties
- NotificationItem
- Properties
- NotificationOptions
- Properties
- PermissionLevel
- TemplateType
- Methods
- clear
- Parameters
- create
- Parameters
- How to turn off web notifications for Google Chrome and macOS
- How to turn off web notifications in Google Chrome
- What if you want notifications again?
- How to turn off notifications in Safari on Mac
- Обновленные уведомления Chrome в операционной системе macOS
- Чем отличается новый формат push-уведомлений Chrome под macOS?
- Native Chrome Desktop Push Notifications in Mac OS [Updated]
- Then Arrived Chrome 59
chrome.notifications
Use the chrome.notifications API to create rich notifications using templates and show these notifications to users in the system tray.
Summary
Types
NotificationButton
Properties
Button icons not visible for Mac OS X users.
NotificationItem
Properties
Additional details about this item.
Title of one item of a list notification.
NotificationOptions
Properties
The app icon mask is not visible for Mac OS X users.
A URL to the app icon mask. URLs have the same restrictions as iconUrl.
The app icon mask should be in alpha channel, as only the alpha channel of the image will be considered.
Text and icons for up to two notification action buttons.
Alternate notification content with a lower-weight font.
A timestamp associated with the notification, in milliseconds past the epoch (e.g. Date.now() + n ).
A URL to the sender’s avatar, app icon, or a thumbnail for image notifications.
URLs can be a data URL, a blob URL, or a URL relative to a resource within this extension’s .crx file Required for notifications.create method.
The image is not visible for Mac OS X users.
A URL to the image thumbnail for image-type notifications. URLs have the same restrictions as iconUrl.
This UI hint is ignored as of Chrome 67
Items for multi-item notifications. Users on Mac OS X only see the first item.
Main notification content. Required for notifications.create method.
Priority ranges from -2 to 2. -2 is lowest priority. 2 is highest. Zero is default. On platforms that don’t support a notification center (Windows, Linux & Mac), -2 and -1 result in an error as notifications with those priorities will not be shown at all.
Current progress ranges from 0 to 100.
Indicates that the notification should remain visible on screen until the user activates or dismisses the notification. This defaults to false.
Indicates that no sounds or vibrations should be made when the notification is being shown. This defaults to false.
Title of the notification (e.g. sender name for email). Required for notifications.create method.
Which type of notification to display. Required for notifications.create method.
PermissionLevel
«granted» , or «denied»
TemplateType
«basic» , «image» , «list» , or «progress»
Methods
clear
Clears the specified notification.
Parameters
The id of the notification to be cleared. This is returned by notifications.create method.
Called to indicate whether a matching notification existed.
The callback is required before Chrome 42.
If you specify the parameter, it should be a function that looks like this:
create
Creates and displays a notification.
Parameters
Identifier of the notification. If not set or empty, an ID will automatically be generated. If it matches an existing notification, this method first clears that notification before proceeding with the create operation. The identifier may not be longer than 500 characters.
The notificationId parameter is required before Chrome 42.
Источник
How to turn off web notifications for Google Chrome and macOS
By Tariq Malik 08 January 2020
Our guide to stopping notifications

Hey, space fans! If you’re like me and love everything space, it’s possible you’ve signed up to receive notifications from your favorite space news websites. Maybe even from Space.com? (If so, we thank you.)
While it may be helpful to receive news and updates from those notifications, just like from your favorite apps, we understand that you may no longer want to receive them. Or perhaps you subscribed by mistake, started getting them on your computer or phone and want them gone.
To take care of that, here’s a handy guide on how to disable notifications in Google Chrome and Safari.
How to turn off web notifications in Google Chrome
- Open Chrome
- Select ‘Settings’
- Navigate to ‘Privacy’
- Scroll to ‘Notifications’
- Select which websites you want notifications from
If you’re using Chrome, chances are it’s linked to your phone or other personal device with the app and you may be getting notifications from a website across those platforms. These screenshots are from my laptop, so yours may look slightly different, but the process should be the same.
The first step is to open Google Chrome on whatever device you’re receiving notifications from.
In the top right corner are three vertical dots, which you can click on to open up the main menu in Chrome. Click on ‘Settings’ to begin the process.

Scroll down to the bottom and click on the section called ‘Advanced.’ Just beneath that is the ‘Privacy and security’ section, where you’ll find a sub-section called ‘Site Settings’ (or ‘Content Settings’). This is where you can turn off notifications.
Click on ‘Site Settings’ reach a new screen with a section clearly marked ‘Notifications’ next to an icon of a bell.
Here, you can choose whether to allow websites to send you notifications outright, or enable a setting that says ‘Ask before sending (recommended)’. It may already be enabled, and it’s good to to keep it so. After all, asking permission to send notifications is the polite thing to do. That way, when a website asks permission, you’ll receive a popup that asks to ‘Allow’ or ‘Block’ notifications.
On this ‘Notifications’ page you can also select individual websites to either allow or block notifications.
Simply scroll to the bottom under the section marked ‘Allow’ and click on the three vertical dots to the right side of a specific website. Here you can see choices to Block, Edit or Remove.
Select ‘Block’ if you want to block the website from sending you notifications, as well as from asking again.
‘Edit’ will allow you change the website’s name in your notifications, which we don’t recommend.
‘Remove’ will stop notifications for now, but you may be asked again whether you want to subscribe in the future. This is a good choice if you’re not 100% sure you don’t want notifications forever.
Since Chrome is connected to your Google account, if you make this change on one device, it should apply to all Chrome apps on your other devices.
What if you want notifications again?
If you’ve blocked notifications to a site and you want to re-enable them, it’s pretty simple.
First, head back to the website. You’ll likely be asked if you want to subscribe to notifications and can select ‘Allow’ to resume them.
You can also select the padlock logo to the left the URL bar when on a website to access the ‘Notifications’ section for that website. There is a drop-down menu that has options for ‘Ask (default)’, ‘Allow’ or ‘Block’ and you can make your choice accordingly.
How to turn off notifications in Safari on Mac
If you’re using Safari on a Mac, adjusting your notifications is a bit different.
You’ll need to open Safari preferences on a Mac, then find the option that says ‘Websites’ along the top of the screen.
Click on ‘Websites’ and in the list on the left side you’ll see an option marked ‘Notifications’. Any sites you may be subscribed to will be shown here.
You can select either ‘Allow’ or ‘Deny’ in a drop-down menu on the right side to change notifications settings for each of those sites. Select ‘Deny’ to stop notifications on your Safari device.
And that’s about it! I hope this helps and a huge thanks to my colleague James Peckham at our sister site Tech Radar for help with this guide.
Keep, looking up space fans!
Join our Space Forums to keep talking space on the latest missions, night sky and more! And if you have a news tip, correction or comment, let us know at: community@space.com.
SPACE.COM EDITOR IN CHIEF — Tariq joined the Space.com team in 2001 as a staff writer, and later editor, covering human spaceflight, exploration and space science. He became Space.com’s Managing Editor in 2009. Before joining Space.com, Tariq was a staff reporter for The Los Angeles Times. He is also an Eagle Scout (yes, he has the Space Exploration merit badge) and went to Space Camp four times as a kid and a fifth time as an adult. He has journalism degrees from the University of Southern California and New York University. To see his latest project, you can follow Tariq on Google+, Twitter and on Facebook.
Sign Up for e-mail newsletters
Get breaking space news and the latest updates on rocket launches, skywatching events and more!
Thank you for signing up to Space. You will receive a verification email shortly.
There was a problem. Please refresh the page and try again.
Источник
Обновленные уведомления Chrome в операционной системе macOS
Пользователи macOS наверняка заметили, что push-уведомления от Chrome изменили внешний вид.
Причина в том, что начиная с 59 версии Chrome push-уведомления становятся нативными и показываются в macOS непосредственно в центре уведомлений. И если подписчик пропустил ваш push, он может ознакомиться с ним позже, заглянув в центр уведомлений.
Чем отличается новый формат push-уведомлений Chrome под macOS?
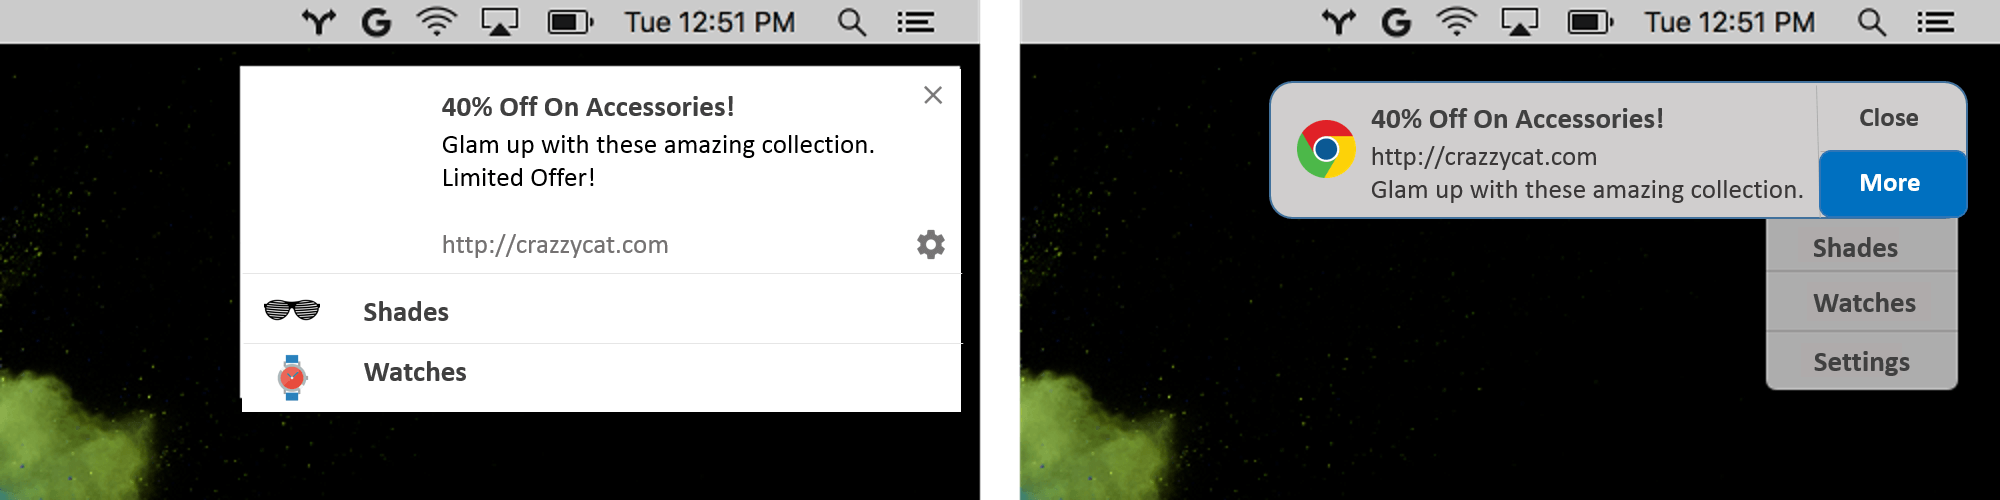
Заданная вами иконка уведомления сместилась вправо и уменьшилась в размерах. В левой части уведомления отображается лого браузера. Ссылка домена “переехала” под заголовок.
Сам push стал меньше и вмещает меньше текста.
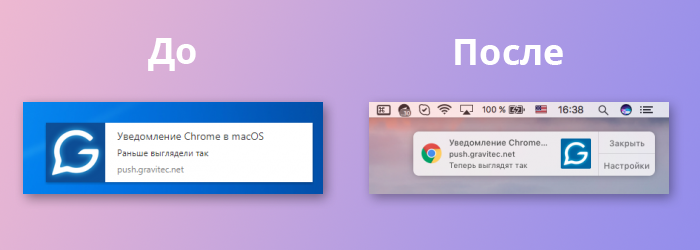
Но новый пуш стал активным. И если получатель “потянет” за нижнюю границу уведомления, он сможет увидеть до 10-13 строк текста!
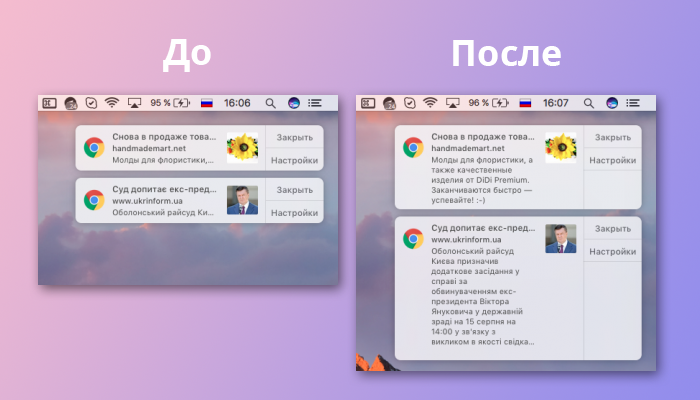
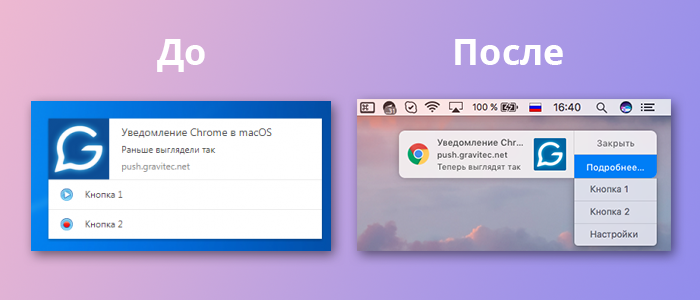
Другие активные элементы так же выглядят иначе.
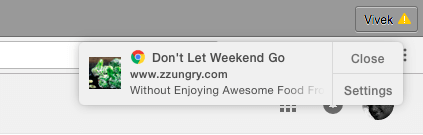
Активные кнопки ранее располагались в нижней части уведомления и были видны без дополнительных действий.
Сейчас кнопки “спрятаны” в выпадающем меню “Подробнее”. Раскрыв меню, получатель увидит предложенные варианты действий.
Отображение больших картинок более недоступно. Такая возможность отсутствует в нативных push-уведомлениях macOS.
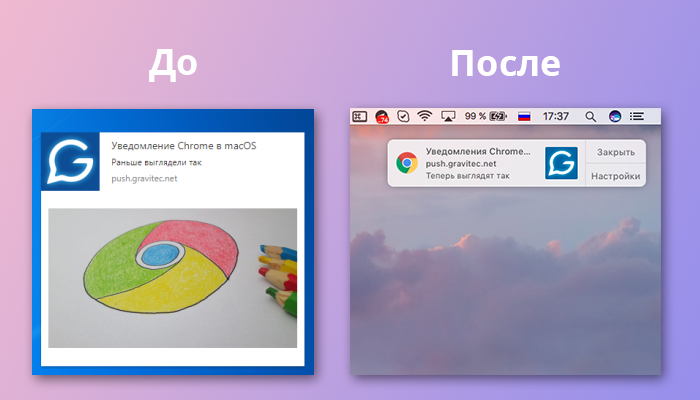
Вышеописанные изменения коснутся отображения push-уведомлений Chrome от 59 версии и выше, под управлением macOS. В предыдущих версиях браузера уведомления будут отображаться так же как и раньше.
Источник
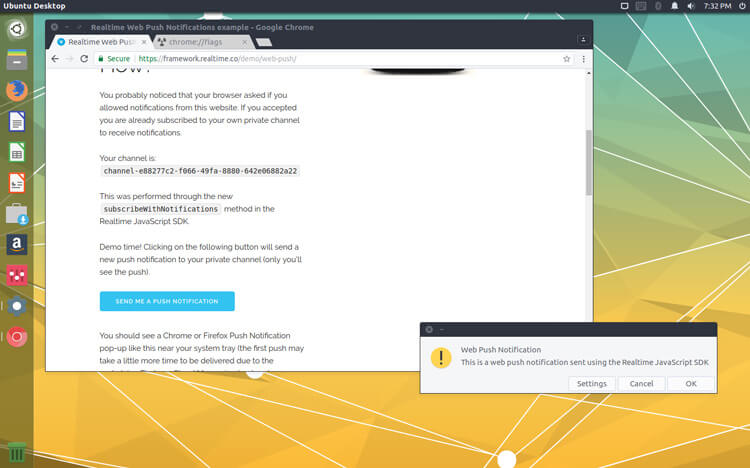
Native Chrome Desktop Push Notifications in Mac OS [Updated]
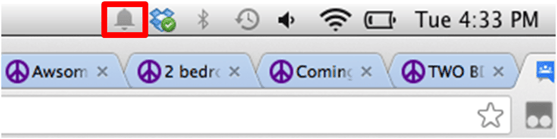
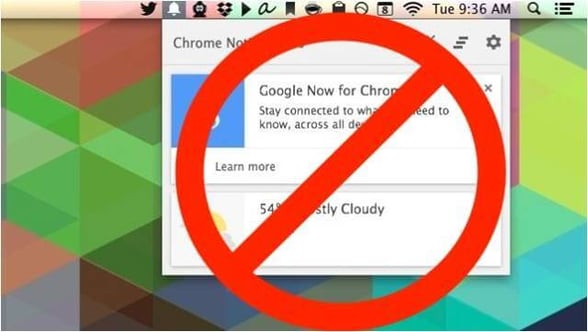
One fine day the people of the world wondered how the Google Chrome desktop push notification ‘bell’ landed on their menu bar. They didn’t remember adding it there nor giving permission to make any changes. Yet, there it was embedded in the menu bar, refusing to budge. They did not enable chrome push notification, but it suddenly had taken over their desktop. Some of the comments in the product forums deserve a read. With so many annoyed users complaining about the design, the way chrome push notifications had hijacked the notification menu, the absence of a disable feature, it was about time that chrome got native web push notification on Mac. Google chrome tried to implement its own in-house chrome desktop notifications system instead of OS X Notification Center and we all know how that went.
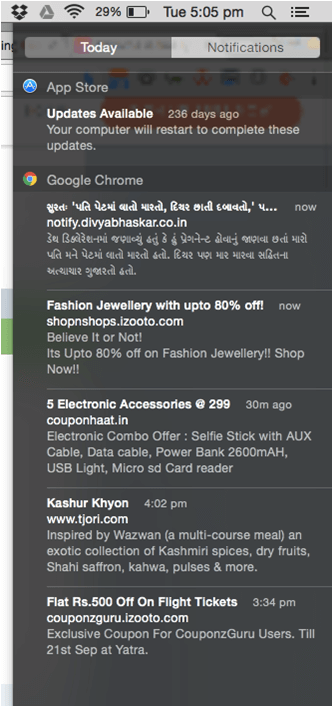
In 2013 , Google released a beta version of Chrome introducing what they called ‘richer notifications ’. This was done to enhance the user experience and their intentions were all good. But, people got so irritated with Chrome that a few even considered replacing it with other browsers. When it launched the Google Chrome notification center, to make it easier for users to see all the notifications when they were away, in reality, it didn’t happen. People got irritated due to the long list of notifications and some didn’t even open the Chrome notification center. Either way, it was decided that it will be removed.
There was a thread of conversations of people who displayed their displeasure with chrome push notification. Google also came up with Chrome 50 , with a few new features, but still, people were not satisfied with they’re in-house Google chrome push notification. Google chrome stacks the notifications in the notification tray, which can be closed then and there. This makes sure that the person sees it and gets to dismiss the Google Chrome push notification manually.
In October , Chrome declared that it will wrap up their in-house notification. Chrome has thus finally allowed the use of native push notifications for the first time in Mac. Chrome realized that people do not prefer Chrome push notification as it was not getting any positive response, so they decided to let go of it . Now, this is a relief, as Chrome’s notifications are cumbersome and incompatible, which do not function harmoniously with the rest of the OS and apps notifications. This also leads to a better and cleaner user experience which was pretty much missing till now.
Then, one didn’t have to receive two sets of notifications; one from the build in OS X and the other from Chrome. Once you enable chrome push notifications, it functions exactly the same way as an alert does on OS X. What is more interesting is that the ‘Do Not Disturb’ feature is available at last. With the coming of push notification in Mac, we will see an end to all the changes that chrome does, as OS X doesn’t support customization.
Chrome notification its development stage had quite a few glitches. Even after enabling native notifications, a few haven’t received several notifications. Especially the users on the Ubuntu Unity desktop faced issues in receiving notifications.
Then Arrived Chrome 59
With Chrome 59, Chrome integrated with native Mac notification system from April 2017. With this update, Chrome desktop push notification is finally finding its place in the notification center on Mac. It has since then created different responses from developers, as native Chrome push notification and Chrome notifications on Mac did not look the same. There were changes pertaining to icons, call to action buttons, banner images, the way listicles are displayed and so on. Read this article to know the changes in detail.
Google Chrome went live for Windows , version 28 and enabled its in-house notification center. Chrome 59 is now available on Mac, Windows, and Linux.
See how you can send personalize Chrome Web push notifications to all your users.
Источник


