- SCCM System Center Configuration Manager
- Nav view search
- Navigation
- Search
- SCCM | Business Hours and Maintenance windows explained
- Business hours and Maintenance windows concepts explained in SCCM with examples.
- How to use maintenance windows in Configuration Manager
- Multiple maintenance windows
- Configure maintenance windows
- Use PowerShell
- Установка Windows 7 с помощью SCCM
- Подготовка дистрибутива Windows 7
- Последовательности задач (Task Sequence)
- Публикуем созданную последовательность Task Sequence
- Установка и процедура захвата (Capture)
- Добавляем в SCCM образ ОС
- Создаем последовательности установки
- Осуществляем установку Windows 7 из SCCM 2007
SCCM System Center Configuration Manager
Nav view search
Navigation
Search
SCCM | Business Hours and Maintenance windows explained
Business hours and Maintenance windows concepts explained in SCCM with examples.
First of all definitions:
· Deadline – Is the time that a deployment installation will be enforced.
User can’t delay (postpone) software to install after the deadline. The system is designed to provide guarantees that you can rely on software being installed at the deadline. However the deadline can be missed if:
o The computer was not powered on at the time the deadline was reached
o A maintenance window was scheduled for the machine ad the deadline was reached before the maintenance window was available
· Maintenance windows – A maintenance window is a period of time reserved to perform software deployment tasks. Usually Software Deployments, Software Updates Deployments, OS deployments will only run during a maintenance window when one is defined. You can define Maintenance Windows in any device collection properties.
In our case we will define a Maintenance Window Saturday in the morning 01:00 AM until 05:00 AM (4 hours) recurring in every week.
We have a deployment with a deadline at 05:00 PM Thursday. Our maintenance windows is Saturday morning at 02:00 AM so no Maintenance Window available at deployment deadline! So, the system automatically defers the deployment and schedules it to run at the next available Maintenance Window. The deadline was at 05:00 PM Thursday but since next available Maintenance Window is available at 01:00 AM the deployment gets deferred at 01:00 Am Saturday.
· Business Hours — Business Hours are the period of time when normally the end user has daily works to do, in other words when the user don’t want to be disturbed by maintenance works. By default Business Hours are from 05:00 AM until 10 PM Monday through Friday. The business hours are configured in Software Center on client computers. Both Maintenance Window and outside of Business Hours are to periods of time when it is the best time for deployments because the system is expected to be idle.
In our case the deadline four our deployment is right in the middle of the user business hours! That’s not good for the user because he wants to be insured that the software installation doesn’t interrupt his work. So let’s configure other element in our deployment the Available After time. When you defined a software deployment you can specified when the deployment becomes available to client computers. Four our example let’s set the time Monday at 02:00 PM. The Available After time triggers a Software Center notification indicating that new software is required to be installed. When the user clicks on the notification he see a dialog box where he can chose his installation options.
o If clicks “Install now” the software will install immediately. Even the deadline wasn’t until few days from now, the user decide that now is the best time to make the installation.
o If clicks “Install later” the software installation time gets deferred to the next available “non-business hours” time. In our case that means he has now schedule the software to be installed at 10:00 PM Monday night.
o If the user simply ignore the notification or close the installation option dialog without choosing an installation option, the deployment will sit ”idle” until three things happens:
§ User install the software from Software Center by clicking the “Install” button
§ User schedule it to install during “non-business hours” by clicking the “Schedule” button from software center
§ The deadline is reached
The user could also right-click the notification icon at any time and click “View Required Software” to redisplay the installation options dialog.
Now if the user doesn’t want to be bothered with all these notifications and he just really wants that the software to be installed when he isn’t not working, he need to configure in Software Center automatic installation option. By selecting the option “Automatically install or uninstall required software and restart the computer only outside of the specified business hours”, any required software that is deployed to the computer will install at the next available “non-business hours” time. Related with our example if the “automatic install” was selected the installation it will start Tuesday at 10:00 PM.
So to resume you have configured business hours from 10:00 PM to 07:00 AM Monday to Friday and Maintenance window each Saturdays at 01:00 AM. You will create a deployment with “Available After” time Tuesday 02:00 PM and deadline Friday at 05:00 PM. What happens next now depends on our end user. Once he is notified Tuesday at 02:00 PM about new software is required he has four options:
· Install the software now. In this case, both “non-business hours” and Maintenance Windows are ignored. The software it will be installed immediately.
· Install the software “later”. In this case the software becomes scheduled to install after the business hours are over. In other words it will be installed Tuesday at 10 PM.
· Do nothing. If the user ignored the messages or indicates he wants to be reminding later, Software Center does not schedule the installation. If this condition continues on until the deadline (in other words, the user has taken no action to schedule or install the software), the software get go to the deadline and check for a maintenance window. At that point, the deployment will wait until the maintenance window before installing. So in our case the software it will be installed Saturday at 01:00 AM.
· Select the “Automatically install” option from software center. In this case the software center schedule the software install after the business hours, in our case Tuesday at 10:00 PM.
So to recap, Maintenance Windows and Business Hours are targeted to the different audiences. Administrators configure maintenance windows to prevent software from installing except during a specific period of time. End Users set the business hours to indicate when they prefer software to be installed ahead of the deadline so that it doesn’t interrupt their work.
How to use maintenance windows in Configuration Manager
Applies to: Configuration Manager (current branch)
Use maintenance windows to define when Configuration Manager can run impacting tasks on devices. Maintenance windows help make sure that client configuration changes occur during times that don’t affect productivity. With Software Center, users can see the device’s next maintenance window on the Installation status tab.
The following tasks support maintenance windows:
Application and package deployments
Software update deployments
Compliance settings deployment and evaluation
OS and custom task sequence deployments
Configure maintenance windows with an effective date, a start and end time, and a recurrence pattern. The maximum duration of a window has to be less than 24 hours. The console doesn’t allow a single maintenance window longer than 24 hours. For example, if you want to allow maintenance all day Saturday and Sunday, then create two 24-hour maintenance windows for each day.
By default, computer restarts caused by a deployment aren’t allowed outside of a maintenance window, but you can override the default. Maintenance windows affect only the time when the deployment runs. Deployments that you configure to download and run locally can download content outside of the window.
When a client is a member of a device collection that has a maintenance window, a deployment runs only if its maximum allowed run time doesn’t exceed the duration of the window. If the deployment fails to run, the client generates an alert. It then reruns the deployment during the next scheduled maintenance window that has available time.
A maintenance window is for a client. A service window is for a site server. For more information, see Service windows for site servers.
Multiple maintenance windows
When a client computer is a member of multiple device collections that have maintenance windows, these rules apply:
If the maintenance windows don’t overlap, the client treats them as two independent maintenance windows.
If the maintenance windows overlap, the client treats them as a single window for the entire time of both windows. For example, you create two maintenance windows on a collection. The first is effective from 6:00 to 7:00, and the second is effective from 6:30 to 7:30. Because they overlap by 30 minutes, the effective duration of the combined maintenance window is 90 minutes from 6:00 to 7:30.
When a user installs an application from Software Center, the client starts it immediately. It prioritizes the user’s intent over the administrator’s.
If an application deployment with a purpose of Required reaches its installation deadline during the non-business hours that a user configures in Software Center, the client installs the application. It prioritizes the administrator’s intent over the user’s.
By default, with multiple maintenance windows, the client only installs software updates during Software Update type windows. It ignores any All deployments maintenance windows, unless they’re the only type. You can configure this behavior with the following client setting in the Software updates group: Enable installation of software updates in «All deployments» maintenance window when «Software Update» maintenance window is available. For more information, see About client settings.
This setting also applies to maintenance windows that you configure to apply to Task sequences.
If the client only has an All deployments window available, it still installs software updates or task sequences in that window.
Configure maintenance windows
In the Configuration Manager console, go to the Assets and Compliance workspace.
Select the Device Collections node, and then select a collection.
You can’t create maintenance windows for the All Systems collection.
On the Home tab of the ribbon, in the Properties group, choose Properties.
Switch to the Maintenance Windows tab, and select the New icon.
Specify a Name to uniquely identify this maintenance window for the collection.
Configure the Time settings:
Effective date: The date when the maintenance windows starts. The default is the current date.
Start and End: The start and end times of the maintenance window. It calculates the Duration for the window. The minimum duration is five minutes, and the maximum is 24 hours. The default duration is three hours, from 01:00 to 04:00.
Coordinated Universal Time (UTC): Enable this option for the client to interpret the start and end times in the UTC time zone. For regionally or globally distributed devices in the same collection, this option sets the maintenance window to occur simultaneously on all devices in the collection. Disable this option for the client to use the device’s local time zone. This option is disabled by default.
Configure the recurrence pattern. The default is once per week on the current day of the week.
Apply this schedule to: By default the window applies to All deployments. You can select either Software updates or Task sequences to further control what deployments run during this window.
If you configure multiple maintenance windows of different types on the same collection, make sure you understand the client behaviors. For more information, see Multiple maintenance windows.
Select OK to save and close the window.
The Maintenance Windows tab of the collection properties displays all configured windows.
Use PowerShell
You can use PowerShell to configure maintenance windows. For more information, see the following articles:
Установка Windows 7 с помощью SCCM
SCCM 2007 — это мощный корпоративный инструмент по управлению различными аспектами «жизнедеятельности» на рабочих станциях и серверах, одна из интересных функций SCCM 2007 – разворачивание ОС на клиентские компьютеры. Последнее время пришлось достаточно много поработать над вопросами автоматической установки Windows 7 при помощи SCCM 2007, и я столкнулся со следующим: мне не удалось найти достаточно простой и наглядной инструкции по настройке процедуры разворачивания Windows 7 средствами SCCM, но что самое интересное процесс достаточно прост! В данной статье я хочу восполнить этот пробел и написать простую и понятную практическую инструкцию по разворачиванию на клиентские ПК ОС (в данном случае Windows 7) при помощи SCCM.
Настроить автоматическую установку Windows 7 с помощью SCCM несложно, весь процесс выглядит примерно следующим образом:
Подготовка дистрибутива Windows 7
Первый этап – подготовка дистрибутива и размещение его на сервере SCCM, я разместил по адресу c:\sources\os\7\retail\x64\professional (не забудьте, что существует несколько версий Win 7). Удостоверьтесь что папка ‘Sources’ расшарена и доступна по сети.
На этом этапе построим структуру SCCM коллекций, которые в дальнейшем будем использовать. Перейдем в SiteDatabase -> ComputerManagement -> Collections > и создадим коллекцию ‘Build and Capture’, в которой создадим еще одну коллекцию ‘Build and Capture Windows 7’:

Далее мы должны создать пакет для установки клиента SCCM 2007, который будем использовать в дальнейшем. В консоли SCCM перейдем в Software Distribution -> Packages, нажимаем правой кнопкой и выбираем ‘New package from definition’.
 Выберем тип ‘Configuration Manager Client Upgrade’ , на следующем экране отметим ‘Always obtain files from a Source Directory’, в следующем оке мастера нужно указать путь к папке с дистрибутивом клиента SCCM (обычно это \\[server-sccm]\[site_name]\client).
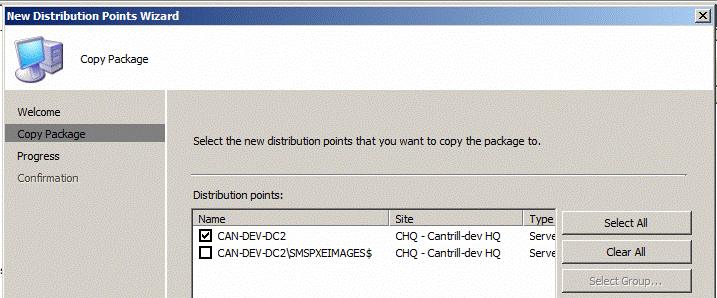
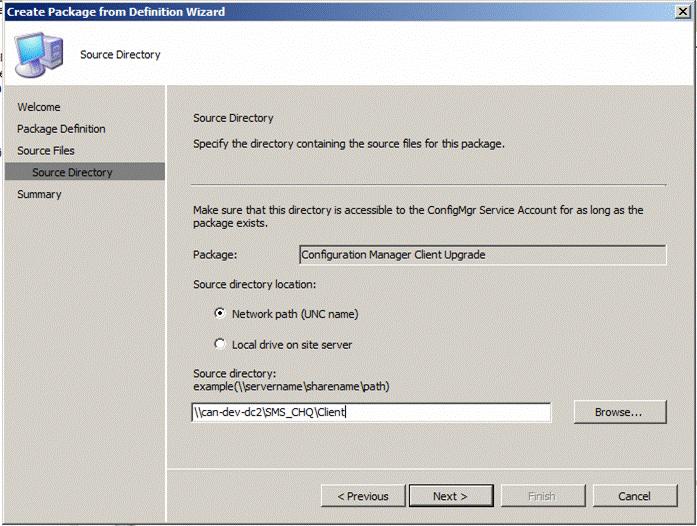 После окончания работы мастера, создастся новый пакет. Далее нужно развернуть новый пакет, найти раздел ‘Distribution points’ и создать новую точку распространения (New distribution points). Отметьте те сервера, на которые вы хотите скопировать данный пакет. После завершения работы мастера обновите пакеты на точках распространения.

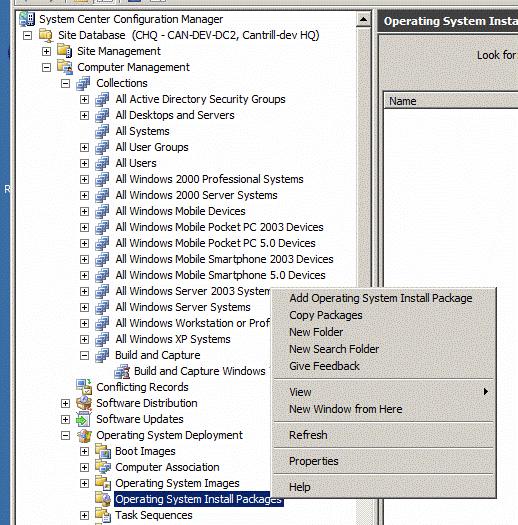
Последний аспект, который нам нужно настроить – в SCCM указать путь к нашему дистрибутиву Windows 7. В консоли SCCM 2007 перейдем в Site DB -> Computer Management -> Operating system deployment -> Operating system install packages > жмем правой кнопкой мыши и выбираем ‘Add operating system install package’.
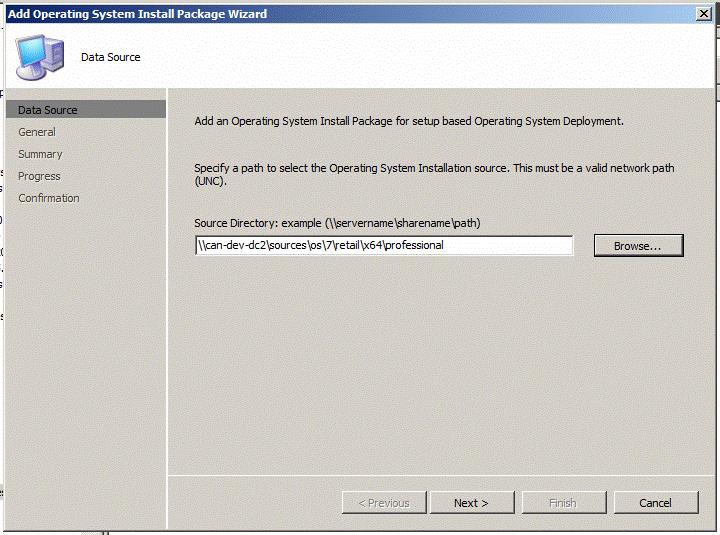
При появлении запроса на указании пути к дистрибутиву, необходимо указать путь (в формате UNC) к папке с дистрибутивом Windows 7, которую мы создали ранее (в моем случае это \\can—dev—dc2\sources\os\7\retail\x64\professional.
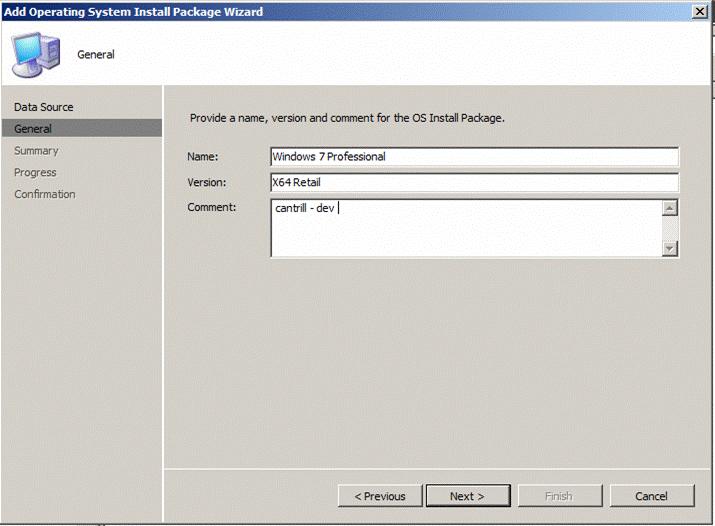
Далее нужно указать дополнительную информацию о пакете с ОС (пример на скриншоте).
После того, как пакет создан, необходимо в консоли SCCM выбрать ‘Distribution points’ и создать новую точку распространения ‘New distribution points’. Выберите любые точки, кроме имеющих тип ‘NON PXE’ (это важно! – т.к. наш образ установочный, а не загрузочный), после чего обновите пакеты на DP (‘Update Distribution points’).
Последовательности задач (Task Sequence)
На данном этапе можно считать, что вся подготовительная работа окончена. В данной разделе инструкции мы должны создать последовательность задач, которая будет управлять установкой базового образа Windows 7, а также параметры захвата (capture). В результате выполнения этих операции у нас появится мастер-образ (шаблон) Windows 7, который в дальнейшем и будет устанавливаться на ПК в вашей среде.
В консоли SCCM перейдем в SiteDB -> ComputerManagement -> TaskSequences, где создадим новую последовательность (Create a new task sequence). Выберем ‘Build and capture a reference operating system’, укажем описательное имя, а также тип загрузочного образа (x86/ x64).
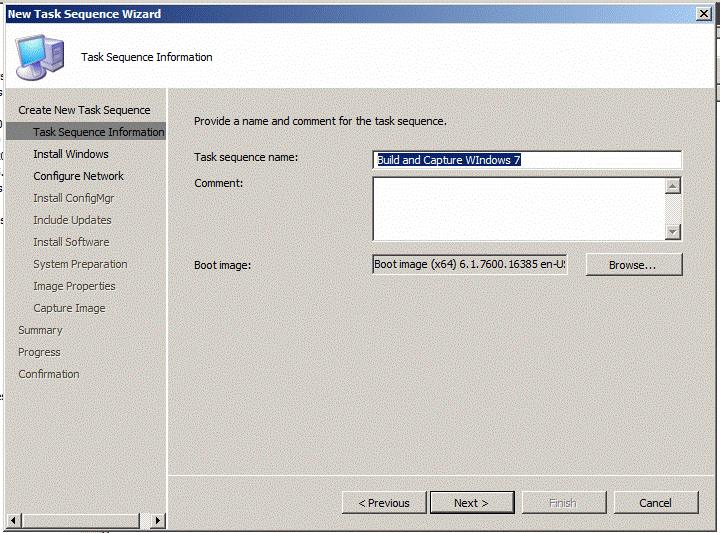 В следующих шагах мастера необходимо указать установочный образ, версию ОС, которую будем устанавливать (у меня это Windows 7 Professional). На данном этапе не нужно задавать ключ продукта. Укажем только пароль локального администратора (стандартный в вашей среде).

В следующем окне нужно указать, что ПК будет включен в рабочую группу (не домен. т.к. мы не хотим, чтобы на наш шаблонный образ применились какие-бы то ни было настройки групповых политик).

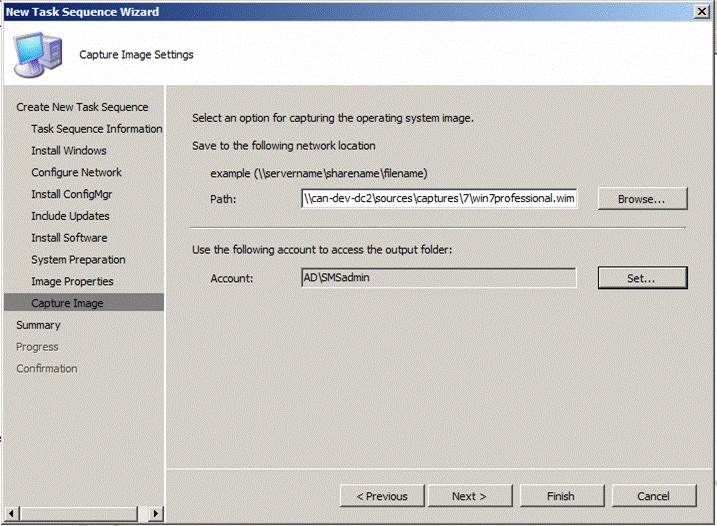
Опции захвата образа укажите в соответствии со скриншотом. В первом поле указано место хранения захваченного образа, во втором – учетной записи, с правами которой будет происходить весь процесс.
Публикуем созданную последовательность Task Sequence
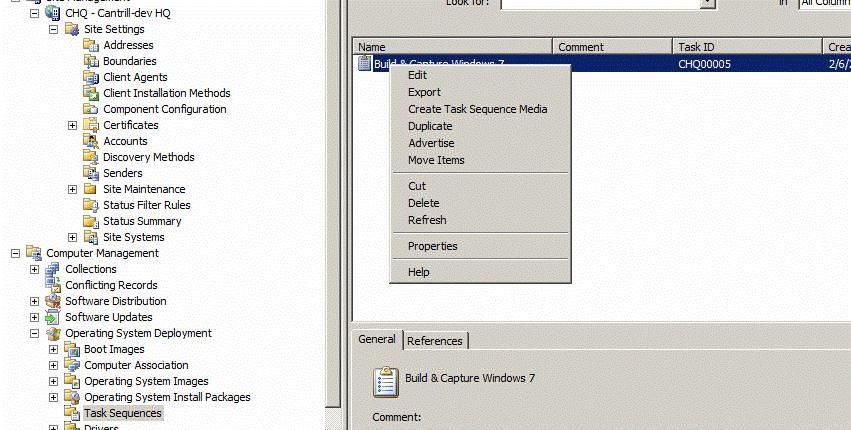
Для того, чтобы определить, на какие машины будет применяться данная последовательность, необходимо опубликовать созданное задание на определенную коллекцию, состоящую из одного или нескольких ПК. Выбираем созданную последовательность, жмем по ней правой клавишей и выбираем ‘Advertise’.
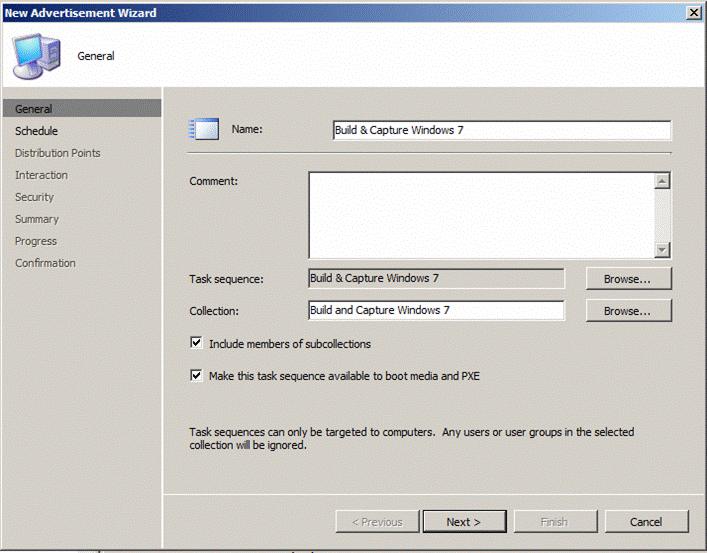
 Указываем имя нашего объявления (advertisement), проверяем что выбрана созданная нами ранее последовательность, и выбираем коллекцию. Также проверьте, что отмечена опция ‘Make this task sequence available to boot media and PXE’.
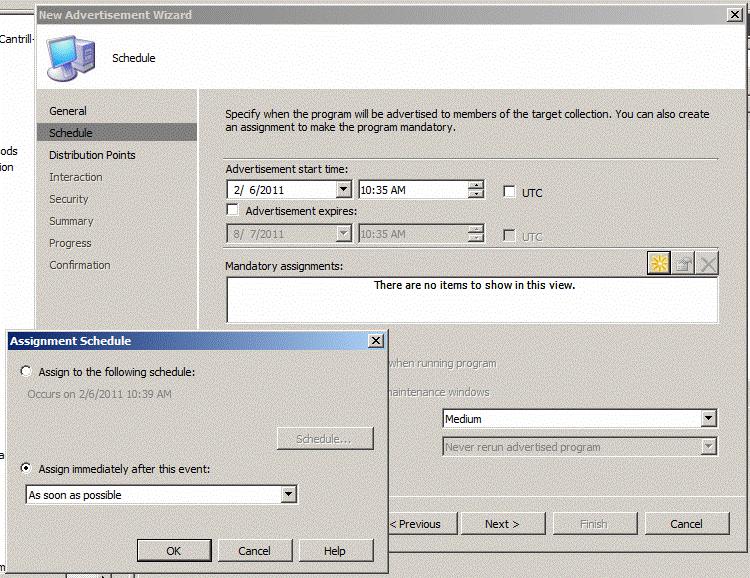
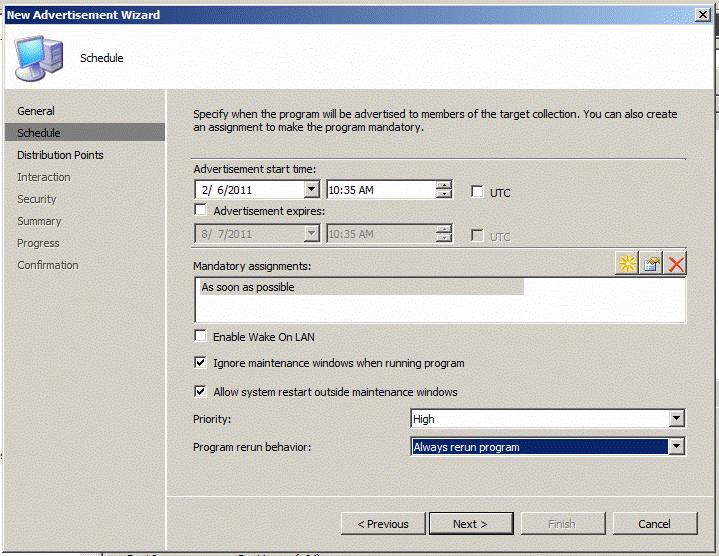
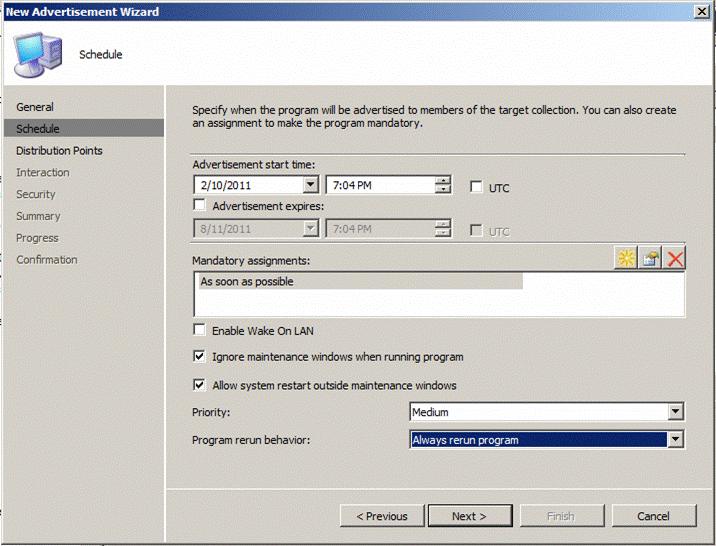
 Далее нажимаем желтую кнопку, отмечаем ‘Schedule to as soon as possible’. Отмечаем опции ‘Ignore maintenance windows’ (Игнорировать окна обслуживания), и ‘Allow system restarts outside maintenance windows’ (Разрешить перезагрузку систему за пределами окон обслуживания).
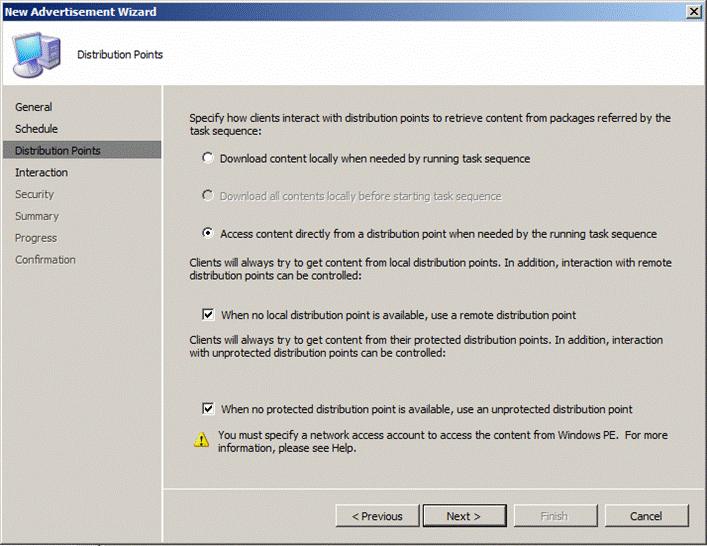
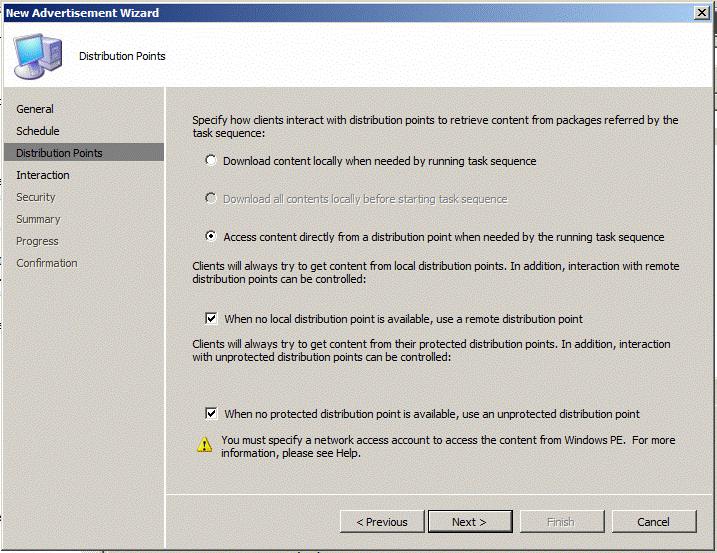
 На вкладке ‘Distribution points’ отмечаем настройки согласно скриншоту:
 Во всех остальных формах мастера все настройки оставляем по умолчанию. После окончания работы мастера, у нас появится новое активное объявление (advertisement), и для начала работы нам необходимо добавить компьютер в коллекцию.
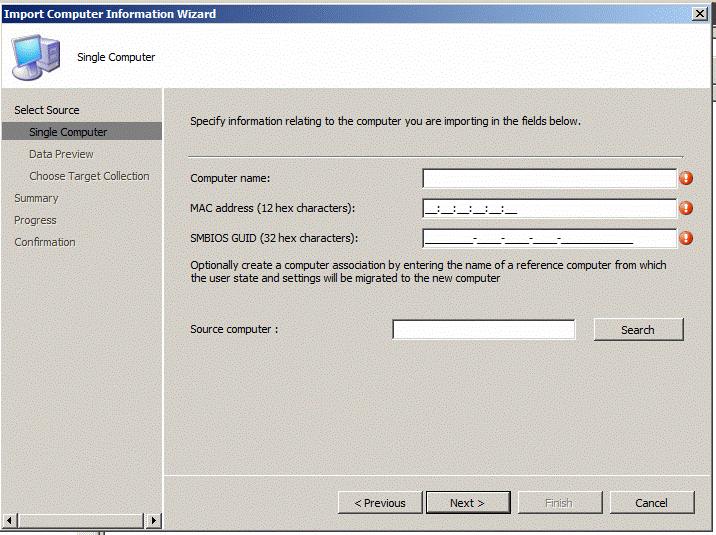
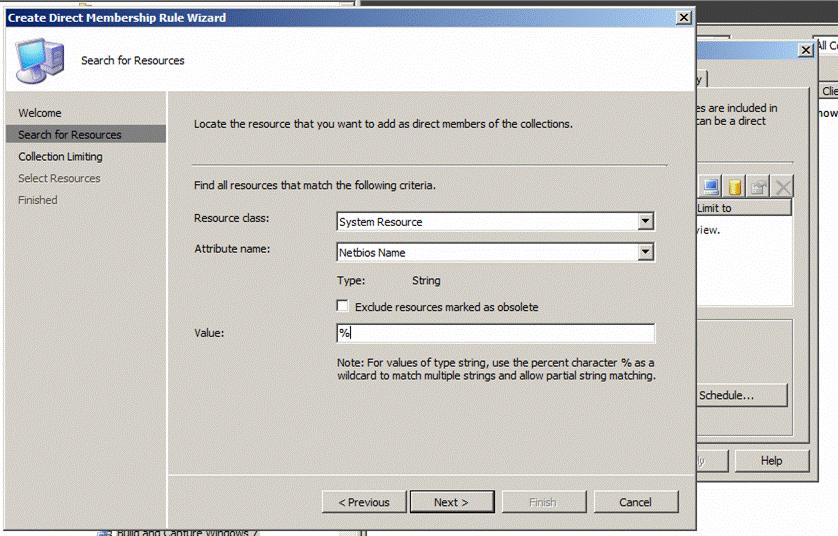
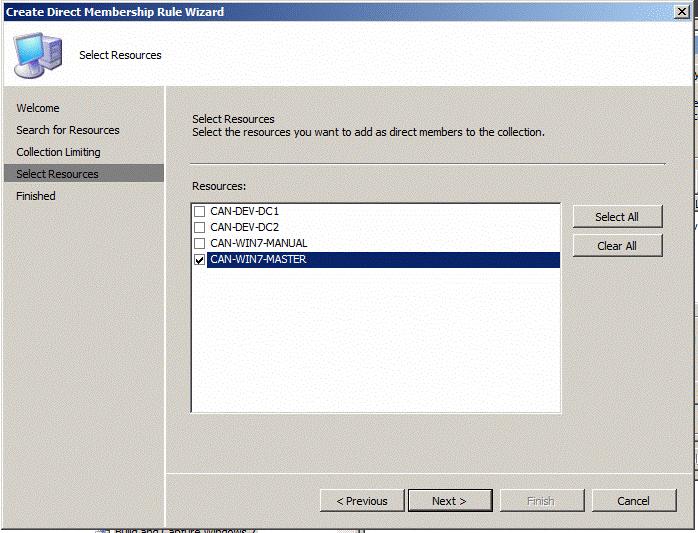
Развернем SiteDB -> ComputerManagement -> OpeatingSystemDeployment -> ComputerAssociation, правой кнопкой мыши вызываем контекстное меню -> ‘Import computer configuration’, выбираем ‘Single computer’ (отдельный компьютер). Далее нужно указать уникальный идентификатор машины (в моем случае это будет MAC адрес), а затем выбрать коллекцию ‘Build & capture windows 7’.
 В том случае, если искомая машина уже есть в системе SCCM, ее можно добавить вручную, для чего нужно найти коллекцию ‘Build & capture windows 7’ , зайти в ее свойства, и на вкладке ‘Membership rules’ добавить в коллекцию статическую запись.
 На этом этапе все работы закончены, и мы переходим к процессу построения и захвата образа на эталонной рабочей станции.
Установка и процедура захвата (Capture)
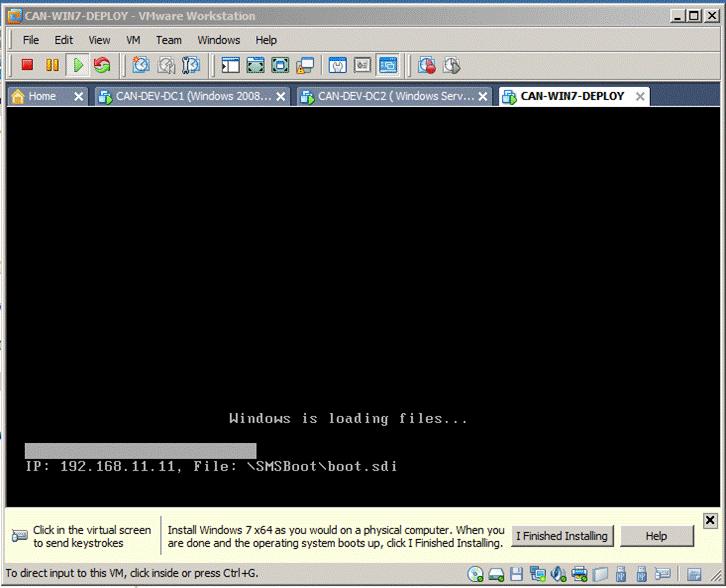
Запускаем машину, образ которой будет использоваться в качестве эталонного (в моей случае это будет виртуальная машина), и при загрузке выбираем загрузку по сети (network boot). Предварительно убедитесь, что в приоритетах загрузки на первом месте стоит пункт загрузки по сети (а не HDD).
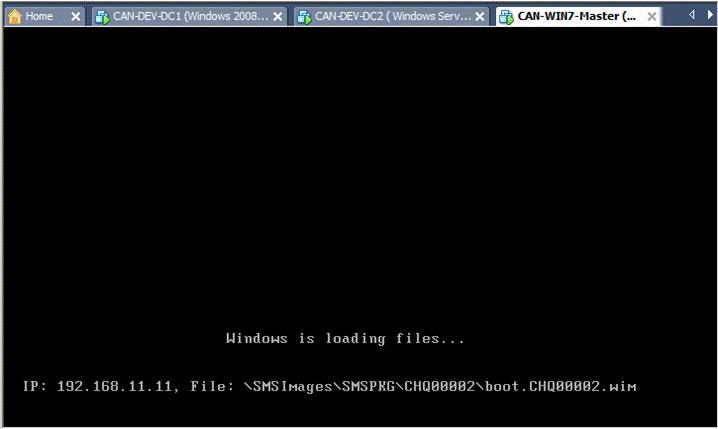
В результате загрузится Windows PE и начнется подготовка разделов на локальном жестком диске компьютера.
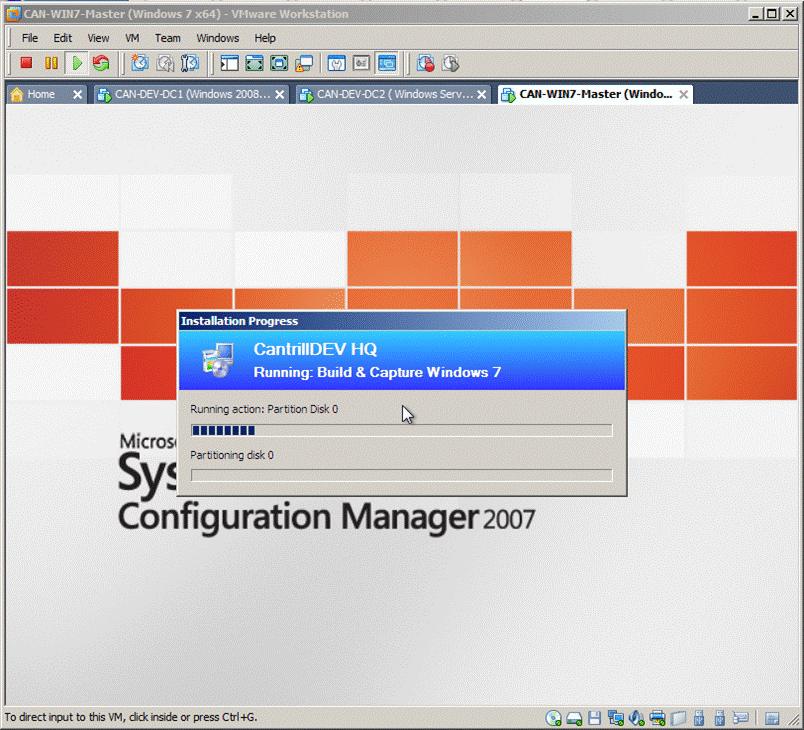
На этом шаге будет происходить установка Windows 7, в процессе которой компьютер несколько раз перезагрузиться.
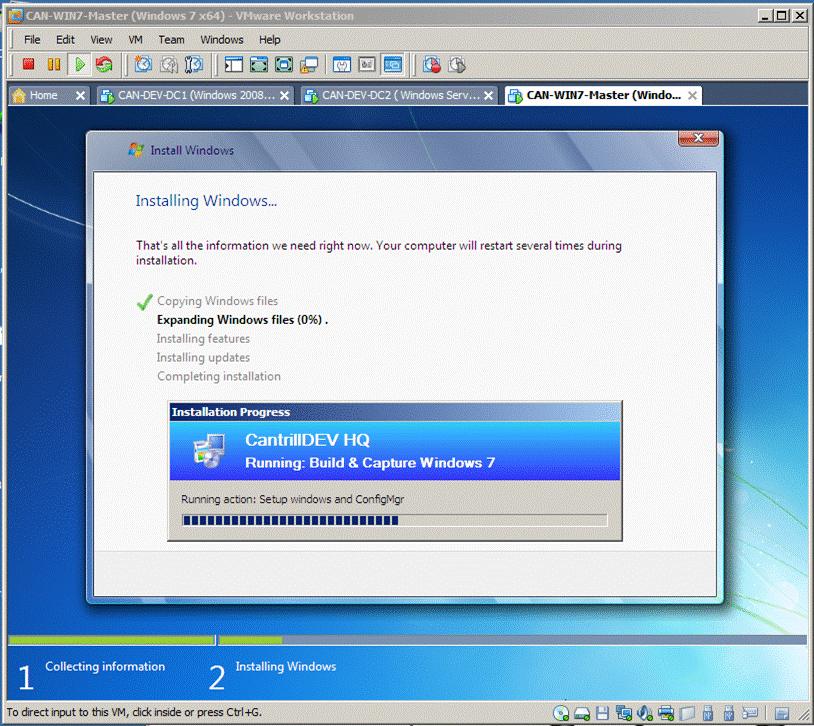
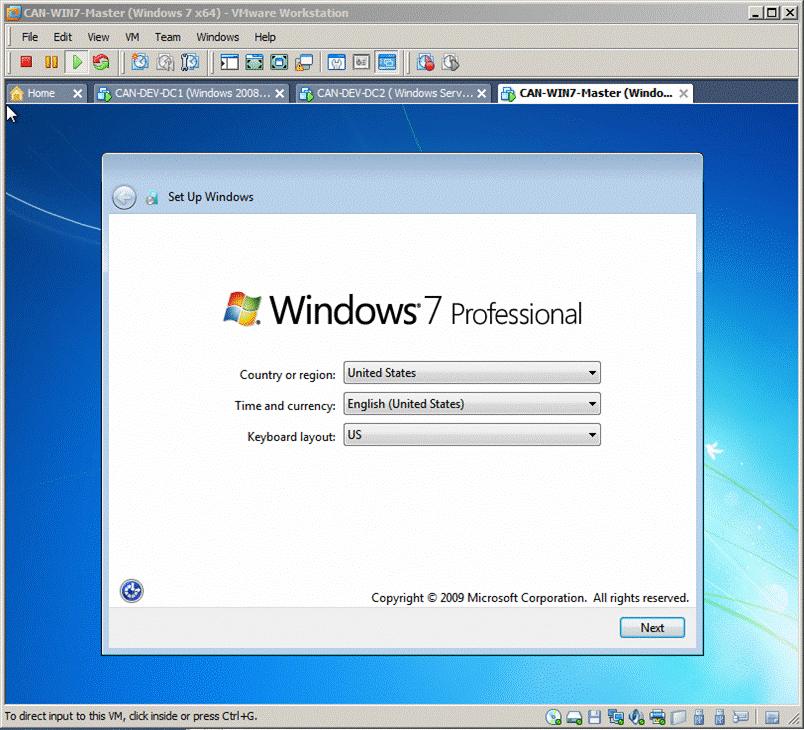
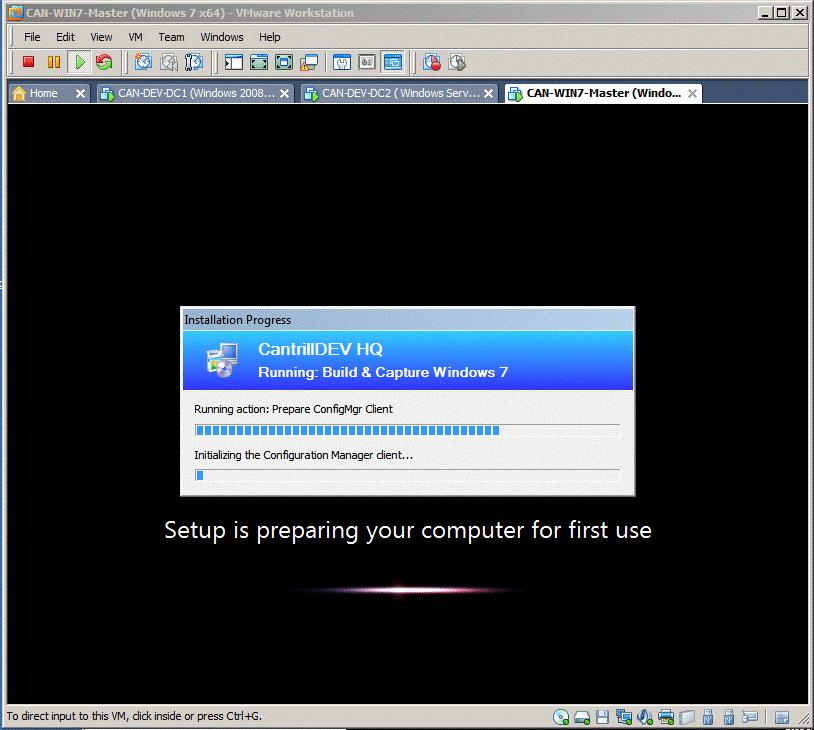 После последней перезагрузки автоматически запустится процесс захвата установленной ОС, который обычно занимает от 20 до 60 минут в зависимости от производительности компьютера и характеристик сети. После окончания процедуры захвата на сервере SCCM появится файл .wim , а сам компьютер перезагрузится и появится такое окно:
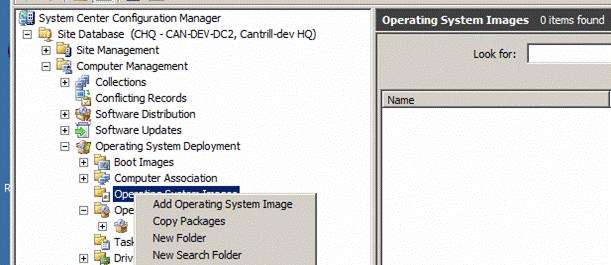
Добавляем в SCCM образ ОС
Разворачиваем Site DB -> Computer management -> Operating System Deployment -> Operating System Images > вызываем контекстное меню ‘Add operating system’.
Затем нужно указать местоположение полученного образа (у меня это
\\can-dev-dc2\sources\captures\7\win7professional.wim )
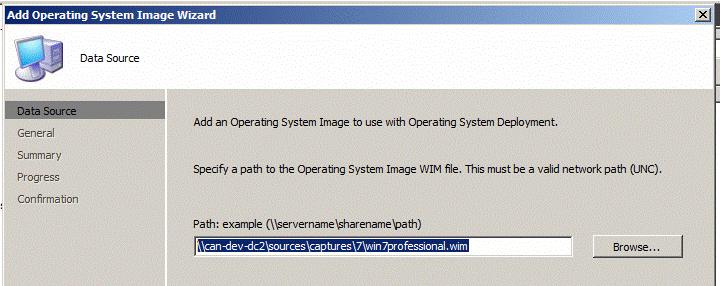
Соглашаемся со стандартными настройками и возвращаемся в консоль SCCM. Разворачиваем образ, и вызываем меню ‘New distribution points’ и размещаем наш образ на нужных точках распространения (кроме точек, имеющих тип PXE ).
Возвращаемся в консоль, и обновляем содержимое точек обновления (‘Update distribution points’).
Создаем последовательности установки
После множества подготовительных шагов мы готовы к разворачиванию образа на клиентские компьютеры. Машину, на которую вы хотите произвести установку должна быть в коллекции Deployment -> Windows 7 (если этой коллекции нет, создайте ее).
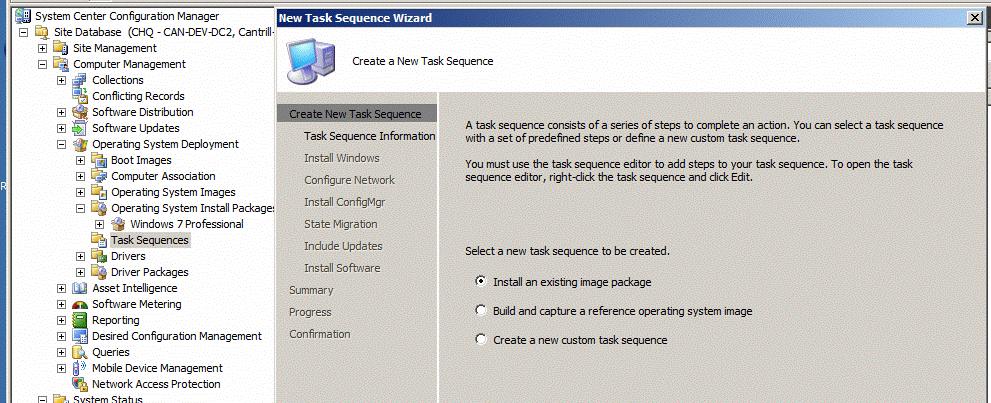
В консоли SCCM перейдите в SiteDB -> ComputerManagement -> OperatingSystemDeployment -> TaskSequences -> в контекстном меню создаем новую последовательность ‘Create a new task sequence’. Выберите ‘Install an existing image package’ (установить существующий образ):
Выбираем имя создаваемой последовательности и выбираем тип загрузчика.
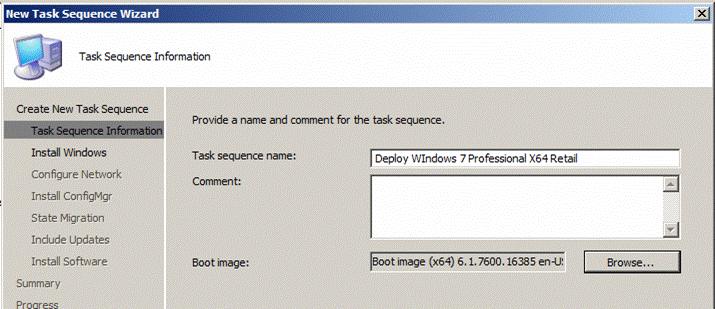
В следующем оке мы должны выбрать ранее созданный образ ( ‘1-1’), остальные поля оставляем без изменений (можете задать стандартный пароль администратора).
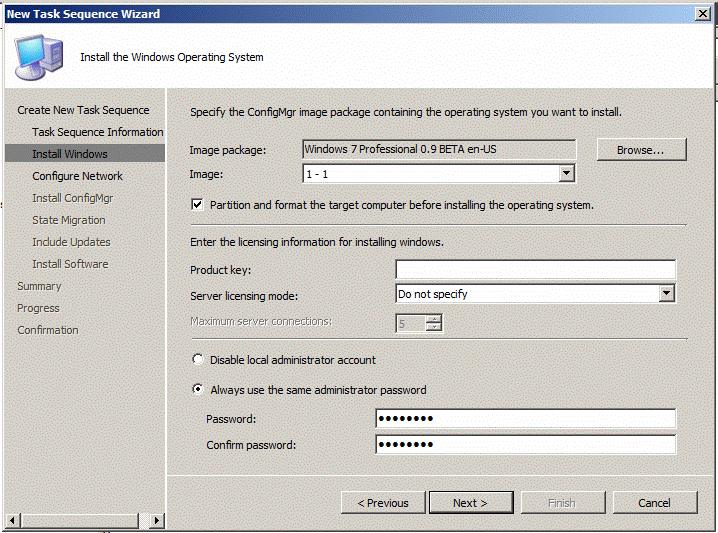
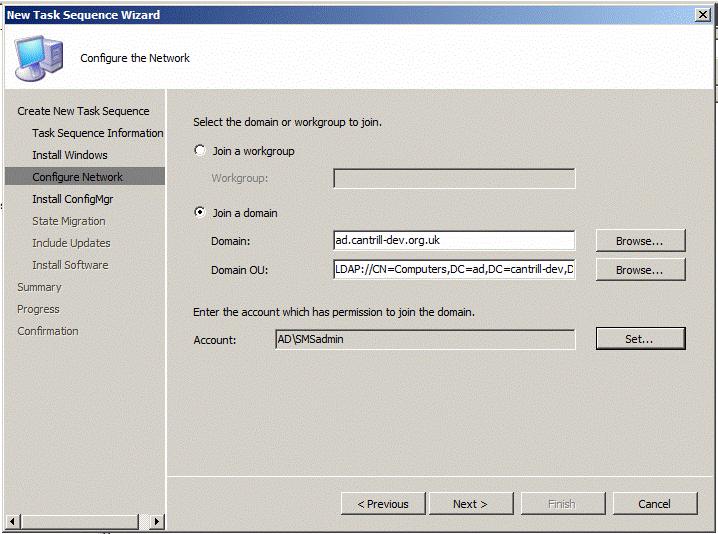
На следующем шаге мы настраиваем параметры по включению установленной машины в домен (не забудьте указать правильный контейнер OU).
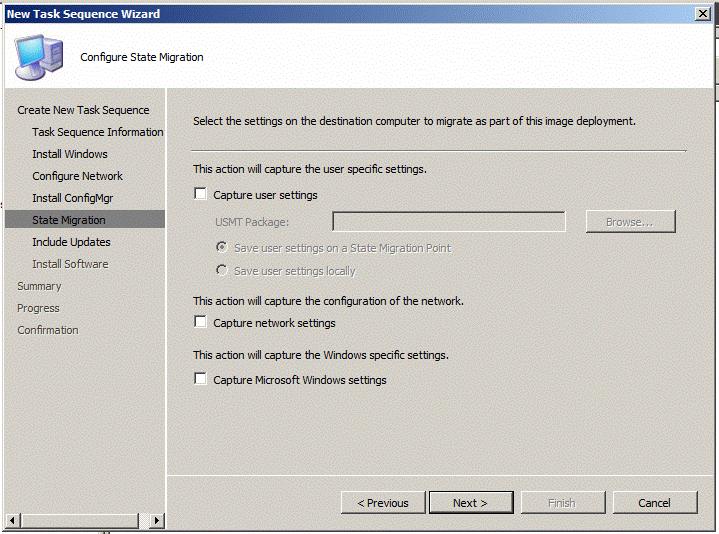
 Следующее окно отвечает за настройку параметров миграции пользовательских данных, в моей тестовой среде я не буду осуществлять миграция пользовательской информации.
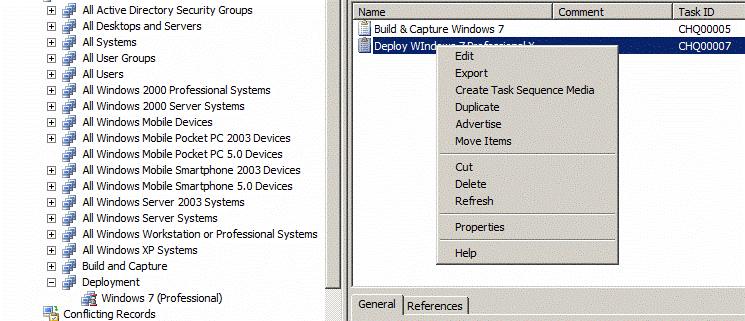
 Нажмите Next укажите стратегию обновления (устанавливать или нет обновления в процессе разворачивания образа). Закончив работу мастера, необходимо правой кнопкой щелкнуть по созданной последовательности и выбрать из меню пункт ‘Advertise’ (опубликовать).
В появившемся мастере нового объявления необходимо указать его параметры, не буду расписывать все подробно, можете просто познакомиться со скриншотами.

Осуществляем установку Windows 7 из SCCM 2007
Прежде чем приступить к установке, удостоверьтесь, что машина присутствует в SCCM (описано выше), и она включена в коллекцию Windows 7.
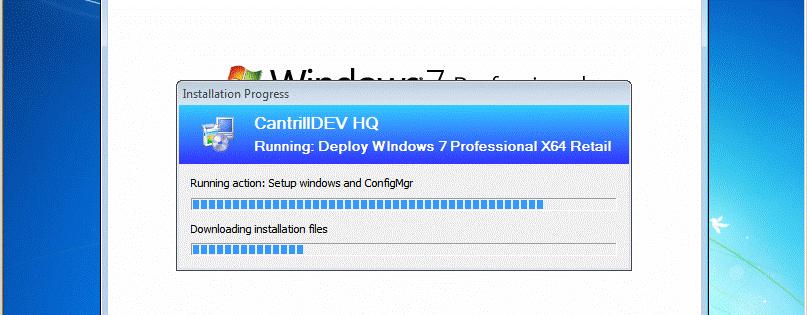
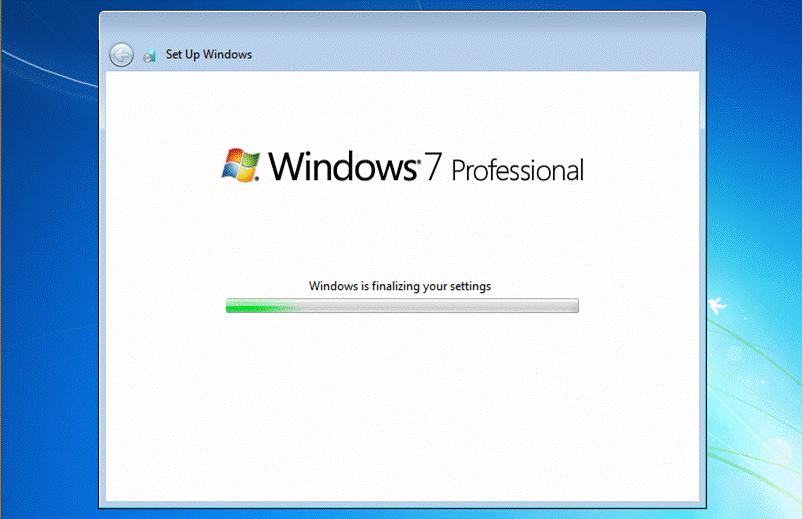
Запускаем нашу клиентскую машину (виртуальную или физическую), на которой планируется развернуть Windows 7, и в BIOS настраиваем загрузку по сети (PXE). В результате компьютер должен загрузиться в среде Windows PE, после чего начнется процесс установки ОС, ее конфигурирования и установки других пакетов. Следующая серия скриншотов описывает процесс установки Windows 7 на компьютер при помощи SCCM 2007.

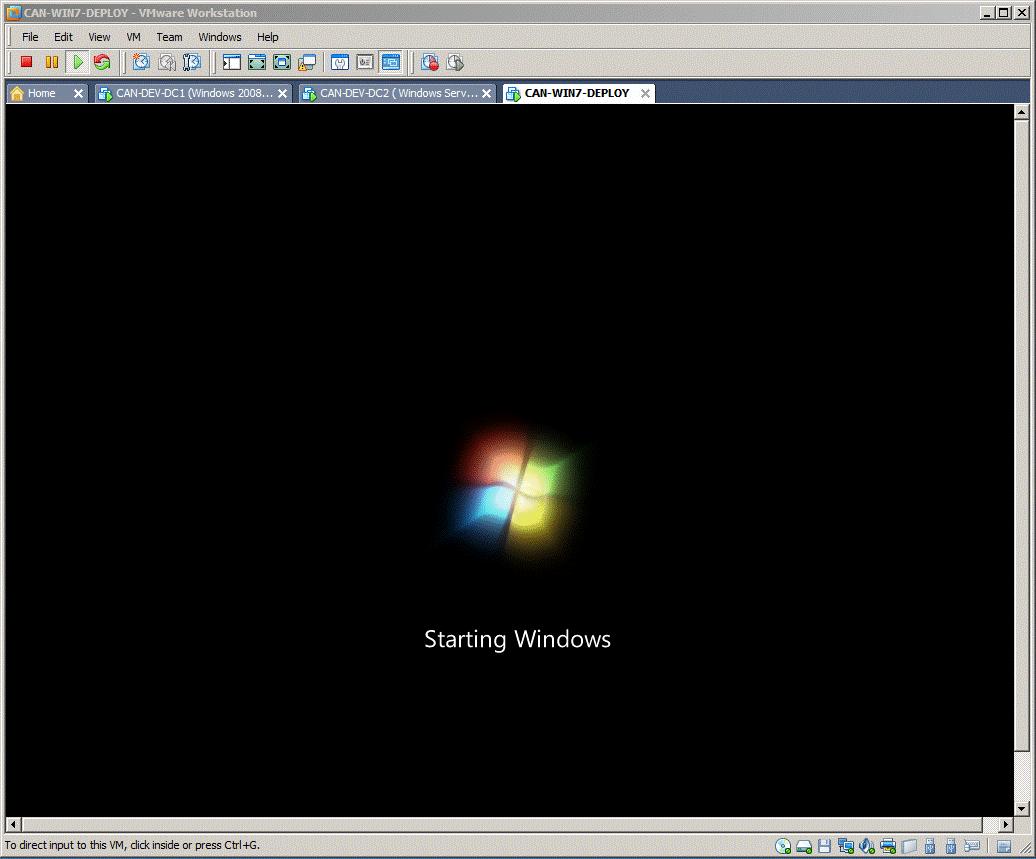

После последней перезагрузки вновь установленная машина с Windows 7 будет включена в домен AD. Далее возможно настроить процедуру дальнейшей настройки образа Windows 7, однако это выходит за рамки этой статьи, и так получившейся очень большой :).
Надеюсь, что данная серия статей, описывающих процедуру установки SCCM 2007, его настройки, и описания процесса установки Windows 7 из SCCM, окажется полезной!


