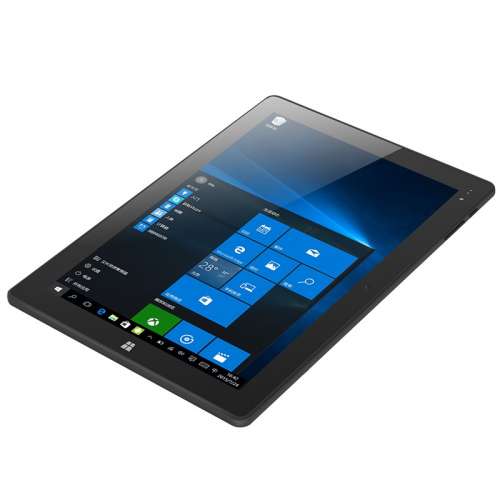
Chuwi hi 10 pro linux
My attempt to provide full Linux support to Chuwi Hi10 Pro
Latest commit
Git stats
Files
Failed to load latest commit information.
README.md
This is my attempt to gather all the information in one place on how to support the Chuwi Hi10 Pro tablet on Linux.
The configuration will be around my distribution (Arch Linux), but I hope that all the instructions here can be easily adapted to other distributions. Be aware that Arch Linux it’s a rolling realese distribution, so all software used will be pretty recent.
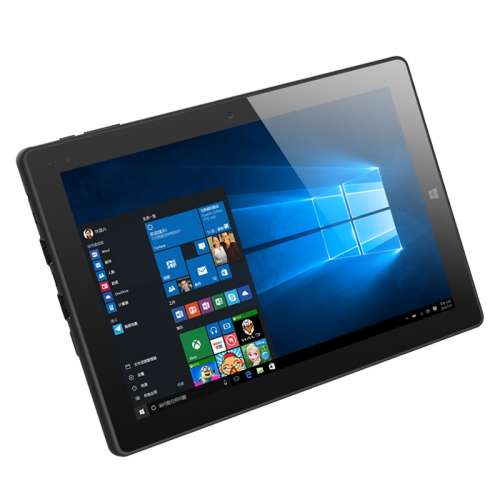
Basic hardware specifications
A more detailed review can be seen at NotebookCheck.
| Part | Component |
|---|---|
| Processor | Intel® Atom™ x5-Z8350 CPU @ 1.44GHz |
| Graphics | Intel® HD Graphics 400 |
| RAM | DDR3 4096 MB @ 1066 MHz |
| Screen | 10.1-inch IPS display @ 1920×1200 pixels |
| Touchscreen | Silead GSL1680 |
| Connectivity | Realtek 8723BS (802.11n & Bluetooth® 4) |
| Accelerometer | Bosch BMC150 |
| Light sensor | Capella CM3218 |
| Camera (?) | OmniVision OV2680 |
| Ports | 1 USB Type-C™, 1 microUSB, 1 microHDMI® |
This table currently refers to the default Arch Linux kernel package version 5.0.7-arch1
| Device | Status |
|---|---|
| Internal flash storage | Yes |
| Graphics | Yes |
| microUSB port | Yes |
| Type-C USB port | Yes |
| Incorporated USB hub | Yes |
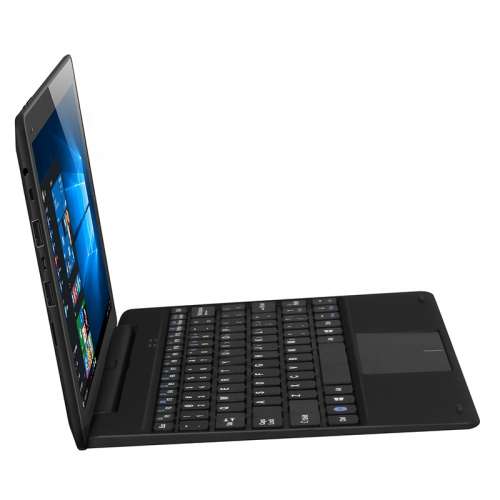
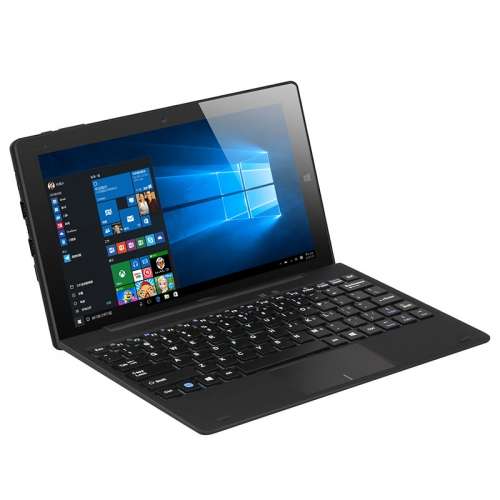
| Keyboard | Yes |
| Touchpad | Yes |
| 802.11n wireless | Very badly |
| Speakers | Yes |
| Headphone plug | Yes |
| Battery measurement | Yes |
| Backlight control | Yes |
| Power button | Yes |
| Volume buttons | Yes |
| Suspend | Yes |
| Screen lid switch | Yes |
| Touchscreen | Yes (see touchscreen folder) |
| microSD card slot | Sometimes, Unreliable |
| Accelerometer | Yes |
| HDMI output | Yes |
| HDMI audio output | No |
| Bluetooth | Not tested |
| Active stylus pen | Yes |
| Front camera | No |
| Back camera | No |
| Light Sensor | No |
Note: This list is sorted by my own priorities.
- Check this patch for the light sensor.
- Search for ways to improve WiFi stability (BIOS?).
- Investigate the touch screen home button.
Take also a look to the willyneutron repo, which is more detailed!
Источник
Ubuntu на Intel z8350 (chuwi hi10 pro)?
Эта проблема присутствует в драйверах 375 и 378 .
Учитывая, что просто уничтожение процесса компиляции устраняет проблему с плохими границами, я протестировал решение, которое работает на моей системе Ubuntu 16.04 каждый раз после system!
Шаг 1:
Я создал скрипт под названием fixbadborders в каталоге /lib/systemd/system-sleep. Он содержал следующее:
Шаг 2:
Разрешил сценарию иметь разрешение на выполнение с помощью:
Чтобы удалить этот скрипт: [ ! d6]
2 ответа
Я недавно переключился от Manjaro до Ubuntu 18.10
Несколько вещей:
a) для сенсорного экрана:
Необходимо выполнить эти шаги:
1. Установите драйвер:
Клонируйте репозиторий от https://github.com/onitake/gslx680-acpi
сделать
insmod./gslx680_ts_acpi.ko
Затем Вам нужно корректное встроенное микропрограммное обеспечение (необходимо выбрать корректную модель Chuwi Hi 10 Pro (на основе начала порядкового номера), переименовать silead_ts.fw к mssl1680.fw:
https://github.com/onitake/gsl-firmware/tree/master/firmware/chuwi
Затем необходимо калибровать экран. Скрипт, который можно запустить с приложениями запуска, в https://github.com/danielotero/linux-on-hi10/blob/master/touchscreen/rotation
Вы, возможно, должны изменить «DSI1» на «DSI-1»
2. Аудио: Ubuntu 18.10 уже имеет его установка главным образом так все, что необходимо сделать:
скопируйте код с: https://gist.github.com/Orochimarufan/d8e42cfaa32c2cdd13640dad6a10b847 и сохраняют его как speakerEnable.c
Затем: сделать
Эта программа должна работать как корень, когда Вы входите в систему поэтому, необходимо превратить его на службу для работы запуска (если Вы вручную не хотите сделать./speakerEnable каждый раз, когда Вы хотите динамики), https://unix.stackexchange.com/questions/202698/how-can-i-run-a-program-as-a-root-user-when-my-ubuntu-15-04-machine-starts-up
Я надеюсь, что указания являются четкими. При необходимости в разъяснении по поводу того, как сделать (скомпилируйте c программу), или что-либо еще, спросите. Это требовало времени для настраивания планшета приятно.
Я недавно переключился с Manjaro на Ubuntu 18.10. Несколько вещей: a) для сенсорного экрана: Вы должны выполнить следующие шаги:
и затем загрузить модуль
Запуск dmesg должен выдать какой-то вывод, если драйвер был согласован с устройством. Вы также должны увидеть сообщение от подсистемы ввода о том, что было добавлено новое устройство ввода.
Источник
Chuwi hi 10 pro linux
- BIOS DualBoot — для V400 E4D6_C106_E0511.233 (Серийный номер 16ххх) + Инструкция по прошивке
- BIOS DualBoot — для V400 E4D6_C106_E0511.224 (Серийный номер 16ххх) + Инструкция по прошивке
- BIOS SingleBoot 60D для V400 (Серийный номер 16xxx)
- BIOS 608 x64 для V300 (Серийник 1511ххх)
- BIOS 608 x64 для V200 (сетевой адаптер Broadcom)
- Инструкция по прошивке
На данный момент последняя версия БИОС для ревизий V200 и V300 — это 608.
Дуалбут работает только на ревизиях V400 попытка прошить ревзию V200 или V300 биосом от V400 — окирпичивает устройство.
Сообщение отредактировал stp101 — 20.05.19, 23:23
Сообщение отредактировал dolgorick — 30.09.15, 03:17
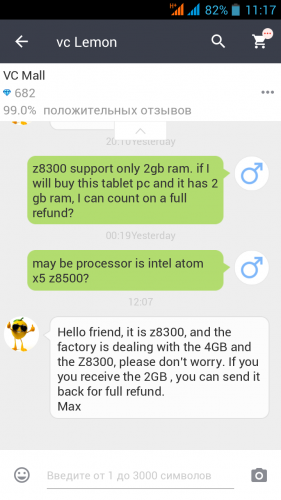
Intel® Atom™ x5-Z8300 Processor
(2M Cache, up to 1.84 GHz)
Макс. объем памяти (зависит от типа памяти) 2 GB
Может опечатка в описании планшета и у него другой процессор?:
Intel® Atom™ x5-Z8500 Processor
(2M Cache, up to 2.24 GHz)
Макс. объем памяти (зависит от типа памяти) 8 GB
Разница в стоимости процессоров 5$, будет странно если сэкономили на проце и при этом поставили память, которая не будет поддерживаться в полном объеме.
Сообщение отредактировал ksystem5 — 02.10.15, 20:14
То что Cherry Trail, это не значит что поддержка 4 GB памяти. Все зависит от контроллера памяти.
Кстати есть схожая модель на том же процессоре и 4 GB памяти, PIPO W1S (CPU Intel Cherry Trail Z8300 quad core, RAM 4GB) — http://www.pipo-store.com/pipo-w1s.html
И уже сейчас с 4 GB памяти PIPO W1S можно купить на ebay, http://www.ebay.com/it…r=&hash=item2808ff9c89
Вот интересно, это программный фикс для поддержки 4GB памяти Intel Cherry Trail Z8300 или Intel сам не знает что пишет в описании процессора? Третьего не дано.
Сообщение отредактировал ksystem5 — 03.10.15, 09:21
Очередное подтверждение про Z8300 и 4 Гб ОЗУ с geekbuying:
|
Из последних новостей( что-то тут тема не сильно жива). Чуви организовало сбор денег на этот планшет и не понятно, что будет если деньги не соберут. Сообщение отредактировал sh0ked — 25.10.15, 15:38
Сообщение отредактировал dim565 — 25.10.15, 16:25 какой смысл помогать собирать деньги для чуви, когда вокруг полно конкурентов уже фактически начавших продавать тоже самое и без всякого сбора (тот же pipo w1s). Меня больше всего интересует, что там будет с системой охлаждения. Добавлено 25.10.2015, 16:44: и кому нужен usb 3.0 на планшете такого уровня? для чего? ерунда. Сообщение отредактировал sdfsdfs — 25.10.15, 16:42 Согласен, устарел уже USB 3.0. Сюда бы USB Type-C 🙂 Но видимо не судьба Сообщение отредактировал dim565 — 25.10.15, 16:57 более мощный спу скорее всего не ставят как раз из-за невозможности справиться с нагревом. у меня есть приставочка pipo x7 и вот по ней я знаю, что китайцев (по крайней мере pipo) абсолютно не волнует что там с нагревом и перегревом. а потом народ купивший этот продукт годами дорабатывает собственными руками охлаждение. а учитывая, что это планшет, а не пк, то своими руками там уже мало что можно будет доработать. у чуви заявлены 2х мегапиксельные камеры. пипо выходит покруче. правда у пипы заявлен аккум на 6. у чуви 8. как-то не верится что в одиноковых по размеру корпусах решили настолько разные аккумуляторы конкуренты засунуть. Добавлено 27.10.2015, 21:04: и никто не подскажет, по фоткам если планшет к клаве подключить, он только в одном положении (грудусах) будет зафиксировано.
я так же посмотрел видео, где мужик доделывает охлаждение у чуви. так вот мужик кладет медные пластинки и якобы все. температура теперь не превышает 50 градусов. просто зимой я купил чудо инженерной мысли pipo x7 в лице первых покупателей. и вот теперь хочет планшет, но уже по вскрытию чуви видется, что точно такая же байда, абсолютно никак не продумано охлаждение, и 100% через 10 минут игр или видео, система будет в тротлинг уходить. как собственно на видео в обзоре это уже показано. спрашивается нахрен оно тогда надо.. я удивляюсь китайцам. доделать охлаждение максимум 10$ стоит. неужели так сложно продавать вещи которые не требуют допила. Медные пластины улучшают тепловой контакт проца с задней крышкой планшета ну и соответственно. А если по теме то чуви мне импонирует из-за двух полноценных юсб, ни у кого больше не видел. Источник Chuwi hi 10 pro linuxInstalling Lubuntu in Chuwi Hi10 Pro In this guide, I will try to explain all processes I followed to have a working Lubuntu 17.10 in a Chuwi Hi10 Pro tablet. I hope this will be easily adapted to other Linux flavours. This is the current state of my system:
I wanted to replace my old and really used ASUS EeePC netbook with a newer and relative inexpensive machine, but it turned to be a really harsh task. Finally, I spoted Intel Cherry Trail tablets and I decided to give them a try with Linux. So I bought this one from a chinese reseller because it is cheap and it has good hardware. Some of the processes described in this guide are dangerous and can damage your device or void it’s warranty, so follow this guide on your own risk! It seems that Chuwi manufactured two slightly different tablets under the name of Chuwi Hi10Pro. You can distinguish which one you have by looking at serial number:
This will be important for some of the configurations we will need to perform later, but it is something really important if you want to perform any kind of factory reset, like flashing BIOS or any of the OSs that come preinstalled. You can find the original files and tutorials of how to do so in Chuwi official forums. All this guide has been tested using a version 2 Chuwi, so maybe some of the configurations shown in this guide could not work in other tablets. My Chuwi is loaded with:
Installing base system I didn’t want to mess arround with the SOs installed in the internal memory of my tablet, so I finally decided to install Lubuntu in a USB stick and boot from there using the USB hub built into the keyboard. This way, I could also mess arround with my installation with no worries, the warranty of my tablet will not be voided, and I also will be able to boot other computers with the same dongle. So I used a VM (VirtualBox) to install Lubuntu into my USB stick. I created a new blank VM configured for Linux with no virtual hard disk drives attached. It is very important to enable EFI support, because the Chuwi won’t boot if Lubuntu is not installed in EFI mode. In VirtualBox, you can change this setting in Configuration > System > Enable EFI. After that, I loaded Lubuntu 17.10 ISO (Lubuntu official download site) into virtual CD-ROM drive and started up my VM. I continued the installation with no problems. This USB stick is ready to boot in pretty much every computer, but not in this Baytrail tablets, because they have a 32 bit UEFI. To address that, we need to get a bootia32.efi and place it inside EFI partition of our new USB stick. You can get one here thanks to John Wells and his Asus Transformer T1000. The easiest way to include this new file into the EFI partition is to plug it in another computer, mount the EFI partition, download the file and copy it in place: You can use lsblk to know what /dev/sdX1 partition is the one you are looking for. So now we are ready to boot from our new USB stick. To force the tablet to boot from USB stick, you will need to enter the BIOS by pressing Del key while Chuwi logo is on screen during tablet boot. With this new 32bit UEFI, you will be able to boot from the USB stick, but the screen will be in vertical mode. In order to work better while trying to fix everything, log in, and once in the desktop, open a terminal with Ctrl-Alt-t and type: This is also a good moment to install some common dependencies that will be needed to build drivers later on: So let’s try now to fix everything up. HW Accelerated graphics Accelerated graphics work out of the box, but if you try to, for example, play a youtube video, browser will get stuck. This is not due to video issues but sound issues, we will fix that later. NOTE: If you want to, you can install Intel Accelerated Graphics driver update tool. I have notice a very little improvement in speed and screen fluency, but I have not measured it in any way, it is just subjective. If you are running your system from a USB stick, installing these drivers could cause graphic crashes if you try to use the USB stick in other systems. NOTE 2: It seems that Intel is discontinuing this method of driver update as you can read here This information is based on a guide published in slimbook.es To install such drivers, we will need to trick Intel installer, because there is no official release for Ubuntu 17.10 (artful), so we will download a release for 17.04 (zesty) and trick the installer to think we have installed this version instead. Let’s download Intel installer for zesty: Let’s also download dependencies: Now let’s trick the installer. First, make a backup of lsb-release: As you may think, modify this file: Before installing the package, let’s import GPG keys: Now we are ready to install the package and launch it: Installer will now pop up. Just install it as normal. Do not forget to restore lsb-release: Sound, speakers and headphone jack This information has been recopiled from a issue opened in Daniel Otero’s guide to adapt Arch Linux to the Chuwi Hi 10. You can read it here. In order to make sound work, some ALSA configuration files need to be modified. You can download the fixed configuration files and install them as follows: After a reboot, headphone plug will be working, but speakers will not work. This is because a GPIO needs to be enabled. To do so, a kernel module needs to be modified. Orochimarufan published the patch to do so here. You need to make this modifications to the file sound/soc/codecs/rt5651.c placed inside your kernel source code directory and then rebuild and install the modified new kernel. See Building a new kernel section on this guide to know how to get kernel source code, recompile and install it. Automatic headphone plug detection is not working. So you will need to select which sound output you want to activate using desktop controls in LXDE taskbar. In order to make the backlight work, some kernel flags needs to be changed: See Building a new kernel section on this guide to know how to get kernel source code, and change configuration flags. Some of these flags has been taken form Daniel Otero’s guide to adapt Arch Linux to the Chuwi Hi 10. You can read it here. This was also featured on freedesktop site here. I weren’t able to make it work with kernel flags specified by Daniel, I finally needed to change some of the values, as I read here. As you can read in this last quote, you can get/modify brightness configuration by reading/writing in /sys/class/backlight/intel_backlight/actual_brightness . Also you can read how to set up brightness after boot by adding it to initramfs. After kernel configuration change, brightness up and down fn keyboard key combinations will also work fine. NOTE: I am currently working on this. The screen is now detected, but it is imprecise and needs to be calibrated. In order to get the screen working, screen firmware need to be installed. In this case, only one file will be needed: The community has been extracting firmwares for this kind of touchscreens. You can get more information here. Notice that if you have the first version of the Chuwi Hi10 Pro, you must download a different silead_ts.fw ! Once the firmware is downloaded, it needs to be copied in the right place for the system to find it at startup: Once the firmware is placed, gslx680 drivers need to be installed, so let’s download, build and install them: /etc/modules will need to be changed, in order to let the system load the new module. This line needs to be added: If the screen is not working properly after reboot, see /var/log/syslog for more details. Volume hardware buttons and fn key combinations on keyboard Volume hardware buttons are recognized by the system, if you run xev and press them, it shows that keypresses are indeed being detected. But in /.config/openbox/lubuntu-rc.xml wrong commands are binded to XF86AudioLowerVolume and XF86AudioRaiseVolume. Almost every fn combination (blue icons on keyboard) are detected succesfully, but the have no binded action. If you want to configure any of the fn key combinations, you can modify /.config/openbox/lubuntu-rc.xml to bind them to some script or command. You can also use xev to know the ID of the key/combination you are pressing. Thanks to jamontes for his help in these issues. Bluetooth is working after installing drivers (big thanks to Larry Finger for this!): Every time you need to activate bluetooth, a script must be run, so is a good idea to set a root cron job to do so at startup. Create a new directory, copy contents in it: Then write the cron job: The light sensor will work after installing drivers. These can be found here, Thanks to burzumishi for this! Once installed, you can read sensor value like this: Accelerometer and screen rotation I have prepared a daemon for this task: bma250 screen autorotator In order to rotate the touchscreen at the same time than the image, you will need to compile this program defining XDEVICE macro using the ID of your touchscreen provided by xinput list . In my case I needed to compile and install it like this: Do not forget also to configure LXDE to run the program at startup. Customizing and compiling Linux Kernel NOTE: Compiling kernel is a CPU-intensive task, I recommend making the build step in a different (and more powerful) Ubuntu/Lubuntu machine. If you try to build the kernel in the Chuwi, it would take several hours (or days). First of all, lets find out what version of Linux kernel is installed on the Chuwi: In my case it was 4.13.0-25-generic . Now, we will need to download the kernel sources. Remember to verify you are downloading the correct kernel version obtained in the last step. Of course, you could build and install another kernel version if you want to. If you are running this commands in the same linux version you want to build and install, you could also refer to your kernel version like this: If you are getting an error saying that no source could be found for this packages, make sure you have deb-src repositories activated in \etc\apt\sources.list . If they were disabled, do not forget to perform an apt-get update . If you have not build a kernel in the system before, some more packages will be needed for the build: You will also need to install ncurses: This is a good point to applly GPIO modifications in sound/soc/codecs/rt5651.c specified in «Sound, speakers and headphone jack» section. This is the patch for this specific kernel version adapted from Orochimarufan’s file. One of the main reasons building the kernel is necesary, is because some configurations need to be changed. In order to do so, some permissions need to be granted inside kernel source directory: Now is time to change this configurations, clean the project and edit the configuration: At this point, you will be prompted with several questions about if you want to edit the configurations associated to each kernel flavour. Normally you will want to modify the configuration for the generic kernel ( amd64/config.flavour.generic ). When you agree to edit the configuration for a certain kernel flavour, you will get to a screen like this:
In this screen, press / key to search for all configurations that need to be changed (specified in blacklight section of this guide):
Select which one of the search results you want to change by pressing the number specified in each result:
In this case, I2C_DESIGNWARE_PCI does not have the correct value, so press 1 to return to configuration page and be able to change it’s value:
In this screen is only necessary to press Y to include this feature:
You could also need to press N or M to change the value as desired. For this kernel version, I only needed to change these configurations: The rest of them (complete list here) were already correct. Do not forget to save the changes before selecting exit. After this, we will be asked once again if we want to change the configuration for the other kernel flavors. Before building the kernel, let’s change version name to be able to distinghish this new kernel from the older one once installed (or in GRUB for instance) and making it newer than the stock one. To do so, let’s add a modifier to the first version number of debian/changelog :
Once all configurations are changed, build the kernel: If you are getting module error checks, you may want to build with skipmodule=true : Several .deb packages must have been generated at this point. Just install them on the Chuwi: In the case you want to know all kernel packages you have installed, you can get a list of them:
AboutGuide to install Lubuntu 17.10 in a Chuwi Hi10 Pro, a Intel Cherry Trail based tablet. Источник |

 brokerZIP, может вернете в характеристики (в шапке которые) Z8300 вместо Z8500? Везде в описании Z8300. А то народ будет путаться 🙂


