- Install Cisco AnyConnect Secure Mobility Client on a Mac Computer
- Available Languages
- Download Options
- Objective
- Introduction
- AnyConnect Software Version
- Install AnyConnect Secure Mobility Client
- Prerequisites
- Check these other articles out!
- Applicable Devices | Software Version
- Licensing Information
- Step 1
- Step 2
- Step 3
- Step 4
- Step 5
- Step 6
- Step 7
- Step 8
- Step 9
- Step 10
- Step 11
- Step 12
- Step 13
- Additional Resources
- AnyConnect App
- View a video related to this article.
- AnyConnect macOS 11 Big Sur Advisory
- Available Languages
- Download Options
- 1. Introduction
- 2. About the AnyConnect System Extension
- 3. Approving the AnyConnect System Extension
- 3.1 Extension Approval by End User
- 3.2 Extension Approval using MDM
- How to Install Cisco AnyConnect on a Mac
- Step 2
- Step 3
- Step 4
- Step 5
- Step 6
- Step 7
- Step 8
- Step 9
- Create Favorite
- Cancel changes
- Unsubscribe
- Install and Configure the Cisco AnyConnect Software VPN on a Mac
- Installing the VPN Client
- Starting the VPN Client
- Disconnecting the VPN Client
Install Cisco AnyConnect Secure Mobility Client on a Mac Computer
Available Languages
Download Options
Objective
This article shows you how to download and install the Cisco AnyConnect Secure Mobility Client version 4.9.x on a Mac Computer.
This article is only applicable to the RV34x series routers, not Enterprise products.
Introduction
AnyConnect Secure Mobility Client is a modular endpoint software product. It not only provides Virtual Private Network (VPN) access through Secure Sockets Layer (SSL) and Internet Protocol Security (IPsec) Internet Key Exchange version2 (IKEv2) but also offers enhanced security through various built-in modules.
AnyConnect Software Version
Install AnyConnect Secure Mobility Client
This toggled section provides details and tips for beginners.
Prerequisites
- You need to purchase client license(s) from a partner like CDW or through your company’s device procurement. There are options for 1 user (L-AC-PLS-3Y-S5) or packets of licenses including one year for 25 users (AC-PLS-P-25-S). Other license options available as well, including perpetual licenses. For more details on licensing, check out the links in the Licensing Information section below.
- Download the latest version of firmware available for your router.
Check these other articles out!
Applicable Devices | Software Version
- RV340 | 1.0.03.21 (Download latest)
- RV340W | 1.0.03.21 (Download latest)
- RV345 | 1.0.03.21 (Download latest)
- RV345P | 1.0.03.21 (Download latest)
Licensing Information
AnyConnect client licenses allow the use of the AnyConnect desktop clients as well as any of the AnyConnect mobile clients that are available. You will need a client license to download and use the Cisco AnyConnect Secure Mobility Client. A client license enables the VPN functionality and are sold in packs of 25 from partners like CDW or through your company’s device procurement.
Want to know more about AnyConnect licensing? Here are some resources:
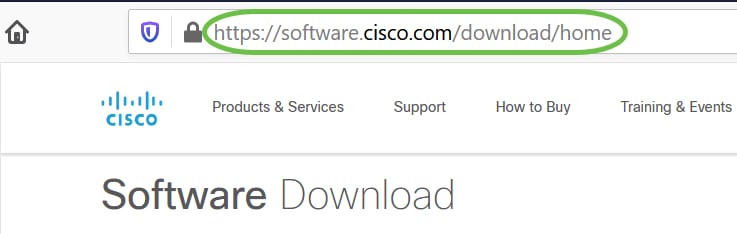
Step 1
Open a web browser and navigate to the Cisco Software Downloads webpage.
Step 2
In the search bar, start typing ‘Anyconnect’ and the options will appear. Select AnyConnect Secure Mobility Client v4.x.
Step 3
Download the Cisco AnyConnect VPN Client. Most users will select the AnyConnect Pre-Deployment Package (Mac OS) option.

The images in this article are for AnyConnect v4.9.x, which was latest version at the time of writing this document.
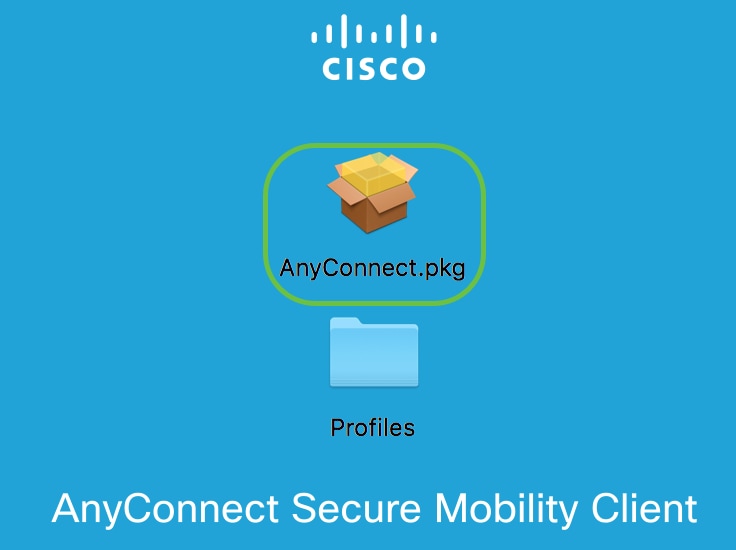
Step 4
Double-click the installer.
Step 5
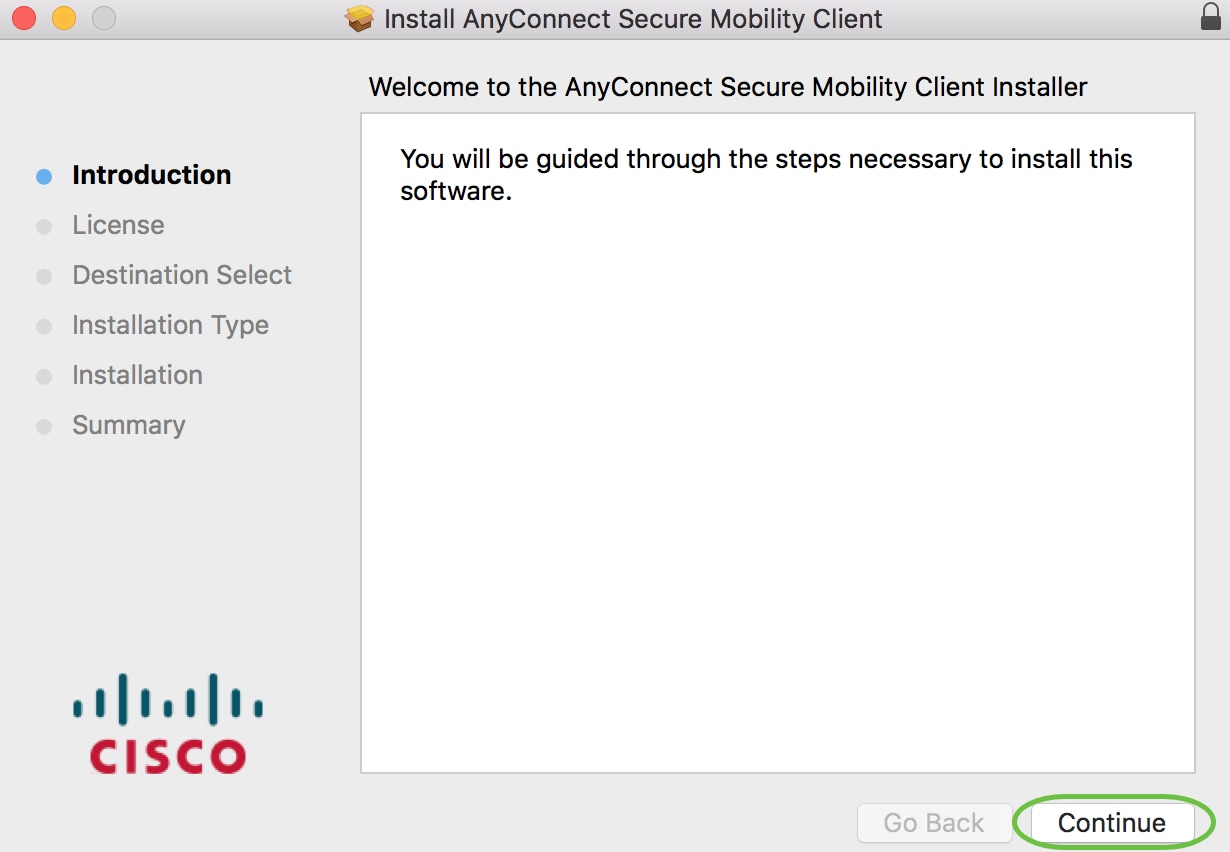
Step 6
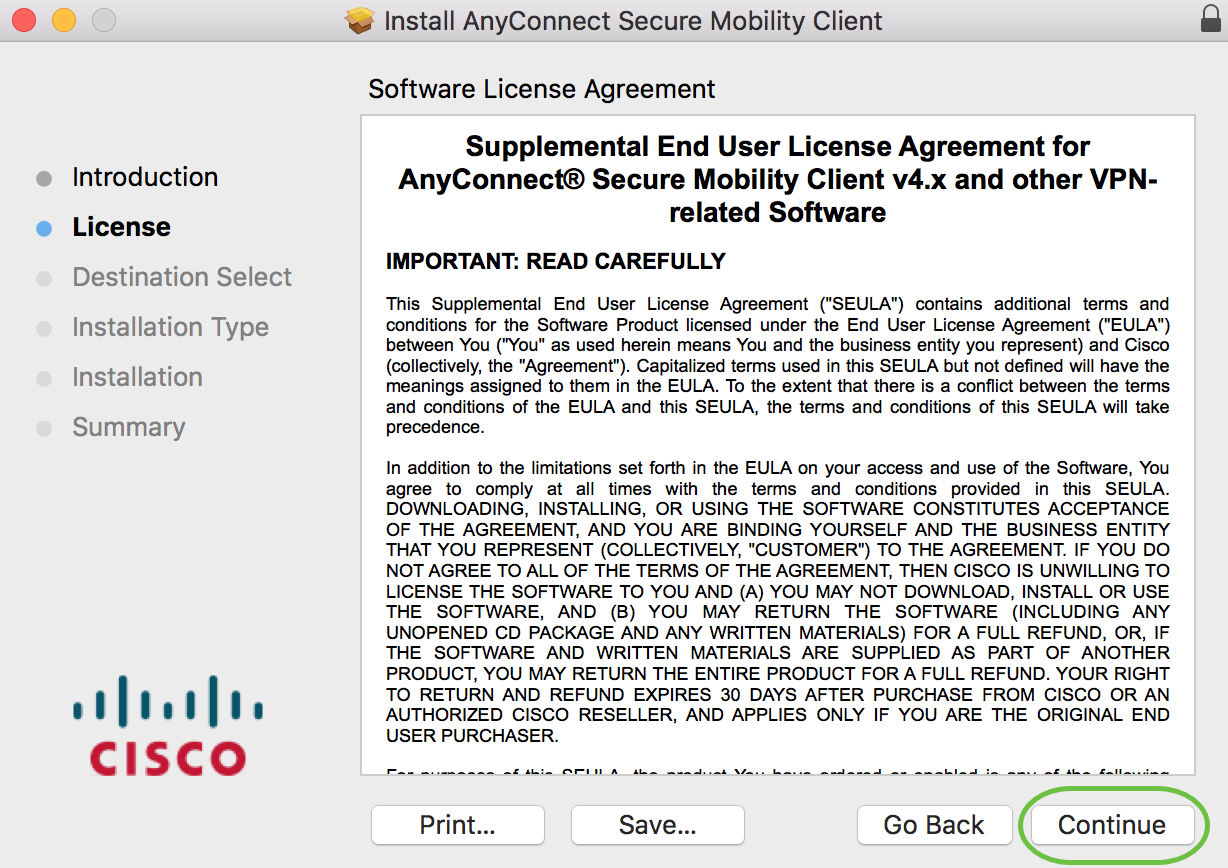
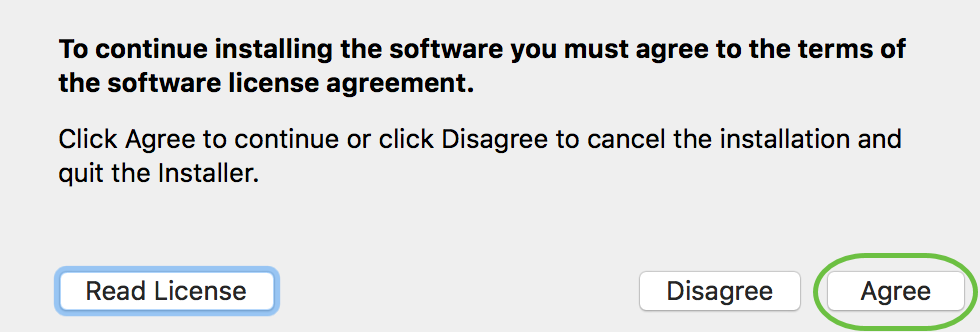
Go over the Supplemental End User License Agreement and then click Continue.
Step 7
Step 8
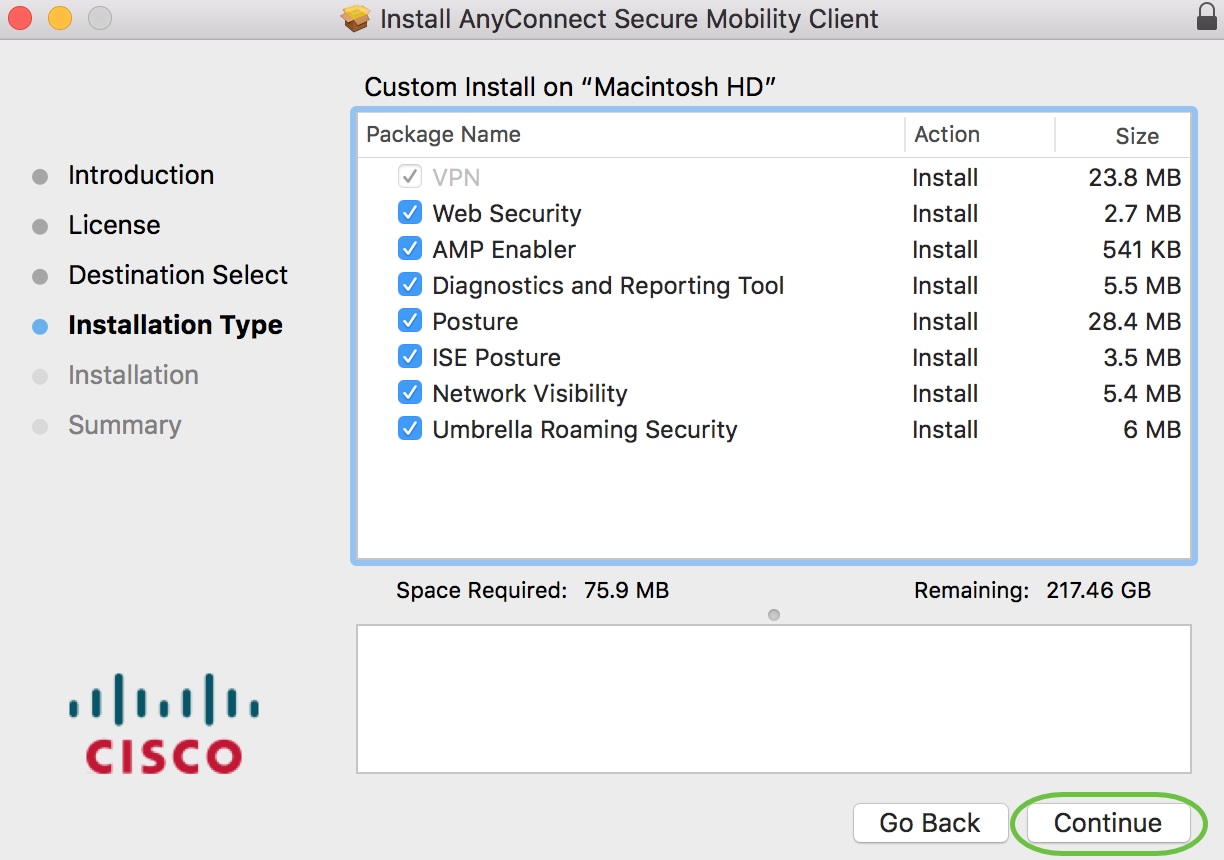
Choose the components to be installed by checking or unchecking the corresponding check boxes. All components are installed by default.
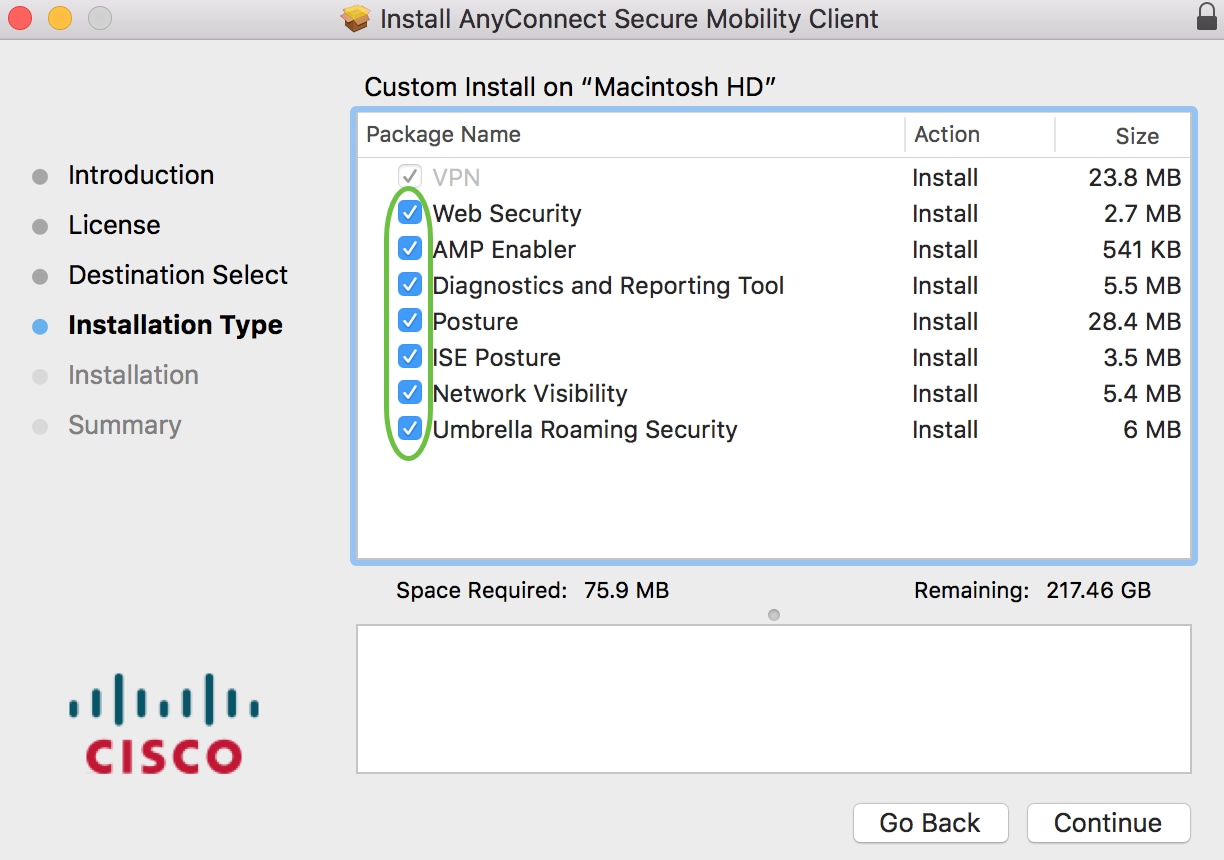
The items you select in this screen will appear as options in AnyConnect. If deploying AnyConnect for end-users, you may want to consider deselecting options.
Step 9
Step 10
Step 11
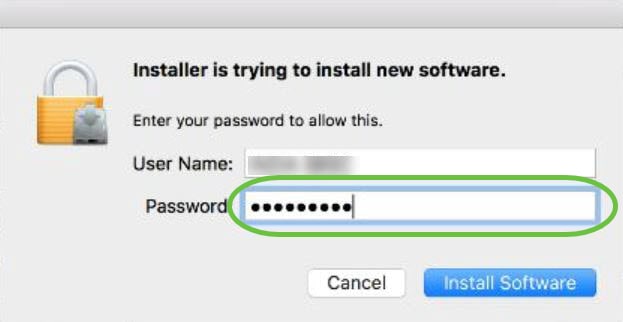
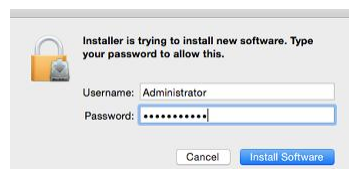
(Optional) Enter your password in the Password field.
Step 12
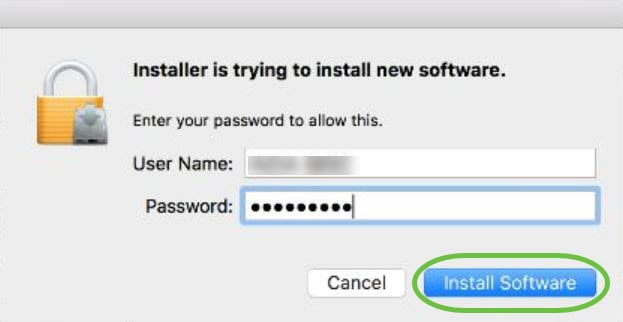
Click Install Software.
Step 13
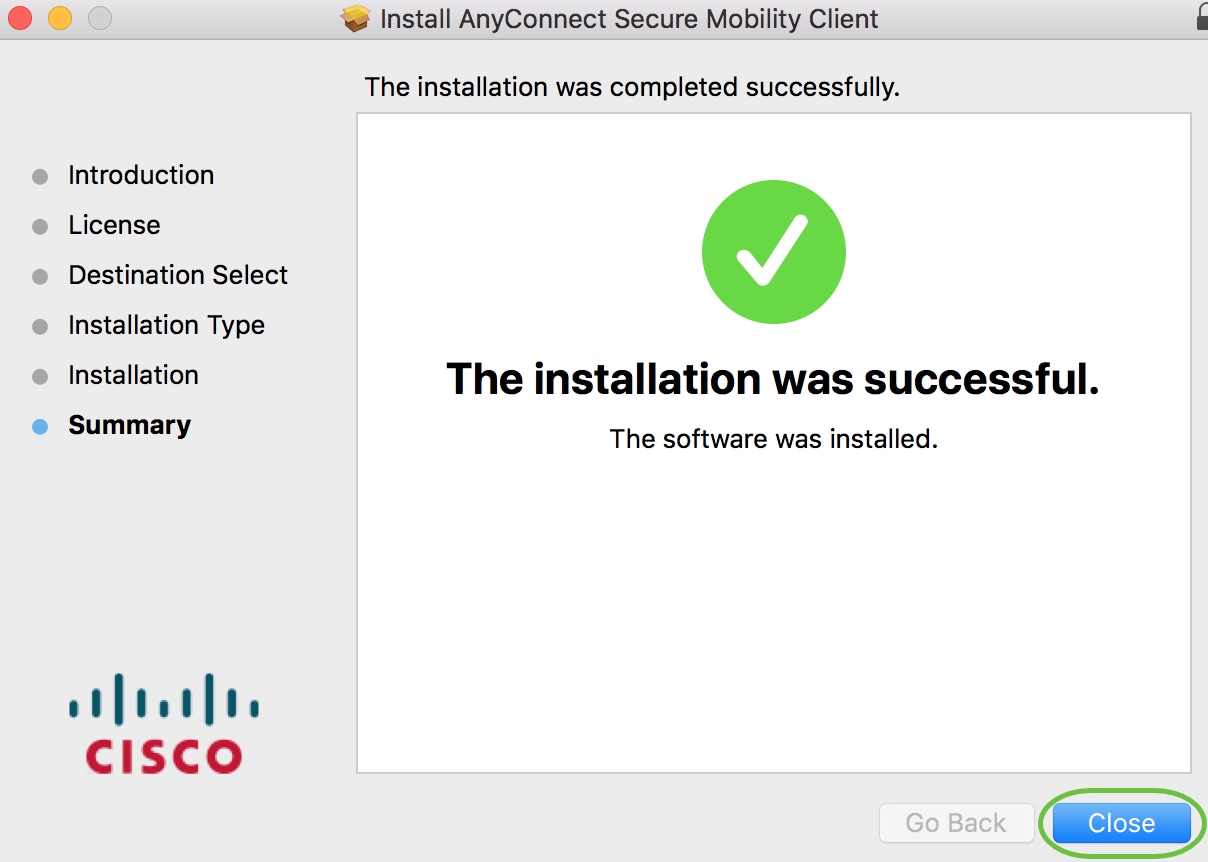
You have now successfully installed the AnyConnect Secure Mobility Client Software on your Mac computer.
Additional Resources
AnyConnect App
To try out AnyConnect on mobile devices, the App can be downloaded from Google Play store or Apple store.
View a video related to this article.
Источник
AnyConnect macOS 11 Big Sur Advisory
Available Languages
Download Options
AnyConnect Changes Related to macOS 11 (Big Sur)
Table of Contents
Table of Figures
1. Introduction
AnyConnect 4.9.04xxx leverages the System Extension framework available in macOS 11 (Big Sur). This differs from past AnyConnect versions, which rely on the now-deprecated Kernel Extension framework. This is the minimum version required to run AnyConnect on macOS 11.
This advisory describes changes introduced in the new AnyConnect version and the steps administrators can take to confirm AnyConnect is operating correctly on macOS 11. There are important changes in approving the AnyConnect system extension, as detailed in the next section.
The advisory also details the steps for failing over to the AnyConnect kernel extension, as last-resort workaround in case a critical system extension (or related OS framework) issue is encountered. The AnyConnect kernel extension is installed on macOS 11 solely for this purpose, it is no longer used by default.
2. About the AnyConnect System Extension
AnyConnect uses a network system extension on macOS 11, bundled into an application named Cisco AnyConnect Socket Filter. (This app controls the extension activation and deactivation and is installed under /Applications/Cisco.)
The AnyConnect extension has the following three components:
These components are visible in the macOS System Preferences – Network UI window:

Figure 1 — DNS proxy component
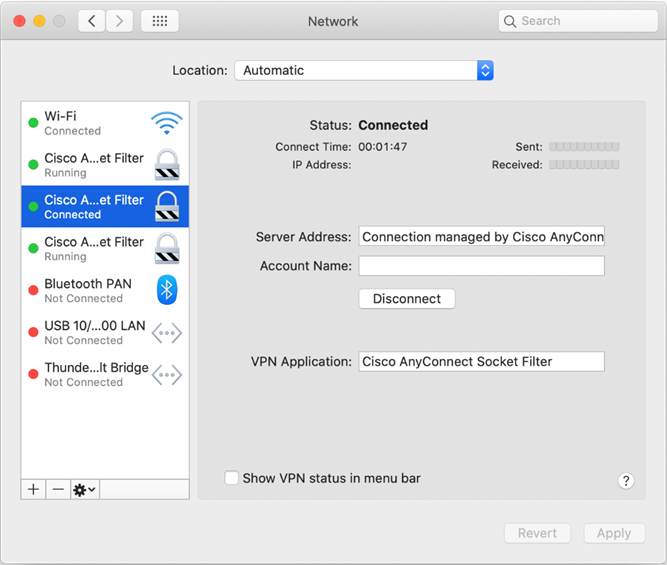
Figure 2 — App/Transparent proxy component
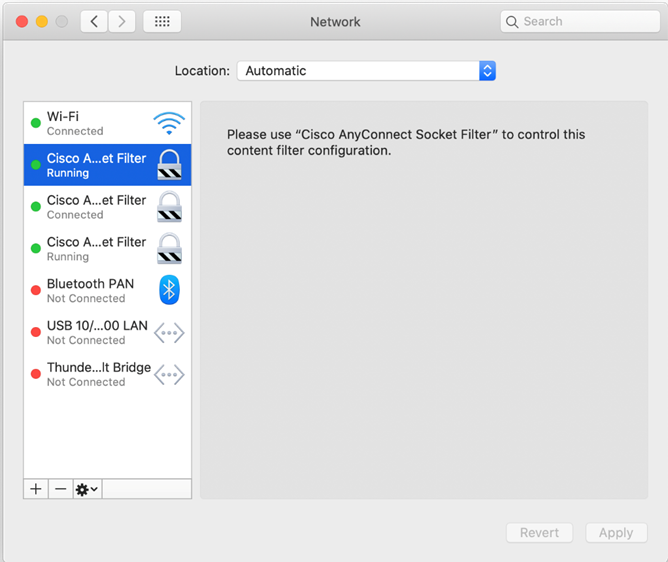
Figure 3 — Content filter component
AnyConnect requires its system extension and all its components to be active in order to operate properly, which implies that the mentioned components are all present and show up as green/running in the left pane of the macOS Network UI, as per above screenshots.
3. Approving the AnyConnect System Extension
macOS 11 requires end user or MDM approval before system extensions are allowed to run.
Two approvals are required for the AnyConnect system extension:
— Approve the system extension loading/activation.
— Approve the extension’s content filter component activation.
3.1 Extension Approval by End User
The AnyConnect system extension and its content filter component can be approved by end user, by following either the OS prompting, or the more explicit AnyConnect Notification app’s instructions.

Figure 4 — Extension blocked — OS prompt
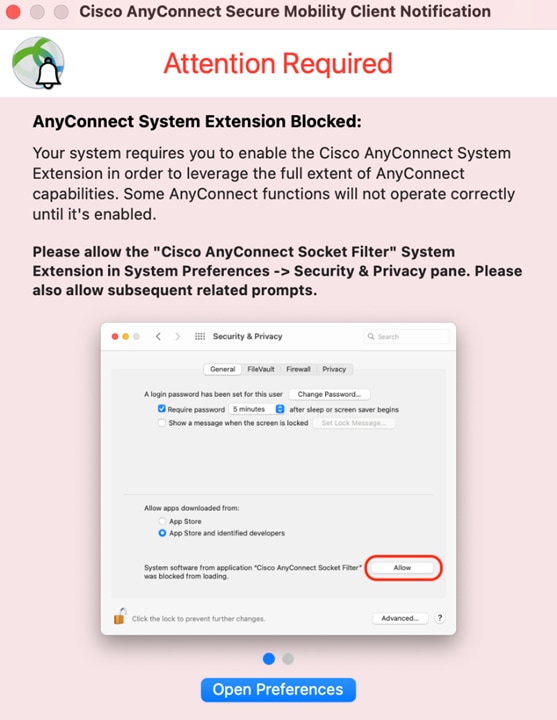
Figure 5 — Extension blocked — AnyConnect prompt
After opening the Security & Privacy Preferences window, click the bottom-left lock and provide the requested credentials, as prompted, to unlock it and allow changes.
The window’s appearance depends on whether the AnyConnect extension is the only one requiring approval. If that’s the case, simply click the Allow button.

Figure 6 — AnyConnect extension approval
Otherwise click the Details… button, then select the ”Cisco AnyConnect Socket Filter” check box and click OK.

Figure 7 — AnyConnect extension approval (multiple unapproved extensions)
Shortly after approving the AnyConnect extension, the user is shown another popup, this time for approving the extension’s content filter component.

Figure 8 — AnyConnect extension’s content filter approval
After the extension’s content filter approval is complete, the extension and its components should be active, as confirmed by the AnyConnect Notification app:

Figure 9 — AnyConnect extension approval confirmation
3.2 Extension Approval using MDM
The AnyConnect system extension can also be approved without end user interaction, using a management profile’s SystemExtensions payload with the following settings:
Источник
How to Install Cisco AnyConnect on a Mac
The Cisco AnyConnect VPN allows you to connect to Mason networks allowing access to restricted services as if you were on campus. To connect to the VPN from your Mac computer, you need to install the Cisco AnyConnect VPN client.
The following instructions are for computers NOT on Jamf Pro (Mason Self Service). If your computer is on Mason Self Service, the Cisco AnyConnect VPN should already be installed. However, if it is not present in your Applications menu, follow the instructions below.
Step 1
Download the Mac Cisco AnyConnect VPN client via the Related Downloads box to the right on this page.
Step 2
Run the downloaded program. 
Note: the version number may be different from the screenshot above.
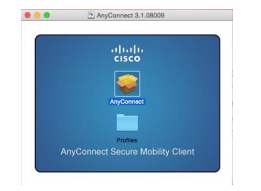
Step 3
When the installation starts, double click AnyConnect to continue.
Step 4
Click Continue twice.
Step 5
Click Agree.

Step 6
Uncheck everything except the VPN package. Click Continue. 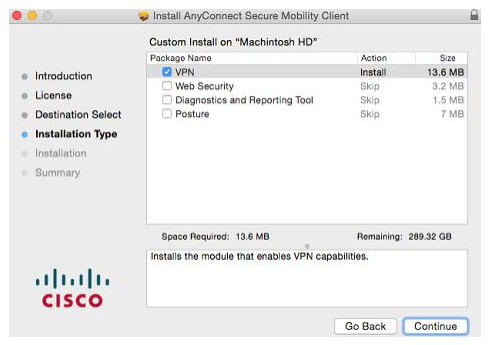
Step 7
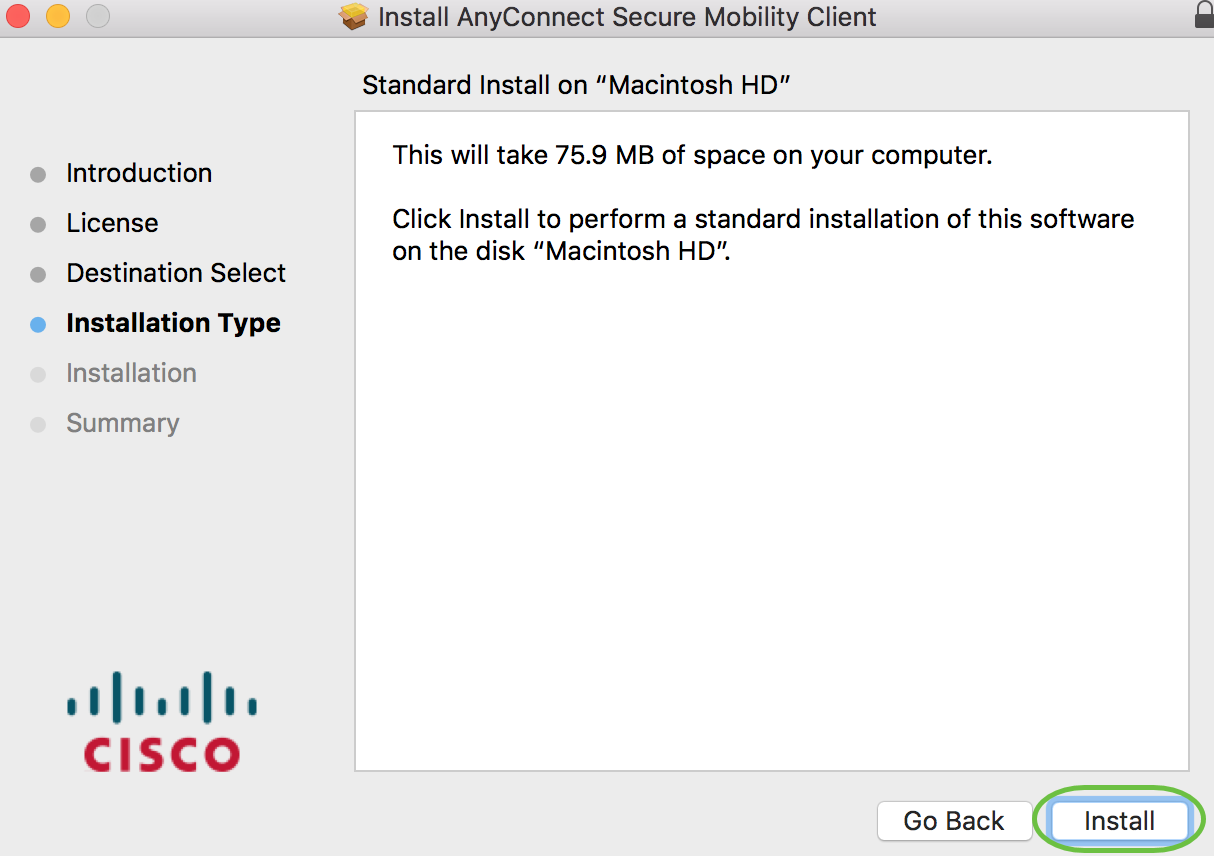
Click Install to start the installation.
Step 8
If prompted, enter your username and password and click Install Software.
Step 9
Click Close when the installation is complete.
Источник
Create Favorite
Cancel changes
Discard all changes?
Unsubscribe
In order to unsubscribe from this article, you will need to unsubscribe from the parent Knowledge Base: Knowledge.
Would you like to unsubscribe from Knowledge ?

Install and Configure the Cisco AnyConnect Software VPN on a Mac
28.0 — Updated on 10-07-2021 by Mike Caban
27.0 — Updated on 10-07-2021 by Mike Caban
26.0 — Updated on 07-22-2021 by Sylvia Bass
25.0 — Updated on 07-13-2021 by Mike Caban
24.0 — Updated on 07-13-2021 by Mike Caban
23.0 — Updated on 07-13-2021 by Mike Caban
22.0 — Updated on 07-13-2021 by Mike Caban
21.0 — Updated on 07-07-2021 by Mike Caban
20.0 — Updated on 07-07-2021 by Mike Caban
19.0 — Updated on 07-07-2021 by Mike Caban
18.0 — Updated on 06-15-2021 by Mike Caban
17.0 — Updated on 06-15-2021 by Mike Caban
16.0 — Updated on 05-27-2021 by Mike Caban
15.0 — Updated on 05-27-2021 by Mike Caban
14.0 — Updated on 05-26-2021 by Mike Caban
13.0 — Updated on 05-07-2021 by Mike Caban
12.0 — Updated on 03-29-2021 by Mike Caban
11.0 — Updated on 12-07-2020 by Mike Caban
10.0 — Updated on 12-07-2020 by Mike Caban
9.0 — Updated on 10-15-2020 by Mike Caban
8.0 — Updated on 10-15-2020 by Mike Caban
7.0 — Updated on 10-13-2020 by Mike Caban
6.0 — Updated on 09-08-2020 by Christopher Cebula
5.0 — Updated on 08-21-2020 by Mike Caban
4.0 — Updated on 07-10-2020 by Mike Caban
3.0 — Updated on 07-10-2020 by Mike Caban
2.0 — Updated on 06-08-2020 by Mike Caban
1.0 — Authored on 05-07-2015 by Mike Caban
Installing the VPN Client
- Download the AnyConnect VPN client for macOS (compatible with 10.14 Mojave, 10.15 Catalina, and 11 Big Sur).
- In your Downloads folder, double-click the file you just downloaded to open it. An icon will appear on the desktop called AnyConnect, and a separate window will open.
- Double-click on AnyConnect.mpkg to run the installer, then follow the steps to complete the installation. NOTE: We recommend you un-check everything (Web Security, Umbrella, etc) except for the VPN and the Diagnostic and Reporting Tool (DART). This will give you a minimal install. The other features are not supported so there’s no need to install them.
- NOTE: During the installation, you will be prompted to enable the AnyConnect software extension in the System Preferences -> Security & Privacy pane. If you’re running Big Sur (macOS 11), you will see another popup for the new Cisco AnyConnect Socket Filter. Select «Allow» to complete the installation.
Starting the VPN Client
- In your Applications folder, go to the Cisco folder and double-click the Cisco AnyConnect Secure Mobility Client.
- Enter vpn.uci.edu in the Ready toConnect to field, then press the Connect button.
- A popup will appear where you will enter your UCInetID and password. By default, you will be connected to the Default-UCI connection profile/group. If you need to change this you can select your desired connection profile from the Group drop-down menu: ( NOTE this window may be hidden slightly behind the login window )
- UCIFULL – Route all traffic through the UCI VPN.
- IMPORTANT: Use UCIFULL when accessing Library resources.
- Default-UCI – Route only campus traffic through the UCI VPN. All other traffic goes through your normal Internet provider.
- UCIFULL – Route all traffic through the UCI VPN.
- Back in the login window, enter your UCInetID and password, then click OK.
- On the next page you’ll see the Duo Multifactor Login screen where you will either receive a push or enter a passcode.
- A banner window will appear. Click Accept to close that window. You are now connected!
Please note that if you are unable to connect to the VPN using the above method, follow these steps instead.
- Enter vpn.uci.edu in the Ready toConnect to field, then press the Connect button.
- A popup will appear where you will enter your UCInetID and password. Do not enter your credentials yet. You must first change your connection group. ( NOTE this window may be hidden slightly behind the login window )
- UCIFULL-classic – Route all traffic through the UCI VPN.
- IMPORTANT: Use UCIFULL-classic when accessing Library resources.
- UCI-classic – Route only campus traffic through the UCI VPN. All other traffic goes through your normal Internet provider.
- UCIFULL-classic – Route all traffic through the UCI VPN.
- Back in the login window, enter your UCInetID and password. Below the password box, type the word ‘push’ (without the quotes) and then select OK. You will receive a push from Duo and will be able to login.
- A banner window will appear. Click Accept to close that window. You are now connected!
Disconnecting the VPN Client
When you are finished using the VPN, remember to disconnect.
- Click the AnyConnect client icon located in the menu bar near the top right corner of your screen.
- Select Quit.
Источник


