- Cisco Jabber for Windows and Mac: Enterprise Collaboration Made Simple Data Sheet
- Available Languages
- Download Options
- Contact Cisco
- Available Languages
- Download Options
- Table of Contents
- Jabber for Mac — Quick Start Guide
- Available Languages
- Download Options
- Contents
- Introduction
- Prerequisites
- Software Requirements
- Hardware Requirements
- Configuring Phone Services
- Jabber Softphone
- Jabber Deskphone
- Deskphone Configuration
- CTI UC Services Setup
- Configuring Voicemail
- Unity Connection Configuration
- CUCM Configuration
- Configuring Directory
- LDAP Directory Services
- UDS Directory Services
- Configuring CUCM End Users
- Service Discovery
- Downloading Jabber
- Installing Jabber
- Logging in to Jabber
Cisco Jabber for Windows and Mac: Enterprise Collaboration Made Simple Data Sheet
Available Languages
Download Options
Contact Cisco
Available Languages
Download Options
Table of Contents
The Cisco Jabber ® client is a unified communications application that lets you be more productive from anywhere on a broad array of devices. Find the right people, see if and how they are available, and collaborate using your preferred method.
Today’s global, distributed work environment has resulted in significant challenges for workers, making it harder to connect with the right people, and significantly increasing the quantity and modes of communications. Organizations of all sizes are striving to improve communications in order to retain customers, compete for new business, control costs, and grow their business globally.
The Cisco Jabber client streamlines communications and enhances productivity by unifying presence, messaging, video, voice, voice messaging, screen sharing, and conferencing capabilities securely into one client on your desktop. Cisco Jabber for Mac and Cisco Jabber for Windows deliver highly secure, clear, and reliable communications. They offer flexible deployment models, are built on open standards, and integrate with commonly used desktop applications. With the Cisco Jabber client, you can communicate and collaborate effectively from anywhere you have an Internet connection (Figures 1 and 2).
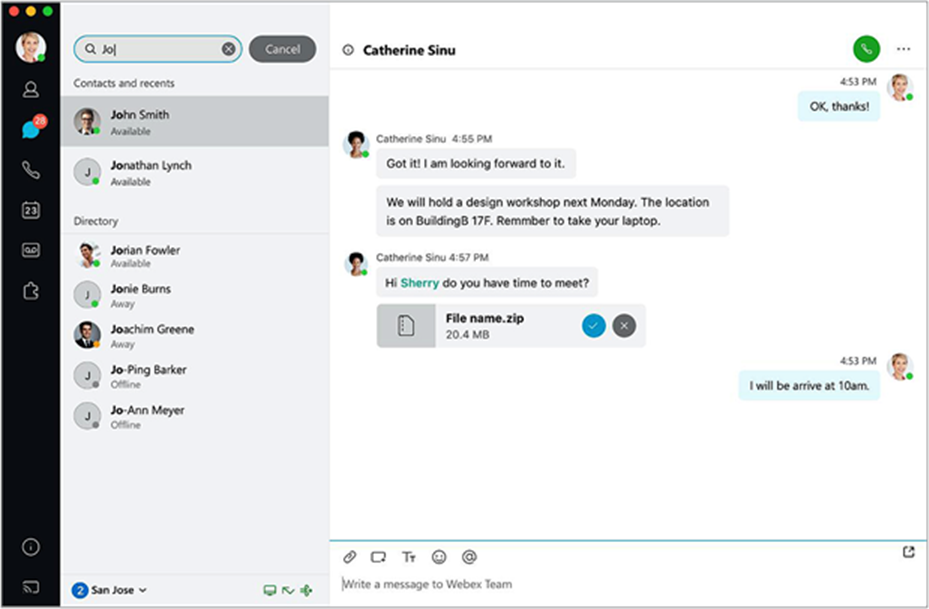
Cisco Jabber for Mac
Cisco Jabber for Windows
Reduce communication delays with presence and contact information
The Cisco Jabber client enables you to see the availability of co-workers and colleagues within and outside your organization. You can immediately see who is offline, available, away, on a call, or in a do-not-disturb state. You can create customized availability states, such as “in a customer meeting,” to provide added context. Contact cards provide additional contact information and multiple options for initiating communications. These capabilities help reduce communication delays and can result in faster decision making and enhanced productivity.
Quickly communicate with borderless, enterprise-class messaging
Messaging is an important communication option that lets you efficiently interact in today’s multitasking business environment. The Cisco Jabber supports a choice of enterprise-class messaging services based on your organization’s requirements.
The solution can provide personal chat, group chat, persistent chat rooms and team spaces based on your choice of messaging platforms. This allows you to quickly connect with your business colleagues. Chat history/persistence and server-based logging capabilities allow you to view the content of prior chats and to store messages for convenience, compliance, and regulatory purposes.
Messaging is integrated with other communication capabilities, so you can simply move between chats, audio conversations, and web conferences. You can even share presence and send messages to people outside your organization who may not be using Cisco Jabber. The enterprise-class messaging capabilities of the Cisco Jabber client provide more efficient, highly secure, flexible, and borderless collaboration.
Bring business-class IP telephony to the desktop
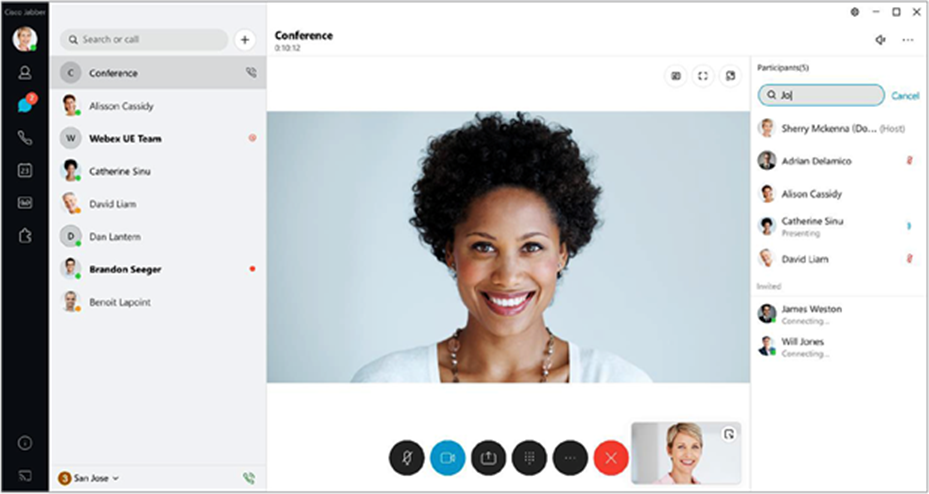
The Cisco Jabber client delivers business-quality voice and video to your desktop. Powered by the market-leading Cisco ® Unified Communications Manager (UCM) call-control solution, it is a soft phone with wideband and high-fidelity audio; standards-based, full high-definition video (1080p); desk phone control features; and support for up to eight lines with multiline technology. These features mean that high-quality and high-availability voice and video telephony is available at all locations and to users’ desk phones, soft clients, and mobile devices. The Cisco Jabber solution makes voice communications simple, clear, and reliable (Figure 3).

High-definition video with integrated audio controls
Accelerate team performance with multiparty conferencing and collaboration
The Cisco Jabber client provides for smooth escalation to desktop sharing or multiparty conferencing and collaboration solutions. You can instantly share documents and expand chats and conversations to multiparty voice, video, and web conferencing. Cisco Jabber can support cloud-based Webex ® meetings, or on-premises Cisco Meeting Server meetings.
Collaborate from common business applications
You can access the capabilities of the Cisco Jabber client from common desktop applications such as Microsoft Outlook, including presence and click-to-communicate (instant message and audio and video calling) capabilities. Within Microsoft Outlook, you can use the Microsoft contact card click to-communicate icons directly from within the application to save time and streamline workflows. You can view user availability and initiate communications such as personal and group voice, video, and chat sessions without having to switch between applications.
Table 1 outlines the features and benefits of Cisco Jabber 12.9.
Table 1. Features and benefits
Use a single, intuitive interface for instant messaging with individuals and groups, IP telephony, soft-phone voice and video, visual voicemail, voice and web conferencing, desktop sharing, communication history, and integrated directories.
View real-time availability of co-workers and colleagues within and outside the enterprise network.
Enterprise XMPP messaging
Chat in real time using instant messaging to save time and reduce phone tag. Several chat modes are supported, including:
Cisco Webex app and Jabber Interoperability 2
Enables basic messaging between Cisco Webex app and Cisco Jabber clients. Supported for users with access to the Cisco Unified Communications Manager IM and Presence service .
Look up contacts quickly. Predictive search provides suggestions for you as you type in a search query and indexes your Cisco Jabber contact list, recent contacts, personal Outlook contacts, Mac address book, and company directory.
Choose the right communication tool for your situation. Escalate from a chat to an audio or video call, desktop share, or web meeting. Media escalations are as easy as clicking a button.
Communicate ideas quickly by instantly sharing what is on your screen. With the Cisco Jabber application, you can share your screen with other Cisco Jabber users as well as with standards-based video endpoints from Cisco and third parties. Remotely control another Windows desktop using Cisco Jabber for Windows.
Integrated enterprise calling
Exchange ideas face to face by using the Cisco Jabber solution as a soft phone, or you can choose to control your Cisco IP desk phone.
Initiate multiparty voice and video meetings.
Far End Camera Control
Control cameras support remote control. Users can zoom, pan, and tilt the camera.
Visual voice message access
Send, forward, reply to, view, play back, and delete voice messages from Cisco Unity ® Connection.
Mac OS X integration
Built for Mac OS X, the Cisco Jabber for Mac client provides a host of integrations for an immersive experience on the Mac, including:
Microsoft Outlook integration
See user availability and click to initiate chat sessions or voice and video calls, or save chat to an Outlook folder directly from Microsoft Outlook.
Cisco Jabber for Windows supports:
Cisco Jabber for Mac supports:
Secure mobile and remote access
We offer our customers deployment options to access the Cisco Jabber application outside the corporate network.
Cisco Expressway for Mobile and Remote Access provides service-level access controls for Cisco Jabber desktop and mobile clients.
Instant messaging communications are encrypted, using up to 256-bit Advanced Encryption Standard (AES) encryption and Transport Layer Security/Secure Sockets Layer (TLS/SSL) connections. Signaling and media are also encrypted.
Single Sign-On (SSO)
SSO allows users to securely access all Cisco Jabber services without being prompted to log in to each of them separately. The Cisco Jabber application uses authentication performed by the corporate identity provider. The identity provider can control the authentication experience for Cisco Jabber users, for example, by prompting users for their enterprise username and password once when the Cisco Jabber application is first run and by specifying the length of time a user is authorized to use Cisco Jabber services.
The Cisco Jabber application uses the Security Assertion Markup Language (SAML), which is an XML-based, open-standard data format that enables access to a defined set of Cisco services transparently, after verifying credentials with an identity provider. SAML SSO can be enabled for Cisco Webex Messaging, Cisco Unified Communications Manager, and Cisco Unity Connection. SSO is deployed for use with Cisco Jabber clients using service discovery.
Enterprise policy management
Set granular policies to determine which features and capabilities can or cannot be accessed by your Cisco Jabber end users.
Flexible deployment models
Cisco Jabber can be deployed on premises or in the cloud, offering IT departments the flexibility to choose the model that best suits their business. In addition, the Cisco Jabber application can be deployed in the following modes:
Instant messaging-only mode
You can use the Cisco Jabber application for instant messaging and presence capabilities without enabling phone services for deployments that do not have access to Cisco Unified Communications Manager.
You can use the Cisco Jabber application as a phone-only client without the instant messaging and presence service on your mobile device. In this mode, Cisco Jabber turns your mobile device into a full-featured Cisco unified IP phone with video capability.
Phone mode with contacts
Deploy Cisco Jabber as a phone-only client without instant messaging but with a contact list that is maintained by Cisco Unified Communications Manager Instant Messaging and Presence Service. Optionally, enable contacts for presence.
Full unified communications mode
Full unified communications mode enables all Cisco Jabber capabilities, including instant messaging and presence, voice and video, and visual voicemail.
Bulgarian, Catalan, Chinese (China), Chinese (Taiwan), Croatian, Czech, Danish, Dutch, English, Finnish, French (France), German, Greek, Hungarian, Italian, Japanese, Korean, Norwegian, Polish, Portuguese (Brazil), Portuguese (Portugal), Romanian, Russian, Serbian, Slovak, Slovenian, Spanish (Spain), Swedish, Thai, and Turkish.
Table 2 outlines system requirements for the Cisco Jabber for Mac client, and Table 3 outlines system requirements for the Cisco Jabber for Windows client.
Table 2. Cisco Jabber for Mac system requirements
300 MB of available disk space
Intel Core 2 Duo or later processors in any of the following Apple hardware:
Источник
Jabber for Mac — Quick Start Guide
Available Languages
Download Options
Contents
Introduction
This document describes the necessary steps required for deployment of Cisco Jabber for Mac basic features. This is a quick start guide and will not cover any of the advanced features supported by Cisco Jabber for Mac.
Prerequisites
Cisco recommends you have a basic understanding of the Cisco Unified Communications Manager (CUCM) administration web page as well as experience with basic phone configurations.
Software Requirements
This guide assumes the following software versions are in use:
- Cisco Unified Communications Manager (CUCM) version 10.5(2) or higher.
- Cisco Unified IM and Presence (IM&P) version 10.5(2) or higher.
- Cisco Unity Connection (CUXN) version 10.5 or higher.
- Jabber for Mac 12.1 or higher.
- macOS Mojave 10.14 or higher.
- macOS High Sierra 10.13 or higher.
- macOS Sierra 10.12 or higher.
- OS X El Capitan 10.11 or higher
Hardware Requirements
The below hardware specifications are the suggested minimum requirements for running Cisco Jabber for Mac on a Apple Mac device:
- CPU
- Intel Core2 Duo or later on any of the following Apple hardware:
- Mac Pro
- MacBook Pro
- MacBook
- MacBook Air
- iMac
- Mac Mini
- Intel Core2 Duo or later on any of the following Apple hardware:
- RAM
- 2 GB
- Free Disk Space
- 300 MB
Configuring Phone Services
Jabber Softphone
Jabber for Mac provides a option to supply phone services through a Cisco Unified Client Services Framework devices which is often referred to as a CSF or Softphone.
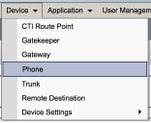
To configure a CSF device, log in to the CUCM Administration web page and navigate to Device > Phone.
From the Find and List Phones menu select Add New.

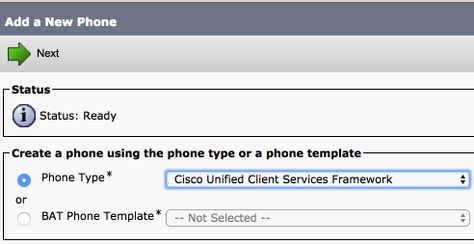
Once on the Add a New Phone menu search the phone type drop down for the Cisco Unified Client Services Framework device type. Once selected click Next.
The table below (Table 1.0) contains all the fields that must be configured when setting up a Cisco Unified Client Services Framework (CSF) device in CUCM. Majority of required fields have default configurations and don’t need to manually configured unless otherwise required for your deployment. You must manually configure all the fields where the Configured by Default column in the table below is set to NO.
Tip: Cisco recommends that all Client Services Framework devices be configured with a device name prefix of CSF. For example, you provision a user named Holly Day with a CSF device. Her CUCM end user user ID Is hday so her CSF device name would be CSFHDAY.
Table 1.0
| Required Fields | Default Parameter | Configured by Default | Description |
| Device Name | Must be manually added, device name should begin with CSF. | NO | Enter a name to identify software-based telephones |
| Device Pool | Must select one of the available device pools. | NO | Choose the device pool to which you want this phone assigned. The device pool defines sets of common characteristics for devices, such as region, date/time group, and softkey template. |
| Phone Button Template | Standard Client Service Framework | NO | Choose the appropriate phone button template. The phone button template determines the configuration of buttons on a phone and identifies which feature (line, speed dial, and so on) is used for each button. |
| Common Phone Profile | Standard Common Phone Profile | YES | C hoose a common phone profile from the list of available common phone profiles |
| Location | Hub_None | YES | Use locations to implement call admission control (CAC) in a centralized call-processing system. The location specifies the total bandwidth that is available for calls to and from this location. A location setting of Hub_None means that the locations feature does not keep track of the bandwidth that this Cisco Unified IP Phone consumes. A location setting of Phantom specifies a location that enables successful CAC across intercluster trunks that use H.323 protocol or SIP. |
| Built In Bridge | Default | YES | Enable or disable the built-in conference bridge for the barge feature by using the Built In Bridge drop-down list box (choose On, Off, or Default) |
| Device Mobility Mode | Default | YES | Turn the device mobility feature on or off for this device or choose Default to use the default device mobility mode. Default setting uses the value for the Device Mobility Mode service parameter for the device. |
| Owner User ID | Set the user ID | NO | From the drop-down list box, choose the user ID of the assigned phone user. The user ID gets recorded in the call detail record (CDR) for all calls made from this device. Assigning a user ID to the device also moves the device from «Unassigned Devices» to «Users» in the License Usage Report. |
| Use Trusted Relay Point | Default | YES | From the drop-down list box, enable or disable whether Cisco Unified CM inserts a trusted relay point (TRP) device with this media endpoint. A Trusted Relay Point (TRP) device designates an MTP or transcoder device that is labeled as Trusted Relay Point. |
| Always Use Primary Line | Default | YES | From the drop-down list box select (Off, On or Default). Default — Cisco Unified Communications Manager uses the configuration from the Always Use Prime Line service parameter, which supports the Cisco CallManager service |
| Always Use Prime Line for Voice Message | Default | YES | From the drop-down list box select (Off, On or Default). Default — Cisco Unified CM uses the configuration from the Always Use Prime Line for Voice Message service parameter, which supports the Cisco CallManager service. |
| Packet Capture Mode | None | YES | This setting exists for troubleshooting encryption only; packet capturing may cause high CPU usage or call-processing interruptions. |
| BLF Presence Group | Standard Presence Group | YES | |
| Device Security Profle | Must be manually selected. | NO | You must apply a security profile to all phones that are configured in Cisco Unified Communications Manager Administration . Installing Cisco Unified Communications Manager provides a set of predefined, nonsecure security profiles for auto-registration. To enable security features for a phone, you must configure a new security profile for the device type and protocol and apply it to the phone. If the phone does not support security, choose a nonsecure profile. |
| SIP Profile | Must be manually selected. | NO | Choose the default SIP profile or a specific profile that was previously created. SIP profiles provide specific SIP information for the phone such as registration and keepalive timers, media ports, and do not disturb control. |
| Certificate Operation | No Pending Operation | YES | This field is related to CAPF enrollment. |
| DND Option | Ringer Off | YES | When you enable DND on the phone, this parameter allows you to specify how the DND features handle incoming calls. |
| Video Calling | Enabled | YES | T urns video capabilities on and off |
| Automatically Start in Phone Control | Disabled | YES | If enabled, the client will start in desktop phone control mode. |
| Automatically Control Tethered Desk Phone | Disabled | YES | If enabled, the client will automatically control the tethered desktop phone. |
| Extend and Connect Capability | Enabled | YES | Indicates if Extend and Connect capabilities are enabled for the client. This allows the client to monitor and control calls on 3rd party PBX, PSTN, and other remote phones. |
| Display Contact Photos | Enabled | YES | Indicates if contact photo retrieval and display is enabled or disabled for the client. |
| Number Lookups on Directory | Enabled | YES | Indicates if phone number lookups using the Corporate Directory are enabled or disabled for the client. |
| Analytics Collection | Disabled | YES | Indicates if analytics collection is enabled or disabled for the client |
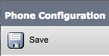
Once you have configured all the required field for the CSF configuration save the configuration by selecting the Save button.
Now that you have created a CSF you will need to add a directory number to the device. This can be done by select the Add a new DN option located at the top left of the CSF configuration.
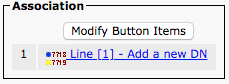
Note: This document does not cover the complete line configuration for the CSF device. Line configuration is a standard configuration that must be performed for all phones and is not a configuration that is specific to CSF devices.
Tip: Once you have configuring a directory number your CSF device make sure to associate the CUCM end user to the directory number. This can be done by scrolling to the bottom of the directory number configuration and selecting Associate End Users. This configuration is required if you plan to use Jabber for phone presence.
Jabber Deskphone
Jabber for Mac also has the capability to perform Cisco Computer Telephony Integration (CTI) with Cisco deskphones. This allows Jabber for Mac users to use their Cisco deskphone as their Jabber telephony device when perform call actions from the Jabber user interface.
Deskphone Configuration
To setup Jabber for Mac CTI integration follow these simple steps.
Start by logging into the CUCM Administration web page and navigate to Device > Phone.

From the Find and List Phones menu search for and select the Jabber users deskphone.

When presented with the Phone Configuration menu verify the two setting listed below:
- Verify that the Allow Control of Device from CTI check box is checked.
- Confirm the device Owner User ID is set to the Jabber for Mac user CUCM user ID.
CTI UC Services Setup
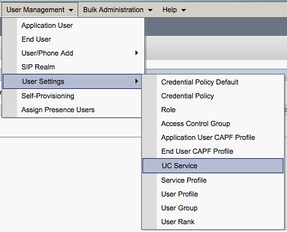
Next we will setup the CTI UC services that will be used by the Jabber client to connect to the CUCM CTIManager service. Start by navigating to User Management > User Settings > UC Service.

Once on the Find and List UC Services page select Add New.

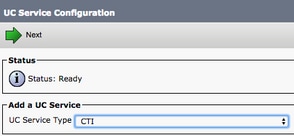
When presented with the UC Service Configuration page select CTI from the UC Service Type drop down then select Next.
You will then be presented with the UC Service Configuration page. Here must configure a Name for the CTI UC Service as well as provided the IP, Hostname or Fully Qualified Domain Name (FQDN) of the CUCM server that is running the CTI service.
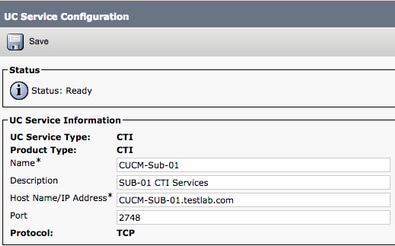
Note: Up to three CTI UC Services can be assigned to a UC Service Profile.
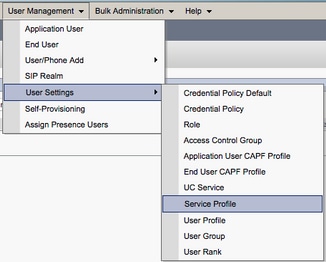
Now that we defined the CTI UC Service(s) we will assign them to the Service Profile. Start by navigating to User Management > User Settings > Service Profile.

From the Find and LIst Service Profiles menu search for and select the service profile used by your Jabber for Mac users or create a new service profile by selecting Add New.


Once on the Service Profile Configuration page scroll down to the CTI Profile section and assign the CTI UC Services to the service profile then select Save.

Note: This document does not cover the configuration of a new new Cisco deskphone as this is a basic CUCM administration task.
To view the list of ( CTI) supported devices, navigate to CUCM Cisco Unified Reporting and select the Unified CM Phone Feature List Report . Next select CTI controlled from the Feature drop-down list.
Configuring Voicemail
Jabber for Mac is able to retrieve and playback voicemail messages that have been stored on Cisco Unity Connection. To setup voicemail for Jabber for Mac please follow the steps below:
Unity Connection Configuration
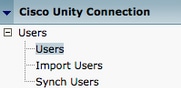
Start by logging into Cisco Unity Connection web administration web page and navigating to Users > Users.
When presented with Search Users page search for and select your Jabber for Mac users mailbox.
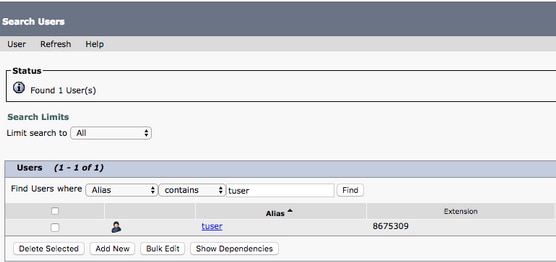
Once presented with the Edit User Basics page of the user Mailbox notate the Calls of Service that is configured.

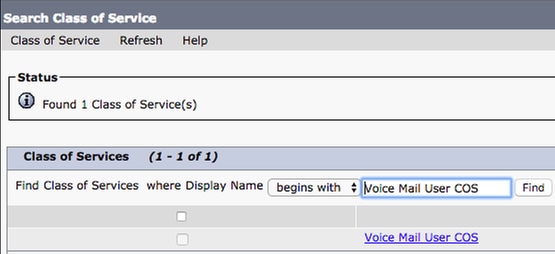
Via the left hand navigation pane navigate to Class of Service > Class of Service.

When presented with the Search Class of Service page search for and select the class of service you previously notated.
Once on the Edit Class of Service page verify that the following:
- Verify that the check box is checked for the Allow Users to Use the Web Inbox and RSS Feeds feature.
- Also verify that the Allow Users to Use Unified Client to Access Voicemail feature is enabled by checking the box near the feature name.
Once the Class of Service configuration has been verified navigate to System Settings > Advanced > API Settings in the left navigation pane. Enable all three of the settings presented on the API Configuration page.

CUCM Configuration
Now that Unity Connection is setup we will move on to the CUCM configuration for Jabber for Mac voicemail. Start by navigating to User Management > User Settings > UC Service.

Once on the Find and List UC Services page select Add New.

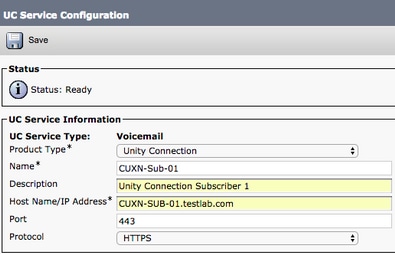
When presented with the UC Service Configuration page select Voicemail from the UC Service Type drop down then select Next.
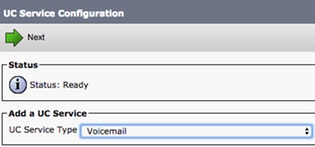
You will then be presented with the UC Service Configuration page. Start by selecting Unity Connection from the Product Type dropdown. You will also need to configure a Name for the Voicemail UCService as well as provided theIP, Hostname or Fully Qualified Domain Name (FQDN) of the Unity Connection server that is running the REST and Jetty services.
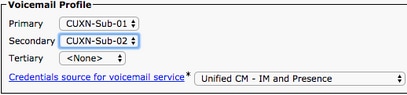
Note: Up to three Voicemail UCServices can be assigned to aUCService Profile.
Now that the Voicemail UC Service(s) are defined we will assign them to the Service Profile. Start by navigating to User Management > User Settings > Service Profile.
From the Find and LIst Service Profiles menu search for and select the service profile used by your Jabber for Mac users or create a new service profile by selecting Add New.


Once on the Service Profile Configuration page scroll down to the Voicemail Profile section and assign the Voicemail UCService(s) to the service profile then select Save.
Note: The Jabber for Mac setup above assumes that Unity Connection is using LDAP authentication. In cases where mailboxes are not LDAP integrated please refer to the Cisco On-Premises Deployment Guide.
Configuring Directory
Jabber for Mac is dependent on directory services for resolution of corporate contacts. Jabber is able to perform directory resolution through Lightweight Directory Access Protocol (LDAP) or CUCM User Data Services (UDS). Please refer to the sections below for information on configuration of LDAP or UDS directory services for Jabber for Mac.
LDAP Directory Services
Jabber for Mac supports three well known LDAP directory services, as seen below:
- Active Directory Domain Services
- OpenLDAP
- Active Directory Lightweight Directory Service (AD LDS)
This guide will provide the steps to configure Jabber for Mac 11.8 or above to integrate with Active Directory Domain Services, as this is the most common integration.
Start by logging into the CUCM Administration web page and navigating to User Management > User Settings > UC Service.
Once on the Find and List UC Services page select Add New.

When presented with the UC Service Configuration page select the Directory from the UC Service Type drop down and select Next.
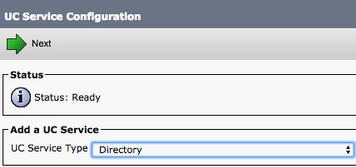
You will then be presented with the UC Service Configuration page. Select Enhanced Directory from the Product Type drop down. You will also need to configure a Name for the Directory UCService as well as provided theIP, Hostname or Fully Qualified Domain Name (FQDN) of the directory server.
By default the Connection Type will be set to Global Catalog which assumes that a Microsoft Domain Controller is being used as the the directory source. If a Global Catalog server is in use the Port number in the configuration should be set to 3268. Cisco does recommend the use of a Global Catalog server as a directory resource as it provides more efficient resolutions of queries.
Tip: In cases where you are not using a domain controller for Microsoft Active Directory Domain Services the Directory UC Service should have the Port set to 389 to Connection Type should be set to Ldap.

Note: Up to three Directory UCServices can be assigned to aUCService Profile.
Now that the Directory UC Service(s) are defined we will assign them to the Service Profile. Start by navigating to User Management > User Settings > Service Profile.

From the Find and LIst Service Profiles menu search for and select the service profile used by your Jabber for Mac users or create a new service profile by selecting Add New.


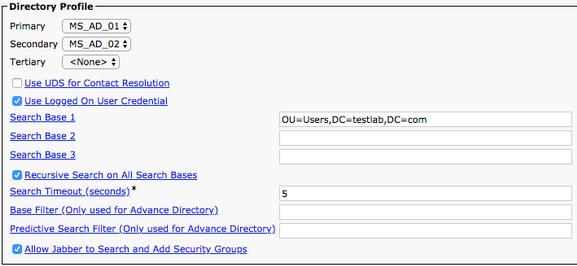
Once on the Service Profile Configuration page scroll down to the Directory Profile section and assign the Directory UCService(s) to the service profile. You will also need to define the Active Directory search base, this should be the organization unit or directory where your corporate users exist.
While configuring the Directory Profile section you will also have to configure a directory authentication method. Check the check box near the «Use Logged On User Credential» to prevent anonymous queries and force Jabber to authenticate with the credentials that were entered during Jabber log in. If the Use Logged On User Credential is left unchecked Jabber will attempt to perform a nonymous access to the directory server. Anonymous directory access is not recommended by Cisco.
Once you are done configuring the Directory Profile select Save.
Note: If you are using CUCM 10.X — 11.5.X the Directory Profile section of the Service Profile will also include username and password fields that allow for a dis tinguished name to be used as the user ID that is authorized to run queries on the LDAP server. In CUCM 12.X if you want to use a single user ID for authentication for directory services you will need to use the ConnectionUsername and ConnectionPassword parameters in the jabber-config.xml.
Caution: Cisco Jabber queries contact source using various attributes, not all of these attributes are indexed by default. To ensure efficient searches the attributes used by Cisco Jabber must be indexed on the directory server. For more information please refer to the LDAP Prerequisites section of the Jabber Planning Guide.
UDS Directory Services
CUCM User Data Services (UDS) provides a contact source API that can be used by Jabber over Cisco Expressway mobile and remote access for the contact resolution and it is an optional contact service for clients on the corporate network. The UDS contact source uses the Unified CM end user table information to provide a directory resolution.
Start by logging into the CUCM Administration web page and navigating to User Management > User Settings > Service Profile.

From the Find and LIst Service Profiles menu search for and select the service profile used by your Jabber for Mac users or create a new service profile by selecting Add New.

Once on the Service Profile Configuration page scroll down to the Directory Profile section and check the check box labeled Use UDS for Contact Resolution then select Save.
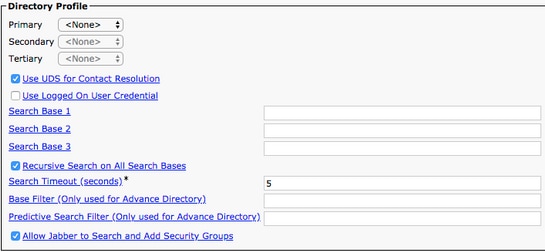
Once UDS Is enabled on the service profile Jabber for Mac will automatically discover the CUCM UDS servers during the Jabber log in process.
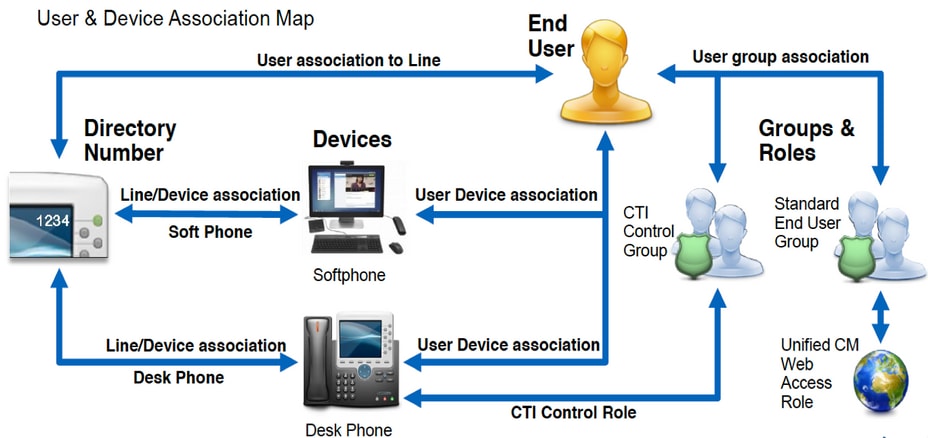
Configuring CUCM End Users
The CUCM end user configuration is a crucial step in deploying Jabber for Mac as many of Jabbers features are dependent on this configuration. The image below depicts all the Jabber configurations that are dependent on the CUCM end user configuration.
To configure the Jabber for Mac CUCM end user start by logging into the CUCM Administration web page and navigating to User Management > End User.
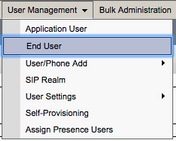
From the Find and LIst Users menu search for and select the CUCM end user you wish to configure for Jabber for Mac.

Once on the End User Configuration web page scroll down to the Service Settings section, here you can assign the end user the services you want them to use. To enable a user to be able to log in to Jabber for Mac you must enable the Home Cluster service by checking the check box next to the service name.
If your end users will be using Jabber for Mac for instant messaging you will need to enable their end user for the service by checking the check box next to the field labeled Enable User for Unified IM and Presence.
Next you will want to assign a service profile by selecting a service profile from the UC Service Profile drop down. The service profile is used to provide the Jabber client with CUCM UC service configuration. .
Note: If you don’t assign a service profile to the CUCM end user then the user will automatically use the service profile that is set as the system default service profile.

Next scroll down to the Device Information section. Here you can manage the CUCM end users controlled devices. Assign the user their softphone and/or deskphone devices. CUCM provides this list of device to Jabber for Mac during Jabber log in.

You can assign a device to a user by selecting the Device Association button. You will then be presented with the User Device Association menu. From here you can search for the CUCM end users devices. When you find a device place a check mark in the check box next to the device and select Save Selected Changes.

Now scroll down to the Directory Number Association section and select the CUCM end users primary extension from the Primary Extension drop down.


Next scroll down to the Permissions Information section. Here will will assign the permissions that are needed by Jabber for Mac.
The table below (Table 1.1) lists all the required roles, their privileges and the reason why Jabber needs the role assigned.
Table 1.1
| Roles | Privileges/Resources | Jabber Role Usage |
| Standard CCM End Users | Grant an end user log-in rights to the Cisco Unified CM User Options. | Jabber SOAP Authentication |
| Standard CCMUSER Administration | Allows access to the Cisco Unified CM User Options. | Jabber SOAP Authentication |
| Standard CTI Allow Control of Phones Supporting Rollover Mode | Allows control of all CTI devices that support rollover mode. | Used for CTI Control of Cisco Unified IP Phone 6900 series |
| Standard CTI Allow Control of Phones Supporting Connected Xfer and conf | Allows control of all CTI devices that support connected transfer and conferencing | Used for CTI Control of Cisco Unified IP Phone 9900, 8900, or 8800 series or DX series |
| Standard CTI Enabled | Enables CTI application control. | Used for CTI control of all other Jabber compatible CTI devices. |
To assign a permission group to the CUCM end user select the Add to Access Control Group button.
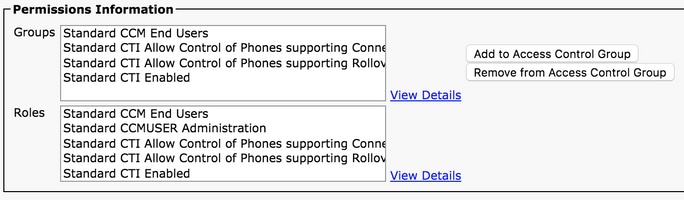
Next, search for the access control group you would like to add and select the checkbox located near the access control groups name. When finished select the Add Selected button.

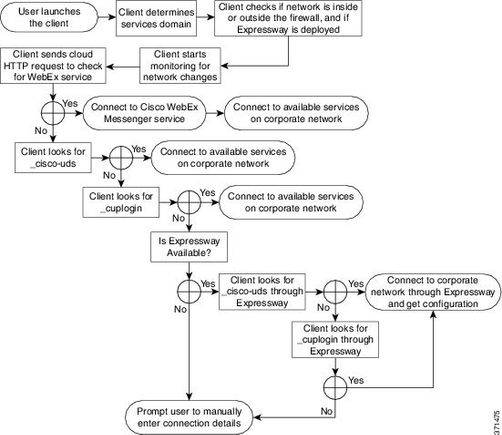
Service Discovery
For the Cisco Jabber client to be able to log in it must first be aware of the services (CUCM, IM&P or Expressway) it will use for authentication and configuration retrieval. Cisco recommends configuring automatic service discovery through the use of Domain Name System (DNS) Service Location (SRV) records as this provides a seamless user experience and ease of administration.
The image below is graphical depiction of the Jabber automatic service discovery process.
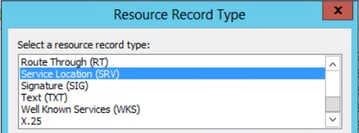
To add DNS SRV record to Microsoft DNS Manager navigate to your domain and expand the tree. Right click on the _tcp folder and select Other New Records.

When presented with the Resource Record Type window, highlight the Service Location (SRV) then select Create Record.
Next you will be presented with the «New Resource Record» pane. Here you will configure a SRV record for each of the CUCM servers that will be used for Jabbers initial UDS home cluster lookup.
Below is a configuration example for the _cisco-uds SRV record. In this example the _cisco-uds record resolves to three CUCM nodes within a CUCM cluster.
Downloading Jabber
Start by opening your web browser of choice and navigating to https://software.cisco.com/download/home. Once on the download home page simply search for Jabber for Mac. When you are presented with download options select the Cisco Jabber for Mac Installation download as seen below:

Installing Jabber
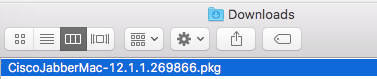
Begin by identifying the Cisco Jabber for Mac installer that you previously download and select the CiscoJabberMac pkg file.
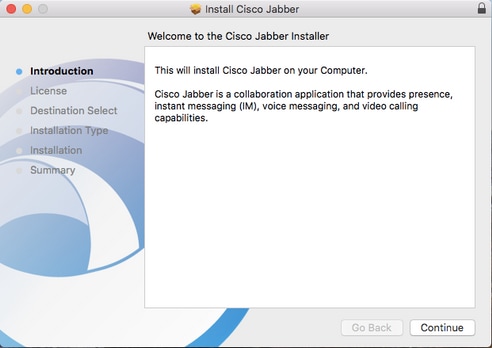
When presented with the Introduction screen select the Continue button to proceed with the installation.

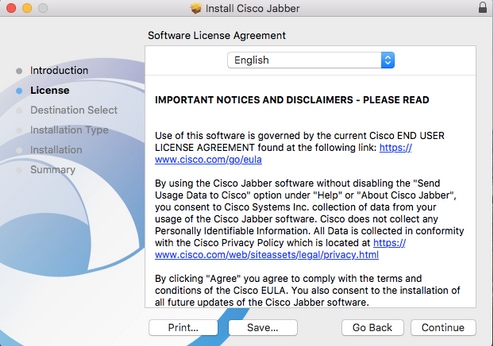
Next, read through the notices and disclaimers. If you wish to continue with the installation select Continue.
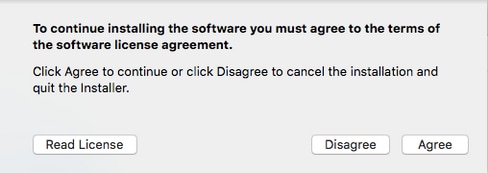
You will then be presented with a pop-up that asks you to confirm if you agree with the end user license agreement that was reviewed in the previous step. I If you wish to continue with the installation select Agree.
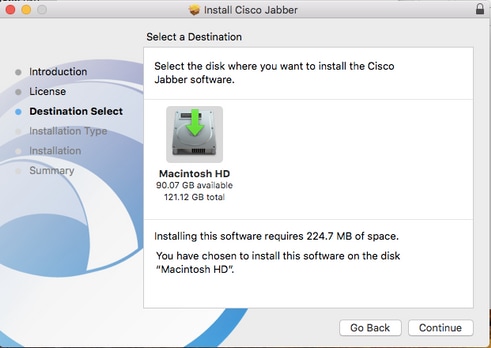
When presented with the Destination Select screen choose the disk you would like to install Jabber to, then select Continue.
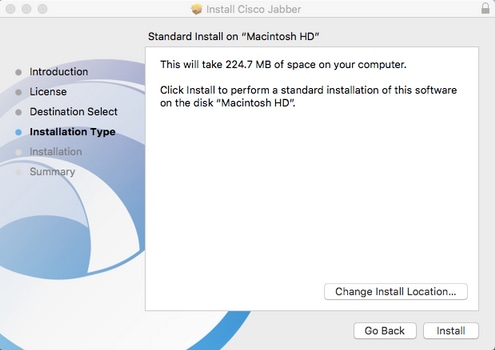
Next, choose the installation location or accept the default location by selecting Install.
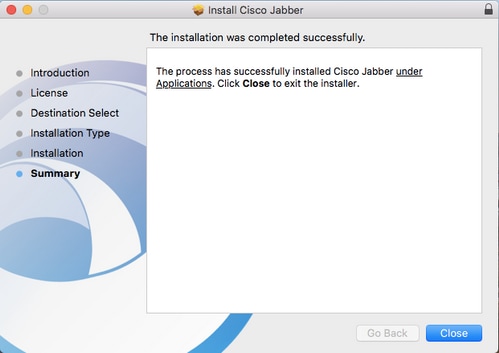
When the installation is complete you will be presented with the Summary screen. Select Close when finished with the installation wizard.
Logging in to Jabber
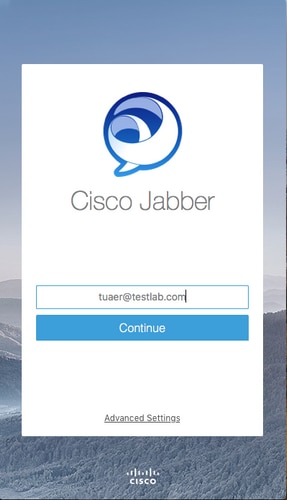
To perform a log in on Jabber for Mac, start by navigate to the Mac Launchpad and select Cisco Jabber from the list of available applications.

Once the Jabber application has launched provided the Jabber username and the domain that will be used for service discovery (example. tuser@testlab.com), then select Continue.
Once service discovery has finished you will be prompted to provide the credentials for Jabber log. Provide a valid Jabber username and password and select Sign In.
Источник


