- Router and Security Device Manager in Cisco IOS Intrusion Prevention System Configuration Example
- Available Languages
- Download Options
- Contents
- Introduction
- Prerequisites
- Requirements
- Components Used
- Conventions
- Configure
- Router and Security Device Manager (SDM) and Cisco IOS CLI in Cisco IOS Intrusion Prevention System (IPS) Configuration Example
- Available Languages
- Download Options
- Contents
- Introduction
- Prerequisites
- Requirements
- Components Used
- Conventions
- Configure
- Enable Cisco IOS IPS with a Factory Default SDF
- Append Additional Signatures after Enabling Default SDF
- Select Signatures and Work with Signature Categories
- Update Signatures for Default SDF Files
Router and Security Device Manager in Cisco IOS Intrusion Prevention System Configuration Example
Available Languages
Download Options
Contents
Introduction
This document describes how to use Cisco Router and Security Device Manager (SDM) version 2.5 in order to configure Cisco IOS ® Intrusion Prevention System (IPS) in 12.4(15)T3 and later releases.
The enhancements in SDM 2.5 related to IOS IPS are:
Total compiled signature number displayed in the signature list GUI
SDM signature files (zip file format; for example, sigv5-SDM-S307.zip) and CLI signature packages (pkg file format; for example, IOS-S313-CLI.pkg) can be downloaded together in one operation
Downloaded signature packages can be pushed automatically to the router as an option
The tasks involved in the initial provisioning process are:
Download and install SDM 2.5.
Use SDM Auto Update in order to download the IOS IPS signature package to a local PC.
Launch the IPS Policies Wizard in order to configure IOS IPS.
Verify that the IOS IPS configuration and signatures are properly loaded
Cisco SDM is a web-based configuration tool that simplifies router and security configuration through smart wizards that help customers quickly and easily deploy, configure, and monitor a Cisco router without requiring knowledge of the command-line interface (CLI).
Note: Cisco SDM requires a screen resolution of at least 1024 x 768.
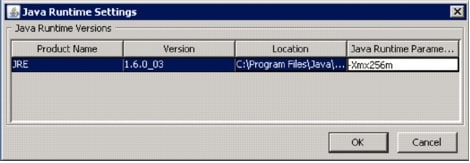
Note: Cisco SDM requires Java memory heap size to be no less than 256MB in order to configure IOS IPS. In order to change the Java memory heap size, open the Java control panel, click the Java tab, click View located under the Java Applet Runtime Settings, and then enter -Xmx256m in the Java Runtime Parameter column.
Prerequisites
Requirements
There are no specific requirements for this document.
Components Used
The information in this document is based on these software and hardware versions:
Cisco IOS IPS in 12.4(15)T3 and later releases
Cisco Router and Security Device Manager (SDM) version 2.5
The information in this document was created from the devices in a specific lab environment. All of the devices used in this document started with a cleared (default) configuration. If your network is live, make sure that you understand the potential impact of any command.
Conventions
Refer to the Cisco Technical Tips Conventions for more information on document conventions.
Configure
Note: Open a console or telnet session to the router (with `term monitor’ on) in order to monitor messages when you use SDM to provision IOS IPS.
Download SDM 2.5 from Cisco.com at http://www.cisco.com/pcgi-bin/tablebuild.pl/sdm (registered customers only) and install it on a local PC.
Run SDM 2.5 from the local PC.
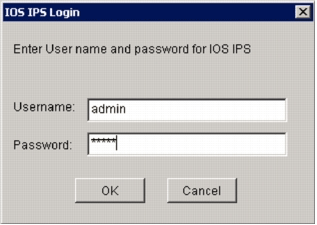
When the IOS IPS Login dialog box appears, enter the same user name and password that you use for SDM authentication to the router.
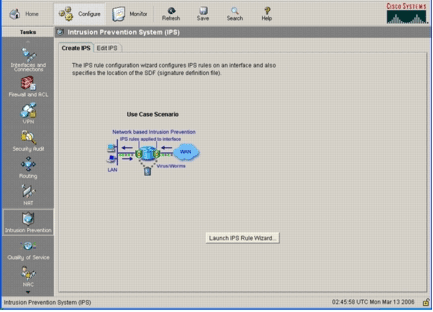
From SDM user interface, click Configure, and then click Intrusion Prevention.
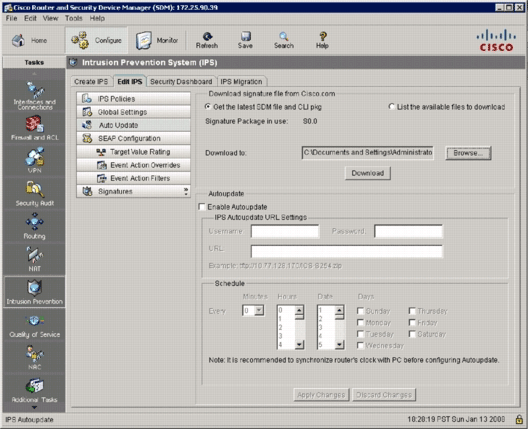
Click the Edit IPS tab.
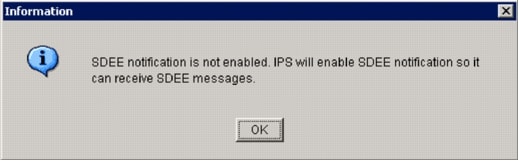
If SDEE notification is not enabled on the router, click OK in order to enable SDEE notification.
In the Download signature file from Cisco.com area of the Edit IPS tab, click the Get the latest SDM file and CLI pkg radio button, and then click Browse in order to select a directory on your local PC in which to save the downloaded files.
You can choose the TFTP or FTP server root directory, which will be used later when you deploy the signature package to the router.
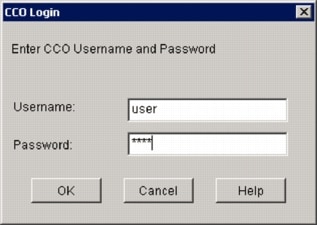
When the CCO Login dialog box appears, use your CCO registered user name and password.
SDM connects to Cisco.com and starts to download both the SDM file (for example, sigv5-SDM-S307.zip) and the CLI pkg file (for example, IOS-S313-CLI.pkg) to the directory selected in step 7.
Once both files are downloaded, SDM prompts you to push the downloaded signature package to the router.
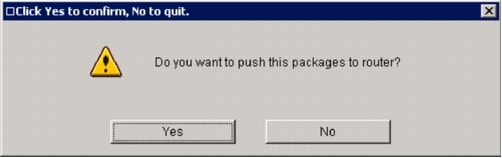
Click No since IOS IPS has not been configured on the router yet.
After SDM downloads the latest IOS CLI signature package, click the Create IPS tab in order to create initial IOS IPS configuration.
If you are prompted to apply changes to the router, click Apply Changes.
Click Launch IPS Rule Wizard.
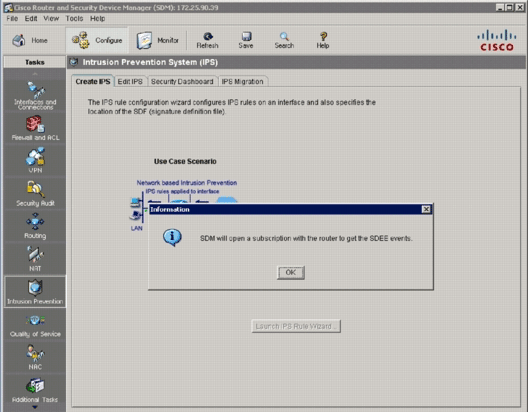
A dialog box appears to inform you that SDM needs to establish a SDEE subscription to the router to retrieve alerts.
The Authentication Required dialog box appears.
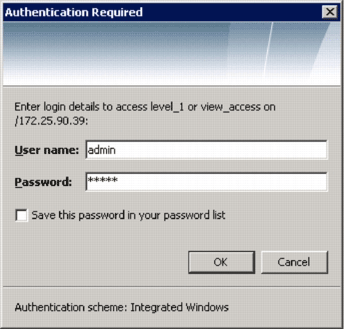
Enter the user name and password that you used for SDM to authenticate to the router, and click OK.
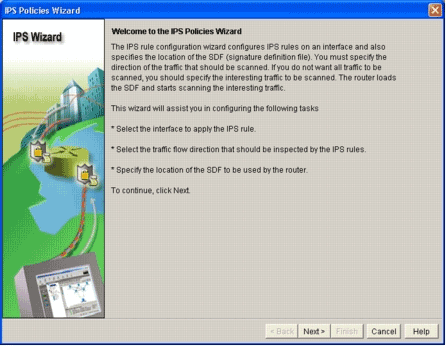
The IPS Policies Wizard dialog box appears.
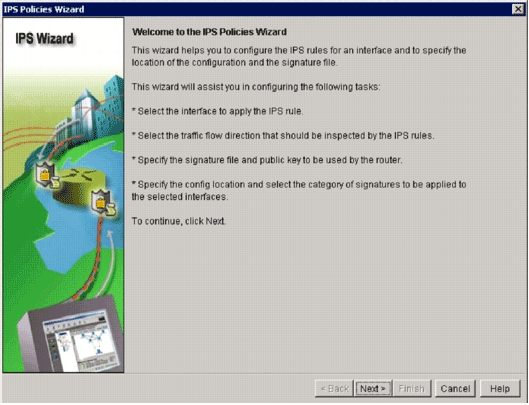
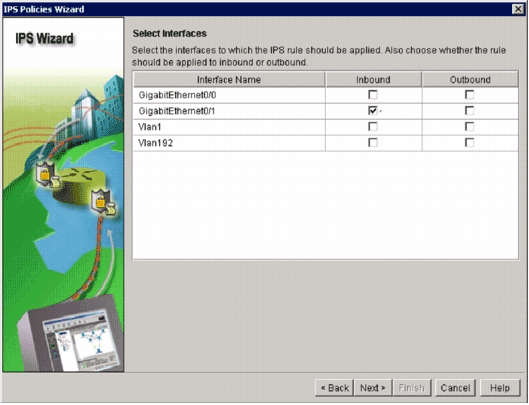
In the Selected Interfaces window, choose the interface and the direction to which that IOS IPS will be applied, and then click Next to continue.
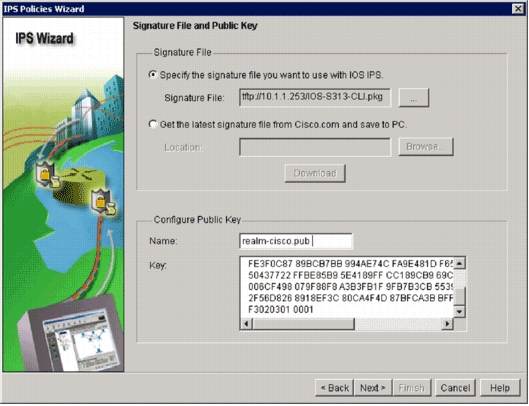
In the Signature File area of the Signature File and Public Key window, click the Specify the signature file you want to use with IOS IPS radio button, and then click the Signature File button (. ) in order to specify the location of the signature package file, which will be the directory specified in step 7.
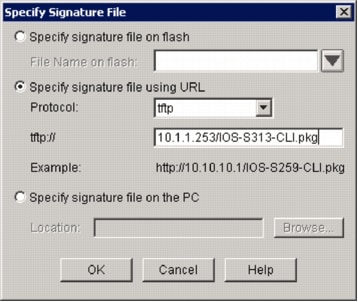
Click the Specify signature file using URL radio button, and choose a protocol from the Protocol drop-down list.
Note: This example uses TFTP in order to download the signature package to the router.
Enter the URL for the signature file, and click OK.
In the Configure Public Key area of the Signature File and Public Key window, enter realm-cisco.pub in the Name field, and then copy this public key and paste it into the Key field.
Click Next to continue.
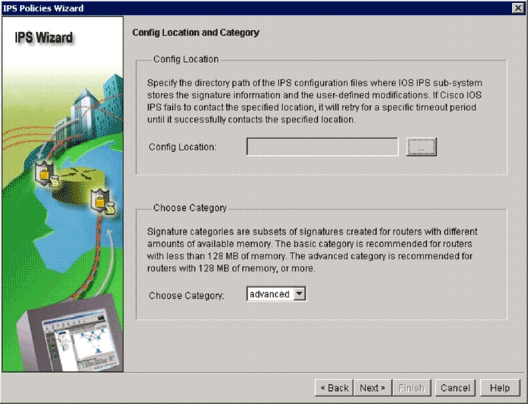
In the Config Location and Category window, click the Config Location button (. ) in order to specify a location where the signatures definition and configuration files will be stored.
The Add Config Location dialog box appears.
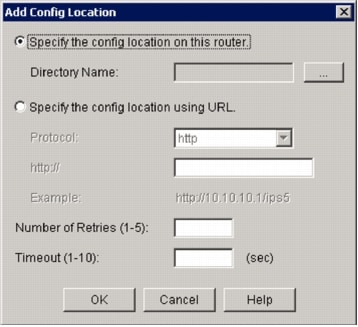
In the Add Config Location dialog box, click the Specify the config location on this router radio button, and then click the Directory Name button (. ) in order to locate the configuration file.
The Choose Folder dialog box appears in order to allow you to select an existing directory or create a new directory on the router flash to store the signature definition and configuration files.
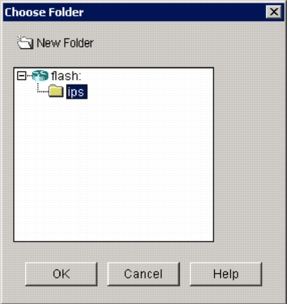
Click New Folder located at the top of the dialog box if you want to create a new directory.
Once you select the directory, click OK in order to apply changes, and then click OK in order to close the Add Config Location dialog box.
On the IPS Policies Wizard dialog box, select the signature category according to the amount of memory installed on the router. There are two signature categories you can choose in SDM: Basic and Advanced.
If the router has 128MB DRAM installed, Cisco recommends that you choose the Basic category in order to avoid memory allocation failures. If the router has 256MB or more DRAM installed, you can choose either category.
Once you select a category to use, click Next in order to continue to the summary page.
The summary page provides a brief description about the tasks IOS IPS initial configuration.
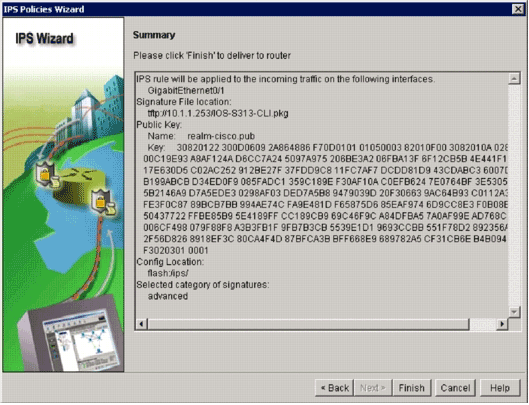
Click Finish on the summary page in order to deliver the configurations and signature package to the router.
If the preview commands option is enabled on the Preferences settings in SDM, SDM displays the Deliver Configuration to Router dialog box that shows a summary of CLI commands that SDM deliver to the router.
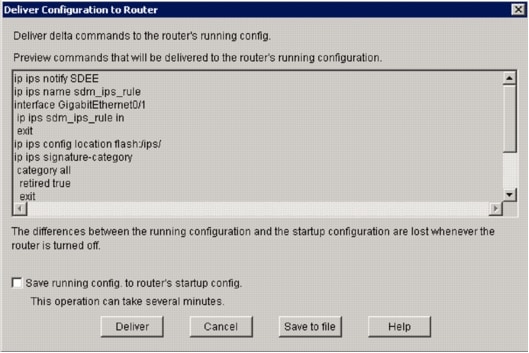
Click Deliver in order to proceed.
The Commands Delivery Status dialog box appears to show the commands delivery status.
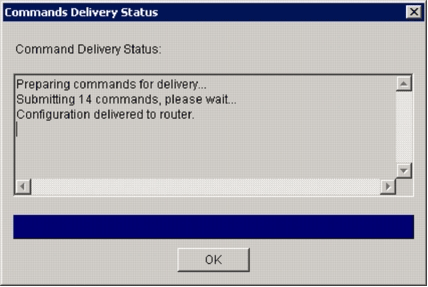
When the commands are delivered to the router, click OK in order to continue.
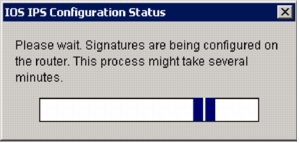
The IOS IPS Configuration Status dialog box shows that the signatures are being loaded on the router.
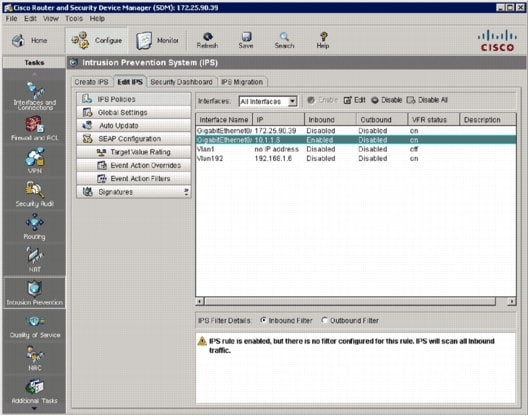
When the signatures are loaded, SDM displays the Edit IPS tab with the current configuration. Check which interface and in what direction the IOS IPS is enabled in order to verify the configuration.
The router console shows that the signatures have been loaded.
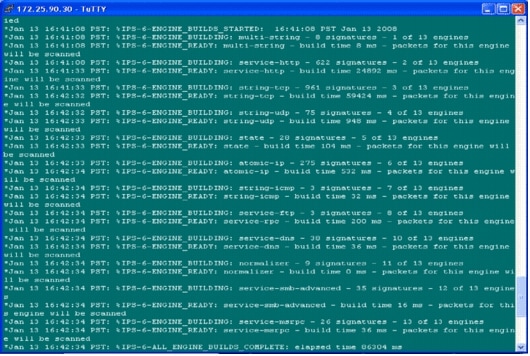
Use the show ip ips signatures count command in order to verify the signatures are loaded properly.
The initial provisioning of IOS IPS using SDM 2.5 is complete.
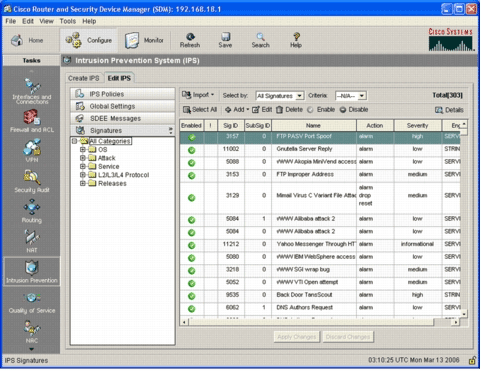
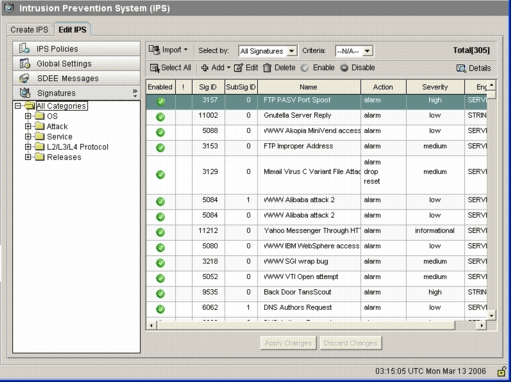
Verify the signature numbers with SDM as shown in this image.
Router and Security Device Manager (SDM) and Cisco IOS CLI in Cisco IOS Intrusion Prevention System (IPS) Configuration Example
Available Languages
Download Options
Contents
Introduction
In Cisco Router and Security Device Manager (SDM) 2.2, the Cisco IOS ® IPS configuration is integrated within the SDM application. You are no longer required to launch a separate window in order to configure Cisco IOS IPS.
In Cisco SDM 2.2, a new IPS configuration wizard guides you through the steps necessary enable Cisco IOS IPS on the router. In addition, you can still use the advanced configuration options to enable, disable, and tune Cisco IOS IPS with Cisco SDM 2.2.
Cisco recommends that you run Cisco IOS IPS with the pretuned signature definition files (SDFs): attack-drop.sdf, 128MB.sdf, and 256MB.sdf. These files are created for routers with different amounts of memory. The files are bundled with Cisco SDM, which recommends SDFs when you first enable Cisco IOS IPS on a router. These files can also be downloaded from http://www.cisco.com/pcgi-bin/tablebuild.pl/ios-sigup (registered customers only) .
The process to enable the default SDFs is detailed in Enable Cisco IOS IPS with a Factory Default SDF. When the default SDFs are not sufficient or you want to add new signatures, you can use the procedure described in Append Additional Signatures after Enabling Default SDF.
Prerequisites
Requirements
Java Runtime Environment (JRE) Version 1.4.2 or later is required to use Cisco SDM 2.2. A Cisco-recommended and tuned signature file (based on DRAM) is bundled with Cisco SDM (loaded on router flash memory with Cisco SDM).
Components Used
The information in this document is based on the Cisco Router and Security Device Manager (SDM) 2.2.
The information in this document was created from the devices in a specific lab environment. All of the devices used in this document started with a cleared (default) configuration. If your network is live, make sure that you understand the potential impact of any command.
Conventions
Refer to the Cisco Technical Tips Conventions for more information on document conventions.
Configure
Enable Cisco IOS IPS with a Factory Default SDF
Complete this procedure in order to use the CLI to configure a Cisco 1800 Series router with Cisco IOS IPS to load 128MB.sdf on the router flash.
Configure the router to enable Security Device Event Exchange (SDEE) event notification.
Enter configuration commands (one per line), and then press Cntl+Z to end.
Create an IPS rule name that is used to associate to interfaces.
Configure an IPS location command to specify from which file the Cisco IOS IPS system will read signatures.
This example uses the file on flash: 128MB.sdf. The location URL portion of this command can be any valid URL that uses flash, disk, or protocols via FTP, HTTP, HTTPS, RTP, SCP, and TFTP in order to point to the files.
Note: You must enable the terminal monitor command if you configure the router via a Telnet session or you will not see the SDEE messages when the signature engine is building.
Enable IPS on the interface where you want to enable the Cisco IOS IPS to scan traffic. In this case, we enabled on both directions on interface fastEthernet 0.
The first time an IPS rule is applied to an interface, Cisco IOS IPS starts built signatures from the file specified by the SDF locations command. SDEE messages are logged to the console and sent to the syslog server if configured. The SDEE messages with of engines indicates the signature engine building process. Finally, when the two numbers are the same, all the engines are built.
Note: IP virtual reassembly is an interface feature that (when turned on) automatically reassembles fragmented packets that come into the router through that interface. Cisco recommends that you enable ip virtual-assembly on all interfaces where traffic comes into the router. In the above example, besides turning on «ip virtual-assembly» on interface fastEthernet 0, we configure it on the inside interface VLAN 1 as well.
SDM 2.2 Procedure
Complete this procedure in order to use Cisco SDM 2.2 to configure a Cisco 1800 Series router with Cisco IOS IPS.
In the SDM application, click Configure, and then click Intrusion Prevention.
Click the Create IPS tab, and then click Launch IPS Rule Wizard.
Cisco SDM requires IPS event notification via SDEE in order to configure the Cisco IOS IPS feature. By default, the SDEE notification is not enabled. Cisco SDM prompts you to enable IPS event notification via SDEE as shown in this image:

The Welcome to the IPS Policies Wizard window of the IPS Policies Wizard dialog box appears.
The Select Interfaces window appears.

Choose the interfaces for which you want to enable IPS, and click either the Inbound or Outbound checkbox in order to indicate the direction of that interface.
Note: Cisco recommends that you enable both inbound and outbound directions when you enable IPS on an interface.
The SDF Locations window appears.
Click Add in order to configure an SDF location.
The Add a Signature Location dialog box appears.
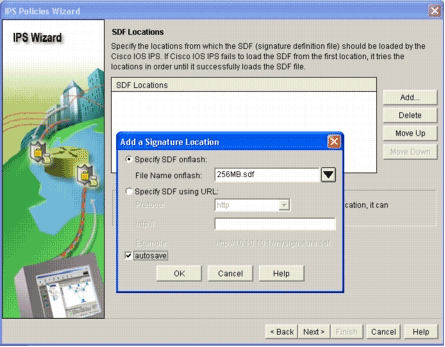
Click the Specify SDF on flash radio button, and choose 256MB.sdf from the File Name on flash drop-down list.
Click the autosave checkbox, and click OK.
Note: The autosave option automatically saves the signature file when there is a signature change.
The SDF Locations window displays the new SDF location.
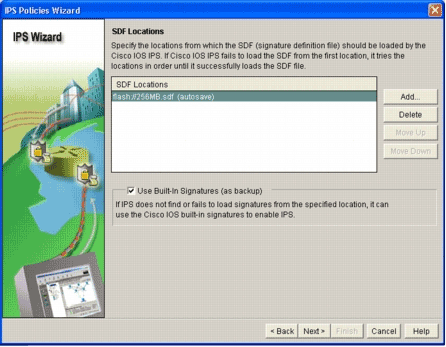
Note: You can add additional signature locations in order to designate a backup.
Click the Use Built-In Signatures (as backup) check box.
Note: Cisco recommends that you do not use the built-in signature option unless you have specified one or more locations.
Click Next in order to continue.
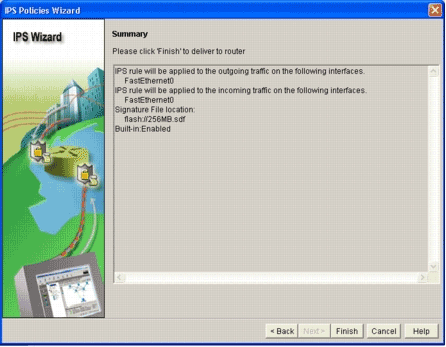
The Summary window appears.
The Commands Delivery Status dialog box displays the status as the IPS engine compiles all the signatures.
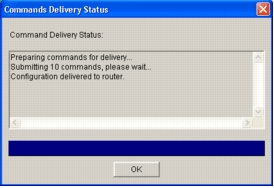
Once the process is complete, click OK.
The Signature Compilation Status dialog box displays the signature compilation information.
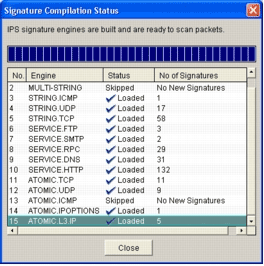
This information shows which engines have been compiled and the number of signatures in that engine. For engines that display Skipped in the status column, there is no signature loaded for that engine.
Click Close in order to close the Signature Compilation Status dialog box.
In order to verify which signatures are currently loaded on the router, click Configure, and then click Intrusion Prevention.
Click the Edit IPS tab, and then click Signatures.
The IPS signature list appears in the Signatures window.
Append Additional Signatures after Enabling Default SDF
There is no CLI command available to create signatures or read signature information from the distributed IOS-Sxxx.zip file. Cisco recommends that you use either SDM or the Management Center for IPS Sensors to manage the signatures on Cisco IOS IPS systems.
For customers who already have a signature file ready and want to merge this file with the SDF that runs on a Cisco IOS IPS system, you can use this command:
The signature file defined by the signature location command is where the router loads signatures files when it reloads or when the router IOS IPS is reconfigured. For the merging process to be successful, the file defined by the signature file location command must also be updated.
Use the show command in order to check the currently configured signature locations.
The output shows the configured signature locations. This command shows from where the current running signatures are loaded.
Signatures were last loaded from flash:128MB.sdf
Cisco SDF release version S128.0
Trend SDF release version V0.0
Use the copy url > ips-sdf command, along with the information from the previous step, in order to merge signature files.
After you issue the copy command, the router loads the signature file into the memory and then builds the signature engines. In the console SDEE message output, the building status for each signature engine is displayed.
%IPS-6-ENGINE_BUILD_SKIPPED indicates that there are no new signatures for this engine.
%IPS-6-ENGINE_READY indicates that there are new signatures and the engine is ready. As before, the «15 of 15 engines» message indicates that all engines have been built.
IPS-7-UNSUPPORTED_PARAM indicates that a certain parameter is not supported by Cisco IOS IPS. For example, CapturePacket and ResetAfterIdle.
Note: These messages are for information only and will have no affect on the Cisco IOS IPS signature capability or performance. These logging messages can be turned off by setting the logging level higher than debugging (level 7).
Update the SDF defined by the signature location command, such that when router reloads, it will have the merged signature set with updated signatures. This example shows the file size difference after the merged signature is saved to the 128MB.sdf flash file.
 Warning: The new 128MB.sdf now contains customer-merged signatures. The content is different from the Cisco default 128MB.sdf file. Cisco recommends that you change this file to a different name to avoid confusion. If the name is changed, the signature location command needs to be changed as well.
SDM 2.2 Procedure
After Cisco IOS IPS has been enabled, new signatures can be added into the router that runs a signature set with the Cisco SDM import function. Complete these steps in order to import new signatures:
Choose the default SDFs or the IOS-Sxxx.zip update file to import additional signatures.
Click Configure, and then click Intrusion Prevention.
Click the Edit IPS tab, and then click Import.
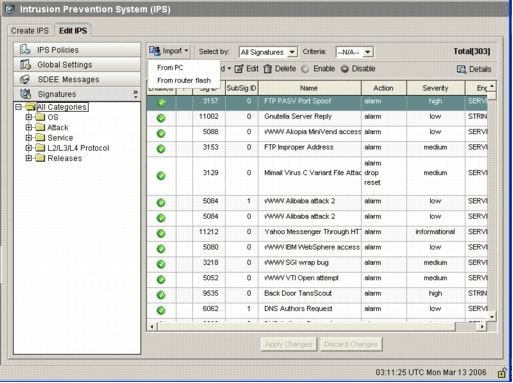
Choose From PC from the Import drop-down list.
Select the file from which you want to import signatures.
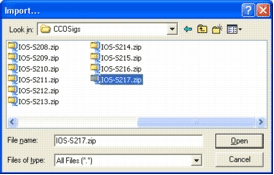
This example uses the latest update downloaded from Cisco.com and saved on the local PC hard disk.
Warning: Due to memory constraint, only a limited number of new signatures can be added on top of signatures that have already been deployed. If too many signatures are selected, the router might not be able to load all new signatures because of lack of memory.
Once the signature file load completes, the IPS Import dialog box appears.
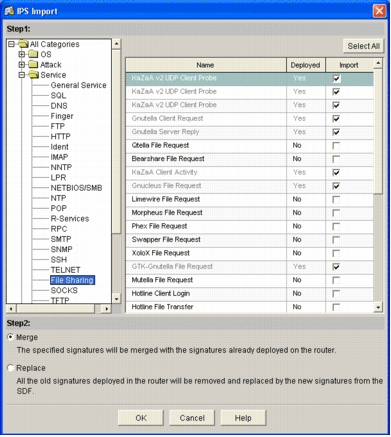
Navigate through the left tree view, and click the Import check box next to the signatures you want to import.
Click the Merge radio button, and then click OK.
Note: The Replace option replaces the current signature set on the router with the signatures you select to import.
Once you click OK, the Cisco SDM application delivers the signatures to the router.

Note: High CPU utilization occurs during compilation and loading of signatures. After Cisco IOS IPS is enabled on the interface, the signature file starts to load. The router takes about five minutes to load the SDF. You can attempt to use the show process cpu command in order to view the CPU utilization from the Cisco IOS Software CLI. However, do not attempt to use additional commands or load other SDFs while the router is loading the SDF. This may cause the signature compilation process to take longer to complete (since the CPU utilization is close to 100-percent utilization at the time of loading the SDF). You might need to browse through the list of signatures and enable the signatures if they are not in enabled state.
The total signature number has increased to 519. This number includes all the signatures available in the IOS-S193.zip file that belong to the File Sharing subcategory.
For more advanced topics about how to use Cisco SDM to manage the Cisco IOS IPS feature, refer to the Cisco SDM documentation at this URL:
Select Signatures and Work with Signature Categories
In order to determine how to effectively select the correct signatures for a network, you must know a few things about the network that you are protecting. Updated signature category information in Cisco SDM 2.2 and later further assist customers to select the correct set of signatures to protect the network.
The category is a way to group signatures. It helps to narrow down signature selection to a subset of signatures that are relevant to each other. One signature could belong to only one category or it could belong to multiple categories.
These are the five top-level categories:
OS—Operation-system-based signature categorization
Attack—Attack-based signature categorization
Service—Service-based signature categorization
Layer 2-4 Protocol—Protocol-level-based signature categorization
Releases—Release-based signature categorization
Each of these categories is further divided into subcategories.
As an example, consider a home network with a broadband connection to the Internet and a VPN tunnel to the corporate network. The broadband router has Cisco IOS Firewall enabled on the open (non-VPN) connection to the Internet to prevent any connection from being originated from the Internet and connected to the home network. All traffic that originates from the home network to the Internet is permitted. Assume that the user uses a Windows-based PC and uses applications like HTTP (web browsing) and e-mail.
The firewall can be configured so that only the applications that the user needs are allowed to flow through the router. This will control the flow of unwanted and potentially bad traffic that can spread throughout the network. Consider that the home user does not need or use a specific service. If that service is allowed to flow through the firewall, there is a potential hole that an attack can use to flow throughout the network. Best practices only allow services that are needed. Now, it is easier to select what signatures to enable. You need to enable signatures only for the services that you allow to flow through the firewall. In this example, services include e-mail and HTTP. Cisco SDM simplifies this configuration.
In order to use the category to select required signatures, choose Service > HTTP, and enable all the signatures. This selection process also works in the signature import dialog, where you can select all the HTTP signatures and import them into your router.
Additional categories that need to be selected include DNS, NETBIOS/SMB, HTTPS, and SMTP.
Update Signatures for Default SDF Files
The three per-built SDFs (attack-drop.dsf, 128MB.sdf, and 256MB.sdf) are currently posted on Cisco.com at http://www.cisco.com/pcgi-bin/tablebuild.pl/ios-sigup (registered customers only) . Newer versions of these files will be posted as soon as they are available. In order to update routers that run Cisco IOS IPS with these default SDFs, go to the website and download the latest versions of these files.
Copy the downloaded files to the location where the router is configured to load these files from. To find out where the router is currently configured, use the show running-config | in ip ips sdf command.
In this example, the router uses 256MB.sdf on the flash. The file is updated when you copy the new downloaded 256MB.sdf to the router flash.
Reload the Cisco IOS IPS subsystem to run the new files.
There are two ways to reload Cisco IOS IPS: reload the router or reconfigure Cisco IOS IPS to trigger the IOS IPS subsystem to reload signatures. In order to reconfigure Cisco IOS IPS, remove all the IPS rules from the configured interfaces, and then reapply the IPS rules back to the interfaces. This will trigger the Cisco IOS IPS system to reload.
SDM 2.2 Procedure
Complete these steps in order to update the default SDFs on the router:
Click Configure, and then click Intrusion Prevention.
Click the Edit IPS tab, and then click Global Settings.
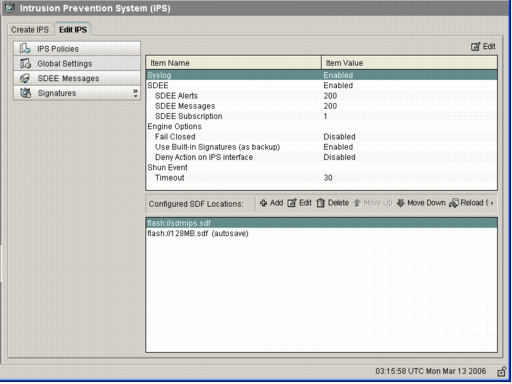
The top of the UI shows the global settings. The bottom half of the UI shows currently configured SDF locations. In this case, the 256MB.sdf file from flash memory is configured.
Choose File Management from the File menu.
The File Management dialog box appears.
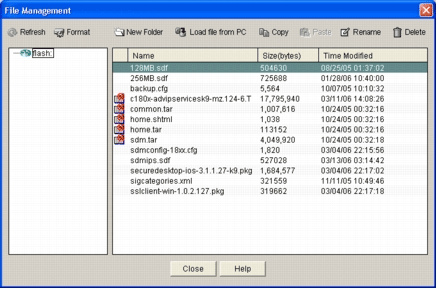
Click Load file from PC.
The Save File dialog box appears.
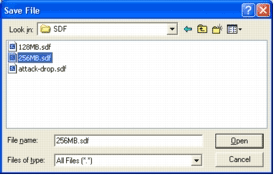
Choose the SDF that needs to be updated, and click Open.
The SDM Warning message appears.
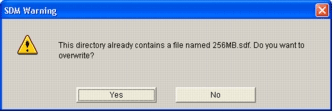
Click Yes in order to replace the existing file.
A dialog box displays the progress of the upload process.
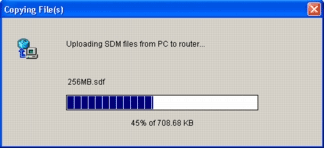
Once the upload process is complete, click Reload Signatures located on the SDF location toolbar. This action reloads the Cisco IOS IPS.


