- Clean Up Your Windows Desktop
- Make better use of your computer’s memory
- What to Know
- How to Clean Up Your Windows Desktop
- How to Keep Your Desktop Clean
- Here’s how to clean out your bloated hard drive in Windows 10
- Empty the recycle bin
- How to delete temporary files and downloads
- How to uninstall apps
- How to change how you use OneDrive
- Use your Xbox One
- Use an external drive
- Use a cloud storage service
- How to Clean Your Computer Properly, Inside and Out
- Cleaning the Physical Parts of Your Computer
- Draining Residual and Static Electricity from a Desktop PC
- Draining Residual and Static Electricity from a Laptop
- Liquids and Computers
- Using Canned or Compressed Air Safely with Computers
- What You’ll Need for Cleaning
- How to Clean a Computer Screen or Monitor
- Steps to Clean Your Screen
- How to Clean a Keyboard and Mouse
- Steps to Clean Your Keyboard
- Steps to Clean Your Mouse or Touchpad
- Steps to Clean Your Computer or Laptop in General
- All Clean
Clean Up Your Windows Desktop
Make better use of your computer’s memory
What to Know
- Put files on the desktop in the My Documents folder (or anywhere other than the desktop).
- Create shortcuts on the desktop for the files you use frequently. Use the Start Menu to park app shortcuts.
- Schedule a regular cleaning to put away files as they accumulate on the desktop. Delete files and folders you no longer use.
This article explains how to clean up your Windows desktop and keep it that way. Instructions in this article apply to Windows 10, Windows 8, and Windows 7.
How to Clean Up Your Windows Desktop
If your formerly fast-running computer has slowed down noticeably, take a close look at your desktop. Is it littered with icons, screenshots, and files? Each of those items takes memory that your computer could put to better use elsewhere. To speed up your computer, clean your Windows desktop.
Each time Windows starts, operating memory is used to display all the files on the desktop and to locate the position of all files represented by shortcuts. If there are dozens of files sitting on the desktop, they use lots of operating memory, essentially for no purpose or gain.
The best way to clean up your desktop is to put your documents in the My Documents folder and your other files where they belong (anywhere other than the desktop). If you have numerous files, you can put them in separate folders and label them accordingly.
Create shortcuts on your desktop only for the folders or files you frequently use. Simplifying the desktop contents frees up operating memory, reduces the time and frequency the hard drive is in use, and improves the response of your computer to programs you open and things you do. The simple act of cleaning the desktop makes your computer run faster.
:max_bytes(150000):strip_icc()/001-cleaning-and-speeding-up-windows-desktop-3506952-6207e09d4cb24c379e421be0df6849bf.jpg)
How to Keep Your Desktop Clean
The more desktop items you have, the longer it takes for your computer to start up. Make a conscious effort to «park» fewer icons on your desktop. Other steps you can take include:
- Schedule a weekly or monthly cleaning to corral any stray items that have gathered on your desktop since the last cleanup.
- Use the Start Menu as a parking place for app shortcuts. Pin any app on your desktop to the Start Menu by right-clicking it and selecting Pin to Start.
:max_bytes(150000):strip_icc()/002-cleaning-and-speeding-up-windows-desktop-3506952-484d90217d7346eba1126d163ac7bdea.jpg)
- Delete any shortcuts, screenshots, or files you no longer use.
- Gather all the files and folders you want to keep on the desktop and instead place them in a single folder on the desktop.
- Hide all the icons on the desktop by right-clicking on the desktop, going to View and deselecting Show desktop icons in the context menu. Repeat the process to show them again.
:max_bytes(150000):strip_icc()/003-cleaning-and-speeding-up-windows-desktop-3506952-5f99ef310f6d4a6481b462d52db2617f.jpg)
You may need to organize your Start Menu into groups to keep everything there tidy and accessible.
Before you know it, hoarding files on your desktop will be a thing of the past and your computer will be running like it did when it was new.
Here’s how to clean out your bloated hard drive in Windows 10
Is your hard drive feeling a little crowded lately? Having more free space on your hard disk can improve speed. By getting rid of files and moving data to other devices, you can quickly clean your hard drive in Windows 10. Here are the easiest ways to free up PC space quickly.
Empty the recycle bin
Ah, the beloved old recycle bin. It’s nice to know that some things about Windows haven’t changed in a long time. Windows 10 still uses the recycle bin to hide all the files you want to throw away, and emptying it can prove useful in freeing up extra space.
You can right-click on the Recycle Bin icon for the option to empty it directly. If you can’t find the icon, then head to the Start menu, and go to Settings > System > Storage. You will be able to select local storage under This PC — look for and click Temporary Files. Doing so will bring up any locations for temporary files, including Recycle Bin. Tick the box next to Recycle Bin, select the Remove Files option at the top of the screen, and confirm your decision. That’s all it takes!
It should be noted that emptying your recycle bin will only help clean your Windows 10 hard disk if there’s a lot of stuff in that bin. When you first download Windows 10 — and long afterward, depending on your desktop habits — emptying it may not affect your hard drive much at all. If you aren’t sure, take a peek inside your bin and see how full it is first. A few GBs worth of data can still make a difference.
How to delete temporary files and downloads
Remember how emptying the recycle bin took you through the temporary files section? If you want to broaden your hard drive cleaning activities, then you can delete all temporary files.
What exactly are you getting rid of here? Well, Windows temp files manage document editing, some application processes, various printing tasks, and so on.
These files are usually automatically deleted, but sometimes they hang on. Please get rid of them all by ticking the box next to each file type, then clicking on the Remove Files option at the top of the screen.
 Digital Trends
Another time files are automatically created occurs when you download anything from the internet. These files pop up in your downloads and tend to stick around — which means they can quickly stack up if you are downloading a lot of content to your Windows 10 desktop.
Go to your Downloads folder via File Explorer > This PC > Downloads and delete any files that you no longer need by highlighting them in groups or individually. This method is a great way to clear out space manually without accidentally deleting something you’ll need later.
How to uninstall apps
Too many apps can lead to an eventual slowdown or lack of space for other content, especially on smaller, lighter Windows devices (looking at you, Surface tablets). Some apps can take up a lot of space — the trick is finding which hog the most room on your hard drive and which you can live without.
From the Start menu, go to Settings, select Apps, and then select Apps & Features. Here, you can see all the apps downloaded. Windows 10 allows you to arrange them by various statistics — if you have a long list, organize them by the amount of hard drive space they are taking up.
See which apps are hogging the most data, and delete those that you don’t use. Double-check that the app doesn’t have anything too valuable, then select it and choose Uninstall.
 Digital Trends
How to change how you use OneDrive
OneDrive is a cloud service for Windows, so you would think that all the cloud data it uses would help free hard drive space, not take it up. This is true, except for one particular OneDrive feature — the ability to save files offline, which you may not even know that you are using.
Sometimes this is handy. If you are dealing with sensitive files or big projects with some sharp deadlines, it’s a good idea to have a backup. But if you are using OneDrive and automatically saving offline for every file and doc at work, school, or home, you probably waste hard drive space.
 Digital Trends
The OneDrive icon should be waiting on the right side of your taskbar (it may be lurking under the Show Hidden Icons arrow). Click on the Cloud icon, choose Settings (the three dots in the upper-right corner), and then select the Preferences option. Doing so will take you to all the file types that OneDrive is saving offline and how much space each takes up.
Unselect all the OneDrive folders that you don’t need. Remember, you can still access all these files online at OneDrive.com, so you aren’t losing anything.
Use your Xbox One
Microsoft platforms are growing increasingly interconnected, and the convergence is very apparent in Windows 10, which connects more freely to other Microsoft devices like the Xbox One game console. If you have an Xbox One, you can use it to help save some space by swapping out select apps and data. You can stream content from the Xbox to your Windows 10 PC with just a few steps.
This service allows you to store data on the game console and free up your PC if you have content you only use at home. Just remember to delete the data from your PC after you transfer it to the Xbox.
Use an external drive
From USB drives to full external hard drives, one of the simplest ways to clean up your hard drive on Windows 10 is to move extra data outside your computer.
First, hook up a hard drive and make sure that it is properly formatted and ready for uploads. Dragging and dropping a file into the new drive using File Explorer will create a copy of the file, allowing you to erase the original.
 Digital Trends
However, it is also possible for you to move large chunks of files at one time. Go to the taskbar and open your File, Explorer . From there, select all the files you want to transfer outside your PC hard drive. Once you have them all highlighted, go to the Home menu at the top of the screen. Select Move To , then select Choose Location . Find your external drive on the list and select it. All of your files will drop into that destination. This is a full transfer, so you don’t even have to erase anything from your computer afterward.
Use a cloud storage service
Purchasing an external hard drive or USB device isn’t your only option for offloading and saving your files. Instead, you can copy your files to free or paid cloud storage services . You can then delete the copy on your PC, which will free up more space on your computer.
Cloud storage is a safe and easy way to store your files. Some of the advantages include the ability to copy your operating system and files to transfer and restore them on a new device if you need to.
Rather than relying on physical storage like USBs and external hard drives, you can use a cloud-based service to “carry” documents with you and access them anywhere you need to. All you need is a login email or username and password to access your files.
Many smartphones will automatically save certain files, such as photos, to the cloud. The cloud is an ideal backup system because you can save your files even if your phone crashes. You’re also able to access any files in the cloud from different devices.
PC users can either drag-and-drop data to cloud storage or upload the files with little difficulty. Be aware of how much cloud storage space you have so you’ll know you have room for all of your files.
Widely-used examples of cloud-based services include iDrive (our favorite), plus Dropbox, Google Drive, Microsoft OneDrive, and iCloud. Companies are constantly developing cloud options, so you’ll be able to find the perfect fit for your storage needs.
Read reviews and consider how big of a name your cloud service has so you can be sure it’s trustworthy and secure. That way, you can practically guarantee your files aren’t going anywhere — ever.
How to Clean Your Computer Properly, Inside and Out
Reduce clutter, get rid of dust bunnies
Everything works better when it’s clean. Not to mention that clutter kills. That is why it’s important to clean your computer regularly and this spring is as good a time as any.
Just as a computer with an uncluttered hard drive runs better and faster, a computer with no dust build-up in it runs cooler, and thus better and faster. Add a clean monitor, keyboard, and mouse and the computer is just more pleasurable to use.

There’s a lot to doing a good cleaning, but it can go very quickly. Due to the number of steps and details, this article will be broken into 2 parts; physically cleaning your computer and cleaning out the ‘insides’ of the computer meaning Windows and your hard drive.
Let’s look at the best ways to physically clean your Windows computer.
Cleaning the Physical Parts of Your Computer
Do NOT do any of the physical cleaning of a computer that is turned on or has power still attached or in it. Unplug your computer or its components before cleaning them.
You’ll also want to drain any residual or static electricity from the computer or laptop. Following are the steps to take for a desktop PC and a laptop. Static electricity is a real threat to you and your computer. It can give you nasty shock or permanently damage your computer.
Draining Residual and Static Electricity from a Desktop PC
- Turn off the computer through your operating system, like you normally would.
- Unplug the computer from the wall.
- Drain off any static electricity by touching a metal part of the case, not any of the components inside.
- Drain residual electricity by pressing and holding in the power button for about 20 seconds.
Draining Residual and Static Electricity from a Laptop
- Turn off your laptop through your operating system, like you normally would.
- Unplug the power cable from the wall and unplug the power block or converter from your laptop.
- Remove the laptop battery if possible. For some new laptops this is not possible unless you open the case of your laptop. We do not advise doing that.
- Drain off any static electricity by touching a metal part of the case, not any of the components inside.
- Drain residual electricity by pressing and holding in the power button for about 20 seconds.
Liquids and Computers
Never apply liquid cleaners or water directly to any part of the computer. Always dampen the cloth, cotton swab, or magic eraser and use that to clean. It should only be damp enough to just know that it is not dry.
Water, or liquids, and electricity do NOT mix. Water and most liquids are excellent conductors of electricity, so even the smallest amount of it will conduct electricity.
That can cause a short circuit in your computer or make an electrical connection between you and the computer causing you pain and possibly severe injury. In the extreme case, it can even result in death.
Also allow your computer enough time to completely air dry before reconnecting power and turning it on. It shouldn’t take long if your cloth was only slightly damp, maybe 5 minutes or so. If you can wait longer, do so.
Using Canned or Compressed Air Safely with Computers
To remove loose dust and dirt, nothing beats canned or compressed air. But there are some safety concerns when using air under pressure, for you and your computer.
- Do NOT use an air compressor that is not specifically designed for use with computers. Ordinary air compressors can use too much pressure and dislodge small computer components. They also can have moisture and grease in the air stream which can cause a short circuit in your computer.
- Wear safety glasses and a dust mask. The glasses will help protect your eyes from any debris that may get blown into them. The dust mask is to prevent you from inhaling the dust. It’s just nasty. Plus, the dust can contain traces of heavy metals like mercury or lead. If you’re cleaning computers every day, these metals can build up in your system and damage your health.
- When using canned air, follow all the instructions on the can. Never spray it on yourself, and always keep the can upright when using it. The propellant can cause frostbite-like burns to your skin. Keeping the can upright also prevents the propellant from coming out as a burst of liquid, which could cause damage to your computer.

Now that you’re sufficiently prepared for safety, let’s get on to cleaning the physical parts of the computer.
What You’ll Need for Cleaning
- Two clean, dry microfiber clothes or soft lint-free cloth. One to dampen and one to keep clean and dry.
- Cotton swabs, like Q-tips. There is a kind that has very pointed ends which are great at getting into the bezel edge and other hard to reach places.
- Screen cleaning liquid. Do NOT use anything with ammonia or alcohol in it. You can buy screen cleaning fluid, or you can make a mix of about a half-cup of water and a half teaspoon of white vinegar or two drops of a gentle dish soap like original Dawn.
- For the rest of the computer, any cleaning solution meant for hard surfaces will work. Your screen cleaning solution will work too.
- Canned air.
- 97% rubbing alcohol. (Optional for deep cleaning around electronic parts. If you’re not comfortable with cleaning electrical contacts, skip this. Better safe than sorry.)
- Magic eraser if the keyboard or computer case is especially dirty.
How to Clean a Computer Screen or Monitor
The computer screen, or monitor, is your view into your computer’s world. What shows up there is ultimately why we use the computer in the first place. So why not keep it clean and clear? Easy to read and easy to see means easier to use.
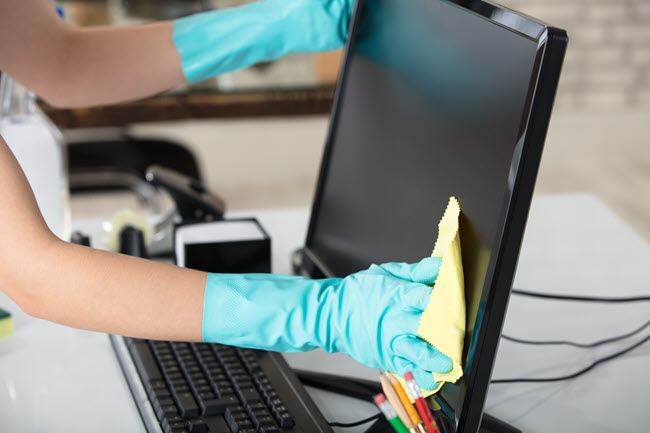
Steps to Clean Your Screen
- Turn off your monitor and unplug it from the power if possible. If it’s a laptop, power off the laptop. This is to prevent damage or injury to you or the screen if some liquid should somehow make it to the electronics.
- Use the dry microfiber cloth to wipe down the entire screen, the bezel or outside edge, and the back of the screen. This will remove the loose dust and dirt.
- With the canned air, spray it into any tight spots that look like they have dust in them.
- Use the Q-tip to get into the tight corners where the bezel meets the screen to get any wedged in dust or dirt.
- Spray or wet the microfiber cloth with your screen cleaning solution. The cloth should be just slightly damp to the touch. You don’t want it wet enough that it might drip. Do NOT spray it on the screen or computer. Liquids and electronics do not mix. Wipe down the screen to remove any remaining dust, dirt, or fingerprints.
- Using the second dry microfiber cloth, dry off and polish your screen. Going in circles helps avoid leaving streaks.
- Leave the screen to completely air dry before turning it on again.
- Turn on the screen again and check for any missed spots. If you missed a spot or two, you can probably clean them up with the dry cloth. If it needs the wet cloth, unplug the monitor and try cleaning it again.
How to Clean a Keyboard and Mouse

Steps to Clean Your Keyboard
- Unplug your keyboard from the computer. If you have a laptop, ensure it is turned off, unplugged, battery removed, and follow the Draining Residual and Static Electricity steps above.
- Turn your keyboard upside-down and shake it out. If it’s not a laptop keyboard, you can try gently tapping it on a hard surface while it’s upside-down. Be prepared to be a little grossed out. Even if you never eat around your computer, stuff will fall out that just looks a bit nasty. Clean that off with your cloth before proceeding.
- Use the canned air to blow off any remaining dust or debris.
- Gently wipe your soft, dry, lint-free cloth across the keys to get the very last bits.
- If possible, use a damp cotton swab to clean just under the keys and the crevices of the keyboard.
- Dampen your cloth with your cleaning solution and wipe down the keyboard, then clean each key individually. If there’s a build-up of dirt on some keys, you may need to scrub a little bit harder or use a slightly damp magic eraser.
- Use the dampened cloth to clean the entire length of the keyboard cable. Pay attention to whether it snags or not. If it snags, there is likely damage to the cable which can cause problems. It is safest to replace the keyboard.
Steps to Clean Your Mouse or Touchpad
- Unplug your mouse from the computer. If you have a laptop, ensure it is turned off, unplugged, battery removed, and the power drained.
- Use the canned air to blow off any loose dust or debris.
- Gently wipe your soft, dry, lint-free cloth across the entire mouse or touchpad surface.
- If needed, use a damp cotton swab to clean in the crevices of the mouse or touchpad.
- Dampen your cloth with your cleaning solution and wipe down the mouse or touchpad. If there’s a buildup of dirt, you may need to scrub a little bit harder or use a slightly damp magic eraser.
- Use the dampened cloth to clean the entire length of the mouse cable. Pay attention to whether it snags or not. If it snags, there is likely damage to the cable which can cause problems. Again, your safest option is to replace the mouse.

Steps to Clean Your Computer or Laptop in General
Turn off your computer or laptop and follow the Draining Residual and Static Electricity steps above.
Remove all cables from the computer.
Use the canned air to blow out any vents or ports on the computer. Be prepared for large puffs of dust. Do this until no more visible dust comes out.

If you’re working on a PC that you can take the cover off, do that and blow out all dust inside. This is a good change to visually inspect your computer components for any damage or degradation. Then go back to cleaning the outside of the computer.
If you’re working on a laptop, there may be panels that can be removed for access to your hard drive or RAM. If you’re comfortable with doing this, remove the panels and use the canned air to blow out any dust.
- Use a cotton swab dampened with cleaning fluid to work dirt out of any crevices or vents.
- Use a cotton swab dampened with rubbing alcohol to work dirt out of any ports.
- Use your dry cloth to wipe off any loose dust or debris.
- Dampen your cloth with your cleaner and wipe down the exterior of the PC or laptop.
- If necessary, use the magic eraser to get any tough marks off it.
- With your damp cloth, clean the entire length of any cables connected to the computer; power, monitor, USB, whatever. Check the cables and ends for any sort of damage and repair or replace them. This also gives you an opportunity to organize your cables so there’s less clutter around you.
- A cotton swab dampened with rubbing alcohol can be used to clean the contacts in the ends of the cables, if you feel it’s necessary. Once you have, let the cables sit and air dry for at least 5 minutes before reconnecting them. Inspect them to make sure they are completely dry.
- Replace the cables making sure they are fully seated and secured and go back to enjoy using your computer.
All Clean
Your computer is now almost as clean as when it came out of the box. And I bet you feel better about it too. I guarantee your computer feels better too. Now air can properly flow through the computer keeping it cool and running fast.
The contacts on your cables are now clean and well-seated allowing the components of your computer to talk to each other better. If you’ve tidied up the cables, you probably have more room on your desktop and less tripping hazards around you.
If you found damaged cables and repaired or replaced them, your computer will run better AND safer. This whole process took you about a half an hour.
Was that 30 minutes’ worth it to you? Stay tuned for part 2 of this article on how to clean out the ‘insides’ of your computer by tuning up Windows and your hard drive.
Guy has been published online and in print newspapers, nominated for writing awards, and cited in scholarly papers due to his ability to speak tech to anyone, but still prefers analog watches. Read Guy’s Full Bio


