- Fix: Windows Button or Key not Working
- Reasons why your Windows Key does not Work
- Method 1: Disable Gaming Mode on your Keyboard
- Method 2: Enable Windows Key using Registry Edit
- Method 3: Re-Register all Apps
- Method 4: Enable the Start Menu
- Method 5: Restart Windows / File Explorer
- Method 6: Turn off Filter Keys
- Method 7: Uninstall and reinstall your keyboard drivers
- Method 8: Unplug your game controller
- Can’t click on start button
Fix: Windows Button or Key not Working
Since the invention of the start menu, keyboards have had the Windows key (also known as the Winkey). This is a physical key with the Microsoft Windows logo embedded on keyboards usually on the left of the keyboard which is linked to the Start Menu, so when you press this key Start menu opens and if it doesn’t open the either the Start Menu or the Windows button is not working. Some keyboards also have two; on the right and on the left of the keyboard. The Windows key quickly brings up the start menu; which is the most common procedure on a Windows computer. This saves time on dragging the mouse to the Start menu button on your screen.
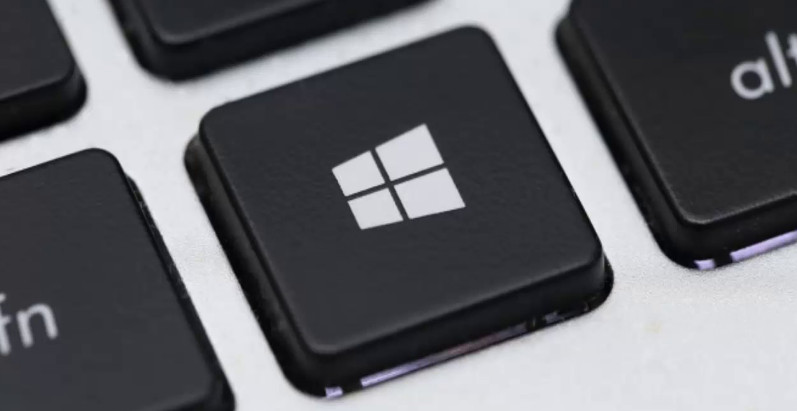 Windows button
However, for some users, this button has caused nothing but frustration. Whenever they press the Windows Key on the laptop, it does not seem to do its dedicated work of bringing up the start menu. This means Windows key shortcuts will also not work. Shortcuts like Winkey + L to log out, Winkey + D to bring up the desktop, Winkey + R to open run, Windows Key + I to open Settings, or Windows Key + Tab to sweep through tasks will not work. However, the start menu still works fine when you use the mouse. Others however cannot get this to work either. This article will help in explaining this problem and give you fixes to it.
Reasons why your Windows Key does not Work
This problem is related to either your PC settings including the software you have installed, or it could be tied to your keyboard itself. Your best bet is to try another keyboard if you have one. If the problem disappears that suggests you have a suspect key on the original keyboard. If the problem doesn’t go away you can assume it’s a Windows problem. Press Ctrl + Shift + Esc to bring up task manager. If the task manager does not come up, then you might have a malware problem.
A common reason for this problem is as seen on gaming keyboards. These keyboards have two modes; a standard mode and a gaming mode. There is a switch to change between these modes. You might flip a switch, press a button, use the software, or use a combination to toggle between the modes. The gaming mode stops the Windows key from working to prevent your game from exiting when the Windows key is accidentally pressed.
There is also a possibility that your Windows key is disabled within the Windows OS registry editor itself, hence Windows is not able to accept a request by this key. A disabled start menu will also show this problem. This could have been done by some software, game, or malware.
Bad drivers, incompatible drivers, or outdated drivers can also cause your keyboard to freeze your Windows key. These symptoms can also be manifested if File Explorer/Windows Explorer, which drives your user interface, did not start correctly. There could also be a conflict between devices as seen when the game controller is plugged in.
In the worst cases, your keyboard could be mechanically or electrically damaged hence needing replacement. Here are solutions that could get you back on track.
Note: Since Windows Shortcuts will not work because of this error, we are going to use longer methods instead of windows shortcuts that require the Windows Key.
Method 1: Disable Gaming Mode on your Keyboard
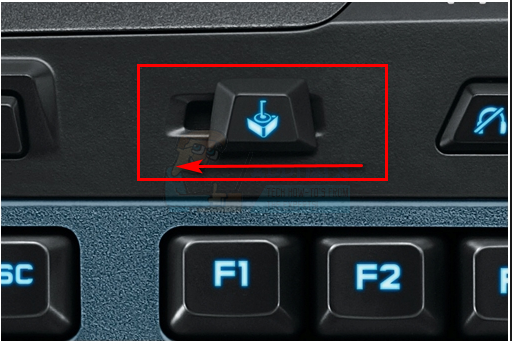
Some keyboards, usually marketed as “gaming”, have the ability to turn off Windows keys via some hardware switch or Fn key combination in order to prevent pressing this key which usually exits your game. The gaming mode key is usually marked with a joystick drawing. Here is how to disable gaming mode on some of the popular gaming keyboards.
- On Logitech keyboards, there is a switch above the F1, F2 & F3 function keys that you can flip to the right for gaming mode and to the left for regular use. Flip it to the left. Other versions have a gaming mode button above F4, press the button to toggle in between gaming and standard modes.

- In some keyboards, beside the right Ctrl button, instead of a second Windows button, there is a “Win Lock” button (not the menu button). Press it to enable the Windows key.
- Corsair keyboards have their own software to adjust lighting, functionality, etc. Run the Corsair software (which has an option to enable/disable the windows key) and enable your Windows key.
- The Azio keyboard also has such a switch in the MGK1 series. MGK1 & MGK1-K: Press FN and F9 at the same time. For MGK1-RGB: Press FN and Windows Start Key at the same time.
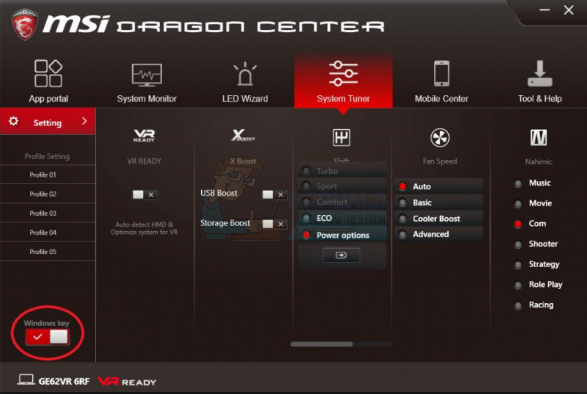
- For the MSI computer/laptop keyboards, you can switch turn on the Windows key from the Dragon Gaming Center > System Tuner.
- For the ibuypower keyboard, press fn + ibuypower (aka windows key) to toggle Windows key on and off
- For Alienware gaming keyboard, press Fn + F6 to toggle gaming mode on and off
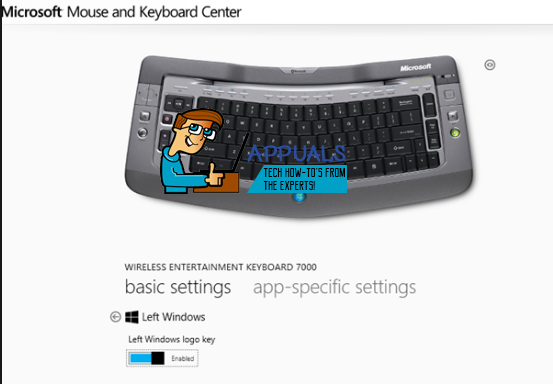
- For MS Sidewinder keyboard, go into MS Keyboard & Mouse Center and you can click the Windows key in the dashboard and set it to enabled/disabled
Method 2: Enable Windows Key using Registry Edit
The registry can allow or restrict a lot including keyboard keys and menu items. To enable your Windows key:
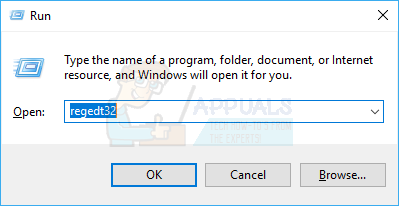
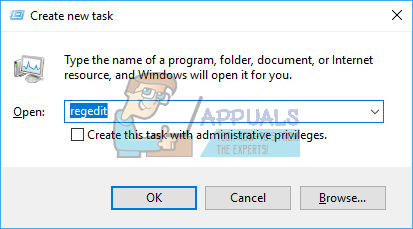
- Click Start, type ‘Run’ and click Run, or in Windows 8/10 right click on the start button and click run
- Type ‘regedt32’, and then click OK. Click Yes if you get any EULA message asking for confirmation.
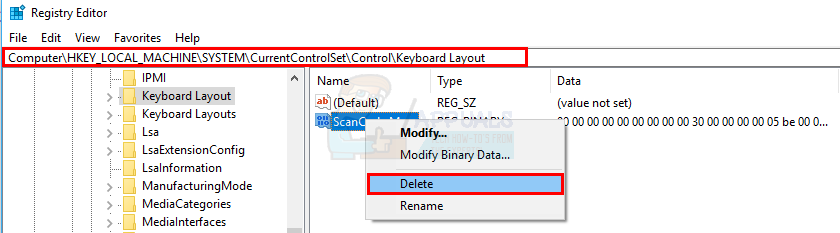
- On the Windows menu, click HKEY_LOCAL_ MACHINE on Local Machine.
- Double-click the System\CurrentControlSet\Control folder, and then click the Keyboard Layout folder.
- Right-click the Scancode Map registry entry, and then click Delete.
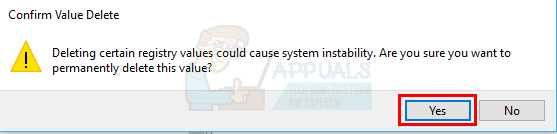
- Click Yes on the confirmation/warning message.
- Close Registry Editor and restart the computer.
If you need to disable Windows key again, go to the Microsoft page here and follow the instructions for disabling windows key. You can also use the easy fix tool from here to enable and disable the Windows Key.
Method 3: Re-Register all Apps
This will clear any software conflict with your keyboard
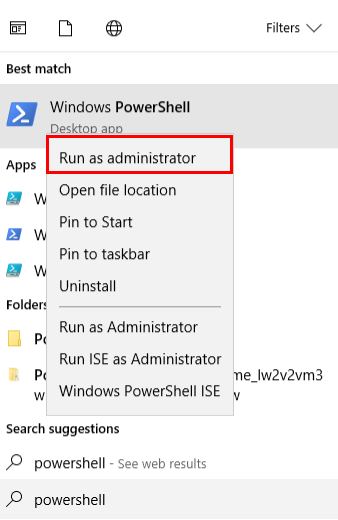
- Click on the Windows button.
- Type ‘PowerShell‘ and then right click on ‘Windows PowerShell’ and run as an administrator.
- If your start button doesn’t work when you click on it, go to this location:
and right click on “Windows PowerShell” and run as administrator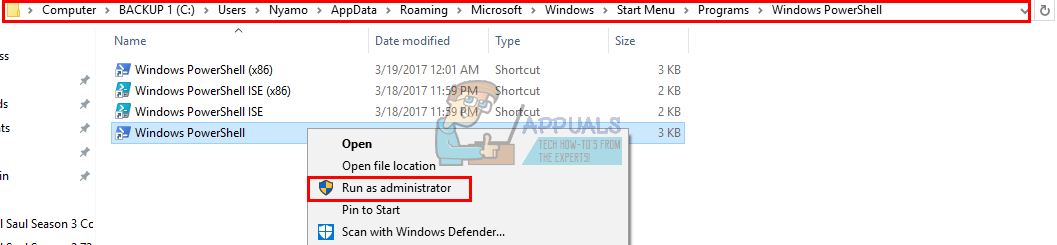
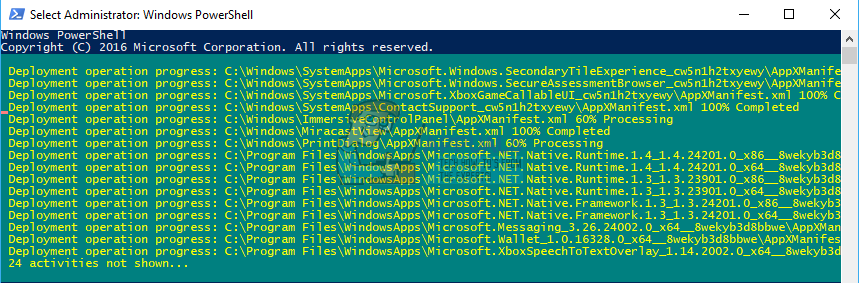
Type or copy and paste the script below into the PowerShell window and press enter

Method 4: Enable the Start Menu
In cases where your start key does not bring up the start menu, there is a possibility the start menu was disabled. To enable it, follow the steps below.
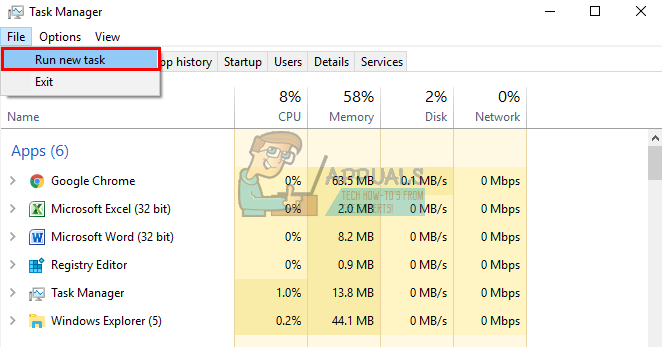
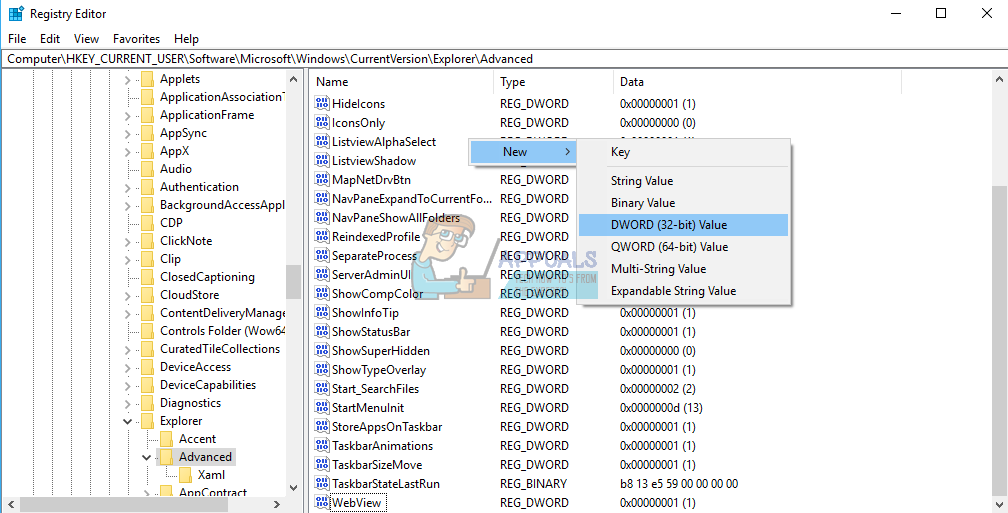
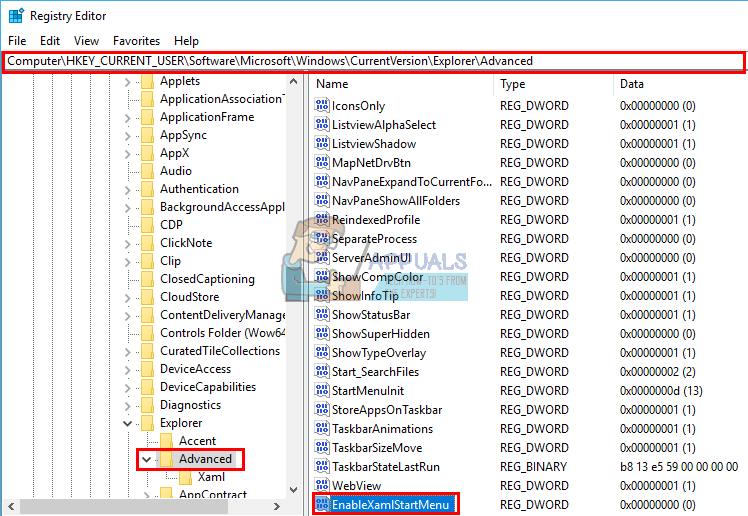
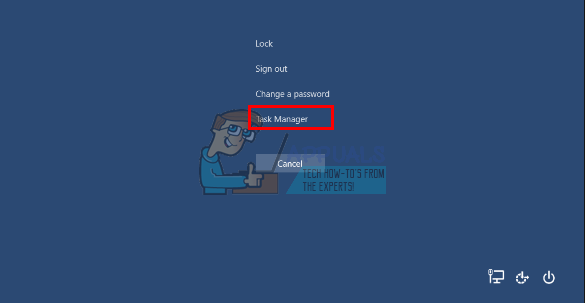
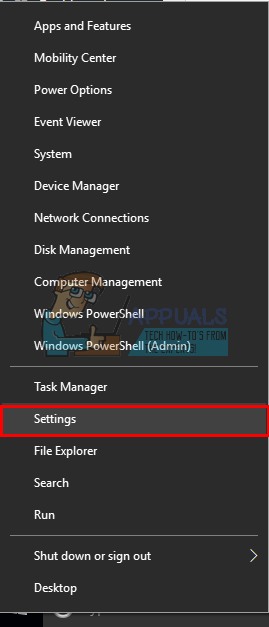
- Right click on the Start Button and select “Run” or press Ctrl + Shift + Esc and go to File > click run a new task from task manager.
- Type “regedit” (without the quotes)
- Navigate to this key
- Right click on the right hand side panel and create a new DWORD (32-bit) value
- Call the new key “EnableXamlStartMenu“
- Restart your PC or restart Explorer using task manager as explained in method 5 below.
Method 5: Restart Windows / File Explorer
Explorer controls your Windows user interface. This method will restart Windows/File Explorer and clear any errors that prevented it from starting correctly.
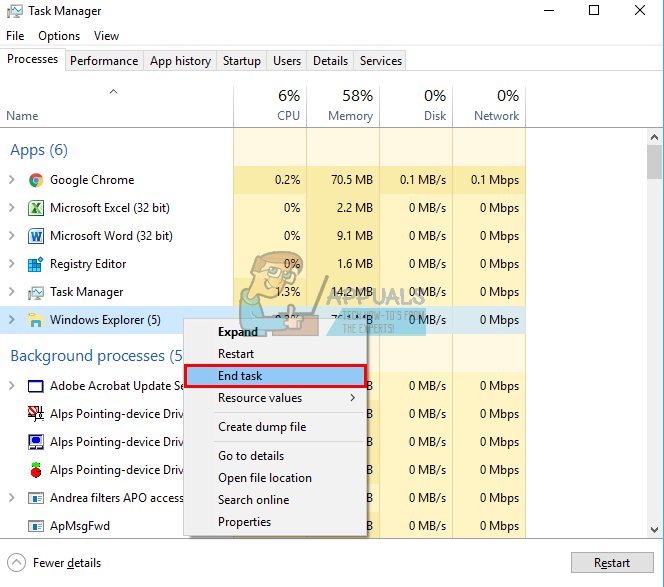
- Press Ctrl + Alt + Del on the keyboard and click on task manager.
- Click on the Process tab and locate Explorer in the windows and right click on it and select end task.
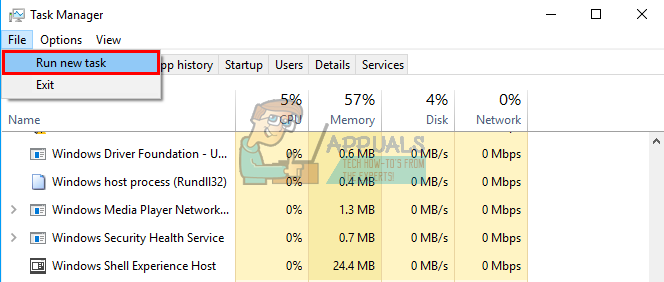
- Click on File and then click on Run New Task.
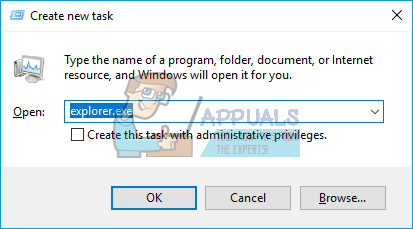
- Type ‘explorer.exe’ and press enter.
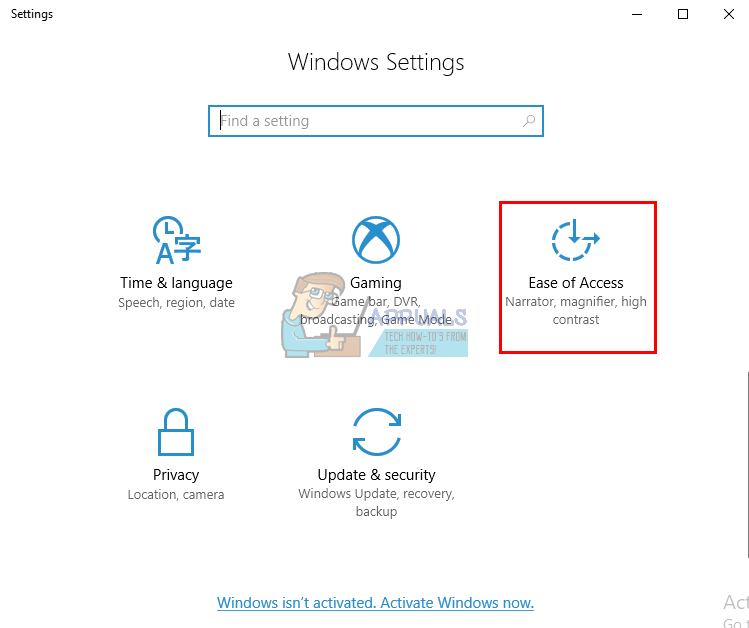
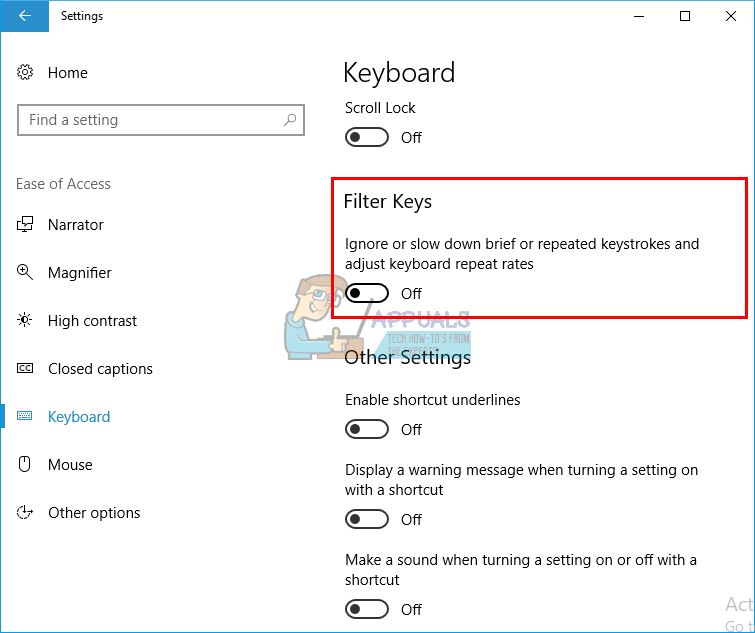
Method 6: Turn off Filter Keys
This has been seen as one of the culprits in Windows 8 and Windows 10 issues. Turning on filterkeys ignores or slows down repeated key strokes and adjusts repeat rates. Somehow, the windows key is also affected on some keyboards. To turn off filter keys:
- Drag your mouse to the right edge of your Windows 8 PC and click settings. In windows 10, right click on your start menu and select settings.
- From the Windows settings page, scroll down and click on Ease of Access
- Click on the keyboard tab on the left hand pane
- Scroll down to ‘filter keys’ and turn it off
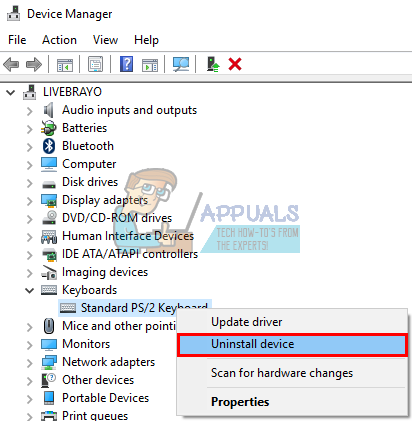
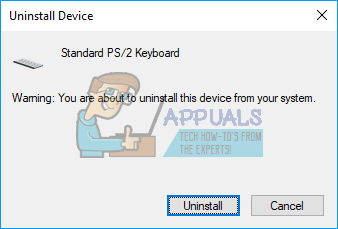
Method 7: Uninstall and reinstall your keyboard drivers
Uninstalling the bad keyboard drivers will reinstall the correct drivers for your keyboard.
- Right click on the Start Button and select “Run” or press Ctrl + Shift + Esc to open task manager and go to File > run a new task.
- Type devmgmt.msc and hit enter to open device manager
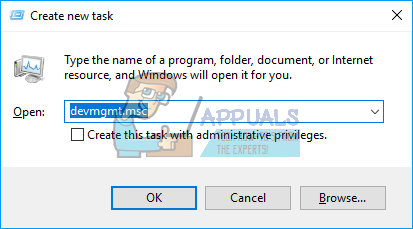
Expand the ‘Keyboards’ section
Method 8: Unplug your game controller
Your Windows key might not function some times when your game pad is plugged in and a button is pressed down on the gaming pad. This could be caused by conflicting drivers. It is rear however, but all you need to do is unplug your gamepad or make sure no button is pressed down on your gaming pad or keyboard. Updating your gamepad or keyboard drivers might permanently solve this problem.
NB: Remember that this could also be a hardware/mechanical/electric problem on your keyboard that would warrant repair or replacement.
Can’t click on start button
My problem is that I cannot click on the start button. I can click on the desktop icons and the rest of the taskbar. Once, I attempted to start my computer in safe mode but I got the error «c:\windows\system32\drivers\hpdskflt.sys is corrupt». Could this have something to do with my inability to use the start button? I have a HP Pavilion dv4 Notebook PC.
Help would be much appreciated, thanks!
Welcome to Microsoft Vista Answers Forum!
I have few steps which might help you.
Step 1
It seems to be a problem with virus. Usually, we get such error message if there are spyware or viruses on the computer.
I would suggest you to run an online virus scan .
Refer the links given below:
Step 2
Run a System File Checker [SFC] scan on the computer which will replace the missing or corrupt files.
To do this, follow the steps given below:
1. Click the Start button
2. From the Start Menu, Click All programs followed by Accessories
3. In the Accessories menu, Right Click on the Command Prompt option
4. From the drop down menu that appears, Click on the ‘Run as administrator’ option
5. If you have the User Account Control (UAC) enabled, you will be asked for authorization prior to the command prompt opening. You may simply need to press the Continue button if you are the administrator or insert the administrator password etc.
6. In the Command Prompt window, type: sfc /scannow and then press Enter
7. A message will appear stating that ‘The system scan will begin’
8. Be patient because the scan may take some time
9. If any files require replacing SFC will replace them. You may be asked to insert your Vista DVD for this process to continue
10. If everything is okay you should, after the scan, see the following message «Windows resource protection did not find any integrity violations»
11. After the scan has completed, close the command prompt window, restart the computer and check.
For further reference check the link given below:
How to repair the operating system and how to restore the operating system configuration to an earlier point in time in Windows Vista
Step 3
If it doesn’t help, perform clean boot and check if it works fine. In clean boot, you can start Windows Vista by using a minimal set of drivers and startup programs. This kind of startup is known as a «clean boot.» A clean boot helps eliminate software conflicts.
The following link has steps showing how to perform clean boot: http://support.microsoft.com/kb/929135
1) Perform clean boot (Check the link for Performing clean boot)
2) Enable half of the services
3) Determine whether the problem returns
4) Enable half of the startup items
5) Determine whether the problem returns
6) Repeat the above steps until you find out which service or program is causing the issue
After you determine the startup item or the service that causes the problem, contact the program manufacturer to determine whether the problem can be resolved. Or, run the System Configuration Utility, and then click to clear the check box for the problem item.
Note: Please ensure that the computer is set to start as usual by following the step 7 from the article http://support.microsoft.com/kb/929135 .
Hope the information helps. Please post back and let us know.
Debleena S
Microsoft Answers Support Engineer
Visit our Microsoft Answers Feedback Forum and let us know what you think


