- Configure IDE settings
- Restore IDE settings
- Back up your settings and restore the defaults
- Clion reset evaluation linux
- Активация на бесконечный период
- Нерабочие способы
- shahadul878 / Mac.sh
- This comment has been minimized.
- shakibdshy commented Mar 10, 2021
- This comment has been minimized.
- KirinyetBrian commented Mar 11, 2021
- This comment has been minimized.
- Anil86 commented Mar 17, 2021
- This comment has been minimized.
- Xaxage commented Apr 12, 2021
- This comment has been minimized.
- shahadul878 commented Apr 14, 2021
- This comment has been minimized.
- abuabrar commented May 7, 2021
- This comment has been minimized.
- shahadul878 commented May 7, 2021
- This comment has been minimized.
- Acron85 commented May 11, 2021
- This comment has been minimized.
- lisovskyi commented May 13, 2021
- This comment has been minimized.
- NightSling commented May 13, 2021
- This comment has been minimized.
- This comment has been minimized.
- RSiniavski commented May 18, 2021
- This comment has been minimized.
- shahadul878 commented May 20, 2021
- This comment has been minimized.
- projectwork1947 commented May 24, 2021
- This comment has been minimized.
- marcosdipaolo commented May 27, 2021
- This comment has been minimized.
- marcosdipaolo commented May 27, 2021
- This comment has been minimized.
- bagheriali2001 commented May 31, 2021 •
- This comment has been minimized.
- ezehkingsleyuchenna commented Jun 3, 2021 •
- This comment has been minimized.
- k1paris commented Jun 4, 2021
- This comment has been minimized.
- marcosdipaolo commented Jun 10, 2021
- This comment has been minimized.
- josuedjh3 commented Jun 13, 2021
- This comment has been minimized.
- andreonis commented Jun 14, 2021 •
- This comment has been minimized.
- shahadul878 commented Jun 14, 2021
- This comment has been minimized.
- shahadul878 commented Jun 14, 2021
- This comment has been minimized.
- shahadul878 commented Jun 14, 2021
- This comment has been minimized.
- shahadul878 commented Jun 14, 2021
- This comment has been minimized.
- congueror commented Jun 25, 2021 •
- This comment has been minimized.
- SuperCatss commented Jun 29, 2021
- This comment has been minimized.
- areoid commented Jul 28, 2021
- This comment has been minimized.
- Kevmatrix commented Jul 29, 2021 •
Configure IDE settings
In CLion, you can configure the settings on two levels: the project level and globally.

Global settings apply to all projects of a specific installation, or version, of CLion. Such settings include IDE appearance (themes, color schemes, menus and toolbars), notification settings, the set of the installed and enabled plugins, debugger settings, code completion, and so on.
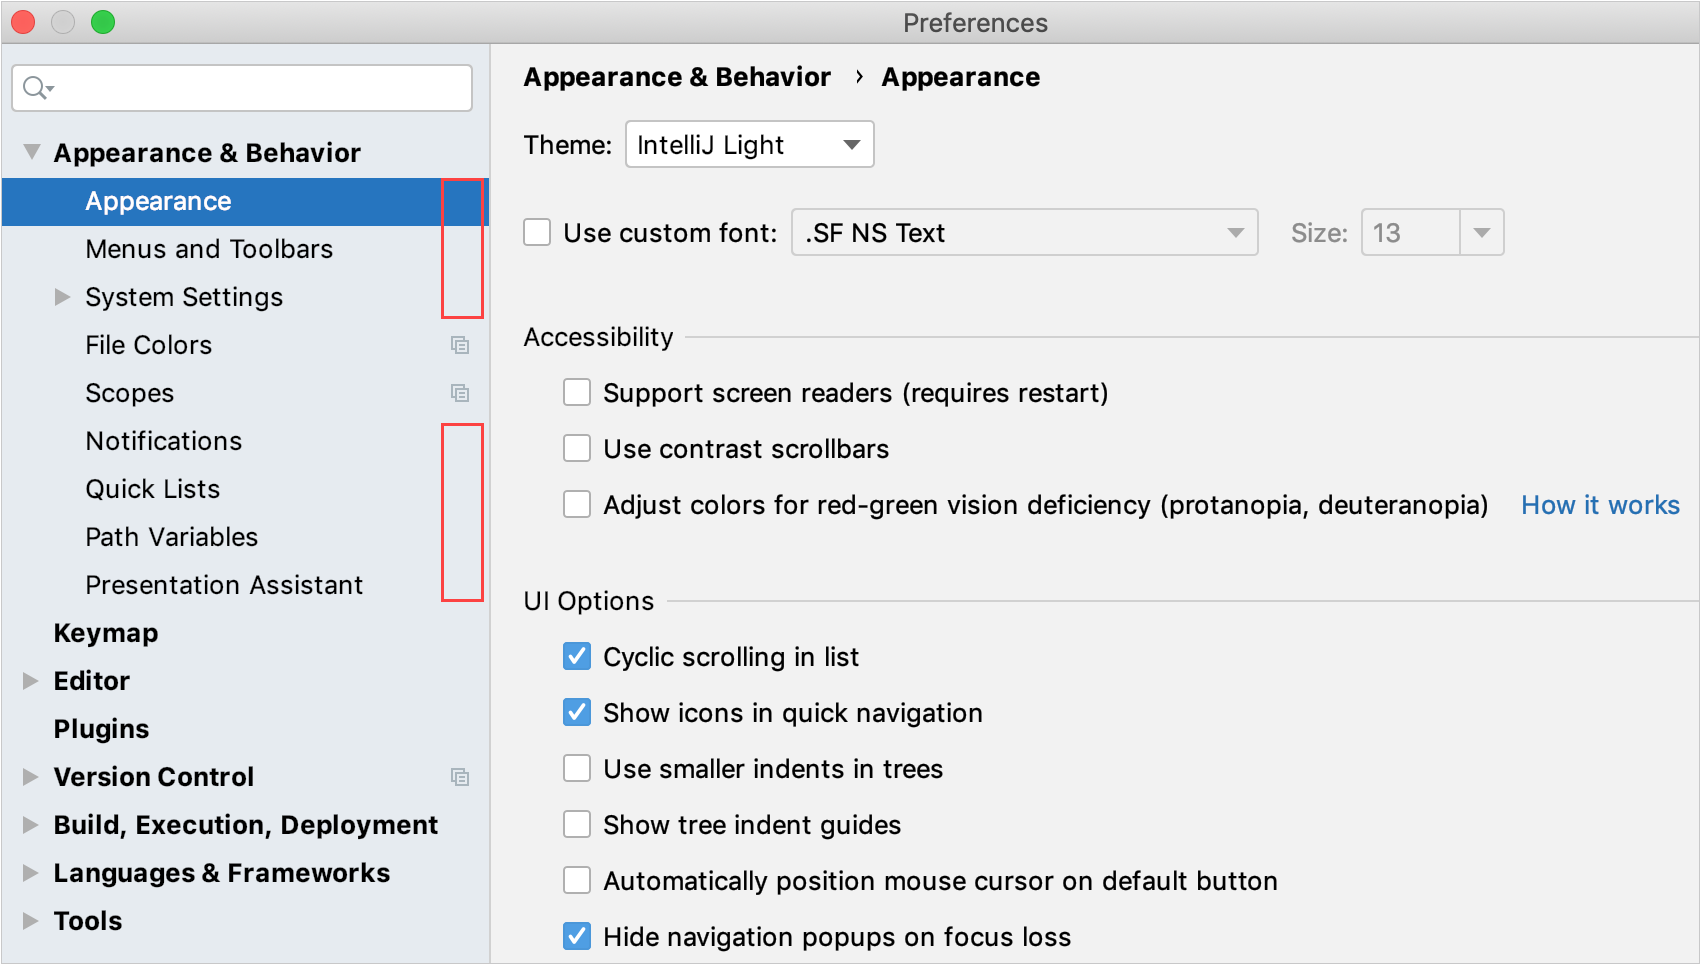
To configure your IDE, select CLion | Preferences for macOS or File | Settings for Windows and Linux. Alternatively, press Ctrl+Alt+S or click on the toolbar.
Settings that are NOT marked with the icon in the Settings/Preferences dialog are global and apply to all existing projects of the current CLion version.
Restore IDE settings
When you restore the default IDE settings, CLion backs up your configuration to a directory. You can always restore your settings from this backup.
Back up your settings and restore the defaults
From the main menu, select File | Manage IDE Settings | Restore Default Settings .
Alternatively, press Shift twice and type Restore default settings .
CLion shows a confirmation popup:

Click Restore and Restart . The IDE will be restarted with the default configuration.
When CLion restores the default IDE settings, it creates a backup directory with your configuration in:
-backup Example C:\Users\JohnS\AppData\Roaming\JetBrains\CLion2021.2-backup
Источник
Clion reset evaluation linux
1. Скачать архив по ссылке >
2. Распаковать архив
3. Закрыть все JetBrains программы
4. Откройте терминал
5. Напишите » chmod +x » без кавычек и перетащите в окно терминала файл reset_jetbrains_eval_mac_linux.sh и нажмите Enter
6. В окно терминала введите перетащите файл reset_jetbrains_eval_mac_linux.sh и нажмите Enter (он сбросит триальный период у ВСЕХ JetBrains IDE в вашей ОС)
7. По окончанию работы скрипта запустить нужную вам JetBrains IDE
8. Появится стартовое окно для активации, в нем выберите триальную версию на 30 дней
9. После сброса пробного периода с помощью скрипта нужно заблокировать доступ в интернет для программы, иначе через время пробный период сбросится на 0 дней.
Для блокировки IDE доступ в интернет, достаточно в файл hosts добавить эти строки:
0.0.0.0 www.jetbrains.com
0.0.0.0 account.jetbrains.com
0.0.0.0 account.jetbrains.com:443
0.0.0.0 plugins.jetbrains.com
0.0.0.0 entry.prod-eu.w3jbcom.aws.intellij.net
0.0.0.0 jrebel.npegeek.com
0.0.0.0 bs.studycoder.com
Также вы можете воспользоваться альтернативным скриптом для сброса пробного периода с github >
P.S. Эти скрипты вы можете найти внутри архивов с плагином jetbrains-agent, но эти плагины больше не работают в новых версиях JetBrains IDEs
1. Откройте JetBrains IDE, в которой нужно сбросить триальный период
2. Установите плагин одним из способов
2.2.1 Скачать образ по ссылке > и смонтировать его
2.2.2 Распаковать архив «ide-eval-resetter-2.2.4-4959c6.zip» и достать из него .jar файл
2.2.3 Перейти в Preferences -> Plugins нужной вам JetBrains IDE
2.2.4 Нажать на иконку шестеренки и в выпадающем списке нажать на «Install Plugin from Disk. »
2.2.5 Выбрать файл ide-eval-resetter-2.2.4.jar
2.2.6 Перезапустить IDE
2.3.1 Скачать образ по ссылке > и смонтировать его
2.3.2 Архив «ide-eval-resetter-2.2.4-4959c6.zip» перетянуть в любое открытое окно IDE
2.3.3 Перезапустить IDE
3. Открыть существующий или создать новый проект
4. Перейти в меню Help и нажать на пункт «Eval Reset»
5. В появившейся снизу панели нажать кнопку «Reset»
6. После перезапуска IDE активировать Trial период на 30 дней
Активация на бесконечный период
1. Скачать архив по ссылке >
2. Распаковать архив
3. Сделать .jar файл javaagent’ом для выбранной IDE
3.4.1 Открыть любой проект в вашей IDE или создать новый
3.4.2 Открыть Help -> Custom VM Options.
// Или перейдите в папку с вашей IDE, например в /Users/your_user/Library/Application Support/JetBrains/AppCode2020.3 и откройте там файл appcode.vmoptions. Если его нет, то лучше создайте с помощью Help -> Custom VM Options.
3.4.3 Если в тексте есть строчки, начинающиеся с «-javaagent», то нужно или удалить их или закомментировать, добавив знак решетки «#» в самом начале строки
3.4.4 В конце файла на новой строке вставить текст » -javaagent:
» указать полный или относительный путь к файлу JetbrainsIdesCrack_5_3_1_KeepMyLic.jar.
// Путь к файлу можно легко скопировать, нажав на нем ПКМ и зажав клавишу Alt и в выпадающем меню вместо слова «Скопировать файл» появится «Скопировать путь до . «. Нажмите на этот пункт и путь скопируется в буфер обмена.
3.4.5 Сохранить .vmoptions файл
3.4.6 Перезапустить IDE
4. Откройте папку KeepLicense_keys из распакованного архива
5. Переместить соответствующий файл-ключ с расширением .key в папку с соответствующей IDE. Она находится в /Users/your_user/Library/Application Support/JetBrains/
6. Перезапустить IDE
7. Откройте окно About и увидите, что в нем нет информации о дате окончания лицензии, значит все сработало правильно
P.S.
Будьте осторожны, при такой активации, если откроете окно Help -> Register, то кнопка Close в нем будет отключена и вы сможете нажать только на кнопку Exit, что приведет к закрытию IDE. Лицензия не слетит, но вы потеряете несохраненные изменения.
1. Скачать архив по ссылке >
2. Распаковать архив
3. Сделать .jar файл javaagent’ом для выбранной IDE
3.4.1 Открыть любой проект в вашей IDE или создать новый
3.4.2 Открыть Help -> Custom VM Options.
// Или перейдите в папку с вашей IDE, например в /Users/your_user/Library/Application Support/JetBrains/AppCode2020.3 и откройте там файл appcode.vmoptions. Если его нет, то лучше создайте с помощью Help -> Custom VM Options.
3.4.3 Если в тексте есть строчки, начинающиеся с «-javaagent», то нужно или удалить их или закомментировать, добавив знак решетки «#» в самом начале строки
3.4.4 В конце файла на новой строке вставить текст » -javaagent:
» указать полный или относительный путь к файлу JetbrainsIdesCrack_5_3_1_KeepMyLic.jar.
// Путь к файлу можно легко скопировать, нажав на нем ПКМ и зажав клавишу Alt и в выпадающем меню вместо слова «Скопировать файл» появится «Скопировать путь до . «. Нажмите на этот пункт и путь скопируется в буфер обмена.
3.4.5 Сохранить .vmoptions файл
3.4.6 Перезапустить IDE
4. Откройте папку Codes из распакованного архива
5. Открыть пункт Help -> Register. В открывшемся окне открыть подпункт Activation Code, вставить любой из валидных кодов и нажать кнопку Activate
6. Перезапустить IDE
7. Откройте окно About и увидите, что в нем дата окончания действия лицензии уже истекла, тем не менее IDE запускается, не говорит что срок действия лицензии истек и не закрывается сама как при нерабочей лицензии
P.S.
Будьте осторожны, при такой активации, если откроете окно Help -> Register, то кнопка Close в нем будет отключена и вы сможете нажать только на кнопку Exit, что приведет к закрытию IDE. Лицензия не слетит, но вы потеряете несохраненные изменения.
. ДАННЫЙ СПОСОБ НЕ РЕКОМЕНДУЕТСЯ .
Все чаще встречаются сообщения, что этот плагин является вирусом keylogger, который как минимум может передавать данные, которые вы печатаете.
Даже если это не так, у некоторых пользователей этот плагин использует подозрительно много ОЗУ для своей работы.
1. Откройте JetBrains IDE, которую нужно активировать
2. Установите плагин одним из способов
2.1.1 Перейти в Preferences -> Plugins
2.1.2 Нажать на шестеренку и в выпадающем списке нажать на «Manage Plugin Repositories. »
2.1.3 Добавить в список адрес https://repo.idechajian.com и нажать ОК
2.1.4 Во вкладке Marketplace в поиске ввести «BetterIntelliJ» без кавычек и установить соответствующий плагин
// Плагин установится в /Users/your_user/.BetterIntelliJ и скорее всего пропишет -javaagent в VM Options на себя
2.1.5 Перезапустить IDE
2.3.1 Скачать образ по ссылке > и смонтировать его
2.3.2 Перейти в Preferences -> Plugins нужной вам JetBrains IDE
2.3.3 Нажать на иконку шестеренки и в выпадающем списке нажать на «Install Plugin from Disk. »
2.3.4 Выбрать файл BetterIntelliJ с расширением .jar и нужной версии
// Плагин установится в /Users/your_user/.BetterIntelliJ и скорее всего пропишет -javaagent в VM Options на себя
2.3.5 Если выбрали плагин версии 1.20 — BetterIntelliJ-1.20.jar, то нужно вашей IDE заблокировать доступ в интернет. Это можно сделать например добавив в файл hosts эти строки
0.0.0.0 www.jetbrains.com
0.0.0.0 account.jetbrains.com
0.0.0.0 account.jetbrains.com:443
0.0.0.0 plugins.jetbrains.com
0.0.0.0 entry.prod-eu.w3jbcom.aws.intellij.net
0.0.0.0 jrebel.npegeek.com
0.0.0.0 bs.studycoder.com
2.3.5 Перезапустить IDE
3. Открыть пункт Help -> Register. В открывшемся окне открыть подпункт Activation Code, вставить код из файла code.txt и нажать кнопку Activate
4. Открыть окно About и убедиться, что активирована лицензия до 2100 года.
Нерабочие способы
Если вы будете самостоятельно искать и тестировать другие способы активации в интернете, то мы это уже сделали и некоторые из этих способов на данный момент не работают. Эти способы представлены здесь, чтобы если вы натыкались на них на других сайтах, то не думали, что они являются чем-то кардинально новым и не тратили время на эти способы.
Я протестировал способ активации с этим плагином версии 3.2.2 на всех ключевых версиях WebStorm начиная с версии 2018.3.6 и ни на одной из версий он не заработал. Возможно когда-то этот способ и был действующим, но на сентябрь 2021 года мне не удалось активировать с его помощью ни одну Jetbrains IDE.
Если вы все же хотите попытать удачу, jetbrains agent v3.2.2 можно скачать по ссылке >
Источник
shahadul878 / Mac.sh
/.config/JetBrains/* rm -rf
/.local/share/JetBrains/consentOptions rm -rf
/.java/.userPrefs
| @ echo off |
| REM Delete eval folder with licence key and options.xml which contains a reference to it |
| for %%I in ( » WebStorm » , » IntelliJ » , » CLion » , » Rider » , » GoLand » , » PhpStorm » , » Resharper » , » PyCharm » ) do ( |
| for /d %%a in ( » %APPDATA% \JetBrains\ %%I * » ) do ( |
| rd /s /q » %%a /eval « |
| del /q » %%a \options\other.xml « |
| ) |
| ) |
| reg delete » HKEY_CURRENT_USER\SOFTWARE\JavaSoft\Prefs\jetbrains » /f |
| #! /bin/bash |
| echo » removing evaluation key « |
| rm |
/.IntelliJIdea15/config/eval/idea15.evaluation.key # for mac go to: /Users/username/Library/Preferences/IntelliJIdea2016.3/eval/idea163.evaluation.key echo » resetting evalsprt in options.xml « sed -i ‘ /evlsprt/d ‘
/.IntelliJIdea15/config/options/options.xml # for mac go to: /Users/lzhoucs/Library/Preferences/IntelliJIdea2016.3/options/options.xml echo » resetting evalsprt in prefs.xml « sed -i ‘ /evlsprt/d ‘
/.java/.userPrefs/prefs.xml # for windows, delete HKEY_CURRENT_USER\Software\JavaSoft\Prefs\jetbrains\idea # for mac defaults delete com.apple.java.util.prefs 2> /dev/null for f in
/Library/Preferences/jetbrains. * .plist ; do if [[ -f $f ]] ; then fn= $
| Then reg delete «HKEY_CURRENT_USER\Software\JavaSoft\Prefs\jetbrains\idea» /f |
| 1- Open Registry Editor |
| 2- HKEY_CURRENT_USER\SOFTWARE\JavaSoft\Prefs\jetbrains |
| 3- Delete the PHPStorm that is there. |
This comment has been minimized.
Copy link Quote reply
shakibdshy commented Mar 10, 2021
Thanks for sharing
This comment has been minimized.
Copy link Quote reply
KirinyetBrian commented Mar 11, 2021
thanks for this
This comment has been minimized.
Copy link Quote reply
Anil86 commented Mar 17, 2021
Thank you. Now I’m able to use PyCharm & DataGrip after resetting evaluation.
This comment has been minimized.
Copy link Quote reply
Xaxage commented Apr 12, 2021
What do i have to do with this code ?
This comment has been minimized.
Copy link Quote reply
shahadul878 commented Apr 14, 2021
What do i have to do with this code ?
Open notepad => copy this code on notepad and save file as reset.bat
This comment has been minimized.
Copy link Quote reply
abuabrar commented May 7, 2021
Hello
Where do I save the file?
This comment has been minimized.
Copy link Quote reply
shahadul878 commented May 7, 2021
Save It on desktop
This comment has been minimized.
Copy link Quote reply
Acron85 commented May 11, 2021
It works. Thanks!
This comment has been minimized.
Copy link Quote reply
lisovskyi commented May 13, 2021
This comment has been minimized.
Copy link Quote reply
NightSling commented May 13, 2021
This comment has been minimized.
Copy link Quote reply
This comment has been minimized.
Copy link Quote reply
RSiniavski commented May 18, 2021
successfully reseted but after about 5 mins of using IDE i got message about expired eval. period, but in help menu eval period untill 17 june
This comment has been minimized.
Copy link Quote reply
shahadul878 commented May 20, 2021
successfully reseted but after about 5 mins of using IDE i got message about expired eval. period, but in help menu eval period untill 17 june
Sent Me Screenshot
This comment has been minimized.
Copy link Quote reply
projectwork1947 commented May 24, 2021
Works like charm, thank you
This comment has been minimized.
Copy link Quote reply
marcosdipaolo commented May 27, 2021
So for Ubuntu I only have to run?:
In that case, is there a way i don’t loose my theme, font and keymap settings?
This comment has been minimized.
Copy link Quote reply
marcosdipaolo commented May 27, 2021
Edit:
For ubuntu run:
This comment has been minimized.
Copy link Quote reply
bagheriali2001 commented May 31, 2021 •
successfully reseted but after about 5 mins of using IDE i got message about expired eval. period, but in help menu eval period untill 17 june
it happened to me too did you find any solution? @shahadul878
This comment has been minimized.
Copy link Quote reply
ezehkingsleyuchenna commented Jun 3, 2021 •
I’m using EAP Edition.
1- Open Registry Editor
2- HKEY_CURRENT_USER\SOFTWARE\JavaSoft\Prefs\jetbrains
3- Delete the PHPStorm that is there.
Worked for me.
This comment has been minimized.
Copy link Quote reply
k1paris commented Jun 4, 2021
This comment has been minimized.
Copy link Quote reply
marcosdipaolo commented Jun 10, 2021
Does this work for 2021.1.2? just asking before downloading
This comment has been minimized.
Copy link Quote reply
josuedjh3 commented Jun 13, 2021
I’m using EAP Edition.
1- Open Registry Editor
2- HKEY_CURRENT_USER\SOFTWARE\JavaSoft\Prefs\jetbrains
3- Delete the PHPStorm that is there.
Worked for me.
This comment has been minimized.
Copy link Quote reply
andreonis commented Jun 14, 2021 •
successfully reseted but after about 5 mins of using IDE i got message about expired eval. period, but in help menu eval period untill 17 june
it happened to me too did you find any solution? @shahadul878
@bagheriali2001 Have you found the solution?
This comment has been minimized.
Copy link Quote reply
shahadul878 commented Jun 14, 2021
Does this work for 2021.1.2? just asking before downloading
Yes It’s working
This comment has been minimized.
Copy link Quote reply
shahadul878 commented Jun 14, 2021
successfully reseted but after about 5 mins of using IDE i got message about expired eval. period, but in help menu eval period untill 17 june
it happened to me too did you find any solution? @shahadul878
1- Open Registry Editor
2- HKEY_CURRENT_USER\SOFTWARE\JavaSoft\Prefs\jetbrains
3- Delete the PHPStorm that is there.
This comment has been minimized.
Copy link Quote reply
shahadul878 commented Jun 14, 2021
successfully reseted but after about 5 mins of using IDE i got message about expired eval. period, but in help menu eval period untill 17 june
1- Open Registry Editor
2- HKEY_CURRENT_USER\SOFTWARE\JavaSoft\Prefs\jetbrains
3- Delete the PHPStorm that is there.
This comment has been minimized.
Copy link Quote reply
congueror commented Jun 25, 2021 •
Using Intellij 2021.1 and running this didn’t work(I get the message about expired eval), the file can neither find a other.xml file nor a phpstorm in the registry. Here’s the console output: D:\MyDocuments\Desktop>renew.bat The system cannot find the file specified. Could Not Find C:\Users\User\AppData\Roaming\JetBrains\IntelliJIdea2021.1\options\other.xml ERROR: The system was unable to find the specified registry key or value. , I did go to the registry editor myself and there is no phpstorm. I used this before and it worked but now it doesn’t seem to work.
note: on windows 10
This comment has been minimized.
Copy link Quote reply
SuperCatss commented Jun 29, 2021
It does not work normally for Resharper 2021.1.3 On windows 10.
This comment has been minimized.
Copy link Quote reply
areoid commented Jul 28, 2021
This comment has been minimized.
Copy link Quote reply
Kevmatrix commented Jul 29, 2021 •
Using Intellij 2021.1 and running this didn’t work(I get the message about expired eval), the file can neither find a other.xml file nor a phpstorm in the registry. Here’s the console output: D:\MyDocuments\Desktop>renew.bat The system cannot find the file specified. Could Not Find C:\Users\User\AppData\Roaming\JetBrains\IntelliJIdea2021.1\options\other.xml ERROR: The system was unable to find the specified registry key or value. , I did go to the registry editor myself and there is no phpstorm. I used this before and it worked but now it doesn’t seem to work.
note: on windows 10
Same here. It worked fine but now it doesn’t.
EDIT: I tried uninstalling WebStorm (select DELETE SETTINGS AND CACHE in the uninstaller), I deleted the Prefs folder in regedit, I deleted JetBrains’ folder in AppData/Roaming (basically I deleted every trace of JetBrains software both in the registry and in my files), and then I redownloaded the WebStorm 2021.2 installer and installed it again.
I lost all my settings but it seems to be working.
Источник


