- microsoft clip gallery где находится
- 5 best software to create Clip Art on Windows 10
- What are the best Clip Art tools to create great digital images?
- Adobe Illustrator
- Edraw
- SmartsysSoft Label Maker
- Greeting Card Builder
- PhoXo
- Add clip art to your file
- Insert clip art
- Clip art and copyright
- Free image library: the Pickit add-in
- New kinds of clip art for Microsoft 365
- Voice clips instead of clip art
- Feedback
- Insert clip art
- Clip art and copyright
- Free image library: the Pickit add-in
- New kinds of clip art for Microsoft 365
- Voice clips instead of clip art
- Feedback
microsoft clip gallery где находится
Для вставки в документы иллюстраций можно использовать готовые библиотеки (коллекции) рисунков. Доступ к коллекции клипов Microsoft осуществляется приложением Microsoft Clipart (Clip Gallery), входящим в состав Microsoft Office и поддерживающим не только рисунки, но и звуки, и видео.
Чтобы вставить картинку необходимо выбрать место для ее вставки, затем использовать команду Вставка/Рисунок/Картинки.
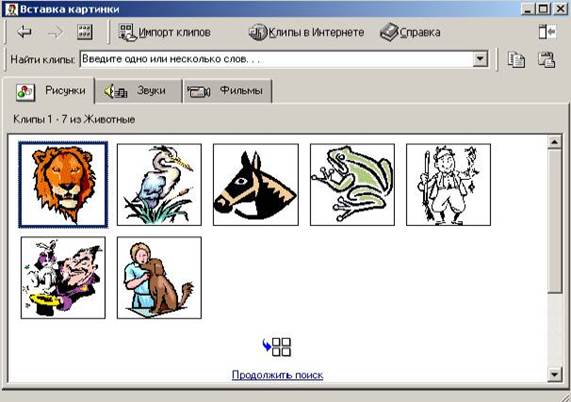
Диалоговое окно Microsoft Clip Gallery 3.0для вставки графических клипов
Графические объекты находятся на вкладке Рисунки. Они классифицированы по категориям. Разыскав нужную картинку, достаточно выделить ее и вставить в документ щелчком на кнопке вставить клип.
Картинки следует рассматривать как заготовки для создания средств оформления. Картинки – это композиционные объекты. Их можно «разбирать» на составляющие, редактировать их элементы по отдельности, создавать композиции из объектов, взятых из разных клипов. Можно изменять размеры вставленного рисунка, перемещать рисунок на другое место, убирать ненужные части, изменять взаимное расположение рисунка и текста.
Всё это выполняется путём редактирования картинок, вставленных в документ.
Обычный порядок редактирования клипартов следующий:
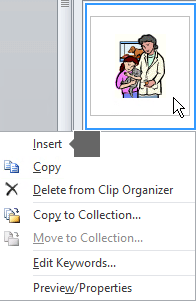
1. Картинку выделяют щелчком левой кнопки мыши;
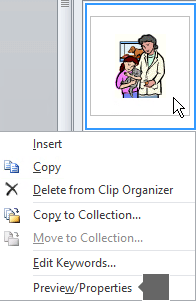
2. Открывают ее контекстное меню щелчком правой кнопки мыши;
3. В контекстном меню выбирают команду Изменить рисунок – он открывается в отдельном окне редактирования;
4. В этом окне работают с отдельными объектами, составляющими рисунок.
Задание 2.
1.Выполните команду Вставка/Рисунок/Картинки… В открывшемся окне Вставка картинки выберите пункт Коллекция картинок…
2. Вставьте в свой документ следующую картинку из раздела Коллекции Microsoft Office/Природа:

3. Откройте контекстное меню добавленного рисунка и выберите команду Изменить рисунок. Теперь рисунок можно редактировать.
4. Увеличьте рабочую область рисунка с помощью маркеров управления размерами рисунка.
5. Выделите фон рисунка. Вокруг нее появится 8 белых маркеров, предназначенных для изменения размеров объекта, и зеленый – для свободного вращения. Увеличить фоновое полотно до размеров рабочей области.
6. В контекстном меню выделенного объекта выберите команду Формат автофигуры. Откроется окно для изменения его свойств. На странице Цвета и линии измените свойства заливки и линии границы.
7. Выделите листок дуба. Он состоит из отдельных частей, которые необходимо выделить вместе и сгруппировать. Изменить цвет листка.
8. Выделите второй листок и сгруппируйте. Изменить его цвет.
9. Скопируйте этот листок, вставьте и перенести на новое место. С помощью маркера Свободного вращения поверните его на нужный угол. Измените цвет.

Не нашли то, что искали? Воспользуйтесь поиском:
Лучшие изречения: Увлечёшься девушкой-вырастут хвосты, займёшься учебой-вырастут рога 9826 —  | 7691 —
  или читать все.
78.85.5.224 © studopedia.ru Не является автором материалов, которые размещены. Но предоставляет возможность бесплатного использования. Есть нарушение авторского права? Напишите нам | Обратная связь.
Отключите adBlock!
и обновите страницу (F5)
очень нужно
Трушина Светлана Юрьевна
Учитель музыки высшей квалификационной категории
Муниципальное бюджетное общеобразовательное учреждение
«Средняя общеобразовательная казачья школа»
с.Знаменка, Нерчинский район, Забайкальский край
Тема: » Вставка рисунков из коллекции клипов Microsoft Office»
Цель:
Обучение последовательному действию вставки рисунков из коллекции клипов в документе Word
Задачи:
1.Научить вставлять рисунки из коллекции клипов в документе Word в программе Microsoft Office
2.Расширить знания коллег о возможностях программы Microsoft Office Word .
3.Передать коллегам личный опыт по предложенной теме.
Клипами в Microsoft Office называют мультимедийные файлы: рисунок, звук, анимация или фильм.
В комплект программы Word входит коллекция рисунков в области «Поиск клипа», где содержится большое количество профессионально выполненных рисунков, предназначенных для оформления документов: изображения людей, географические карты, карикатуры и многое другое.
Документ Microsoft Word может содержать различные графические объекты: рисунки из графических файлов и рисунки из коллекции клипов Microsoft Office, организационные и обычные диаграммы.
Пункт «Клипы» — позволяет вставлять рисунки, медиа — файлы, настраивать их анимацию и прочее. Кроме того, этот пункт поможет вам сделать довольно интересные вещи с обычным рисунком уже после вставки его в Word.
Шаг 1
Открываем документ. В верхней панели инструментов во вкладке «Вставка» выбираем пункт «Клипы».
.png)
Шаг 2
Нажимаем «Клипы», появляется меню, выбираем- «Коллекция Microsoft»
.png)
Шаг 3
Для выбора клипов прокручиваем окно поиска.
В создании этой статьи участвовала наша опытная команда редакторов и исследователей, которые проверили ее на точность и полноту.
Команда контент-менеджеров wikiHow тщательно следит за работой редакторов, чтобы гарантировать соответствие каждой статьи нашим высоким стандартам качества.
Из данной статьи вы узнаете, как вставить клипарт в Microsoft Word на компьютерах под управлением Windows и Mac OS X. В новых версиях MS Office клипарты были заменены изображениями Bing, но в Microsoft Word все равно можно найти и вставить клипарты.
5 best software to create Clip Art on Windows 10

- If you want to create nice greeting cards or clever presentation, you need the best Clip Art software.
- Check out the guide below for clip art/image gallery software examples and more information.
- A tool from Adobe is on the top of our list as the best clipart software for Windows 10 .
- There are plenty of other apps to make your own clipart, even free ones.

While the clip art function from MS Word got replaced by Bing images, there are many other options to insert clip art.
There are some of the best software to create Clip Art online, that help users to choose from their favorite images.
From making greeting cards to visually informative presentations, Clip Arts are the best way to perk up any illustration.
These images do not belong to stock photos and are copyrighted to avoid getting stolen. Clip arts are solely designed for sale or distribution.
So, those looking to access the exclusive clip art images should invest in the best software to create clip art.
These software solutions are available in both paid and free versions and keep users off from any legal issues. Best of all, these programs offer a host of royalty-free images from every genre.
Here we have listed some of the best clip art software that can save both time and money.
What are the best Clip Art tools to create great digital images?
Adobe Illustrator
The industry-standard vector graphics software is the natural choice for creating beautifully sophisticated clip art.
This solution is packed with everything from vector-based graphics that allow you to scale your artwork to the perfect size and obtain crisp, sleek looking print-ready outputs every time.
The results are complex drawing tools, gorgeous typography with stunning effects, loads of different styles, and a rich color palette plus an unlimited fonts library.
Unleash your creativity and get your clip art over the top with the Illustrator. As a bonus, you can work seamlessly with other Creative Cloud apps like Photoshop, InDesign, XD, and Premiere Pro.
Let’s quickly go through its key features:
- Improved launch time and faster file opening for peak performance
- Improved effects (faster rendering of Drop Shadows, Gaussian Blurs, and Feather Effects in preview mode)
- Simplified vector paths (simply remove redundant points to accelerate your workflow)
- Freeform Gradients that allow you to create rich color blends
- Step-by-step tutorials to help you get the job done hassle-free
Edraw

Edraw is one best clipart software programs that work on all major platforms.
It empowers users to create different types of diagrams like flow charts, floor plans, mind maps, etc. using their gallery full of templates and examples.
It’s a convenient vector-supported clipart drawing tool that offers a free download. This powerful application comes loaded with advanced functions that help make amazing clipart.
The software helps users create amazing designs using its high-quality and exceptional functionalities.
It features 8500 plus vector clip arts that can be used to personalize greeting cards, flowchart, business diagrams, and more.
Best of all, users do not require any added verification for using and sharing these clip art.
While it offers several categories, it also features easy to understand floating dialogues. The images are saved within the software and no downloading is required.
Compatibility with an extended range of software, scaling of images without losing clarity, or option to export to TIF, GIF, JPG, PNG file formats are among its other major features.
SmartsysSoft Label Maker

SmartysSoft Label Maker is counted among the best software to create clip art due to its ability to design and print some nice-looking images.
From address labels, postcards, envelopes, or media labels to even CD/DVD labels, it offers all possible designs.
The software comes equipped with a range of pre-designed templates, images, shapes, and symbols for templates.
Users can pick one of their liking from the library and then modify it using their own logos, pictures, and clip arts.
This robust program is perfect for vector graphics that allow users to design their own high-quality labels that are print-ready. Users can also get a print of the clip arts or images on any regular paper on their local printer.
Moreover, it also lets users save their prints in different formats, viz., PDF, BMP, JPEG, GIF, PNG, and TIFF.
It provides tools for visual path editing, different types of dash styles, and smoothly painted drawing elements. Best of all, it works as a perfect image editing software that offers powerful layer-editing.
Greeting Card Builder

Greeting Card Builder by PearlMountain is another great software that offers a fun and fast way to make personalized greeting cards and clip art using your own images and text.
The program is user-friendly making it easier even for beginners. It does not require any previous experience or any computer skills.
It helps users to create personalized greeting cards in just three simple steps.
The software offers a good collection of editing options with easy controls. Its WYSIWYG editor enables users to view any changes made to the greeting cards made immediately.
Moreover, it comes with an aggressive set of tools that helps arrange light and color, resizes images, crop, applies masks, and more.
Pre-made templates for all occasions, or option to save, share, and print images, are some of its other significant features.
PhoXo

A compact, fast, and easy to use the program, PhoXo is rightly among the best software programs to create clip art. It’s free software that’s so tiny that it can be used as a small PhotoShop tool.
Option to undo, adding layers, batch processing, more than 50 special effects, and a wide range of handy tools are among its major features.
These tools help users to perform different functions like selecting, crop, painting, retouching, measuring, and navigation.
Moreover, users can also add text effects like shadow, gradients, and more to the images. It comes with a huge collection of resources that includes step by step shapes, patterns, textures, clip arts, tutorials, and more.
Photo enhancement tools, brush pen, or multi-language support are among its other major features.
Clip arts are especially useful for those who are creative and love to add images to express their words more artistically.
So, if you are looking for the best software to create clip art, you will definitely find the right tool for you in our guide. Let us know which one you liked best in the comments section below.
Add clip art to your file
Depending on which version of Office you have, you may be able to use an Office library of clip art, or get clip art from the web.
- Which version of Office are you using on your PC?
- Microsoft 365, 2019
- Office 2016, 2013
- Office 2010
Insert clip art
In the newer versions of Office, there’s no longer a clip art library, but Office still helps you insert clip art.
STEP 1:
Select Insert > Online Pictures
(In Outlook, when you’re using the Reading pane, there isn’t an Insert menu. Click Pop Out  and then you’ll see the Insert menu.)

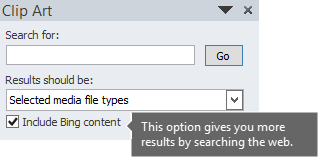
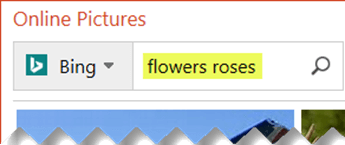
STEP 2:
Type a word or phrase to describe what you’re looking for, then press Enter.
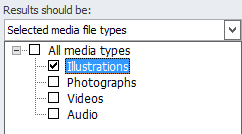
STEP 3:
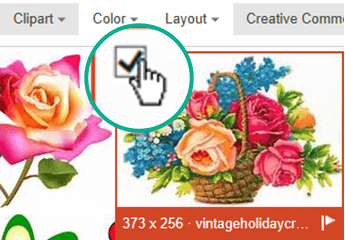
Filter the results by Type for Clipart.

STEP 4:
Select a picture.

STEP 5:
Select Insert.
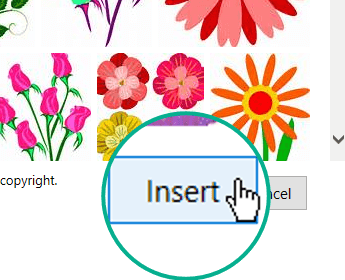
The image is inserted in your Office document.

Clip art and copyright
The licensing filter ( Creative Commons only or All) can help you choose images that are appropriate for the use you have in mind. (Read about Creative Commons licenses here.)
When using pictures or clip art from Bing, you’re responsible for respecting copyright, and the license filter in Bing can help you choose which images to use.
Free image library: the Pickit add-in
Another option is to install an Office add-in named Pickit that puts free, licensed clip art in Office.
Click a section title below to open it and read detailed instructions.
Open the Office app you want to add Pickit it to (Word, PowerPoint, or Excel).
On the Insert tab, in the Add-ins group, select Store.
The Office Add-ins dialog box opens.
In the dialog box, use the Search box to look for Pickit Free Images .
Click the Add button for Pickit Free Images.
Close the Office Add-ins dialog box.
Pickit may take a few moments to be «loaded» into the Office app. When it’s done, a message appears at the bottom of your app window telling you so.
At the far right end of the ribbon, on the Home tab, you’ll see the circular pink Pickit icon:
Once Pickit is on your computer, you can find pictures with it as described here:
On the Home tab of the Ribbon, in the Pickit section at the far right, select the Free Images button.
The Pickit Free Images task panel opens on the right side of the application window.
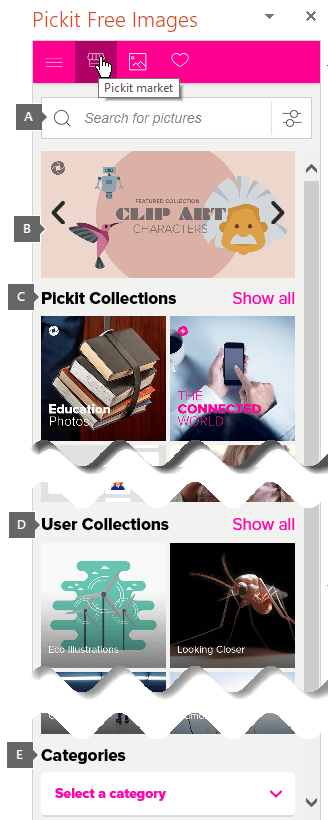
On the pink toolbar near the top, use the second tab, the Pickit market, to browse for images.
Pickit lets you browse images in several ways:
There’s a search box (callout A in the picture) where you can type keywords such as flower, clipart, and business.
A set of featured collections (B) just below the Search box. The set includes a Clip Art Characters collection.
There are 25 collections (C) organized by Pickit.
There are numerous user collections (D) to browse.
There are 35 categories (E) of images (such animals and pets, cities and places, music and instruments, and transportation) you can choose from at the bottom of the task panel.
New kinds of clip art for Microsoft 365
Microsoft 365 doesn’t have traditional clip art anymore, but subscribers get two fresh kinds of art in its place— icons and 3D models , available on the Insert tab of the ribbon, near where the Clip Art button used to be:

 |

| |