- How to access clipboard (copy-paste) history on a Mac
- How to view and manage clipboard history on macOS
- Where do you find the clipboard on your Mac?
- How does the macOS clipboard work?
- The Mac’s hidden secondary clipboard
- What is Mac’s Universal Clipboard
- How to view clipboard history
- How to avoid clipboard limitations
- How to save text from image to clipboard
- Save screenshot to clipboard
- Automate your flow with text expanders
- How do you paste from the clipboard on a Mac?
- How to fix it a non-working clipboard
- How to recover clipboard history on a Mac
- How to clear the clipboard
- Clipboard History 4+
- Raul Ignacio Verano
- Screenshots
- Description
- What’s New
- Ratings and Reviews
- Good app — one minor issue
- Faster Access?
- How did I live without this for so long.
How to access clipboard (copy-paste) history on a Mac
Make your Mac invincible
Copy and paste has been revolutionary for productivity. That may sound bizarre, considering how commonplace it is. Everyone copy–pastes, all the time. But without such functionality, we’d have to start from scratch on whatever we are working on every time we’d need a duplicate.
Instead of starting over, copy and paste gives us control and time. Control to know that once we’ve created something once — whether it’s a passage of text, an entire document, images, videos, music, code — we can replicate it, instantly and easily. Wherever we have an internet connection, we can share those creations or links with anyone else in the world.
When you stop and think about it, copy and paste is remarkable (on a Mac: ⌘ + C to copy, then ⌘ + V to paste). The problem is, we are so used to it, so used to skipping back and forth between tasks that once we’ve copied something, if we don’t paste it right away, we can lose it and need to start again. Such a pain! Unfortunately, even the most expensive Macs only have one clipboard.
Avoid clipboard limitations
Get an upgrade for your macOS clipboard with Setapp. Quick fixes, no limitations, simplified history recovery.
How to view and manage clipboard history on macOS
Once you’ve copied something else, what you originally copied is lost. A Mac clipboard is a transient memory function, only designed to hold one item at a time. Once it’s gone, it’s gone. You can see what the problem is here. So knowing how to see previous copied items on Mac is essential, and developers have been working on numerous solutions — known as clipboard managers — designed to solve this for years.
Thankfully, now we have apps that we can highly recommend to resolve this particular problem with copy and paste history once and for all.
Where do you find the clipboard on your Mac?
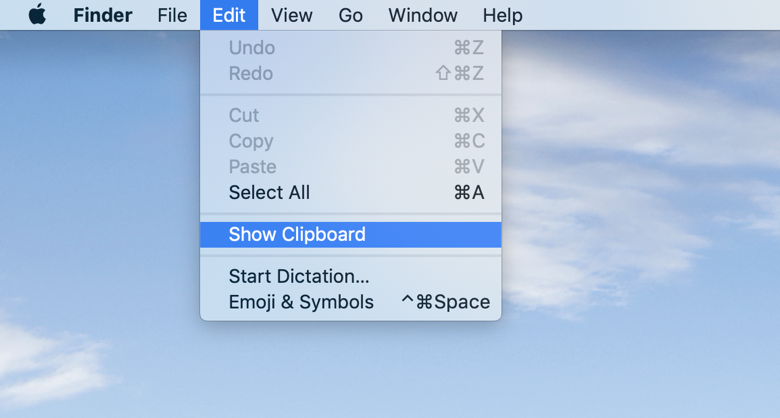
“Where is my clipboard?” you may ask. It’s kind of everywhere and nowhere. A Mac clipboard is one of those macOS programs that runs in the background and has no functional user interface. Although you can find and view the last item copied to the clipboard by activating Finder, then selecting Edit ➙ Show Clipboard from the menu bar.
How does the macOS clipboard work?
As a native program, macOS clipboard runs the same way as other macOS operating functions. Clipboard is a basic function, which is why it takes up almost no processing power or space, except for the item it currently holds. Unfortunately, this produces some limitations. You can’t just open clipboard and see everything you’ve ever copied (and we hate it!) Once you copy something else, the first copied item disappears.
Natively, your Mac also carries a second, very little-known clipboard that you can use to effectively double your copy buffer.
The Mac’s hidden secondary clipboard
Not many people know that macOS has a hidden secondary clipboard for cutting and pasting functions. It’s a very well-kept secret. Why? We don’t know.
Here’s how to open clipboard that is called hidden secondary clipboard on Mac: select any text and then Control + K to cut it. To paste it in its new location, use Control + Y.
Note that this cuts, rather than copies, the text. As this feature uses a different functionality, it won’t remove what is currently on the main copy-paste clipboard. Double the buffer, just like that!
What is Mac’s Universal Clipboard
Universal Clipboard is yet another feature that was introduced in macOS Sierra and iOS 10. It allows you to seamlessly copy and paste information between Apple devices, as long as they’re signed into the same iCloud account and connected to the same WiFi network, with Bluetooth switched on.
To use Universal Clipboard, make sure your Apple devices are close to each other and then copy on one and paste on the other just like you’d do if it was only one device.
If you have any problems using Universal Clipboard, try logging out of iCloud on each device and logging back in again.
How to view clipboard history
The quickest way to view your clipboard history is to paste (Command/⌘+V). That will show you the most recent item you copied.
Did you know you can copy and paste in the Finder too? If you want to copy a file from one folder to another, for example, you can select it, press Command/⌘+C , then click in the folder you want to copy to and press Command/⌘+V . You can even access clipboard history on a different device than the one you copied from, thanks to Universal Clipboard to share something between different devices.
How to avoid clipboard limitations
As having a clipboard buffer limitation of just one item is a widespread problem, you could expect that there would be more workarounds to this besides using a cut-paste clipboard or Universal Clipboard. And there are indeed quite a few available alternatives.
You can use text clippings, for example. These are snippets of text that look like files, but can’t be edited and behave differently. To create a text clipping, select text in any document and drag it to the desktop. You can then drag it onto any document in any application that accepts text and drop it at the point where you want to paste it. You can also drag and drop the snippet directly from one application window onto the window of another without taking up any clipboard space at all.
Besides, there’s also a selection of various clipboard managers and other tools available today that approach the same problem from a variety of angles.
How to save text from image to clipboard
You can’t copy and paste text from visual content. Which is another huge roadblock. Let’s say you have a photo with text you want to save in a text document. Or, you watch a video presentation and you’d love to save some text from the slides. This is where you’ll need a helper tool.
TextSniper approaches the how to access clipboard problem from the text recognition perspective. This lightweight utility features a special screenshot tool that automatically applies OCR (optical character recognition) on any image or PDF, and then saves the resulting text to your clipboard, which you can paste at any time. Additionally, if you enable Additive Clipboard in the menu bar options of TextSniper, you can copy as many bits of information as you like, and then paste them all at once.
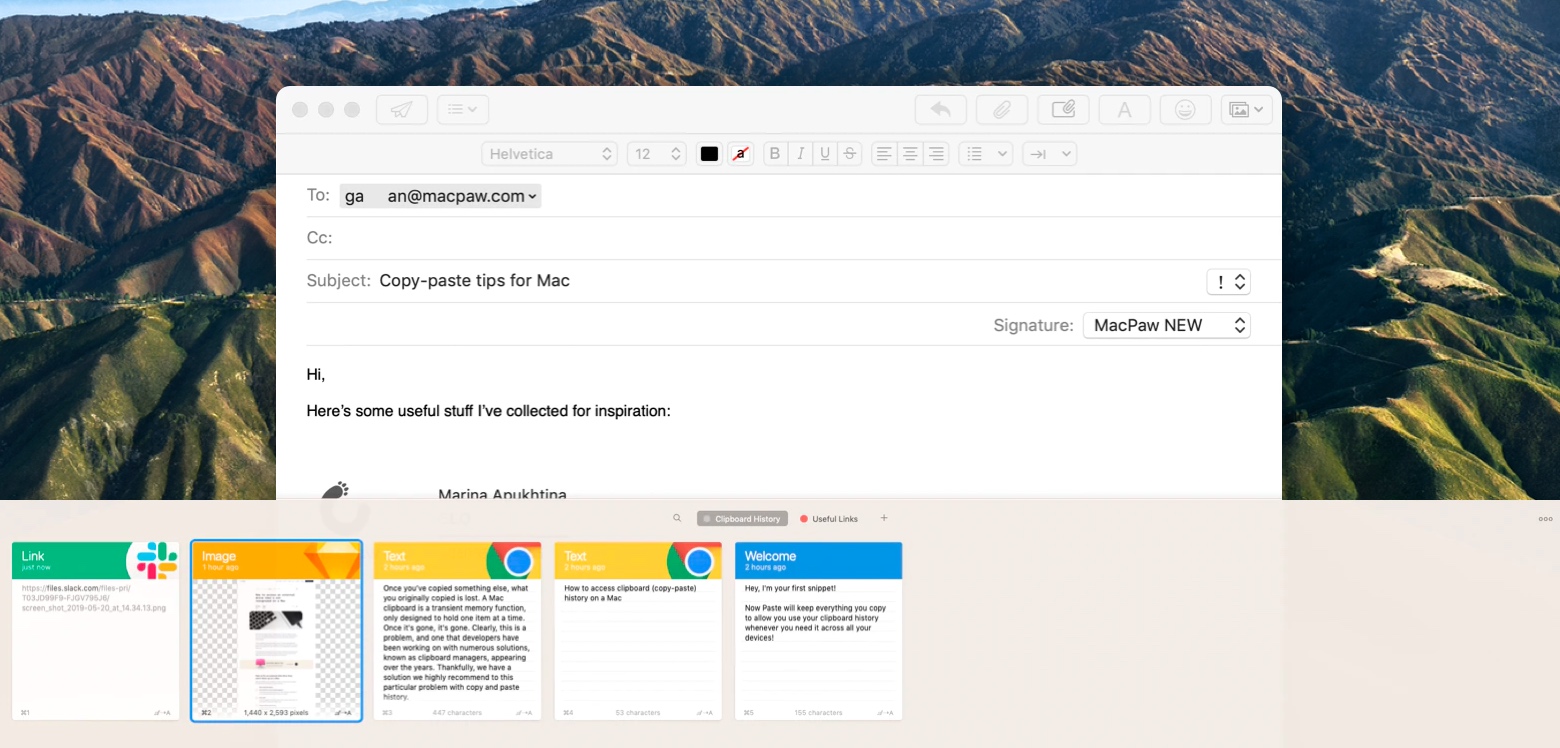
Do you know what could improve the TextSniper use case even more? Paste app! It’s an app that saves all your clipboard history in one place. So here’s a trick: 1) open Paste; 2) grab text with TextSniper; 3) go to Paste and find everything you’ve copied there. It’s a dream workflow for when you watch online presentations and take notes.
Once you start using Paste, you’ll be answering the question “what is clipboard?” in a new way. With Paste, the clipboard turns into a rich source of information and a great tool to speed up your flow.
Save screenshot to clipboard
What if you need to copy screenshots? Of course, you can do that using the native macOS shortcut — the copy and paste works with images. However, when you save Mac screenshot to clipboard through Ctrl+C, you don’t actually see the screenshot you’re copying.
This could be a problem if you have a dozen of similar-looking screenshots on your desktop. To know which one you need, you should first open each screenshot, one by one. Unclutter can help you avoid this.
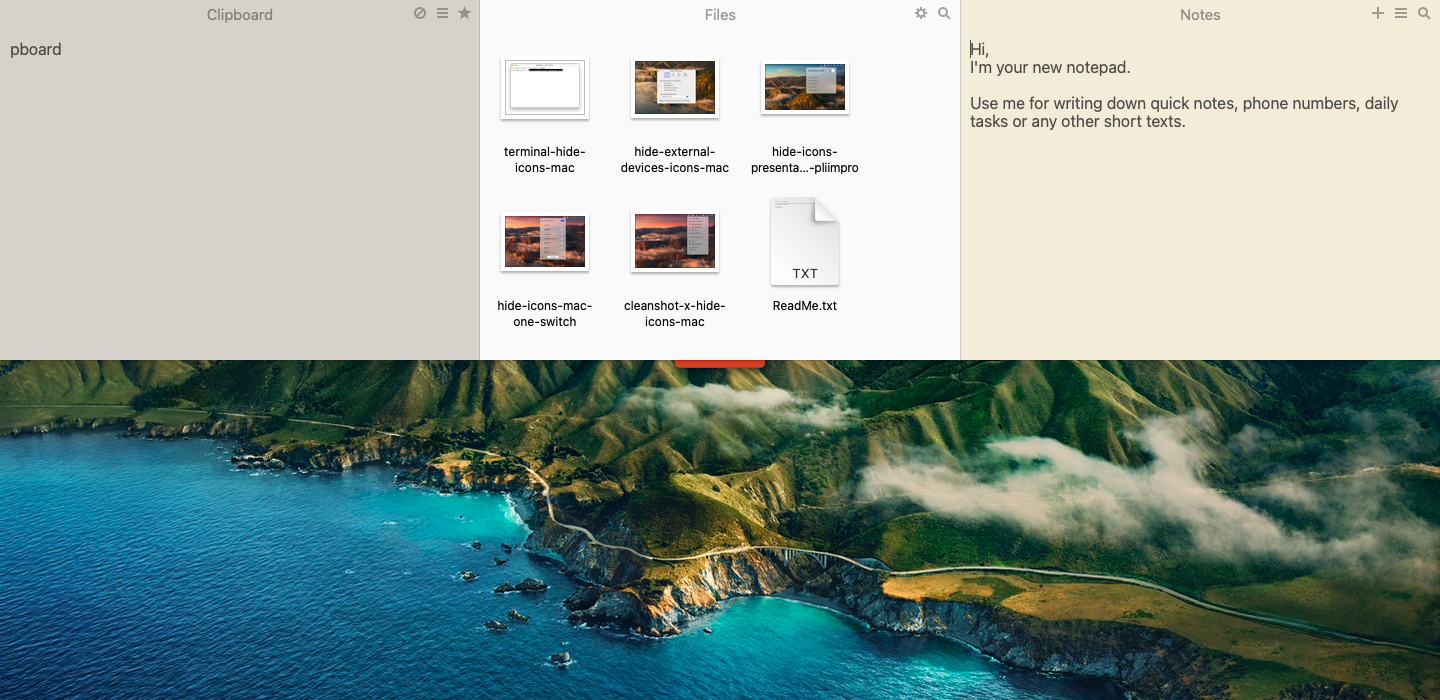
Unclutter is designed as an app for storing notes and files neatly on your desktop, plus a clipboard manager that retains the contents of your Mac’s clipboard, even after you copy something else. Its organized interface makes your clipboard history easily accessible, allowing you to find any old item if you need to paste it again.
And if you want to edit your screenshot before saving it to clipboard, get Capto. Essentially a screen recorder and editor, it has one awesome feature — automatically saving your screenshots to the built-in editor where you can apply any changes. Crop, annotate, you name it.
Automate your flow with text expanders
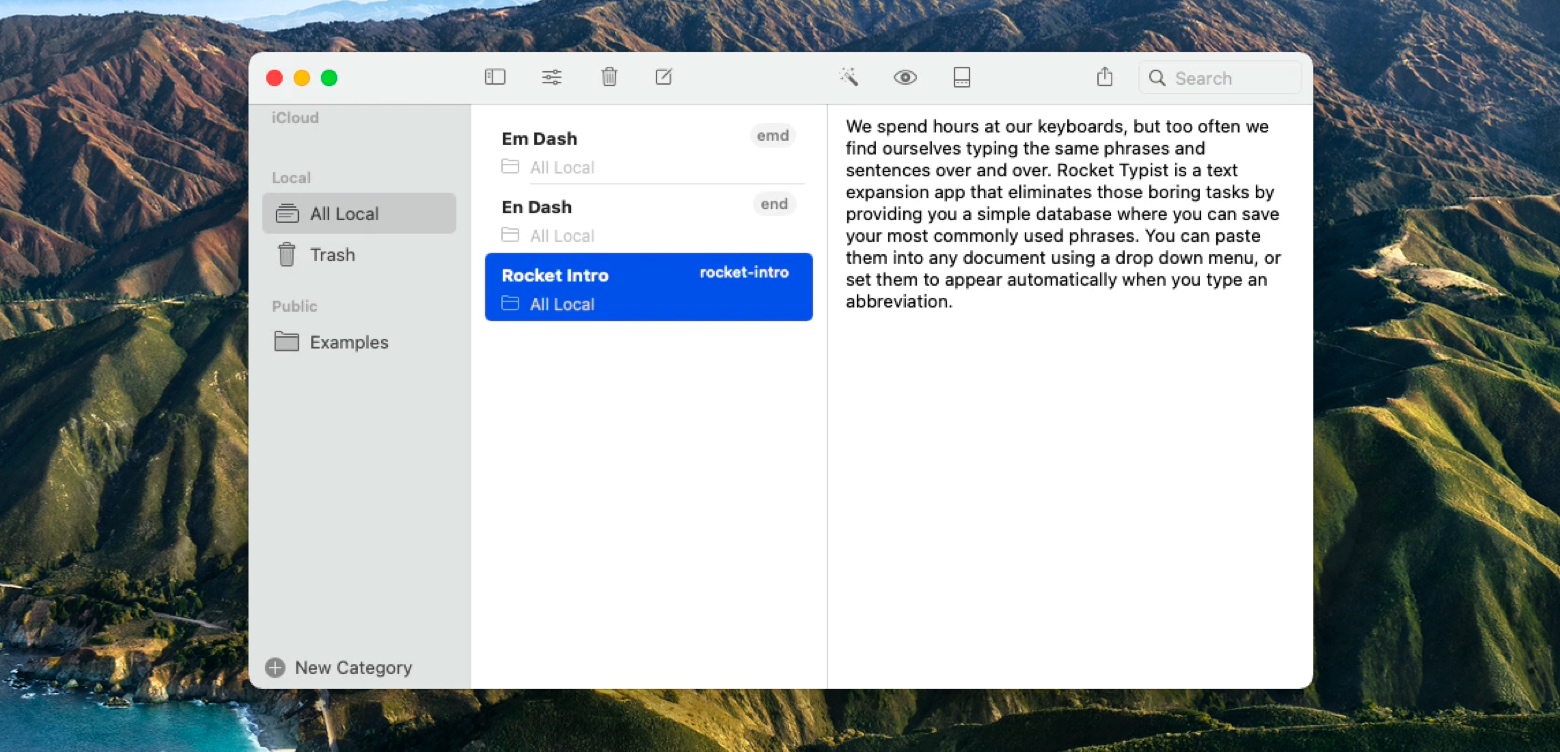
Rocket Typist is another great app that approached solving clipboard limitations from a different angle. This app allows you to create multiple text snippets for passages you use frequently, from email greetings to PHP scripts. Assign trigger combinations for saved snippets and call on them in any app or environment. Alternatively, you can then paste directly into the document you’re working on by selecting the snippet in Rocket Typist to move it to the clipboard and pasting it the regular way.
How do you paste from the clipboard on a Mac?
To paste something from the standard macOS clipboard, use ⌘ + V. However, when you are using a clipboard manager like Paste, you’ve got several options for pasting items from the clipboard.
- Drag and drop items from the Paste interface directly to any Mac app
- Select and paste multiple items at once
- Paste items as plain text, no matter the format of the original
- Access and paste files from multiple devices using iCloud sync
- Allow others to paste your snippets by sharing over AirDrop
Depending on the clipboard manager you have, you can also paste using customized shortcuts for most recent as well as old items.
How to fix it a non-working clipboard
The first step when you discover that copy and paste don’t work is to check that it’s macOS that’s at fault and not your keyboard. Select some text in any application, then go to the Edit menu and choose Copy. Then go back to the Edit menu and choose Paste. If that works, the problem is with your keyboard.
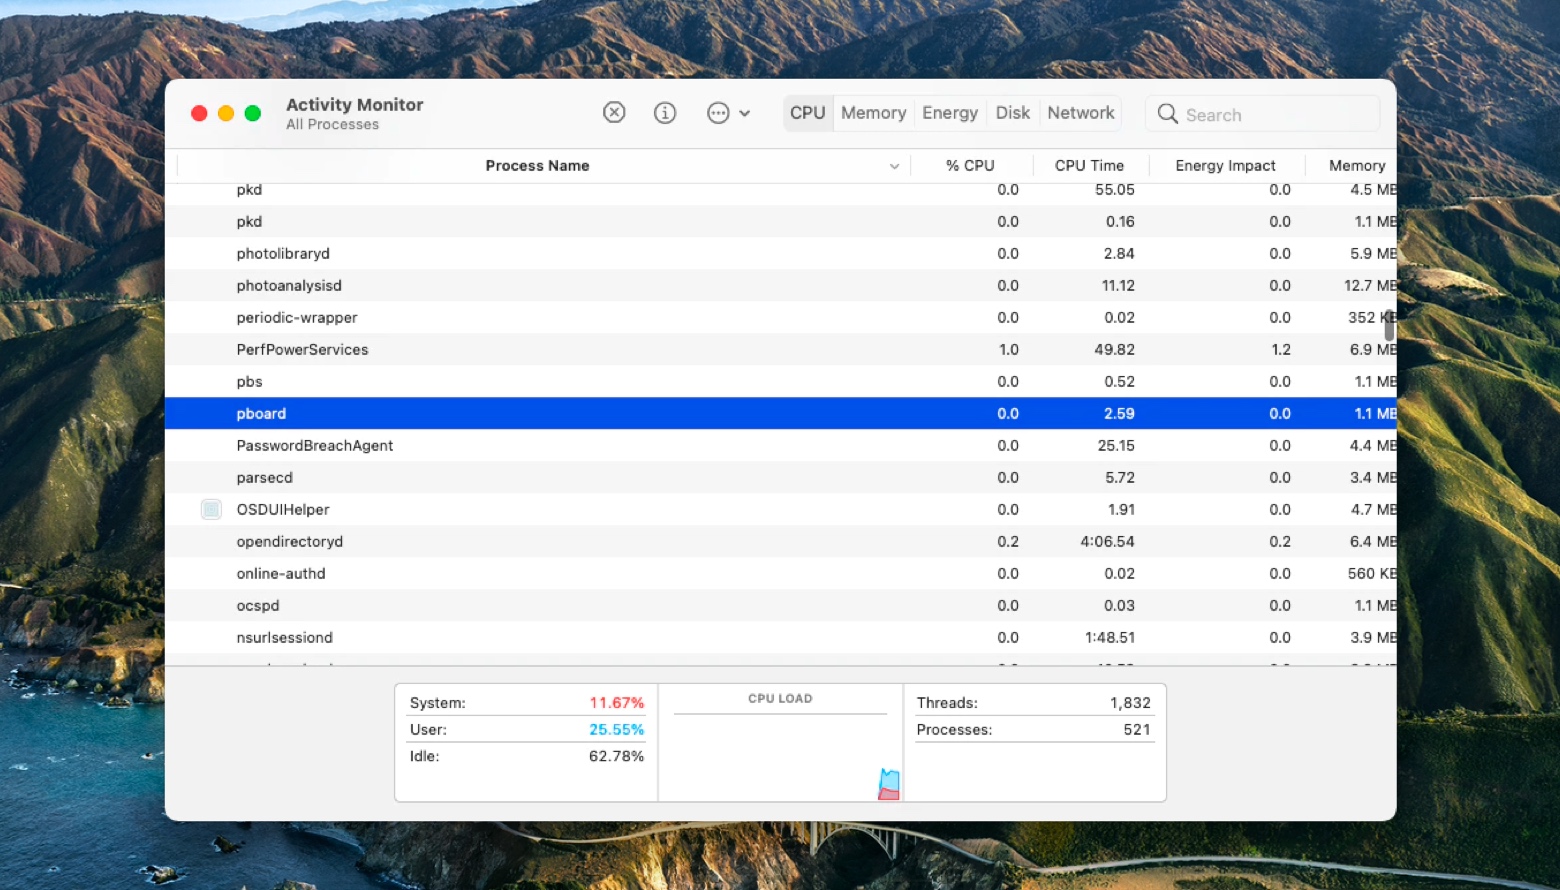
If that doesn’t work, trying fixing the issue with Activity Monitor.
- Go to Applications > Utilities and double-click on Activity Monitor to launch it
- In its search box, type: pboard
- When it shows the pboard process, select it and press the X in the toolbar
- Click Force Quit and then close Activity Monitor
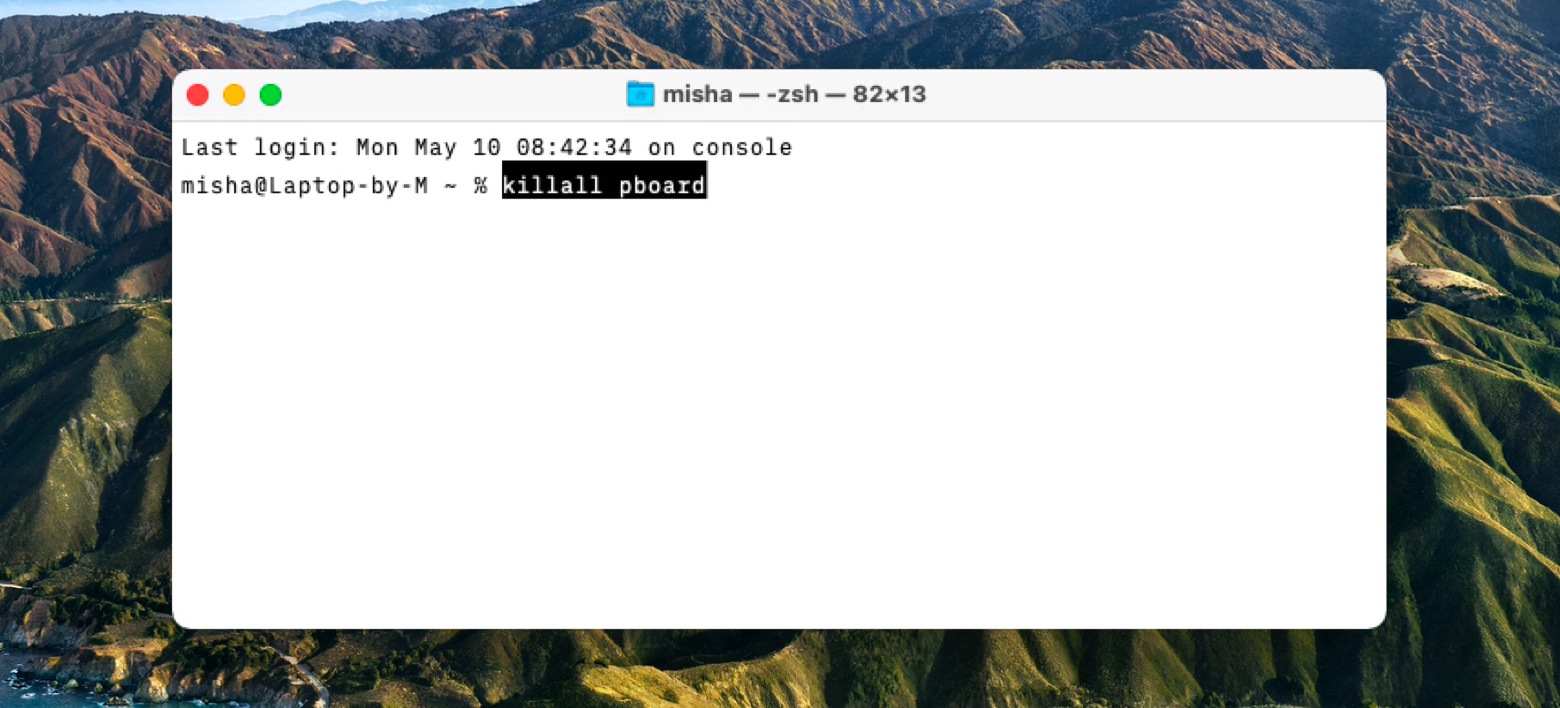
Go to an app where copy and paste wasn’t working and try again. If it still doesn’t work, try using Terminal to fix it.
- Go to Applications > Utilities and double-click on Terminal to launch it
- Type: killall pboard
- Hit Return
- Close Terminal
Try and copy and paste again in the same app as before. If neither Activity Monitor nor Terminal solves the problem, the next step is to restart your Mac.
How to recover clipboard history on a Mac
The fact that the macOS clipboard only retains the most recently copied thing means that there’s no way to easily view or recover clipboard history.
You can, however, use ⌘ + Z to undo the most recent action and then press it repeatedly to step back through everything you’ve done.
Eventually, assuming the application you’re using supports unlimited undos, you’ll get to the point where you pasted the item you want to recover.
A much easier way to recover clipboard history is to use apps like Paste or Unclutter. They retain multiple items and allow you to view them easily in the app, selecting the one you need.
Best snippets managers for Mac
Check out the top three best clipboard managers for handling snippets. Grab the handiest one for the job.
How to clear the clipboard
Clearing your clipboard is easy. Either overwrite the current copied item with a copy of something else or, in case of using Paste or another clipboard manager, delete the clipboard history with a few clicks.
It’s still a good idea, however, to store some items or the whole clipboard history in iCloud just in case you need some of it in the future. In this case, Paste, TextSniper, or Unclutter will ensure that managing your clipboard history is as straightforward as it can be.
While most Mac users limit themselves to one clipboard item at a time and feel frustrated with every accidental overwrite, you can use apps like Paste, Unclutter, Rocket Typist, Capto, and TextSniper — all available in Setapp — to extend the native capabilities of your Mac and save yourself hours of headaches in the future.
Источник
Clipboard History 4+
Raul Ignacio Verano
Screenshots
![]()
![]()
![]()
![]()
![]()
Description
Named Top Ten Micro App by Lifehacker!
«Clipboard History Provides a Simple, Unobtrusive Stream of Your Clipboard Activity» (Adam Dachis — Lifehacker)
Copying and pasting one item at a time is a thing of the past! With Clipboard History, you can copy any number of things and paste them back in the order that you want!
Clipboard History is a very simple and straightforward application that keeps your history of copied items, and provides a configurable hotkey so you can paste them inside of any app. These items can be images, text or a mix of them (rich text, like PDFs and HTML).
It also provides a way to browse and search in your clipping history, preview items or even save them to your hard disk.
Clipboard History persists your information so it resists reboots and system crashes!
Clipboard History is an ideal companion while writing emails, browsing the web or hacking code.
——————————
If you are experiencing any problems or would like to send us a suggestion, please contact support@agileroute.com or tweet us @agileroute and we’ll be happy to help you.
What’s New
Version 1.3.1:
— Fix for the users that get a crash after updating to v1.3 (unresponsive app). Important: if you need to quit an unresponsive Clipboard History before updating, you can do it from the Activity Monitor.
— Fix for Clipboard History not working with MS Word (and probably other Office apps).
Version 1.3:
The BEST Clipboard application just got BETTER.
In this awesome version:
— BLACKLIST! Block and unblock Applications to prevent them from inserting items into your Clipboard History (e.g.: password generators).
— FAVORITES! Flag items you use over an over as favorites. They will not be erased from your clipboard. Use the new hotkey to bring them in a pop-up menu (default: cmd+alt+c).
— AVOID DUPLICATES! When you copy something, now you won’t find it twice in your clipboard history.
— PASTE AS PLAIN TEXT SHORTCUT! Just press shift while pasting from the pop up menu.
— Extend your history to up to 500 ITEMS!
— Several bugfixes and *drastic* performance optimizations (lower memory usage, faster loading, faster scrolling).
——
Did we miss the fix you where expecting or your favorite feature? Let us know! We’ll be happy to hear from you! Write support@agileroute.com or tweet @agileroute.
Ratings and Reviews
Good app — one minor issue
Would have been a major issue, but I eventually figured out the preference that fixed it. Basically, having Clipboard history in the Dock and menu bar («Both» needs to be the default option in Preferences. Right now the default is menu bar. This is a problem because if it’s only the menu, it’s not in the application switcher (command-tab), it’s not in the dock, it doesn’t have its own menu bar (just a menu bar item), and the only way to actually open the clipboard history window is to go into the menu, at which point you can either select Open Clipboard History, or hit command-O (but only when the menu is already open, at which point the keyboard shortcut is useless). And then when you finally select Open Clipboard History, it opens in the BACKGROUND, and I can’t see it, and I have no idea whether it actually opened. And since there’s no dock icon and no application switcher icon, the only way to actually find the window is to remove other windows or press F9 to show all windows. Every time. NOT ideal. I was about to give this app a much lower review because it was so difficult to find the history window. Selecting either «Dock» or «Both» for the application icon fixes this problem, but one of those two, preferably «Both,» needs to be the default. Fix that and you have a 5-star app.
Faster Access?
I want to start by saying Thank you for creating this app!!
At work, I use copy and paste all day. What I had to do was: open text-editor and paste into there, then later go back, find and select the data I wanted then copy. Which if you add up all the times I did that in a day.. It comes out to a lot of wasted time. Your app solves this problem. except I have to use the mouse and the mouse is very slow.
So, I am looking for an update that will speed up the process of retreving the copied item using only the keyboard.
Here is one way to do it.
1. Global Keyboard-Shortcut Access
(There are apps out there like spotlight and Quick-Silver that have global shortcuts, which will open the app no matter what program you are in.)
2. Opens «Recent History» front and center
3. Up and down arrow keys for navigation through «Recent History».
4. [Enter] to copy the selected data and hide the app.
I am not saying remove the mouse function just looking for an alternative way. 🙂
How did I live without this for so long.
I’m a beginning Mac user who also happens to be a programmer myself. The problem I don’t know how to develop on the Mac very well just yet. I like this whole idea of having apps on the apps store automagically install themselves on the computer with the click of the button. I’d have to say that my Mac experience so far is pretty awesome. Anyways, I had an application on the PC that I coded that had a stack-based clipboard functionality and I thought it was great, then I downloaded the version on the Mac. (I think this is allowed, because I’m clearly saying that this program is better than my own on the PC). This program is incredible. Have no doubts about it. If you’re thinking about getting this program, get it, don’t be skimpy, the amount of time you’ll save is incredible. The way he implements the history without using a move-to-to front algorithm is awesome. Trust me. You’ll like it.
Источник


