- Using CloneZilla for regular hackintosh backups
- Requirements
- Clonezilla workflow
- Clonezilla for Mac
- Softonic review
- Backup Simply With File Cloning
- Professional-Level Cloning
- The Clone Ranger?
- Question: Q: CloneZilla Alternative
- All replies
- Как произвести чистую установку macOS Catalina
- Зачем вообще переустанавливать macOS с нуля
- Установка через режим восстановления
- Установка при помощи флешки
- Question: Q: Installing macOS Catalina on OS X Extended Journaled Filesystem drive
- All replies
Using CloneZilla for regular hackintosh backups
Update: With macOS Catalina I switched to bootable daily incremental backups.
If you are a macOS user you may be used to Time Machine as the standard for backups. Time Machine is fine if you want to backup your files and configuration, but if for example your disk dies or your hackintosh completely breaks with some bad update, there are better and faster ways to get it up and running again.
Requirements
Basically everything comes down to your backup requirements. These are mine
- full backup of the macOS SSD including EFI with Clover
- backups that can be restored without any additional configuration to the current macOS SSD or a new one in case of a disk failure
- no need for the ability to restore single files (all work data are in Git and Dropbox)
- reasonable backup and restore speed
Looking at different backup solutions I chose Clonezilla. It is not exactly the most user-friendly solution, but it is a very powerful one if you know what you are doing.
Clonezilla workflow
Once a week I, or before a macOS update I
- boot Clonezilla from a flash drive
- save the macOS SSD as an image file to a data HDD
- delete old backups to keep just 4 latest ones
Although I use High Sierra I kept the HFS+ file system. One of the reasons was that Clonezilla understands HFS+ when saving the image file.
This means the resulting backups are only as big as the actually used disk space on my macOS SSD. I use a 256 GB SSD for macOS but the backups currently have only 63 GB which is my used disk space. It takes Clonezilla about 10 minutes to do the backup.
Clonezilla can of course also backup APFS partitions but just with a sector by sector backup (basically a dd), meaning the resulting image file is the same size as the SSD no matter what amount of disk space you actually use.
You cannot think your backups are working until you try to restore them. So when I decided to upgrade from Sierra to High Sierra a few months ago it was a good chance to test it. I was running Sierra on an 128 GB SSD so I decided to buy a new 256 GB SSD, restore a Clonezilla backup to this new SSD and upgrade Sierra to High Sierra. The idea was that if anything goes wrong I can still boot Sierra from the old SSD and continue using it.
I booted Clonezilla, restored the latest backup to the new SSD and macOS booted just fine from it. The whole process took about 10 minutes. Now I am reasonably sure that in case of a failure (other then both my macOS SSD and the data HDD breaking at the same time) I am safe.
Источник
Clonezilla for Mac
Softonic review
Backup Simply With File Cloning
Clonezilla is a free backup and recovery utility which partitions a disk and then uses an imaging and cloning approach to create file copies that will be able to be recovered in the event of a catastrophic failure. It is similar in functionality to a programme like Norton’s Ghost.
Professional-Level Cloning
Although Clonezilla Live is designed for single machine backup and restore functions – making it ideal for one-off users – the server edition (SE) version of the programme is suited to wide deployment, perhaps in an office environment. SE is capable of cloning over 40 computer terminals simultaneously and, when used with high-end hardware that was capable of 42-node clusters, it has been recorded at restoring at rates of about 8 GB per minute over a multicast. All sorts of file systems are supported by Clonezilla including – but not limited to — NTFS of MS Windows, HFS+ of Mac OS, various GNU/Linux file management systems, VMFS5 of VMWare ESX and NetBSD. AES-256 encryption is also offered which secures data access whilst making storage and transfer safe. Finally, it is worth mentioning that single image restoration to multiple local devices is another handy function that is also supported.
The Clone Ranger?
With a range of functions, Clonezilla is handy for complete system backups and for stand-alone PCs. In terms of hardware, all that is needed is a CD/DVD drive, a USB port, a PXE or hard drive to provide a boot device.
Источник
Question: Q: CloneZilla Alternative
Using CloneZilla I backuped up my MacBook Pro Retina with 512GB SSD with latest OS and bootcamp with Windows 7. During the backup I did get some error but it continued and verification at the end succeeded. However, I am still concerned and therefore want to make a second backup with a different program. I am looking for something like CloneZilla that backups up the Mac OS, Mac OS recovery disk and Windows on bootcamp in one backup. All the programs I have seen seem to either backup the Mac portion or Windows portion but not both or create a non-bootable backup. Are there any other alternatives to CloneZilla?
Posted on Jul 30, 2013 11:23 PM
All replies
Loading page content
Page content loaded
I think the problem with Clonezilla is the fact that it’s not smart, it’s just a imager.
So when OS X/Win is restored it’s the same partition size as it was before which makes it unsuitable to use to put OS X or Windows on differnet sized partitions or on a newer, larger (in some cases smaller like SSD’s) drives.
On newer Mac’s there is a RecoveryHD partition and it needs to go at the bottom of the drive so there is all this room for the OS X and BootCamp partitons that fit between RecoveryHD and the EFI partition.
So we use Carbon Copy Cloner for OS X, EFI and RecoveryHD as it will make the world right, it also defrags in the process also «blesses» the new OS X copy so it boots.
Then we use WinCone to clone BootCamp.
Commerical software now (both used to be free) oh well.
Perhaps one day if Clonezilla will be a bit more smart and GUI friendly then I will certainly recommend it.
Источник
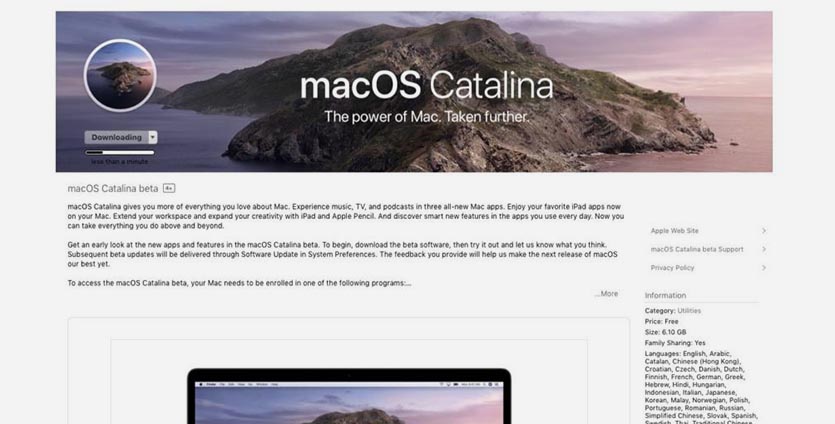
Как произвести чистую установку macOS Catalina
Есть несколько способов и причин поставить новую macOS с нуля, но обо всем по порядку.
Зачем вообще переустанавливать macOS с нуля
Чистая установка системы – лучший способ подготовить Mac к продаже. Так на компьютере точно не останется пользовательских данных и конфиденциальной информации.
Подобный способ установки пригодится, если на Mac производилась замена накопителя и систему нужно установить на новый диск.
Даже если с вашим Mac все в порядке и продавать его в ближайшее время точно не собираетесь, периодически следует производить именно чистую установку системы, чтобы не накапливать кэш и всевозможный программный мусор.
При ежегодном обновлении одной системы поверх другой возможно захламление и перенос глюков. Раз в пару лет точно следует делать чистую установку для профилактики. Ключевое обновление macOS – лучший повод для этого.
Внимание! Чистая установка предполагает удаление всех пользовательских настроек, данных и приложений. Заранее переносите нужные файлы в облако, на другие накопители или в другие логические разделы текущего накопителя.
Чистая установка возможно двумя способами: через режим восстановления и при помощи флешки. В первом случае вам не понадобится никаких дополнительных накопителей, но процесс будет происходить дольше.
Сейчас детально разберем оба варианта.
Установка через режим восстановления
Если с накопителем Mac все в порядке, область восстановления цела и невредима, то можно произвести чистую установку системы отсюда. Для этого не потребуется внешний накопитель.
Алгоритм действий следующий:
1. Обязательно создаем резервную копию в Time Machine или в стороннем сервисе, чтобы иметь доступ к точке восстановления или нужным файлам, которые не были перенесены в безопасное место.
2. Выключаем Mac и запускаем его с зажатыми клавишами Command + Option (Alt) + R для загрузки из раздела восстановления.
При зажатии Command + R произойдет загрузки с возможностью восстановления на текущую установленную версию, а при зажатии Command + Option + R происходит загрузка с возможностью апгрейда до последней доступной версии системы.
3. После запуска следует выбрать Дисковую утилиту.
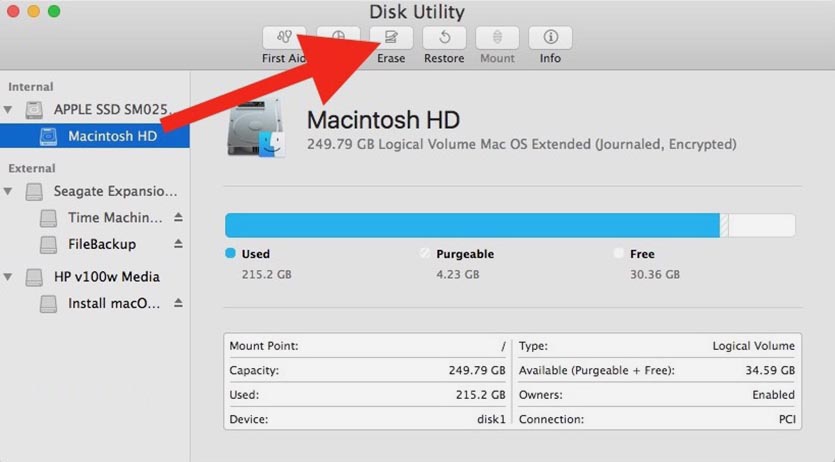
4. Здесь можно либо полностью отформатировать системный диск, либо удалить раздел с уже установленной системой, оставив другие разделы с данными.
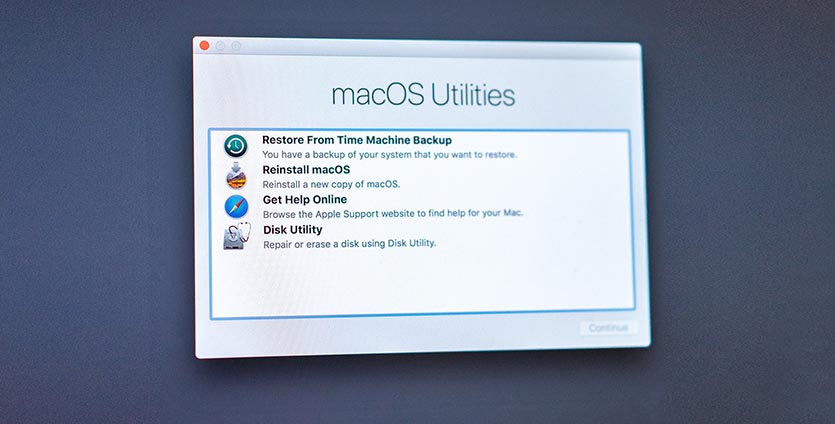
5. Возвращаемся в главное меню раздела восстановления и выбираем пункт Переустановить macOS.
6. Далее, следуя подсказкам мастера установки, производим чистую инсталляцию macOS на отформатированный накопитель.
Остается дождаться окончания процесса копирования данных и произвести первоначальную настройку системы.
Установка при помощи флешки
Предыдущий способ не совсем удобен тем, что загрузка новой системы будет происходить в процессе восстановления. В зависимости от скорости подключения и загруженности серверов Apple, это может занять много времени.
Гораздо проще заранее скачать систему и устанавливать ее уже с накопителя. При наличии флешки или внешнего диска объемом от 8 ГБ и более можно произвести установку через него.
Владельцам компьютеров с чипом T2 (iMac Pro, Mac mini 2018, MacBook Air 2018-19, MacBook Pro 2018-19) придется предварительно отключить защиту для возможности загрузки с внешних накопителей по нашей инструкции.
Когда все готово, делаем следующее:
1. Подключаем флешку или накопитель к Mac и запускаем Дисковую утилиту.
2. Форматируем флешку в формате Mac OS Extended, предварительно сохранив все нужные данные с нее.
3. В магазине приложений Mac App Store находим установщик macOS Catalina и скачиваем его на компьютер.
4. После окончания загрузки установщика запускаем приложение Terminal.
5. Вводим в командной строке:
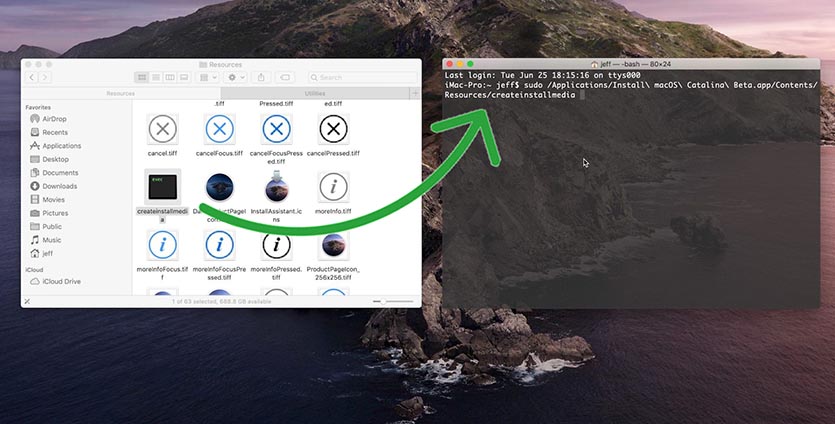
6. В Finder открываем папку Программы, находим Установка MacOS Catalina и в контекстном меню нажимаем Показать содержимое пакета.
7. В папке Contents/Resources/ находим файл createinstallmedia и перетаскиваем его в открытое окно Terminal (в команду добавится путь к файлу)
8. Продолжаем писать команду, добавив следующее:
9. Теперь перетаскиваем иконку отформатированной флешки с рабочего стола в окно Terminal (в команду снова добавится путь)
10. Продолжаем писать команду и добавляем туда следующее:
Так в процессе установки не будет появляться диалоговых окон с вопросами и уведомлениями.
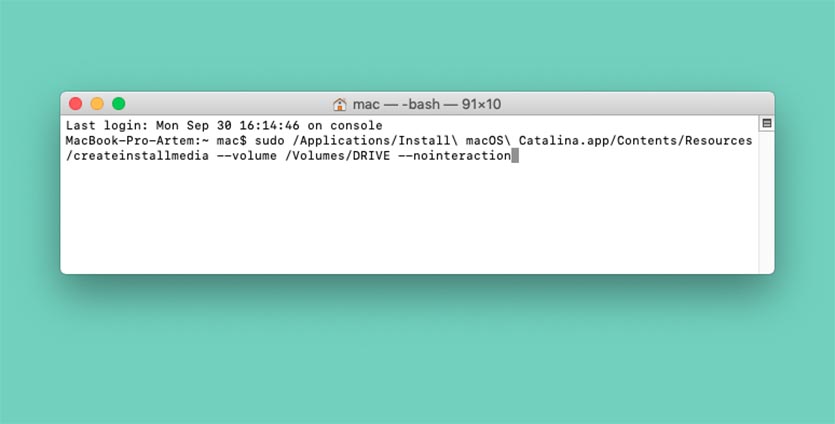
Должна получиться такая команда:
sudo /Applications/Install\ macOS\ Catalina.app/Contents/Resources/createinstallmedia —volume /Volumes/DRIVE —nointeraction
Разумеется, вместо “DRIVE” должно быть вписано имя вашего накопителя.
11. Нажимаем клавишу ввод, подтверждаем действие паролем администратора и вводом “y” после соответствующего запроса.
Когда процесс копирования завершится (примерно 15-20 минут), получите готовую флешку для установки macOS Catalina.
Останется лишь запустить Mac с зажатой клавишей Option (Alt).
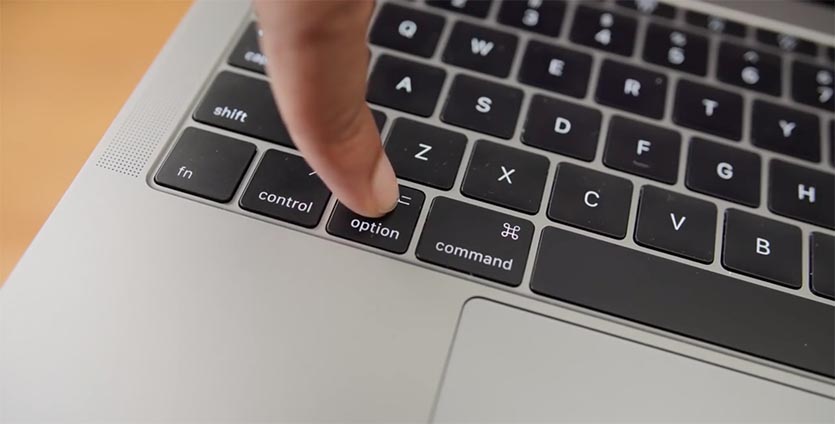
В списке доступных для загрузки накопителей увидите созданную флешку. Загружаемся с неё, форматируем системный диск и производим чистую установку системы аналогично, как в случае с установкой из режима восстановления.
Вот так можно получить чистую систему, как на компьютере Mac из коробки.
Источник
Question: Q: Installing macOS Catalina on OS X Extended Journaled Filesystem drive
I have 250 GB of HDD installed with macOS Mojave. The drive is formatted in OS X Extended Journaled. Therefore, Catalina installer has denied installation mentioning that drive is not formatted in APFS. Please suggest with steps how to upgrade to Catalina without losing data.
I was thinking to create another partition from existing HDD and format it on APFS and continue installation. Once, Catalina gets installed successfully then was planning to delete the Mojave Partition after copying the data to Catalina partition. Please advise if this approach would work.
Posted on Oct 7, 2019 5:19 PM
All replies
Loading page content
Page content loaded
Use Carbon Copy Cloner to clone to APFS-formatted volume, reformat internal disk as APFS, and clone back to it. It might be a good idea to have a 2nd backup in case something goes wrong (it won’t, but just in case some drive decides to break just then. ).
Oct 7, 2019 10:28 PM
Note that if you add a partition, you won’t be able to reacquire the space used by the first partition.
Oct 8, 2019 1:06 AM
So first I should I create a different partition in existing Macintosh HD in APFS format. After that use the cloning step and then proceed with installation of Catalina. Is my understanding correct?
Oct 8, 2019 1:05 AM
No, because if you add a partition, you won’t be able to remove the older partition and reclaim its space.
Oct 8, 2019 1:08 AM
Once I install Catalina on APFS partition, will I not be able to delete the old partition and aquire it’s space to the APFS partition?
Oct 8, 2019 1:08 AM
No, because only the last made partition (the newest one) can be recovered. Do what Matti suggested.
Oct 8, 2019 1:11 AM
Clone to an external APFS formatted disk (you can partition it if you like *). Then, as a bonus, you can continue to use it as a bootable Carbon Copy Cloner backup of your internal disk. Another alternative is to use the external disk as a TimeMacine backup disk later after you get this thing done.
* I’d recommend getting a SSD disk the same size or maybe somewhat bigger than your internal drive so there is some extra space for Carbon Copy Cloner’s «safety net» or another partition (When the SafetyNet is on, CCC places the older versions of modified files, and files that have been deleted from the source since a previous backup, into the _CCC SafetyNet folder at the root of the destination). Personally I don’t use safety net but I have a 2nd backup disk that I update only monthly.
Источник


