- Clover amd mac os
- FAQ Rev 1.3.0
- Getting Started
- Tools
- Support
- Compatibility
- BIOS Settings
- Notes
- Known Issues
- Installation
- Booting the Install
- Disk Utility
- WARNING:
- Post Installation
- Installing Clover
- UEFI Motherboard Settings
- Legacy Motherboard Settings
- Configuring Clover
- Specific Settings
- Installing Kexts
- Graphics
- Nvidia Graphics
- AMD Graphics
- Networking
- Ethernet
- Wireless
- Ryzen Systems
- All Other Systems
- Audio
- Ryzen Systems
- All Other Systems
- Tweaks
- Disable Gatekeeper
Clover amd mac os
AMD Clover config.plist
- Please get the patches.plist (Ryzen, FX) from AMD OS X Github (Right click, Save Page As, Remember to change the suffix to .plist)
- Open patches.plist with Clover Configurator (CCG) or Clover Cloud Editor (CCE).
<% hint style="info" %>If you are using CCE, please go to home page and set _ Show Find/Replace/TgtBridge values as: to Hex _because the following CCE screenshots are in Hex.
Explanations
Patches:
The first thing we’ll go over is the Patches section. This section allows us to dynamically rename parts of the DSDT via Clover. Since we’re not running a real mac, and macOS is pretty particular with how things are named, we can make non-destructive changes to keep things mac-friendly. We have one entries here:
- change SAT0 to SATA — for potential SATA compatibility
Enable Fix Shutdown
- This can fix some shutdown issues like reboot instead of shutting down. But this might also cause shutdown issues on some board. So if you are having some issues with shutting down, disable this.

Arguments:
- -v — enable verbose which shows all the behind-the-scenes text that scrolls by as you’re booting instead of the Apple logo and progress bar. It is very helpful for tracking issues are fixing them.
- npci=0x2000 — a fix for stuck at [PCI Configuration Start].
Default Volume — setting the default volume for booting.
- LastBootedVolume — let Clover uses the last booted volume (no matter if it boot successfully) as default.
Timeout (sec) — setting the timeout for auto-booting.
- -1 — disable auto-boot.
Legacy (PBR) — let Clover use PBR to boot legacy system.

Boot Graphics (which doesn’t matter much)
We have nothing to do here. You can tweak it if Clover doesn’t show correctly.
We have nothing to do here also.
- Reset HDA — Puts the codec back in a neutral state between OS reboots. This prevents some issues with no audio after booting to another OS and then back.
- USB — Under this section, we ensure that Inject and FixOwnership are selected to avoid issues with hanging at a half-printed line somewhere around the Enabling Legacy Matching verbose line. You can also get past that by enabling XHCI Hand Off in BIOS.

We have nothing to do here.
Scan:
The only settings I’ve tweaked on this page are the Scan settings. I’ve selected Custom, then checked everything except Legacy and Kernel. This just omits some of the unbootable entries in Clover to clean up the menu.

Please refer to GPU Buyers Guide and see which settings do you need for your GPU.
Kernel And Kexts Patches
The patches.plist (which you are editing) already has all of the patches you want to have. Those patches are used to patch the native Kernel.
- AppleRTC (enabled) — this ensures that we don’t have a BIOS reset on reboot.

Rt Variables and SMBIOS
RAW XML (Rt Variables)
RT Variables: (From CorpNewt’s Vanilla Guide)
We set Rt Variables -> ROM to UseMacAddr0 which just utilizes our onboard Mac address — this should be unique enough to not conflict with any others.
BooterConfig gets set to 0x28 , and CsrActiveConfig is set to 0x3e7 which effectively disables SIP as SIP is not supported on AMD Systems unfortunately.
SMBIOS: Skip this first

Explanations
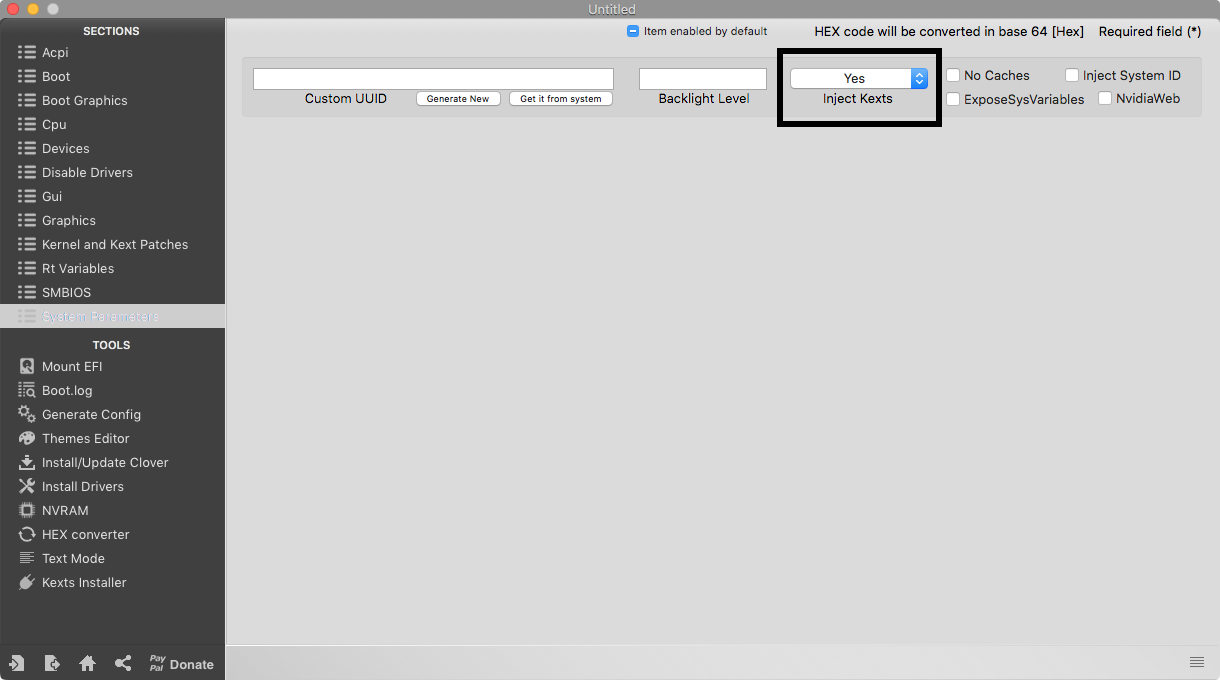
Inject Kexts:
This setting has 3 modes:
- Yes — this tells Clover to inject kexts from the EFI regardless.
- No — this tells Clover not to inject kexts from the EFI.
- Detect — this has Clover inject kexts only if FakeSMC.kext or VirtualSMC.kext are not in the kext cache.
We set it to Yes to make sure that all the kexts we added before get injected properly.
Inject System ID:
This setting tells clover to set the SmUUID as the system-id at boot — which is important for iMessage and such.
NvidiaWeb:
This setting will force nvda_drv=1 on every boot, this is recommended for users with non-functional NVRAM ****(EmuVariableUEFI) or issues switching from the default macOS drivers to the Nvidia WebDrivers.

At this point, you can do File -> Save to save the config.plist (or go back to home page and download your config.plist if you are using CCE). Keep it to somewhere you’ll remember.
Now go to the next page to configure SMBIOS.
Источник
FAQ Rev 1.3.0
AMD OS X Frequently Asked Questions

Getting Started
Welcome to the AMD OS X FAQ. Here we aim to provide you with enough information so you can squash any bugs or issues you have with ease and speed.

Tools
These aren’t a requirement but do assist in making it easier to perform tasks.:
- AMD OS X Knowledge Base: A collection of tools and guides that you might find useful for installing macOS on you AMD machine.
- Clover Bootloader: This is the software that will allow you to boot from the HDD/SSD without the USB Installer.
- Clover Configurator: This software allows you to configure Clover.
Support
If you require further support that this page cannot offer please visit the Forums or the Discord server.
Compatibility
When it comes to an AMD Hackintosh compatibility is often questioned. Truth is if the device works on an Intel hackintosh it’ll work on AMD too.
There’s no specific motherboard that won’t work but there are some that can make it harder. Gigabyte boards are normally the choice of many.
As for CPUs, Just about every AMD CPU is supported by the modified kernel. It’s the system that limits it. From Sierra onwards your CPU must support the SSE4.1 CPU instruction.
This currently isn’t emulated by the kernel and most likely won’t be added. FX and Ryzen systems have the required instructions to run.
BIOS Settings
The only true requirement in the BIOS is that SATA is set to AHCI. If there’s no option then it’s most likely already on. The other settings below are for optimisation.
- APU/Integrated graphics = Disabled
- EHCI Handoff = Enabled
- XHCI Handoff = Enabled
- Cool’n’Quiet = Enabled
- Serial and Parallel ports = Disabled
- HPET = Enabled
- HPC = Enabled
Notes
Some useful pointers to take note of.
- Sierra 10.12 onwards is only compatible with CPUs that have the SSE4.1 / 4.2 Instructions for now.
- Sleep doesn’t always work with macOS on AMD. It’ll work or it won’t.
- It’s always best to install macOS to a separate HDD/SSD and keep your other Operating System separate.
Known Issues
These issues are known on AMD systems and no known fix is available but will be looked at when time allows.
- iMessage.
- FaceTime.
- Siri.
- Issue on High Sierra with Nvidia Performance.
Installation
Booting the Install
Some machines will fall at the first hurdle, there can be a few reasons for this. The main issue is USB support. This applies more to non Ryzen systems when booting the USB Installer.
You may be faced with a symbol with the last text entry on boot referring to «Still waiting for root device».
In most cases to remedy this you need to perform a USB Hot Swap. To do this simply start the installation booting and once the system leaves the bootloader and starts the macOS boot sequence swap your USB device to another USB port.
If this doesn’t fix the issue please refer to the Forums or Discord for support.
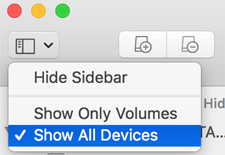
Disk Utility
Before installing macOS you must first format your install drive. From the installer, navigate to «Utilities» and open Disk Utility. Make sure view is set to «Show All Devices».
WARNING:
Erasing your disk will delete all your files including Windows. Do NOT erase your Windows drive if you’re not okay with losing your Windows installation along with all your files.
When Disk Utility is open:
- Select the drive you want to install macOS on
- Click the Erase button
- Select the following Settings
- Format: Mac OS Extended (Journaled) or APFS
- Scheme: GUID Partition Map
- Click the «Erase» button
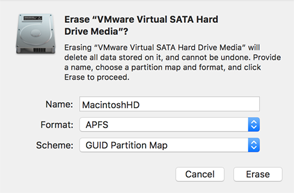
If the erase is successful then macOS can be installed on the previously selected drive.
Post Installation
Installing Clover
The most complete Hackintosh Bootloader. Boot OS X, Windows, and Linux on Mac or PC with UEFI or BIOS firmware.
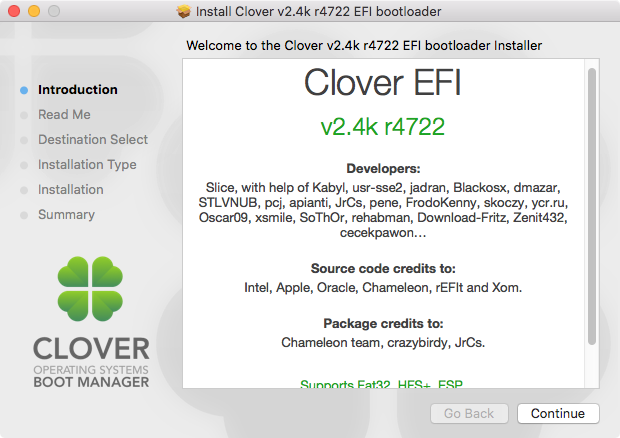
Download the latest Clover package from the Getting Started section to begin.
From there you need to follow the steps on the installer but use the Customise option to correctly install for your System. Use the settings below,
UEFI Motherboard Settings
- Install Clover for UEFI only
- Install Clover in ESP
- UEFIDrivers: AptioMemoryFix — PartitionDxe — ApfsLoader (only if you’re using APFS), don’t touch the pre-ticked options
- Install RC Scripts on target volume
Legacy Motherboard Settings
- Install Clover in ESP
- Boot0ss
- Clover EFI Sata
- Bios Drivers, 64 bit: ApfsLoader (only if you’re using APFS)
- Install RC Scripts on target volume
Configuring Clover
Download the latest Clover Configurator app from the Getting Started section to begin.

Specific Settings
Each system requires different settings. Not that settings that work for someone may not work for you.
Once you’ve got Clover installed and Clover Configurator opened go ahead and click on the Mount EFI tab on the left of the app. Now find the drive you’ve got macOS on and click on Mount Partition then Open Partition.
Now open EFI > CLOVER and right click on config.plist and open with Clover Configurator.
Now your config is open. This is the file that tells Clover what to apply to your system when booting. All you need for now is in the Boot tab on the left. Check Verbose and npci=0x2000.
All other options referring to Graphics etc will be covered in the relevant sections.
Installing Kexts
Kext files are essentially drivers for macOS. «Kext» stands for Kernel Extension, kext files «extend» the macOS kernel, the core part of the operating system.
They allow hackintosh systems to run hardware that is normally unsupported on macOS. Typically Kexts are found in the System Extensions folder of the system but it’s best to leave this folder untouched.
The most common and safest option is to «inject» the kexts into the prelinkedkernel using the bootloader. To do this with Clover simply mount the EFI partition as described in the Configuring Clover section and add them to the Kexts/Other folder within the Clover files. With that done you need to ensure Inject Kexts is enabled in the config using Clover Configurator.
Graphics
Integrated AMD GPUs are not supported in macOS in anyway.
Not all Graphics cards are natively supported in macOS. Some need a little help to get going.
Nvidia Graphics
- 10 series cards require Sierra 10.12.4 or later & Nvidia Web Drives (GTX 1050-1080)
- 9 Series cards require Nvidia Web Drives (GTX 950-980)
- 7 Series cards require Nvidia Web Drives (GTX 750-780)
- 6 Series cards work natively in macOS (GTX 650-680)
The simplest way to install nVidia drivers on macOS is to use a script from Benjamin Dobell.
Simply copy and paste this command into Terminal,
From here mount your EFI partition and open the config with Clover Configurator and enable NvidiaWeb within the System Parameters section.
AMD Graphics
The majority of modern AMD GPUs work OOB in macOS due to Apple using them in the Mac lineup. Some however still need some tweaks to get going. See an extensive guide from AlGrey here.
Networking
Not all networking chips are compatible with macOS. See below the fix for your network setup.
Ethernet
Realtek LAN
In most cases what you need is RTL8111.kext. You can find the download below and this goes inside the Clover kext folder.
Wireless
Native solutions are always the best in this case. Try to find a wireless chipset that’s used in any Mac. For example I use an Atheros AR5B91 that was used in MacBooks with a PCI adapter.
Broadcom chips work well. See a guide by Toleda here.
USB can work natively on Ryzen with a DSDT patch and Clover patch. All other systems need some extra kexts and or modifications to work.
Ryzen Systems
Ryzen only needs a DSDT patch and some Clover patches to use native USB kexts within macOS.
You can find out how here.
All Other Systems
WIP — Coming Soon
Audio
As with USB, Audio can work using native AppleHDA on Ryzen. All other systems require VoodooHDA.
Ryzen Systems
Ryzen has an advantage where it can make use of AppleHDA. A few tweaks are required though.
Find out how to apply the fix here.
All Other Systems
VoodooHDA is the hackintosh version of AppleHDA. This works on just about every codec available. Install the kext to the Clover kext folder
Tweaks
Some system tweaks maybe?
Disable Gatekeeper
Gatekeeper, first introduced in OS X Mountain Lion, is a Mac security feature which prevents the user from launching potentially harmful applications. In macOS Sierra, however, Apple made some important changes to Gatekeeper that seemingly limit the choices of power users. But don’t worry, Gatekeeper can still be disabled in Sierra and above. Here’s how, enter the following command into Terminal.
Источник


