- Включить Telnet через командную строку или панель управления в Windows 10/8/7
- Включить Telnet в Windows
- Windows: Установка Telnet — CMD & PowerShell
- Установить Telnet с помощью CMD
- Установить Telnet с помощью PowerShell
- Просмотр Звездных Войн из Командной Строки
- RootUsers
- Guides, tutorials, reviews and news for System Administrators.
- How To Enable Telnet Client in Windows Server 2016
- Enabling the Telnet Client
- Enabling the telnet client through command prompt
- Enabling the telnet client through PowerShell
- Enabling the telnet client through the graphical user interface
- Verifying that the telnet client is enabled
- Summary
- How to install telnet client on Windows Server 2019, 2016 or 2012
- Install Telnet Client on Windows Server 2019, 2016 or 2012 using the command line
- Install Telnet Client on Windows Server 2016 using Server Manager
- Check that Telnet is installed
- Check Ports with Telnet
- Reader Interactions
- Trackbacks
- Cmd telnet windows 2016
- Answered by:
- Question
- Answers
- All replies
Включить Telnet через командную строку или панель управления в Windows 10/8/7
В Windows 10/8/7 клиент и сервер Telnet по умолчанию отключены. Если вы хотите включить его, вы можете сделать это с помощью командной строки или через панель управления.
Включить Telnet в Windows
Использование CMD
Чтобы включить Telnet через командную строку:
- Нажмите Пуск и введите тип поиска в CMD .
- Щелкните правой кнопкой мыши CMD и выберите Запуск от имени администратора .
- Введите пароль администратора, если он предложит
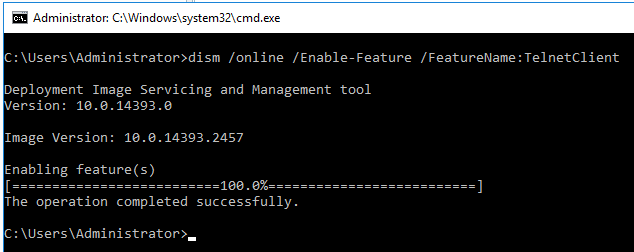
- Затем введите pkgmgr/iu: ”TelnetClient” ИЛИ dism/online/Enable-Feature/FeatureName: TelnetClient и нажмите Enter, чтобы включить клиент Telnet.
- Используйте команду pkgmgr/iu: ”TelnetServer” , чтобы включить сервер Telnet.
Через панель управления
В случае, если вы хотите включить его через Windows Explorer, выполните следующие действия:

- Нажмите «Пуск» и введите тип поиска в appwiz.cpl .
- Затем нажмите Включить или выключить функцию Windows на правой боковой панели.
- Там найдите Telnet Server и Telnet Client и нажмите на это поле
- Нажмите OK и перезагрузите систему, если будет предложено.
Взгляните на некоторые из этих интересных трюков, связанных с Telnet, таких как наблюдение за Star Wars с использованием Telnet в Windows.
Читать . Как включить клиент TFTP в Windows 10.
Windows: Установка Telnet — CMD & PowerShell
telnet в Windows по умолчанию отключен.
Перед использованием команды telnet в Windows необходимо активировать компонент Telnet Client, иначе вы рискуете получить следующую ошибку:
CMD: ‘telnet’ не является внутренней или внешней командой, исполняемой программой или пакетным файлом.
В этой заметке я показываю, как установить telnet в Windows с помощью CMD и PowerShell.
В качестве бонуса я покажу, как с помощью telnet можно посмотреть фильм Звездные Войны из командной строки. .
Дельный Совет: Как проверить открыт ли TCP-порт в PowerShell! Читать далее →
Установить Telnet с помощью CMD
Запустите CMD с правами администратора: нажмите клавишу Win , чтобы открыть меню «Пуск», наберите cmd , чтобы найти командную строку и нажмите комбинацию Ctrl + Shift + Enter , чтобы запустить командную строку от имени администратора.
Установить telnet в Windows с помощью командной строки (CMD):
Установить Telnet с помощью PowerShell
Запустите PowerShell с правами администратора: нажмите клавишу Win , чтобы открыть меню «Пуск», наберите powershell , чтобы найти командную строку и нажмите комбинацию Ctrl + Shift + Enter , чтобы запустить PowerShell от имени администратора.
Установить telnet в Windows с помощью PowerShell:
Дельный Совет: Убить зависший процесс в Windows из CMD! Читать далее →
Просмотр Звездных Войн из Командной Строки
Как только компонент Telnet Client активирован, вы можете начинать использовать команду telnet для отладки сетевых проблем либо … для просмотра Звездных Войн из командной строки:
RootUsers
Guides, tutorials, reviews and news for System Administrators.
How To Enable Telnet Client in Windows Server 2016
By default the telnet client in Microsoft’s Windows operating systems is disabled, this is unfortunate as it is an extremely useful tool which can be used for testing TCP connectivity to external hosts on a specified port.
This is great when you’re trying to troubleshoot network connectivity problems, for example, say we have a web server which should be listening on port 80 to serve HTTP traffic but we are not able to load a web page, by using telnet to connect to the web server on port 80 we can verify the connectivity.
It may be that the connectivity is fine but there is a problem with the web server, or that the web server is stopped and the port is not listening at all, for instance. With telnet we can get a better understanding of what’s going on.
Enabling the Telnet Client
Firstly you need to enable the telnet client, if you don’t enable it you’ll get a result similar to the below message when trying to use it.
You can enable the telnet client either by command line or through the graphical interface.
Enabling the telnet client through command prompt
Using the command line is the easiest and fastest way to install the telnet client. Run the below command in command prompt with administrator permissions.
That’s it, after a few seconds telnet should be ready to use.
Enabling the telnet client through PowerShell
Again we can also do this instead with PowerShell, we can run the below command in a PowerShell console with administrator permissions.
Enabling the telnet client through the graphical user interface
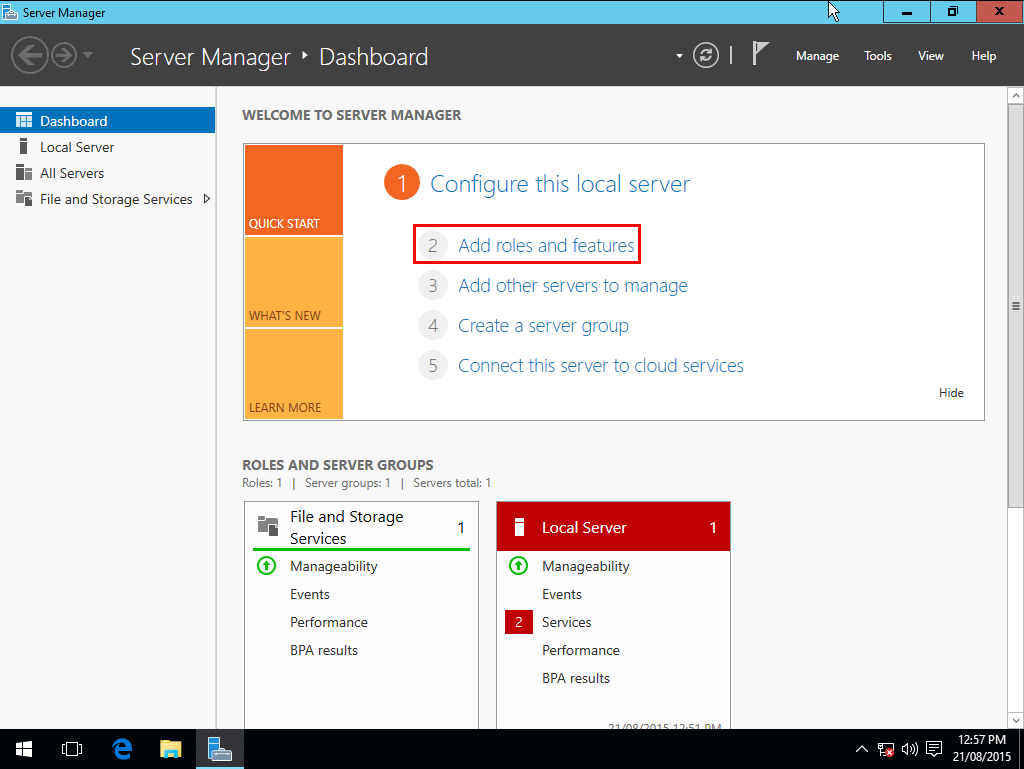
- Open Server Manager.
- From Server Manager click “Add roles and features”.

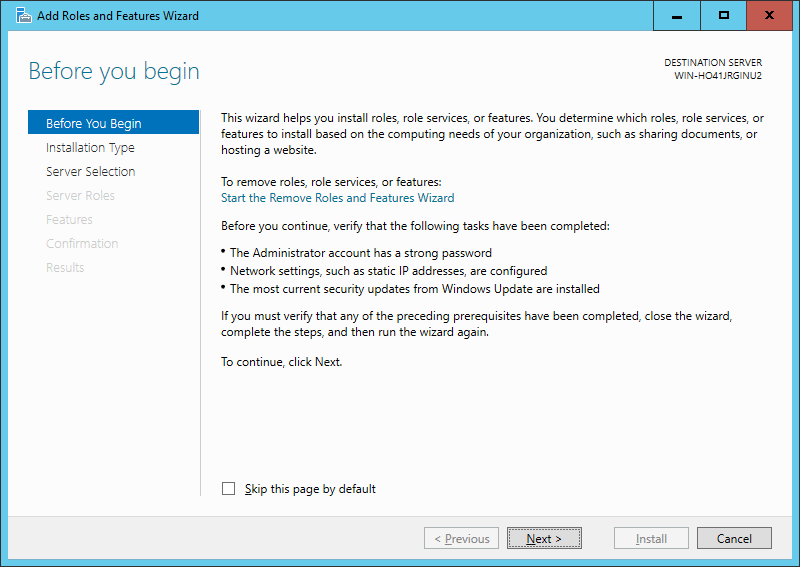
- The Add Roles and Features Wizard opens to the Before you Begin screen, click next.
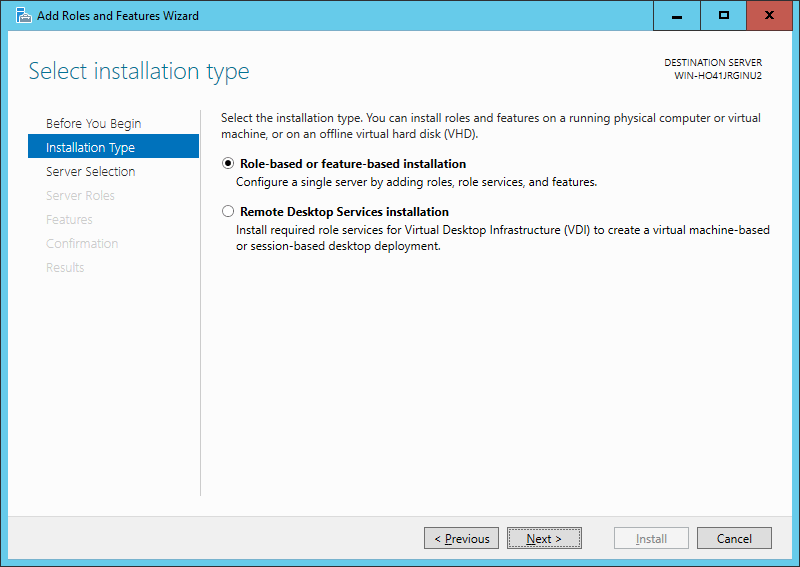
- On the Installation Type screen, leave Role-based or Feature-based installation selected and click next.
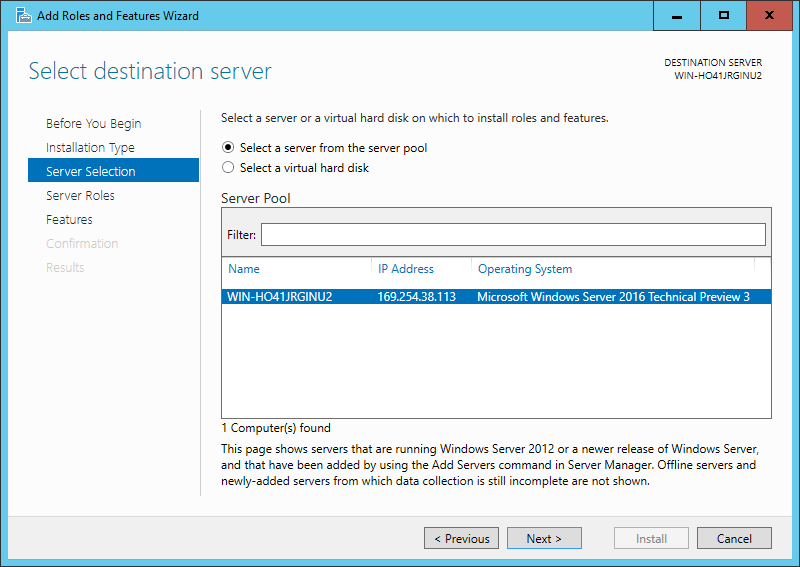
- On the server selection screen, select the server to install on. By default it should be the local server itself, click next.
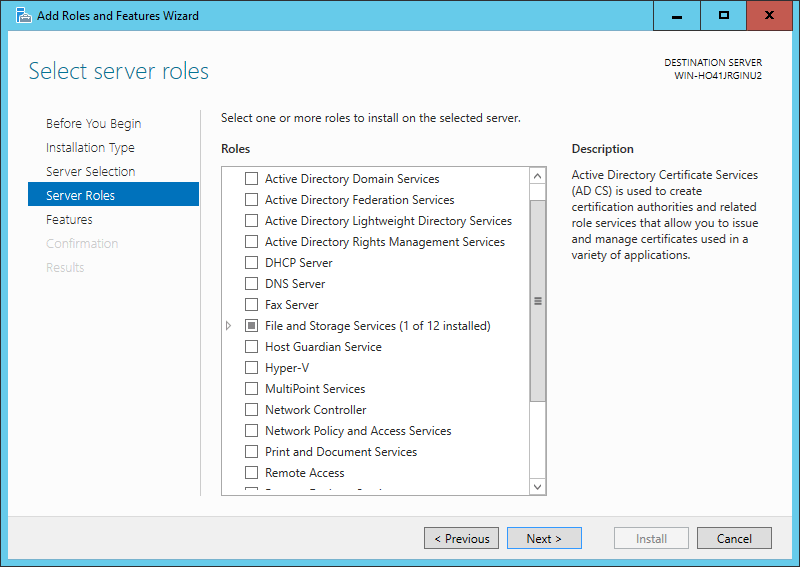
- On the Server Roles screen, click next. We are installing a feature rather than a role so don’t select anything here.
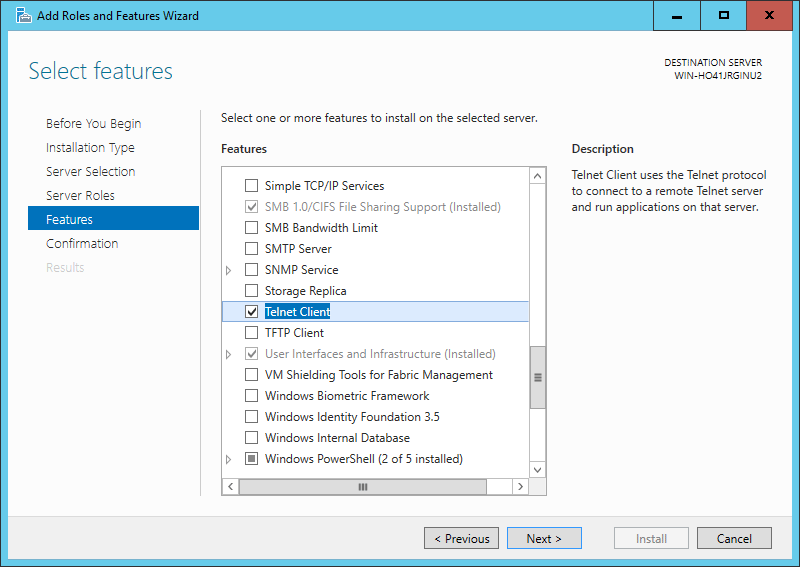
- On the Features screen, tick the check box next to Telnet Client.
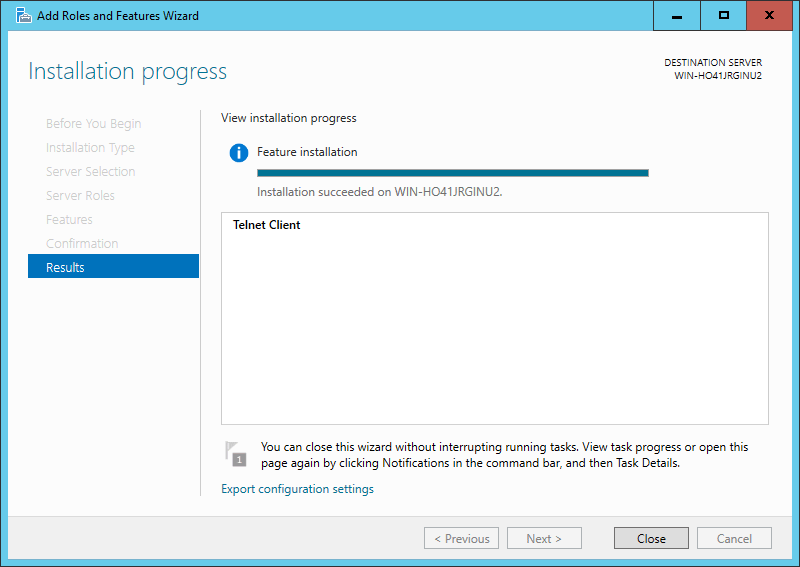
- On the Confirmation screen, click Install.
- Once the installation succeeds, click the Close button. The telnet client is now installed and ready for use.

Verifying that the telnet client is enabled
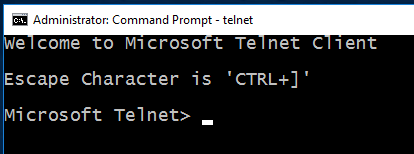
Simply open command prompt or powershell, type ‘telnet’ and press enter. If this was successful you should have a prompt similar to the below:
Already have telnet installed but still failing?
In some cases you must run command prompt or powershell as administrator in order to issue the telnet command, otherwise it will give the same error as if it was not enabled at all.
Summary
Now that you have enabled telnet in Windows Server 2016 you should be able to start issuing commands with it and using it to troubleshoot TCP connectivity problems.
How to install telnet client on Windows Server 2019, 2016 or 2012
Telnet is not installed on Windows Server by default. I don’t understand why, because it is a useful tool and uses little space. It is however, easy to enable telnet on Windows Server 2016 or 2012. If you do not have telnet installed you will see this message from the command line:
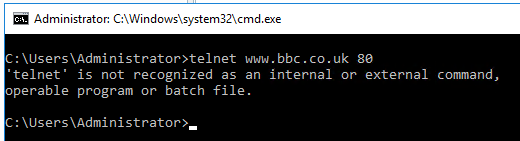 Telnet is not recognized as an internal or external command.
Install Telnet Client on Windows Server 2019, 2016 or 2012 using the command line
The command line is the quickest way of installing the telnet client, very simply just type:
Install Telnet Client on Windows Server 2016 using Server Manager
You can use Server Manager to install the telnet client, but it is a much longer process than doing it via the command line, here is a short video of the correct options to select.
Check that Telnet is installed
To check if your installation was successful, just go into a command prompt and type “telnet” and you should come to the interactive telnet prompt, like this:
Check Ports with Telnet
Now that you have got telnet installed, you can use it to test open ports ports and connect to remote machines.
Reader Interactions
Trackbacks
[…] Microsoft stopped including the telnet client by default on Windows Server, so you will need to install the telnet client first if it is not already […]
Cmd telnet windows 2016
This forum has migrated to Microsoft Q&A. Visit Microsoft Q&A to post new questions.
Answered by:
![]()
Question
![]()
![]()
Could any one help me ,
I have installed win 2016 Tech Preview 5. I wanted to install telnet server on it. I couldnt find it in «add roll and features», i found only telnet client on it.tried to enable telnet server by cli but failed.
C:\WINDOWS\system32>dism /online /Enable-Feature /FeatureName:TelnetServer
Deployment Image Servicing and Management tool
Version: 10.0.14342.1000
Image Version: 10.0.14342.1000
Feature name TelnetServer is unknown.
A Windows feature name was not recognized.
Use the /Get-Features option to find the name of the feature in the image and try the command again.
The DISM log file can be found at C:\WINDOWS\Logs\DISM\dism.log
Answers
![]()
![]()
Does not surprise me telnet sever is not in server 2016 as it is old technology and not secure. I do not think it will be included.
PowerShell has remote access, so look into that as an alternative. After enabling you can use PowerShell ISE it has a New Remote PowerShell Tab. option on the File menu.
All replies
![]()
![]()
Does not surprise me telnet sever is not in server 2016 as it is old technology and not secure. I do not think it will be included.
PowerShell has remote access, so look into that as an alternative. After enabling you can use PowerShell ISE it has a New Remote PowerShell Tab. option on the File menu.
![]()
![]()
Thanks for your post.
As far as I know, Telnet Server feature was not included in Windows server 2016 Tech Preview 5, so we could not install this on it. Please wait for the later updates and official announcements for Windows Server 2016.
Everything you Need to Know About Windows Server 2016
Please Note: Since the web site is not hosted by Microsoft, the link may change without notice. Microsoft does not guarantee the accuracy of this information.


