- Бюджетное видеонаблюдение для прижимистых «чайников»
- Скачать XMEye для ПК
- XMEye для ПК Скриншоты
- загрузить и установить XMEye на вашем персональном компьютере и Mac
- Шаг 1: Загрузите эмулятор Android для ПК и Mac
- Шаг 2: установите эмулятор на ПК или Mac
- Шаг 3: XMEye для ПК — Windows 7/8 / 8.1 / 10
- Шаг 4: XMEye для Mac OS
- XMEye for Mac Free Download | Mac Tools
- XMEye for Mac – Specifications
- Features of XMEye Mac
- How to Get XMEye for Mac
- Screenshots of XMEye
- Incoming Related Searches
- IP Camera VMS for Windows/Mac PC Software — VMS
- Top Best License Free VMS Software for IP Cameras/NVRs
- Download XMEye VMS for PC
- How to use the VMS software?
- Add the Cameras/DVRs/NVRs to VMS
Бюджетное видеонаблюдение для прижимистых «чайников»
Скоро будет 7 лет с момента написания статьи «Видеонаблюдение под Ubuntu для «чайников» (ZoneMinder)». За эти годы она не раз корректировалась и обновлялась в связи с выходом новых версий, но кардинальная проблема, а именно — стоимость IP видеокамер, оставалась прежней. Её обходили оцифровывая аналоговые потоки и эмулируя IP камеры с помощью USB «вебок».
Ситуация изменилась с появлением китайских камер стандарта ONVIF 2.0 (Open Network Video Interface Forum). Теперь любую камеру отвечающую стандарту вы можете настроить с помощью ONVIF Device Manager.

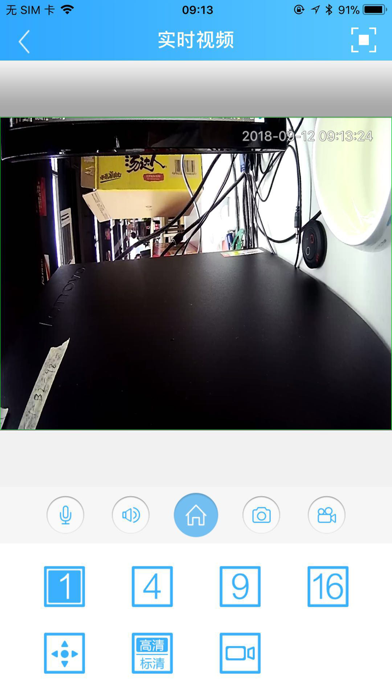
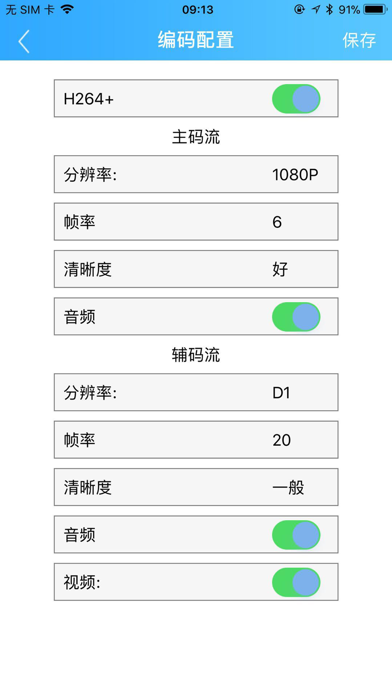
Более того, вы сразу можете увидеть адреса и параметры потоков вещания с камеры. Да, да. Теперь потоков, как минимум — 2, не считая звука. Один архивный — в максимальном качестве, другой — рабочий в меньшем разрешении.
Я буду рассказывать на примере камеры MISECU IPC-DM05-1.0 Купил её в «чёрную пятницу» по цене 1059,15 руб. Сейчас они подняли цену и я бы скорее приобрел GADINAN. Что в прочем, одно и то-же. В любом случае, аппаратная часть моей камеры определяется как hi3518e_50h10l_s39 не зависимо от того, какой логотип написан на коробке. Камера купольная, по факту представляет из себя шарик «на верёвочке» легко вынимаемый из гнезда-держателя. Если будете заказывать, обратите внимание, что блок питания надо покупать отдельно (DC 12V/2A). Я использовал БП от сгоревших китайских-же настольных часов. К сожалению, звука и управления позицией в камере нет. Для этих целей подойдет какой-нибудь беби-монитор типа этого или этого. Главное, что бы в названии было слово Onvif.
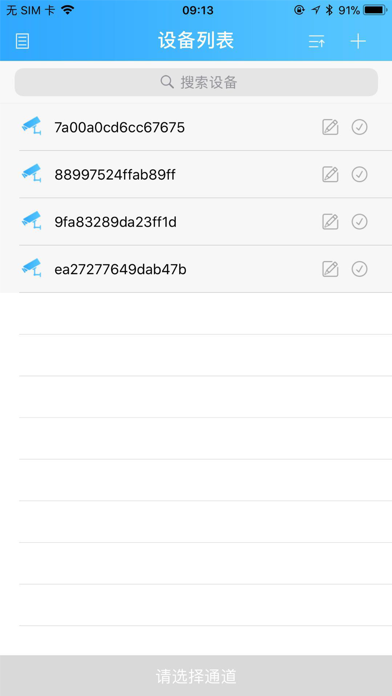
После распаковки и включения надо выставить IP адрес каждой камеры (по умолчанию у всех жестко 192.168.1.10), чтобы они не конфликтовали между собой. Это можно сделать в ONVIF Device Manager или штатной утилитой General Device Manage которая идет в комплекте, на мини CD. Далее, выставляем временную зону, параметры отображения дат и имя для каждой камеры. Создаем пользователей с правами «только для просмотра».
Веб-интерфейс камеры, программы CMS и интерфейс облака в браузере совершенно одинаковы, неудобны и требуют IE c ActiveX.
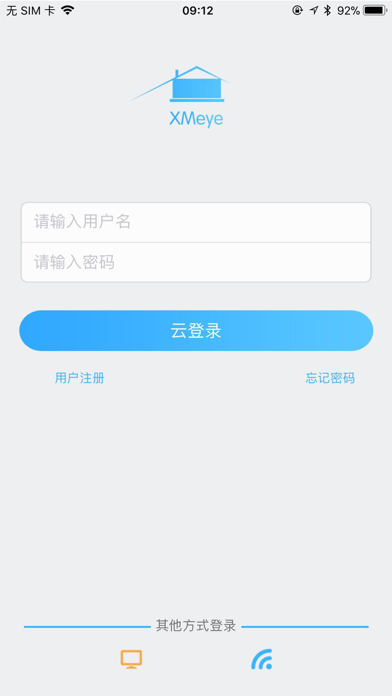
Благо, их можно с успехом заменить приложением XMeye установленным на Android или iOS. Но, прежде необходимо сделать нашу камеру видимой для облака. Для этого откройте порт по которому работает Onvif (8899) на вашем коммутаторе. В моём случае — это NAT Setting-Virtual Server. Если камер несколько, то внутренний порт для каждого IP оставляете прежним, а внешний меняете на пару значений. Далее, камера сама постучится в облако и предъявит свой индивидуальный CloudID. Вам нужно будет только добавить его в свой профиль в облаке.
Собственно, сама по себе камера уже может детектить движение, стримить видео и отправлять аллармы. Вкупе с облачным сервисом XMeye — это готовый сервис мониторинга.
Если вам хочется иметь свой собственный регистратор с архивами, и вы любите Windows, то ставьте бесплатные iSpy, или SecurOS Lite (до 32 камер) или бесплатную-же версию (до 8 камер) Xeoma. Кстати, у последней есть версии для Mac OS X, Linux включая ARM и Android.
С настройками не должно возникнуть проблем, так что можете дальше не читать. Остальная часть статьи написана для Linux.
Я был приятно удивлен обнаружив в Zoneminder v.1.30.0 визард для настройки ONVIF камер. Он позволяет подключить к консоли любой из потоков идущих с камеры в зависимости от аппаратных возможностей и потребностей оператора.
Установка и настройка Zoneminder никогда не были лёгким занятием. Последняя версия вышла особо капризной и требует предварительной установки веб-сервера LAMP, с последующим выполнением ряда дополнительных действий. Поэтому, приведу старый «джедайский» способ подключения камеры для более старых версий:
1. Определите адреса потоков через ONVIF Device Manager или Xeoma. У вас должно получиться что-то похожее:
Не забудьте заменить звездочки (*) своими данными.
2. Проверьте адреса в проигрывателе VLC. Меню-Медиа-Открыть IRL
Источник
Скачать XMEye для ПК
- Категория: Utilities
- Дата выпуска: 2020-12-03
- Текущая версия: 3.1.1
- Размер файла: 84.07 MB
- Совместимость: Требуется Windows 10/8.1/8/7/Vista
XMEye для ПК Скриншоты
загрузить и установить XMEye на вашем персональном компьютере и Mac
Проверить совместимые приложения для ПК или альтернативы
| заявка | Скачать | Рейтинг | Разработчик |
|---|---|---|---|
 xmeye xmeye | Получить приложение или альтернативы | 1.87048/5 332 рецензия |
Или следуйте инструкциям ниже для использования на ПК
Если вы хотите установить и использовать XMEye на вашем ПК или Mac, вам нужно будет загрузить и установить эмулятор Desktop App для своего компьютера. Мы усердно работали, чтобы помочь вам понять, как использовать app для вашего компьютера в 4 простых шагах ниже:
Шаг 1: Загрузите эмулятор Android для ПК и Mac
Хорошо. Прежде всего. Если вы хотите использовать приложение на своем компьютере, сначала посетите магазин Mac или Windows AppStore и найдите либо приложение Bluestacks, либо Приложение Nox . Большинство учебных пособий в Интернете рекомендуют приложение Bluestacks, и у меня может возникнуть соблазн рекомендовать его, потому что вы с большей вероятностью сможете легко найти решения в Интернете, если у вас возникнут проблемы с использованием приложения Bluestacks на вашем компьютере. Вы можете загрузить программное обеспечение Bluestacks Pc или Mac here .
Шаг 2: установите эмулятор на ПК или Mac
Теперь, когда вы загрузили эмулятор по вашему выбору, перейдите в папку «Загрузка» на вашем компьютере, чтобы найти приложение эмулятора или Bluestacks.
Как только вы его нашли, щелкните его, чтобы установить приложение или exe на компьютер или компьютер Mac.
Теперь нажмите «Далее», чтобы принять лицензионное соглашение.
Чтобы правильно установить приложение, следуйте инструкциям на экране.
Если вы правильно это сделаете, приложение Emulator будет успешно установлено.
Шаг 3: XMEye для ПК — Windows 7/8 / 8.1 / 10
Теперь откройте приложение Emulator, которое вы установили, и найдите его панель поиска. Найдя его, введите XMEye в строке поиска и нажмите «Поиск». Нажмите на XMEyeзначок приложения. Окно XMEye в Play Маркете или магазине приложений, и он отобразит Store в вашем приложении эмулятора. Теперь нажмите кнопку «Установить» и, например, на устройстве iPhone или Android, ваше приложение начнет загрузку. Теперь мы все закончили.
Вы увидите значок под названием «Все приложения».
Нажмите на нее, и она перенесет вас на страницу, содержащую все установленные вами приложения.
Вы должны увидеть . Нажмите на нее и начните использовать приложение.
Шаг 4: XMEye для Mac OS
Привет. Пользователь Mac!
Шаги по использованию XMEye для Mac точно такие же, как для ОС Windows выше. Все, что вам нужно сделать, это установить Nox Application Emulator или Bluestack на вашем Macintosh. Вы можете получить Это здесь .
Источник
XMEye for Mac Free Download | Mac Tools
XMEye for Mac Free: XMEye for Mac is one of the free video monitoring application for the front-end monitoring equipment. The XMEye Mac PC app is the practical video monitoring software tool for the IPC and DVR. It is an efficient video monitoring application that is specially designed for various inexpensive IP cameras and NVRs and DVRs. With the XMEye app, remotely monitoring the videos via your Mac desktop PC has become super easy and very simple. You can scan the live videos on the go with the latest version of XMEye for Mac. There is a support for the cloud technology, and thus you can log in via the same for the better viewing. You can watch the live video monitoring to get a complete view of monitoring the video from the XMEye Mac app with the help of cloud technology. XMEye for Mac supports the real-time live view and it even remote playback too. It even works in a way to scan the live video recordings on your digital video recorder and IPC and thus you can see those video clips with ease.
XMEye Mac is the world’s most popular video monitoring application tool as it has included many advanced features in it when compared with the rivals. You can watch videos and take control of the home or your office as XMEye for Macbook. It is a remote video surveillance application that has Live Preview option with which you can watch a real-time live view of the things happenings on your Mac PC Desktop. Watching the live videos on the go is easy with this video surveillance application. With the Remote video playback feature of XMEye Mac app, you can easily playback the videos remotely. XMEye Mac Download lets you capture the screenshots from the video and even view photos as it supports taking the snapshot and searching for the pictures. Get involved in a bidirectional talk by using the voice intercom. With the PTX control in XMEye app, you can zoom in and zoom out. The adapted MD5 encryption of XMEye for Mac has the support of cloud technology, and thus it gives you better performance and provides authentication.
XMEye for Mac – Specifications
Application Name: XMEye
Developer: Huangwanshui
Version: 2.2.2
Categories: Tools
Languages: English
File size: 13.79 MB
Features of XMEye Mac
The salient features of XMEye Mac are listed below
Video Surveillance App: Download XMEye App as it is the best video monitoring or surveillance software application for the inexpensive IP cameras like IPC, DVR with which you can watch live view and playback remotely.
Cloud Login: With the integration of cloud technology, you can log in easily by using the device’s serial number to see the live view monitoring video in the XMEye Macbook App.
Live Preview: You can watch or preview the live videos in real-time in the front-end monitoring equipment as the XMEye Mac app supports live viewing.
Remote Playback: Remotely playback the videos using XMEye for Mac app. The local recording feature of the app will record and play videos, and you can add, edit, delete the videos by using the remote device.
Capture Screenshot: You can easily capture the photos, take screenshots, search or view photos as XMEye Mac download app supports taking screenshots with ease.
Voice Intercom Support: The Voice Intercom feature of the XMEye Mac app supports bidirectional talk, and thus you can communicate on the go without any complications.
Support Remote Device: XMEye for Mac supports adding, editing, deleting a remote device. So you easily add the device as with its address as it manually searches for the device in LAN.
How to Get XMEye for Mac
To install and use XMEye on MAC, you need an emulator. Bluestacks is one of the most famous and popular Android emulators which can be used to install Android apps on your MAC.
- Download and install Bluestacks from its official website (www.bluestacks.com).
- Open Bluestacks app and sign in with your Gmail username and password.
- Open Google Play Store app which is located on the home page of Bluestacks emulator.
- Search XMEye under Google Play Store search bar.
- From the resultant apps, choose the XMEye official app and click on it.
- Press Install to download and install the app.
- After installation, you can launch the app from the Bluestacks home screen.
Screenshots of XMEye
Incoming Related Searches
XMEye for MacBook Pro
Download XMEye for Mac
XMEye for Mac download
Источник
IP Camera VMS for Windows/Mac PC Software — VMS
XMEye is the popular App that designed for various inexpensive IP cameras and NVRs/DVRs. XMEye makes remote video monitoring via smartphones become super easy. However, this App is only compatible with Android (Smartphone, Tablet) and iOS (iPhone, iPad) devices. Is there any software for the PC which can be used for Windows or Mac PC? Well, we are delighted to introduce you the replica which recently has been released by the Xiongmai (XM). VMS is an acronym for “video monitoring software”.
Top Best License Free VMS Software for IP Cameras/NVRs
As the latest central monitoring station software, the VMS now adopts Apple skin and user-intuitive UI design. Unlike the conventional CMS software, the new software is easy to use. Despite supporting both Windows (Windows 7, Windows 8, Windows 10) and Mac OS, it also can be compatible with network cameras from Xiongmai, Hikvision, Dahua, and other ONVIF compliant brands. VMS is also a freeware, offering up to 64 channel video monitoring capability, depending on your PC’s hardware performance, it makes video monitoring over PC become smooth and straightforward. Lastly, this software can support local video surveillance but also the remote surveillance.
This software is license-free, no trial, no registration is required, it supports up to 64-channel video monitoring and has a very friendly UI design. WE DON”T OFFER ANY SUPPORT FOR IT! You can find common FAQs in comment sections.
Download XMEye VMS for PC
- Windows OS: http://t.cn/EVNrcyW (64bit released on July, 2017)
- Windows OS: http://t.cn/EVNBrjF (32bit released on Feb, 2017)
- Mac OS: http://t.cn/EVNrHap (released on September, 2016)
Optional download link from shop.tuyaoem.com, need to contribute 0.1 USD to download via Paypal. The web server is located in UK can provide faster download speed.
- Windows 64 version: Click Here!
- MacOS X version (Apple computers): Click Here!
If you wish to add Dahua or Hikvision cameras/DVRs/NVRs to VMS, you can use another version that comes with Dahua and Hikvision protocol, you can download from here!.
After sharing the article, it will reveal download link, you can download VMS that compatible with Windows and Mac computers from Googledrive.
How to use the VMS software?
Download and install the VMS software.
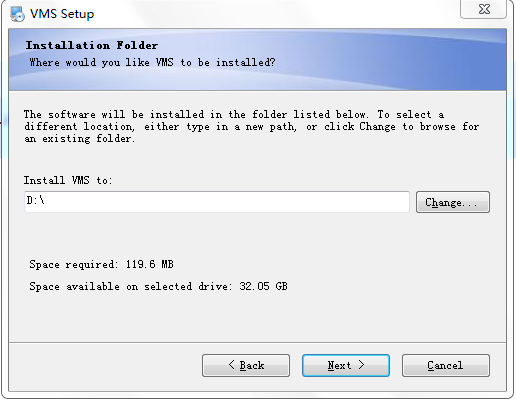 XMEye VMS PC Software — Installation
Login with default account information (account & password: admin). After login, navigate to [User Manager] to modify the account, or manage the account.
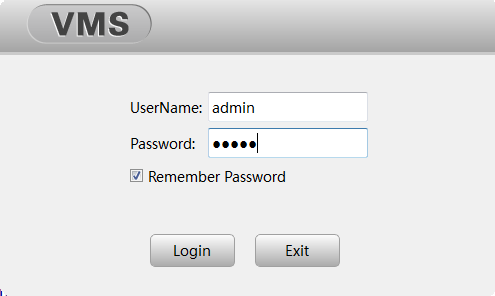 VMS PC Software — Login
After login to the VMS, you will see all the features which the VMS supported.
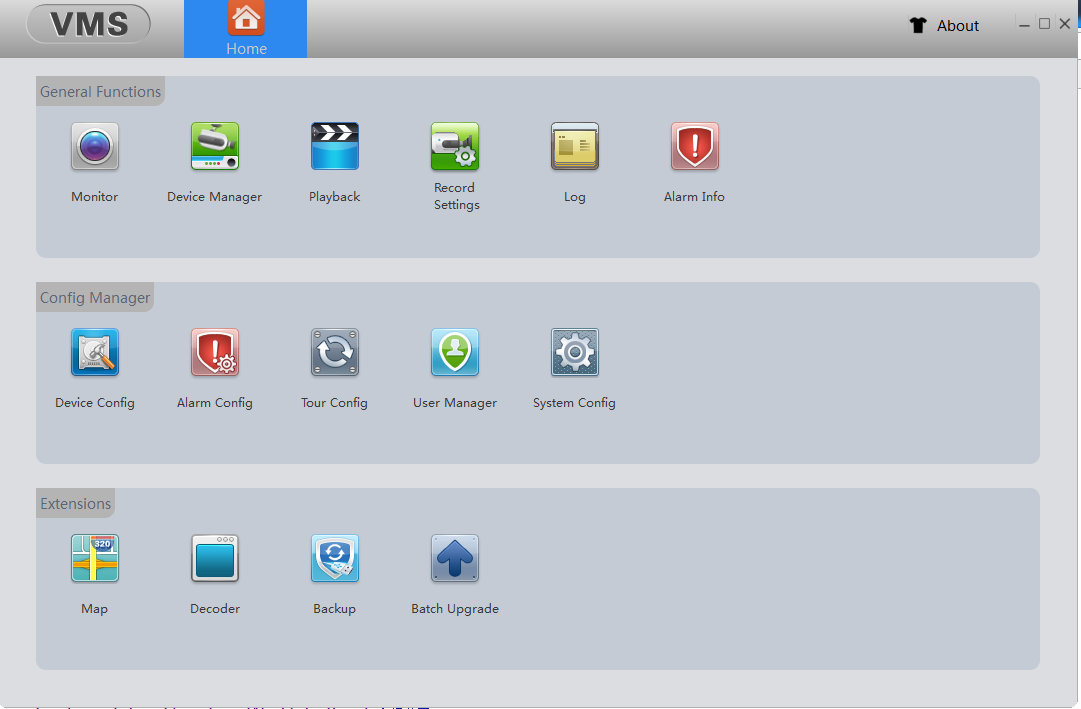 VMS PC Software — Main Function
- Monitor: Watch security video (preview)
- Device Manager: Add/delete IP cameras/NVRs/DVRs
- Playback: Play the recorded video clips
- Record Settings: Storage space setting, recording modes
- Device Config: Config the connected IP cameras/DVRs/NVRs
- Alarm Config: Enabled/Disable Motion detection, camera masking, video loss, Alarm I/O
- Tour Setting: Tour setting for PTZ cameras
- User Manager: Manager the user accounts
- System Config: Config the VMS software settings
- Map: Google map integration
- Decoder: Decoding video footage
- Backup: Backup all the settings of VMS software
- Batch Upgrade: Update/Upgrade the firmware of devices remotely
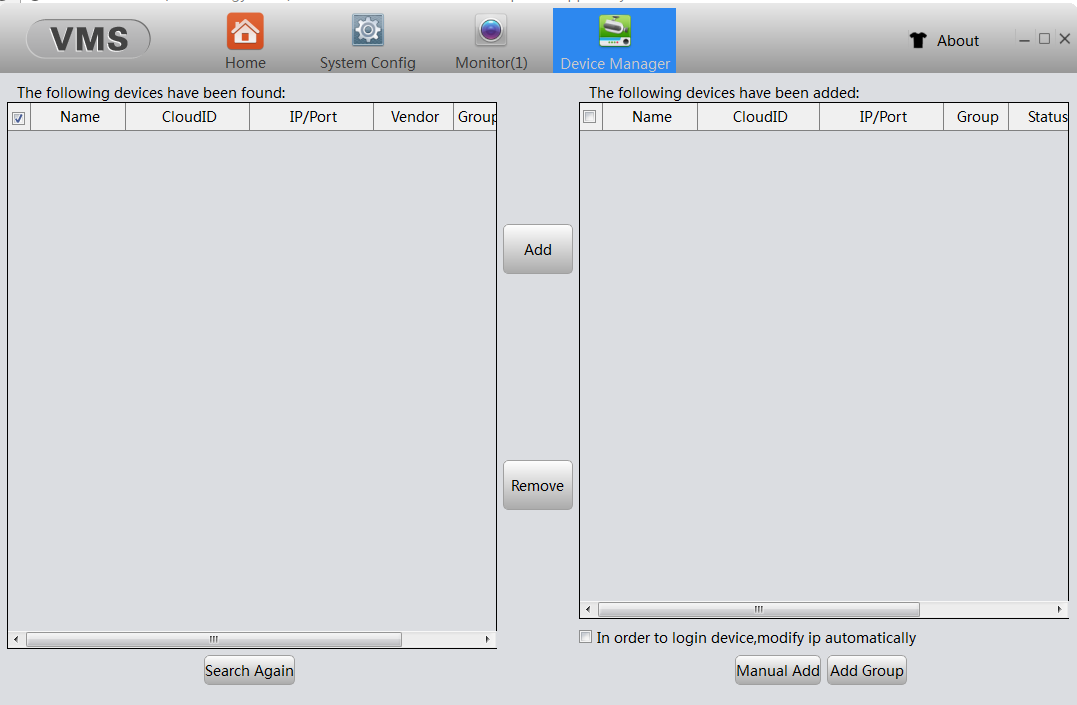
Add the Cameras/DVRs/NVRs to VMS
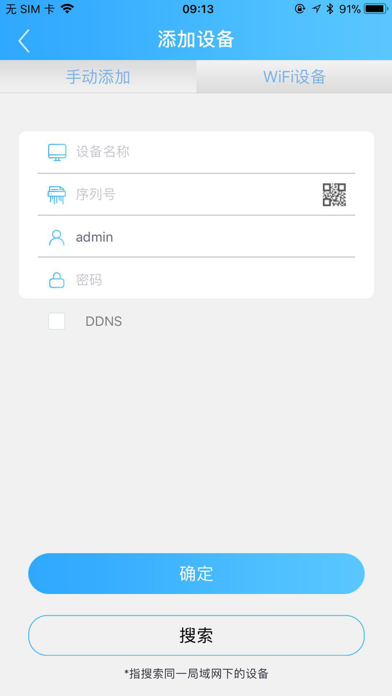
Navigate to [Device Manager], the VMS will list all the available devices that in the same network. You can click «Search again» menu to start to search for devices. If you wish to add the camera which are not in the same network, then you have to add it manually.
 VMS PC Software — Add your Cameras/NVRs/DVRs
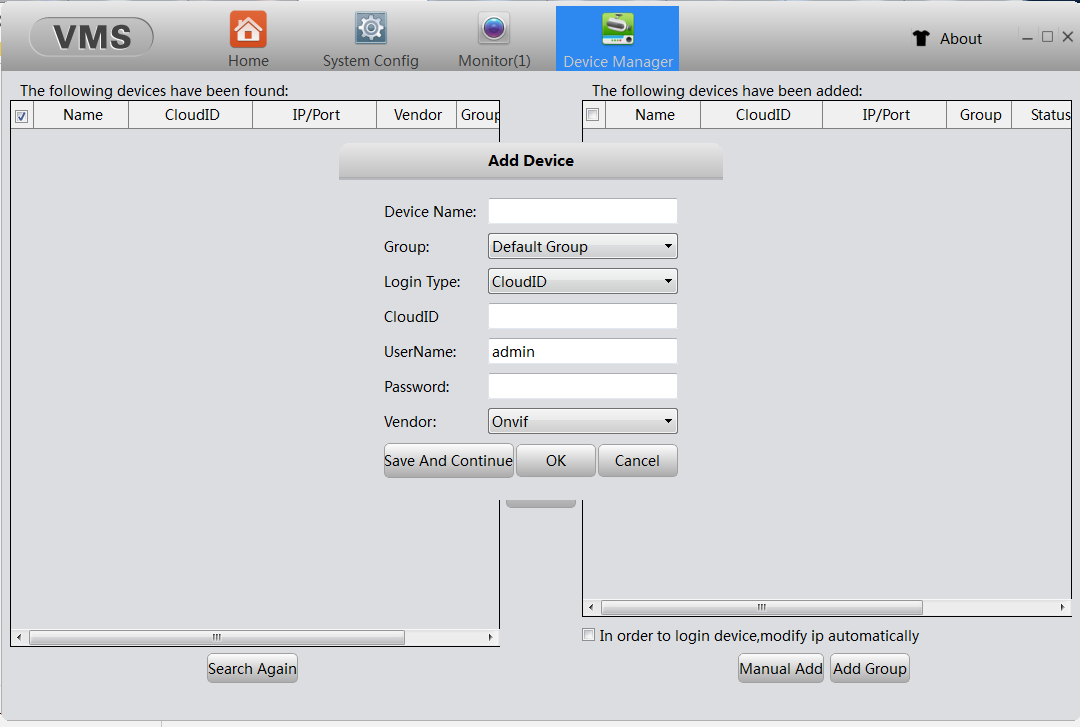
Click [Manual Add] to add the device manually, input the user-defined name, then select the group. If adding the camera from the same network then select [IP/Domain] value on login type column, if you wish to add the camera for remotely video monitoring (not in the same network/accessing from a different place), then should select [CloudID]. Vendor selection list includes XM, HK, DH, ONVIF, choosing the appropriate one according to your device’s brand. After completing the other input, click [Save and Continue] to add the device.
Note: If choosing IP/Domain, it’s required to input the camera’s IP address or domain name, using the default port number 34567, if you don’t change the port number in your device (IPC, DVR, NVR). User name and password are the device’s account info.
 Add your Cameras/NVRs/DVRs Manually
Get My Latest Posts
Subscribe to get the latest updates.
Your email address will never be shared with any 3rd parties.
Источник


