- Code::Blocks for Mac
- Download Code::Blocks for Mac Latest Version
- Screenshots
- Top Downloads
- Comments and User Reviews
- Join our mailing list
- Freeware
- Open Source
- Free to Play
- Trial
- Binary releases
- Microsoft Windows
- Linux 32 and 64-bit
- Mac OS X
- blog.carsaddict.co
- A powerful C++ and Fortran IDE with an integrated compiler that aims to meet all the requirements of even the most demanding programmers
- Filed under
- Code::Blocks 20.03 Build Apr 2 2020
- Prerequisites
- Ensure Clang is installed
- Create Hello World
- Add hello world source code file
- Explore IntelliSense
- Build helloworld.cpp
- Code Blocks Mac Catalina Update
- Running the build
- Modifying tasks.json
- Debug helloworld.cpp
- Start a debugging session
- Step through the code
- Set a watch
- Code Blocks Mac Catalina Update
- C/C++ configuration
- Compiler path
- Mac framework path
- Reusing your C++ configuration
- Troubleshooting
- Compiler and linking errors
- Terminal won’t launch For input
Code::Blocks for Mac
Code::Blocks 17.12 LATEST
Mac OS X 10.6 or later
Code::Blocks for Mac 2021 full offline installer setup for Mac
Code::Blocks for Mac is a free C, C++ and Fortran IDE built to meet the most demanding needs of its users. It is designed to be very extensible and fully configurable. Finally, an IDE with all the features you need, having a consistent look, feel and operation across platforms.
Built around a plugin framework, Code::Blocks for macOS can be extended with plugins. Any kind of functionality can be added by installing/coding a plugin. For instance, compiling and debugging functionality is already provided by plugins!
Download Code::Blocks for Mac Latest Version
Screenshots

Top Downloads
Comments and User Reviews
Join our mailing list
Stay up to date with latest software releases, news, software discounts, deals and more.
Each software is released under license type that can be found on program pages as well as on search or category pages. Here are the most common license types:
Freeware
Freeware programs can be downloaded used free of charge and without any time limitations. Freeware products can be used free of charge for both personal and professional (commercial use).
Open Source
Open Source software is software with source code that anyone can inspect, modify or enhance. Programs released under this license can be used at no cost for both personal and commercial purposes. There are many different open source licenses but they all must comply with the Open Source Definition — in brief: the software can be freely used, modified and shared.
Free to Play
This license is commonly used for video games and it allows users to download and play the game for free. Basically, a product is offered Free to Play (Freemium) and the user can decide if he wants to pay the money (Premium) for additional features, services, virtual or physical goods that expand the functionality of the game. In some cases, ads may be show to the users.
Demo programs have a limited functionality for free, but charge for an advanced set of features or for the removal of advertisements from the program’s interfaces. In some cases, all the functionality is disabled until the license is purchased. Demos are usually not time-limited (like Trial software) but the functionality is limited.
Trial
Trial software allows the user to evaluate the software for a limited amount of time. After that trial period (usually 15 to 90 days) the user can decide whether to buy the software or not. Even though, most trial software products are only time-limited some also have feature limitations.
Usually commercial software or games are produced for sale or to serve a commercial purpose.
Источник
Binary releases
Please select a setup package depending on your platform:
NOTE: For older OS’es use older releases. There are releases for many OS version and platforms on the Sourceforge.net page.
NOTE: There are also more recent nightly builds available in the forums or (for Ubuntu users) in the Ubuntu PPA repository. Please note that we consider nightly builds to be stable, usually.
NOTE: We have a Changelog for 20.03, that gives you an overview over the enhancements and fixes we have put in the new release.
NOTE: The default builds are 64 bit (starting with release 20.03). We also provide 32bit builds for convenience.
 Microsoft Windows
 Microsoft Windows
| File | Download from |
|---|---|
| codeblocks-20.03-setup.exe | FossHUB or Sourceforge.net |
| codeblocks-20.03-setup-nonadmin.exe | FossHUB or Sourceforge.net |
| codeblocks-20.03-nosetup.zip | FossHUB or Sourceforge.net |
| codeblocks-20.03mingw-setup.exe | FossHUB or Sourceforge.net |
| codeblocks-20.03mingw-nosetup.zip | FossHUB or Sourceforge.net |
| codeblocks-20.03-32bit-setup.exe | FossHUB or Sourceforge.net |
| codeblocks-20.03-32bit-setup-nonadmin.exe | FossHUB or Sourceforge.net |
| codeblocks-20.03-32bit-nosetup.zip | FossHUB or Sourceforge.net |
| codeblocks-20.03mingw-32bit-setup.exe | FossHUB or Sourceforge.net |
| codeblocks-20.03mingw-32bit-nosetup.zip | FossHUB or Sourceforge.net |
NOTE: The codeblocks-20.03-setup.exe file includes Code::Blocks with all plugins. The codeblocks-20.03-setup-nonadmin.exe file is provided for convenience to users that do not have administrator rights on their machine(s).
NOTE: The codeblocks-20.03mingw-setup.exe file includes additionally the GCC/G++/GFortran compiler and GDB debugger from MinGW-W64 project (version 8.1.0, 32/64 bit, SEH).
NOTE: The codeblocks-20.03(mingw)-nosetup.zip files are provided for convenience to users that are allergic against installers. However, it will not allow to select plugins / features to install (it includes everything) and not create any menu shortcuts. For the “installation” you are on your own.
If unsure, please use codeblocks-20.03mingw-setup.exe!
Linux 32 and 64-bit
 Linux 32 and 64-bit
| Distro | File | Download from |
|---|---|---|
 | codeblocks_20.03_amd64_oldstable.tar.xz | FossHUB or Sourceforge.net |
| codeblocks_20.03_i386_oldstable.tar.xz | FossHUB or Sourceforge.net |
| codeblocks_20.03_amd64_stable.tar.xz | FossHUB or Sourceforge.net |
| codeblocks_20.03_i386_stable.tar.xz | FossHUB or Sourceforge.net |
 | codeblocks-20.03-1.el6.rmps.tar | FossHUB or Sourceforge.net |
| codeblocks-20.03-1.el7.rmps.tar | FossHUB or Sourceforge.net |
 | For Ubuntu, use this PPA |
Note: The Linux packages above are compressed archives (tar, tar.xz or tar.bz2). When you decompress the package you downloaded on your system, you will find all the .rpm or .deb packages required to install Code::Blocks.
Note: On RedHat/CentOS older revisions of 6 (up to 6.2 as far as we know) you need to add repoforge (former rpmforge) to your repolist, to be able to install the needed wxGTK-package. See http://repoforge.org/use for an instruction.
Note: Redhat/CentOS probably also needs an installed hunspell-package, if you want to install the contrib-plugins.
Mac OS X
 Mac OS X
| File | Download from |
|---|---|
| CodeBlocks-13.12-mac.zip | FossHUB or Sourceforge.net |
NOTES:
- Code::Blocks 20.03 for Mac is currently not available due to issues caused by Apple hardening their install packages and lack of Mac developers. We could use an extra Mac developer to work on these issues.
- The provided download contains an Application Bundle (for the i386 architecture) built for Mac OS X 10.6 (and later), bundling most Code::Blocks plugins.
Источник
blog.carsaddict.co
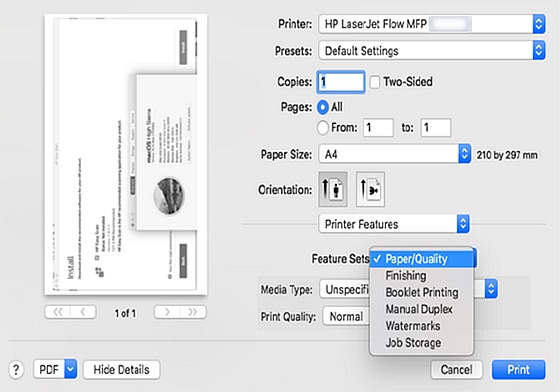
Download the Developer Tools from Apple, if not installed with Mac OS X. For Mac OS X 10.4, you need to install Xcode Tools version 2.4 or later; Download the latest Mac binary ZIP package of Code::Blocks, from BerliOS. For Mac OS X 10.4 up to 10.6 (PowerPC or Intel), download the ‘Universal’ Now unpack the zip file package, and put CodeBlocks.

- MacBook Pro, Mac OS X (10.7.5), Code Blocks compiler and Xcode Posted on Feb 4, 2013 6:58 AM Reply I have this question too (583) I have this question too Me too (583) Me too.
- Code Blocks For Mac Os Catalina Download. Shut down your Mac. Press Power + Command + R keys to bring up the macOS Utilities screen. Click Reinstall macOS. Select Disk Utility Erase HDD. Install the macOS Catalina from here. Code Blocks For Mac Os Catalina 10 15.
A powerful C++ and Fortran IDE with an integrated compiler that aims to meet all the requirements of even the most demanding programmers
Application development and code compiling are tasks specific for programmers and users with extensive knowledge in this area. To successfully carry out such projects and build apps, manage source code and collaborate with other people, having a specialized software is a must.
Code::Blocks is one of the available tools that offer everything one would need to get through all the stages of the development process. Highly customizable and extensible, this Integrated Development Environment (IDE) supports a variety of functions.
The interface is complex, yet not too complicated and, since less experienced users are not targeted by this software, it shouldn’t pose any problems to programmers. With all the features and commands ready at hand, Code::Blocks can be operated with maximum efficiency from the get-go.
A neat characteristic of this IDE, apart from the fact that it can be extended through plugins, is the ability to generate them using a simple wizard. There are literally dozens of highlighting modes available, so if the developer prefers a specific language, like Pascal, C++, Haskell, Java, Perl, Python, Ruby and so on, there is an option to mark the code in that specific manner.
More so, Code::Blocks offers its users the possibility to choose the style, indentation and formatting for source code. Even the mouse movements and scrolling actions can be customized if necessary and the overall customization alternatives are quiet extensive and will require a few minutes to go through.
For code compiling and profiling tasks, the software enables you to select the preferred tool and configure its settings in great detail. Code::Blocks supports many compilers, like GCC (MingW / Linux GCC), MSVC++, Digital Mars, or Borland C++ 5.5.
Overall, the application is very well equipped for the tasks it is meant to perform and thanks to a well thought layout, its users will surely get to know all the functions and manage to use them to their fullest with minimal efforts.
Filed under
Code::Blocks 20.03 Build Apr 2 2020
top alternatives FREE
top alternatives PAID
In this tutorial, you configure Visual Studio Code on macOS to use the Clang/LLVM compiler and debugger.
After configuring VS Code, you will compile and debug a simple C++ program in VS Code. This tutorial does not teach you about Clang or the C++ language. For those subjects, there are many good resources available on the Web.
If you have any trouble, feel free to file an issue for this tutorial in the VS Code documentation repository.
Prerequisites
To successfully complete this tutorial, you must do the following:
Install Visual Studio Code on macOS.
Install the C++ extension for VS Code. You can install the C/C++ extension by searching for ‘c++’ in the Extensions view ( ⇧⌘X (Windows, Linux Ctrl+Shift+X ) ).
Ensure Clang is installed
Clang may already be installed on your Mac. To verify that it is, open a macOS Terminal window and enter the following command:
- If Clang isn’t installed, enter the following command to install the command line developer tools:
Create Hello World
From the macOS Terminal, create an empty folder called projects where you can store all your VS Code projects, then create a subfolder called helloworld , navigate into it, and open VS Code in that folder by entering the following commands:
The code . command opens VS Code in the current working folder, which becomes your ‘workspace’. As you go through the tutorial, you will create three files in a .vscode folder in the workspace:
- tasks.json (compiler build settings)
- launch.json (debugger settings)
- c_cpp_properties.json (compiler path and IntelliSense settings)
Add hello world source code file
In the File Explorer title bar, select New File and name the file helloworld.cpp .
Paste in the following source code:
Now press ⌘S (Windows, Linux Ctrl+S ) to save the file. Notice that your files are listed in the File Explorer view ( ⇧⌘E (Windows, Linux Ctrl+Shift+E ) ) in the side bar of VS Code:
You can also enable Auto Save to automatically save your file changes, by checking Auto Save in the main File menu.
The Activity Bar on the edge of Visual Studio Code lets you open different views such as Search, Source Control, and Run. You’ll look at the Run view later in this tutorial. You can find out more about the other views in the VS Code User Interface documentation.
Note: When you save or open a C++ file, you may see a notification from the C/C++ extension about the availability of an Insiders version, which lets you test new features and fixes. You can ignore this notification by selecting the X (Clear Notification).
Explore IntelliSense
In the helloworld.cpp file, hover over vector or string to see type information. After the declaration of the msg variable, start typing msg. as you would when calling a member function. You should immediately see a completion list that shows all the member functions, and a window that shows the type information for the msg object:
You can press the Tab key to insert the selected member. Then, when you add the opening parenthesis, you’ll see information about arguments that the function requires.
Build helloworld.cpp
Next, you’ll create a tasks.json file to tell VS Code how to build (compile) the program. This task will invoke the Clang C++ compiler to create an executable file from the source code.
It’s important to have helloworld.cpp open in the editor because the next step uses the active file in the editor as context to create the build task in the next step.
Code Blocks Mac Catalina Update
From the main menu, choose Terminal > Configure Default Build Task. A dropdown will appear listing various predefined build tasks for the compilers that VS Code found on your machine. Choose C/C++ clang++ build active file to build the file that is currently displayed (active) in the editor.
This will create a tasks.json file in the .vscode folder and open it in the editor.
Replace the contents of that file with the following:
The JSON above differs from the default template JSON in the following ways:
- ‘args’ is updated to compile with C++17 because our helloworld.cpp uses C++17 language features.
- Changes the current working directory directive ( ‘cwd’ ) to the folder where helloworld.cpp is.
The command setting specifies the program to run. In this case, ‘clang++’ is the driver that causes the Clang compiler to expect C++ code and link against the C++ standard library.
The args array specifies the command-line arguments that will be passed to clang++. These arguments must be specified in the order expected by the compiler.
This task tells the C++ compiler to compile the active file ( $
The label value is what you will see in the tasks list. Name this whatever you like.
The problemMatcher value selects the output parser to use for finding errors and warnings in the compiler output. For clang++, you’ll get the best results if you use the $gcc problem matcher.
The ‘isDefault’: true value in the group object specifies that this task will be run when you press ⇧⌘B (Windows, Linux Ctrl+Shift+B ) . This property is for convenience only; if you set it to false , you can still build from the Terminal menu with Terminal > Run Build Task.
Note: You can learn more about tasks.json variables in the variables reference.
Running the build
Go back to helloworld.cpp . Because we want to build helloworld.cpp it is important that this file be the one that is active in the editor for the next step.
To run the build task that you defined in tasks.json, press ⇧⌘B (Windows, Linux Ctrl+Shift+B ) or from the Terminal main menu choose Run Build Task.
When the task starts, you should see the Integrated Terminal window appear below the code editor. After the task completes, the terminal shows output from the compiler that indicates whether the build succeeded or failed. For a successful Clang build, the output looks something like this:
Create a new terminal using the + button and you’ll have a new terminal with the helloworld folder as the working directory. Run ls and you should now see the executable helloworld along with the debugging file ( helloworld.dSYM ).
You can run helloworld in the terminal by typing ./helloworld .
Modifying tasks.json
You can modify your tasks.json to build multiple C++ files by using an argument like ‘$
Debug helloworld.cpp
Next, you’ll create a launch.json file to configure VS Code to launch the LLDB debugger when you press F5 to debug the program.
From the main menu, choose Run > Add Configuration.. and then choose C++ (GDB/LLDB).
You’ll then see a dropdown for predefined debugging configurations. Choose clang++ build and debug active file.
VS Code creates a launch.json file, opens it in the editor, and builds and runs ‘helloworld’. Your launch.json file will look something like this:
The program setting specifies the program you want to debug. Here it is set to the active file folder $
By default, the C++ extension won’t add any breakpoints to your source code and the stopAtEntry value is set to false .
Change the stopAtEntry value to true to cause the debugger to stop on the main method when you start debugging.
Ensure that the preLaunchTask value matches the label of the build task in the tasks.json file.
Start a debugging session
- Go back to helloworld.cpp so that it is the active file in the editor. This is important because VS Code uses the active file to determine what you want to debug.
- Press F5 or from the main menu choose Run > Start Debugging. Before you start stepping through the source code, let’s take a moment to notice several changes in the user interface:
-
The Integrated Terminal appears at the bottom of the source code editor. In the Debug Output tab, you see output that indicates the debugger is up and running.
The editor highlights the first statement in the main method. This is a breakpoint that the C++ extension automatically sets for you:
The Run view on the left shows debugging information. You’ll see an example later in the tutorial.
At the top of the code editor, a debugging control panel appears. You can move this around the screen by grabbing the dots on the left side.
Step through the code
Now you’re ready to start stepping through the code.
Click or press the Step over icon in the debugging control panel so that the for (const string& word : msg) statement is highlighted.
The Step Over command skips over all the internal function calls within the vector and string classes that are invoked when the msg variable is created and initialized. Notice the change in the Variables window. The contents of msg are visible because that statement has completed.
Press Step over again to advance to the next statement (skipping over all the internal code that is executed to initialize the loop). Now, the Variables window shows information about the loop variable.
Press Step over again to execute the cout statement. Note As of the March 2019 version of the extension, no output will appear in the DEBUG CONSOLE until the last cout completes.
Set a watch
You might want to keep track of the value of a variable as your program executes. You can do this by setting a watch on the variable.
Place the insertion point inside the loop. In the Watch window, click the plus sign and in the text box, type word , which is the name of the loop variable. Now view the Watch window as you step through the loop.
To quickly view the value of any variable while execution is paused, you can hover over it with the mouse pointer.
Code Blocks Mac Catalina Update
C/C++ configuration
For more control over the C/C++ extension, create a c_cpp_properties.json file, which allows you to change settings such as the path to the compiler, include paths, which C++ standard to compile against (such as C++17), and more.
View the C/C++ configuration UI by running the command C/C++: Edit Configurations (UI) from the Command Palette ( ⇧⌘P (Windows, Linux Ctrl+Shift+P ) ).
This opens the C/C++ Configurations page.
Visual Studio Code places these settings in .vscode/c_cpp_properties.json . If you open that file directly, it should look something like this:
Default folder x alternative mac. You only need to modify the Include path setting if your program includes header files that are not in your workspace or the standard library path.
Compiler path
compilerPath is an important configuration setting. The extension uses it to infer the path to the C++ standard library header files. When the extension knows where to find those files, it can provide useful features like smart completions and Go to Definition navigation.
The C/C++ extension attempts to populate compilerPath with the default compiler location based on what it finds on your system. The compilerPath search order is:
- Your PATH for the names of known compilers. The order the compilers appear in the list depends on your PATH.
- Then hard-coded XCode paths are searched, such as /Applications/Xcode.app/Contents/Developer/Toolchains/XcodeDefault.xctoolchain/usr/bin/
Mac framework path
On the C/C++ Configuration screen, scroll down and expand Advanced Settings and ensure that Mac framework path points to the system header files. For example: /Library/Developer/CommandLineTools/SDKs/MacOSX.sdk/System/Library/Frameworks
Reusing your C++ configuration
VS Code is now configured to use Clang on macOS. The configuration applies to the current workspace. To reuse the configuration, just copy the JSON files to a .vscode folder in a new project folder (workspace) and change the names of the source file(s) and executable as needed.
Troubleshooting
Compiler and linking errors
The most common cause of errors (such as undefined _main , or attempting to link with file built for unknown-unsupported file format , and so on) occurs when helloworld.cpp is not the active file when you start a build or start debugging. This is because the compiler is trying to compile something that isn’t source code, like your launch.json , tasks.json , or c_cpp_properties.json file.
If you see build errors mentioning ‘C++11 extensions’, you may not have updated your tasks.json build task to use the clang++ argument —std=c++17 . By default, clang++ uses the C++98 standard, which doesn’t support the initialization used in helloworld.cpp . Make sure to replace the entire contents of your tasks.json file with the code block provided in the Build helloworld.cpp section.
Terminal won’t launch For input
On macOS Catalina and onwards, you might have a issue where you are unable to enter input, even after setting ‘externalConsole’: true . A terminal window opens, but it does not actually allow you type any input.
The issue is currently tracked #5079.
The workaround is to have VS Code launch the terminal once. You can do this by adding and running this task in your tasks.json :
You can run this specific task using Terminal > Run Task.. and select Open Terminal.
Once you accept the permission request, then the external console should appear when you debug.
Источник


