- Here’s how to change color in Paint 3D
- Steps to change the color of objects in Paint 3D
- How to change the color of a 2D shape in Paint 3D?
- How to change the color of selection inside Paint 3D?
- Conclusion
- How to make a background transparent in Paint on Windows 10
- How can I remove background color in Paint?
- 1. How to add transparent backgrounds to images with Paint
- 2. Alternative methods to add transparent backgrounds to images on Windows 10
- Adobe Photoshop
- 3. Add transparent backgrounds to images in Paint 3D
- MS Paint is a online remake of MS Paint editor.
- Try Out the Next Best Thing
- Specifications of MS Paint Online
- What is New in MS Paint online?
- Limitations of the App
Here’s how to change color in Paint 3D

If you found yourself asking the question ‘ How can I change color in Paint 3D? ‘, you came to the right place.
There is nothing better than being able to create your own art from the comfort of your own home. With the use of Paint 3D, you can now create elaborate 3D models and scenes to complement or replace your 2D art entirely.
In order to be able to create at your full potential, you will need to know how to apply and change the color of your 2D and 3D models.
For this reason, in today’s article, we will explore the best way to change colors of 2D shapes, specific selections in your project, and also 3D models. Read on to find out how to do it.
Steps to change the color of objects in Paint 3D
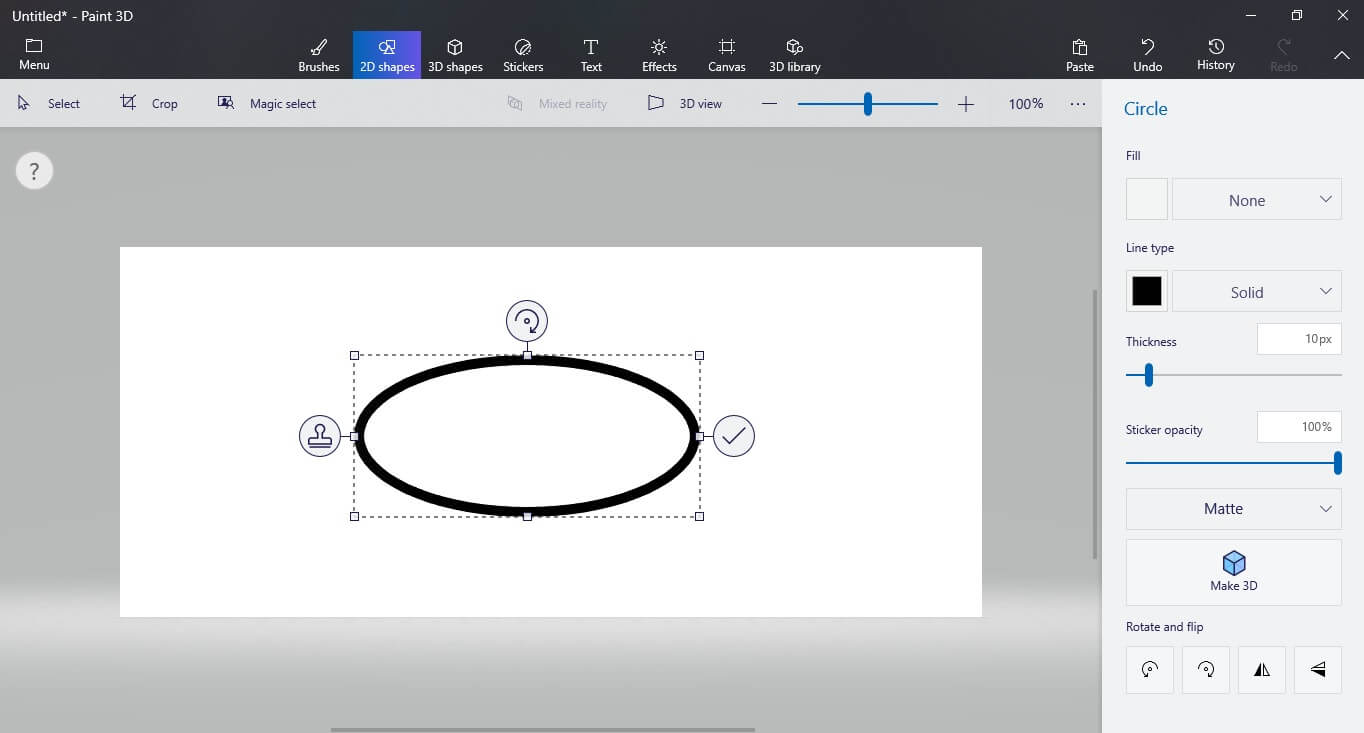
How to change the color of a 2D shape in Paint 3D?
As Paint3D was created in order to offer you a viable option to create using your Windows 10 PC, it was built to be easy to use.
As in the case of the ‘old-school’ Microsoft application, in order to change the color of a 2D object, you will need to first make a 2D object. Follow these steps to do so:
- Open Paint 3D.
- Select Create a new project from the start menu.
- Select the 2D Shapes button found in the top toolbar.
- Use the right-side menu to choose the desired shape of your 2D object -> click and drag the mouse on the canvas to create the shape.

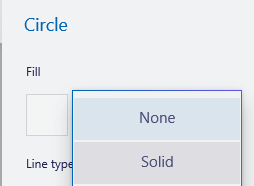
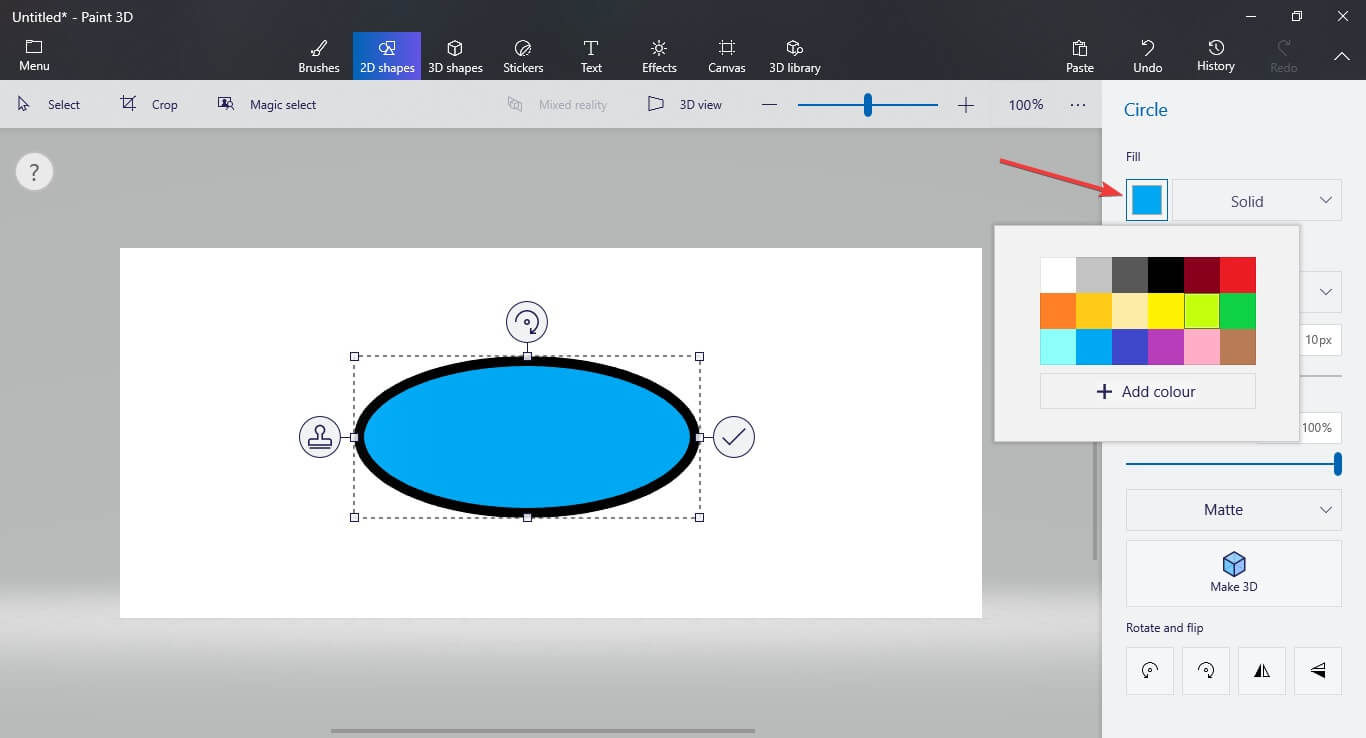
- Inside the Fill section in the same right-hand side menu -> click the to activate the drop-down menu -> select Solid.
- Click the square box next to the drop-down menu -> select your desired color.
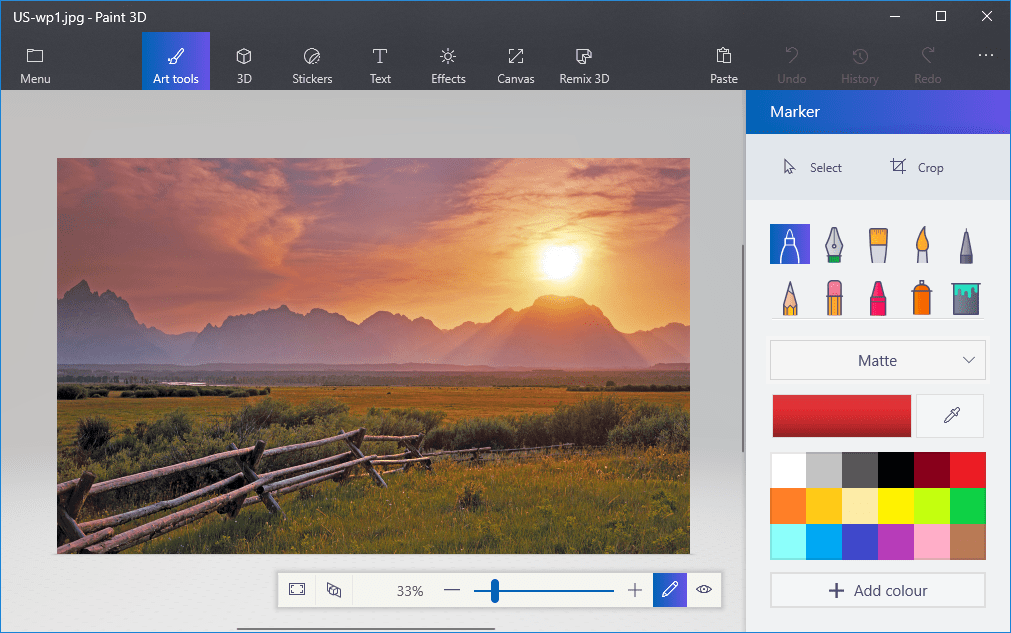
How to change the color of selection inside Paint 3D?
In order to be able to change the color of a selection inside Paint 3D, you will need to follow these steps:
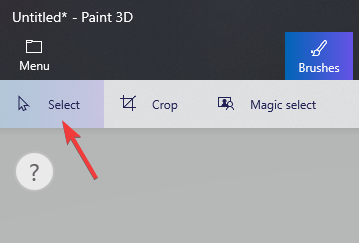
- Select the 2D or 3D object you want to change the color to by clicking the Select tool.
- Press the Brushes icon found inside the top toolbar.
- From the right-side menu select the Fill option.
- Click on the selection to fill it with the desired color.

Conclusion
In today’s How-to article we explored the best way to add color to your Print 3D project. We also discussed the easiest way to add color to a 2D object, and also how to add color to a selection.
Please feel free to let us know if this guide helped you to better understand how to use Paint 3D on your Windows 10 PC. You can do so by leaving a comment in the comment section below.
How to make a background transparent in Paint on Windows 10

- Microsoft Paint is capable of various tricks, and in this guide, we’ll show you how to make background transparent in Paint.
- To create a transparent background, you just need to select the object and cut it from an image.
- Paint 3D also supports transparent background, and it’s usually a better option for image editing.
- If you want to create professional images, you can always use specialized tools such as Adobe Photoshop.
![]()
- Photos
- Videos
- Songs
- 3D models & infographics
- Many other artworks
Paint is the image editor included with Windows. Most photographers probably overlook MS Paint or new Paint 3D for editing photos as they have relatively limited tools compared with the likes of Photoshop.
However, one thing you can do is make a transparent background in Paint and Paint 3D for Windows 10. Here’s how.
How can I remove background color in Paint?
So, how do I make a transparent background in Paint?
There are two ways that you can make a picture‘s background transparent in Paint for Windows 10.
The first method involves cutting out a foreground area in an image so that the rest of its surrounding background becomes transparent. Then you can paste the foreground over another image.
The second method involves deleting an area from a picture so it’s left with a transparent area that you can fill by adding a second background image layer.
You can add transparent backgrounds to selected foregrounds with the original Paint. However, that Windows accessory doesn’t save transparent backgrounds so that you can combine images with layers.
Although, you can set up image layers with transparent backgrounds in Paint 3D. Below you can see how you can make background 100% transparent in both Paint and Paint 3D.
1. How to add transparent backgrounds to images with Paint
- Open Paint by clicking the Cortana button. Enter the keyword Paint in Cortana’s search box, and select to open Paint.
- Next, click File >Open; and select an image to open.
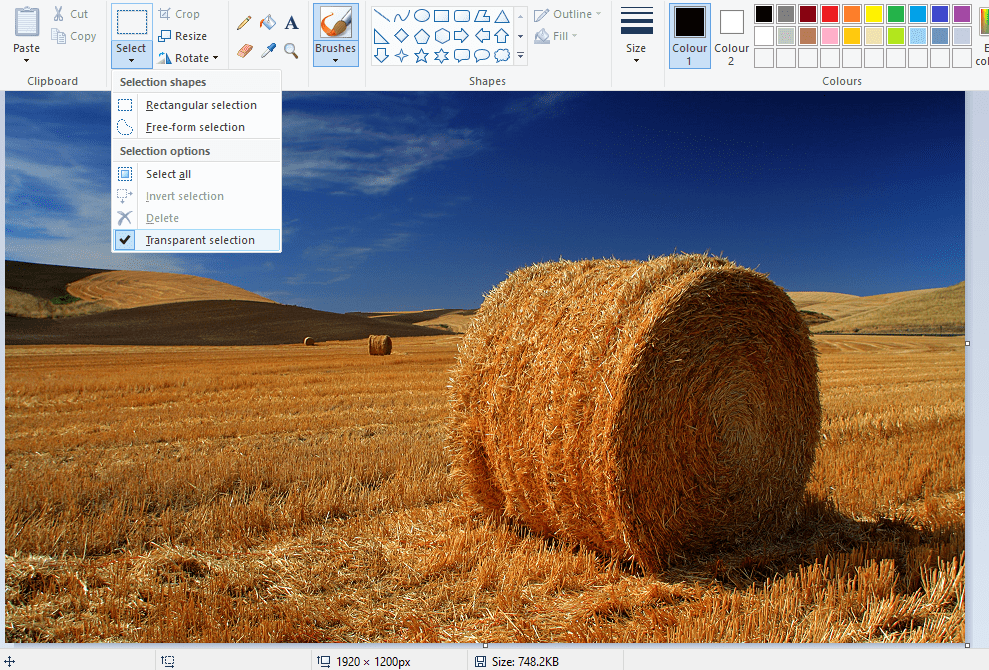
- Press the Select button, and then click the Transparent selection option.
- Select the Free-form selection option on the Select button’s menu.
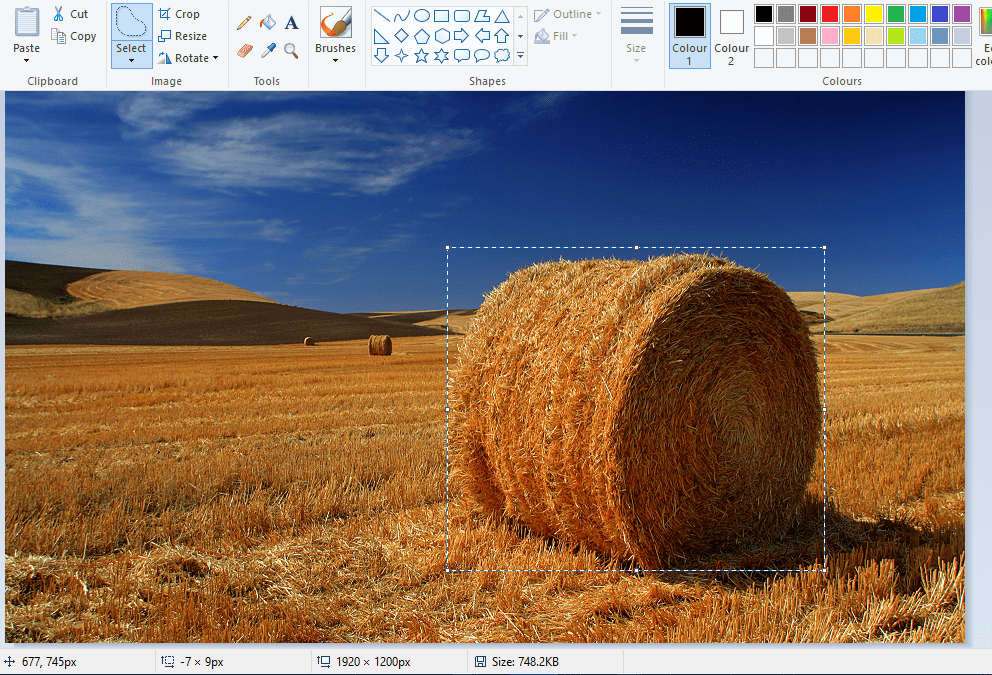
- Trace around a foreground area to preserve from the original picture with the cursor by holding the left mouse button.
- The rest of the picture left outside the traced area will be a transparent background.
- Right-click within the rectangle that appears around the selected area.
- Select Cut on the context menu to remove the selected foreground from the picture as in the snapshot below.
- Now open an entirely new image in Paint.
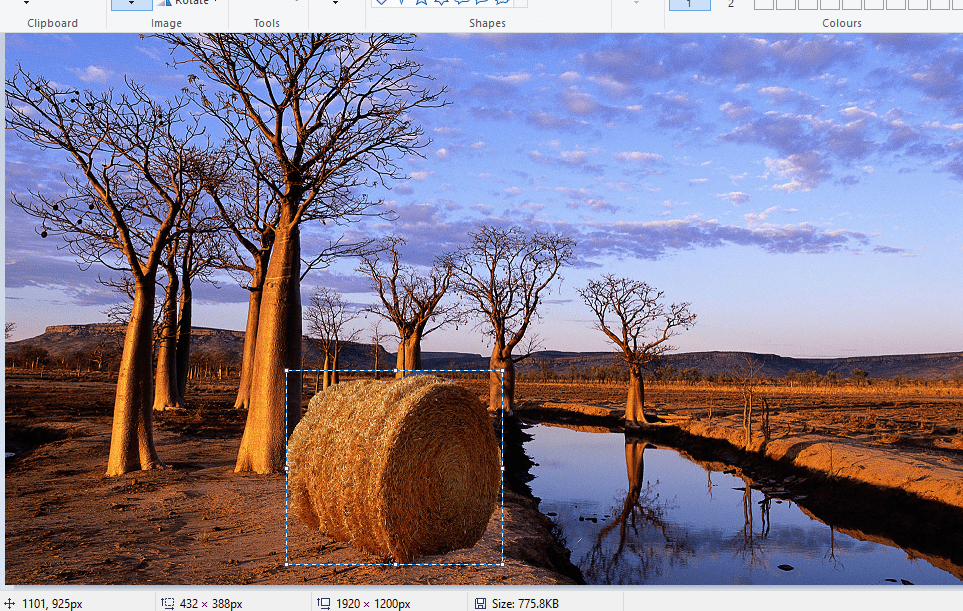
- Press the Ctrl + V hotkey to paste the foreground area you traced from the first image.
- As that picture now has a transparent background, you can see the rest of the second image behind it as shown below.
- Now left-click the pasted foreground image, and drag it to a suitable position on the background picture.

If you ever wondered how to remove background in Paint, this is one of the ways to do it.
2. Alternative methods to add transparent backgrounds to images on Windows 10
When it comes to digital graphics design, few programs have a more resounding name than Adobe Photoshop.
Among the many features that this program boasts, it can also help you in your effort to create transparent backgrounds.
This is thanks to the fact that Adobe Photoshop supports the use of image layers, allowing you to overlap images for great effect.
If you want to know to create transparent background in Adobe Photoshop, follow the steps below:
- Go to the Layers tab on the right-pane, right-click your image and select Duplicate Layer
- Make sure to hide the newly-created bottom image layer
- Select the original picture in the Layers tab, and then select the Magic Wand tool from the toolbar on the left pane
- Select and mark the background in your image that you need to turn transparent
- Click the Delete key on your keyboard
- Press File, and hit Save as…
- Give your newly-created image a name, and save it in the PNG format
Of course, this is just one of many tools and useful tricks that you can perform in Adobe Photoshop.
As such, if you are an avid graphics designer and feel like adding a bit of extra life into your photography, then a tool like Adobe Photoshop is the right thing for you.
Adobe Photoshop
3. Add transparent backgrounds to images in Paint 3D
- Enter Paint 3D in Windows 10’s search box. If you haven’t had the Creators update, add the app to Windows 10 from this website page.
- Select to open the Paint 3D app below.
- Click Menu >Open >Browse files, and select an image to open in Paint 3D.
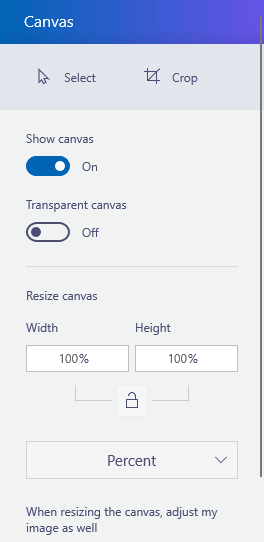
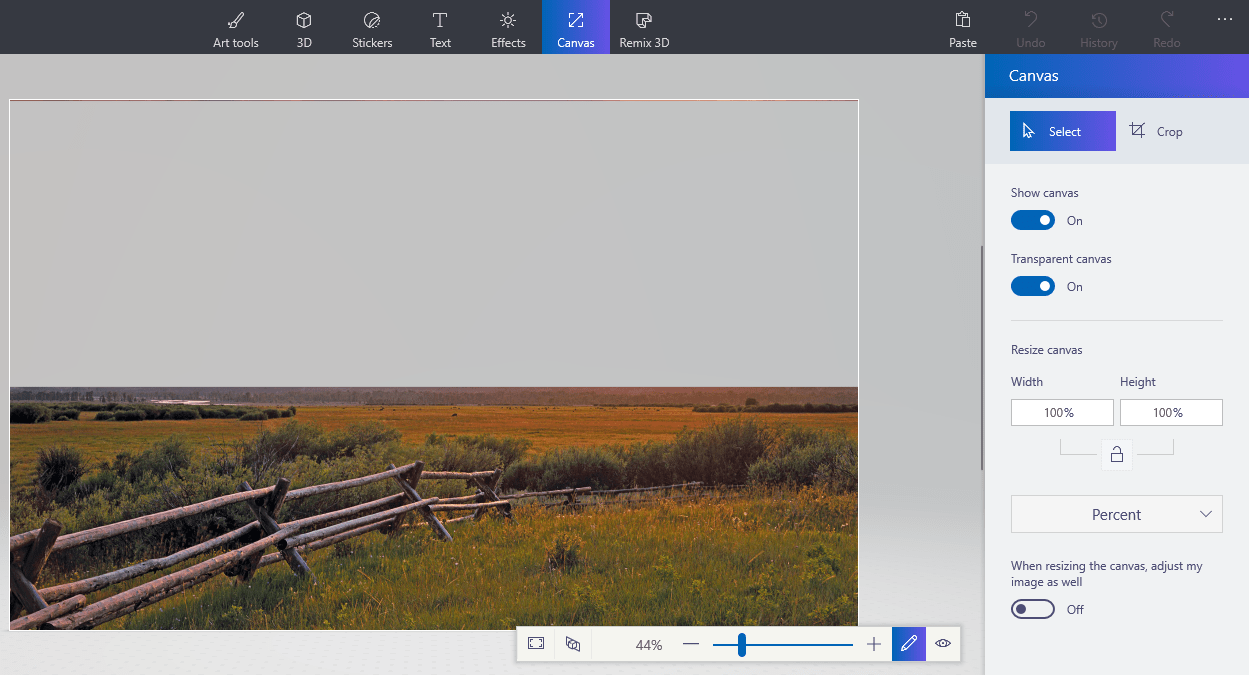
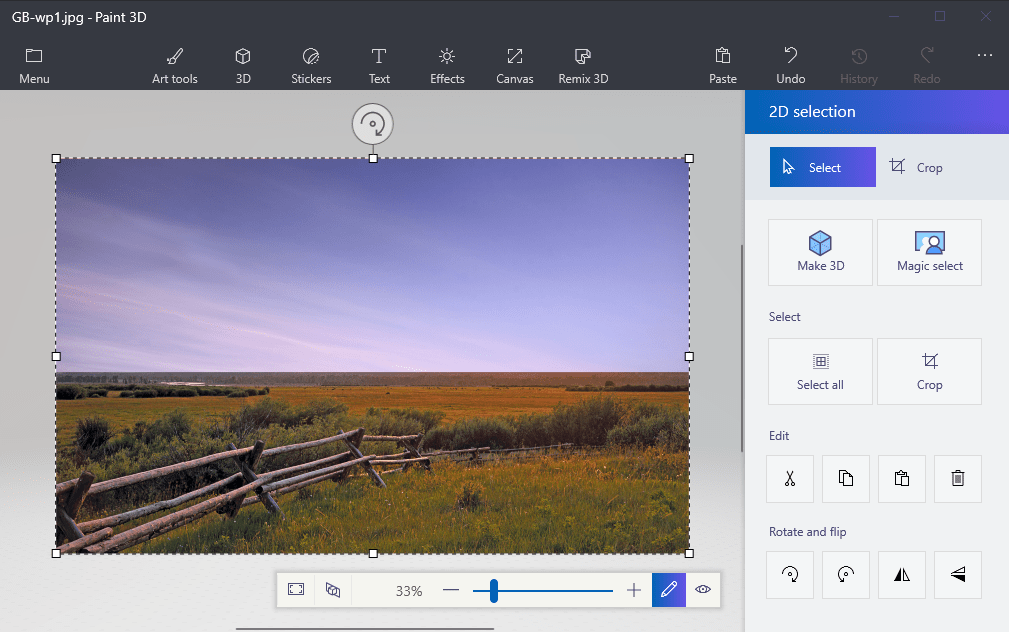
- Press the Canvas button to open the sidebar shown directly below.
- Click the Transparent canvas setting on the sidebar.
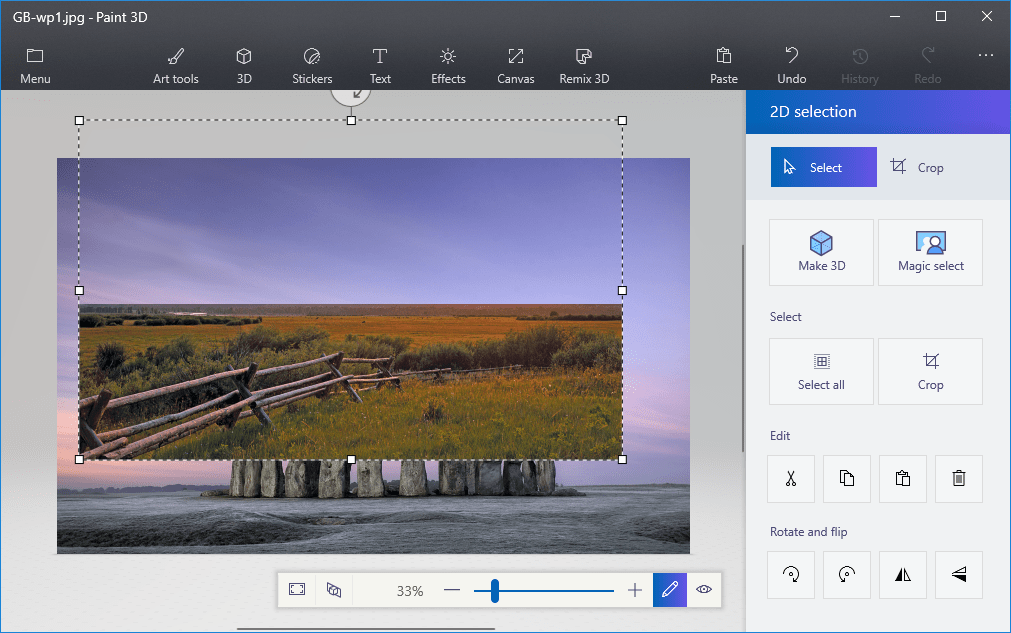
- Press the Select button, and then drag the selection rectangle over an area of the image to delete.
- Press the Ctrl + X hotkey to cut out the area from the picture as in the snapshot below.
- That leaves the picture with a blank transparent area that any background layer can fill.
- That leaves the picture with a blank transparent area that any background layer can fill.
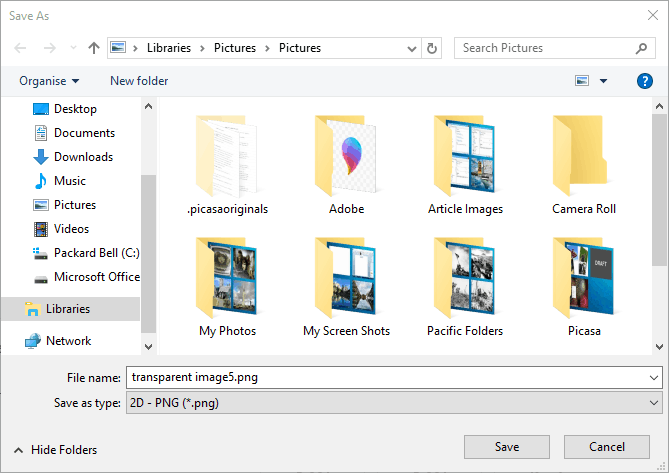
- Click Menu >Save as, and select the 2D PNG option.
- Enter a file title in the text box, and press the Save button.
- Click Menu >New to open a blank canvas.
- Select Menu >Open >Browse files, and select to open a background layer image for the transparent picture you just saved.
- Click Menu >Insert, and select to open the transparent image that you saved.
- The transparent image will open on top of the background layer as shown in the snapshot directly below.
- As you can see, the background image layer now fills the transparent area in the overlapping picture.
- You can resize the overlapping picture by moving the cursor to one of the selection border’s corners, holding the left mouse button and then dragging the cursor.
- To rotate the foreground picture layer, hover the cursor over the rotation circle at the top of the selection border and hold the left mouse button. Drag the cursor left or right to rotate the selected layer clockwise or anti-clockwise.


Cutting the foreground out in Paint leaves a blank area in the original picture. However, that does not become a transparent region in the original picture when you save the image.
Consequently, the area cut out remains blank when you open the image and utilize layers in other image-editing software.
However, Paint 3D in Windows 10 does save transparent areas in images, and you should be able to make transparent background in Paint 3D using this method.
So, that’s how Windows 10 users can add transparent backgrounds to images with Paint. Then you can combine the transparent images with other pictures by pasting the selected foreground or overlapping them with layers.
By following the steps written above, you should be able to turn any backgrounds transparent in Microsoft Paint.
If you need more ideas on how to make transparent selections in Paint, we’ve written a similar guide on the subject. Check it out here.
Alternatively, in case you may want to remove photo background images without using any photo background remover software, check out this guide for more information.
MS Paint is a online remake of MS Paint editor.
Microsoft Paint is also known as MS Paint. It is a basic graphics drawing program that has been an indispensable part of all versions of the Microsoft Windows operating system. MSP provides easy ways for creating different types of graphics with different tools. The tools include brushes, shape generators, pens, and erasers. Many users of Windows might also be unaware of its presence, considering the popularity of web-based graphics creation tools. So, you need to know exactly from where to access MS Paint.
The simplicity of MS Paint is the foremost reason for its popularity among users for graphic editing. Let us take note of the different tools that you can get with MS Paint for creating and editing graphics. The foremost instrument which you can note in MS Paint refers to the drawing tools. The different icons in the “Tool Box” indicate the different artistic tools such as brushes, erasers, and freehand drawing. You can also find other tools in the “Tool Box” for creating shapes such as squares, rectangles, and circles.
Interestingly, the “Fill with Color” tool can help you color a particular section of a graphic in a particular color. As a result, you don’t have to take the trouble of coloring the section manually. You can also use the “Tool Box” for adding text to images on MS Paint. Users could also find tools for zooming in and out of a particular image alongside tools for modifying the whole image. For example, you have the “Flip and Rotate” option for turning the image in the desired direction. Most important of all, MS Paint provides the flexibility of sharing an open file through email.
When we got the first computer on our hands, as a kid, we were intrigued with MS paint. It was the one application that made us aware that digitally we could unleash our creativity. All of us, especially the 90s kids were a bit disheartened when we learned that Microsoft will stop supporting MS paint very soon, in order to promote Paint 3D, that comes with windows 10. Although Paint is still available in Windows, eventually Microsoft plans to remove it permanently and only keep it as a Windows store product for users who still wants to use MS Paint.
Try Out the Next Best Thing
Those of us who still want to make MS Paint a part of their life, the next best thing is in store. Behold MS Paint online. It is an easy to use web-based application, the look and feel of which is exactly like MS Paint. Not only that, the user interface of MS Paint online resembles the version of MS Paint used in older versions of windows. With the color pallet located at the bottom and classical sidebar icons, the app promises you the old Windows Classic experience. I personally checked out the tool and found it working properly in all major browsers without any cross-browser compatibility issues.
Specifications of MS Paint Online
Let’s take a look at the features of MS Paint online and how it succeeds to revive the MS Paint experience of old Windows.
- The web-based application works perfectly in all devices, operating systems as well as all major browsers like Chrome, Firefox, Opera and Internet Explorer.
- In the old MS Paint, the user was given only 3 chances to undo or redo his action. In MS Paint online, you have unlimited redos and undoing.
- If you allow storage in your local system, your work will be autosaved.
- In Stretch/Skew, it allows you to stretch the image by more than 500% at one try.
- Let’s suppose you and some of your friends are planning to work together on a project. You can start a new multi-user session and share the link with your friends. However, this is not seamless. Actions performed by your friends can interrupt your current work. Also, these sessions are not private and anytime, you can lose your work.
- Since browsers support SVG, you can use this app to open and edit SVG files.
- You can easily rotate the images by using Ctrl + . What’s more special, instead of rotating images by only 90 degrees, you can rotate them by any angle of your choice.
- Cropping images doesn’t require you to use the crop tool. You can hold the Ctrl key and select any portion of the image to crop it.
What is New in MS Paint online?
Now that we have discussed how MS Paint online enhances the old features of MS Paint, let’s see what extra features are added.
- First of all, you can edit and create transparent images. Navigate to Image => Attributes to access the transparency tool. If any image has transparent pixels, by default they will open in transparent mode.
- For accessing the extra features, navigate to view => Extras. You will find loads of features which were not there in MS paint.
- The app gives you multiple themes. Go to the Extras menu and choose any theme according to your preference.
- You can create animated GIFs using this app. You can access the tool either from Extras or by using the keyboard shortcut Ctrl+Shift+G. However, while creating a GIF, check the image size since GIFs tend to have a larger size.
- Apart from the set of preset colors, you can also add new color formats by going to the Get Colors option.
- Just click or tap on the selected color and you can switch between background and foreground colors.
- The best feature is, the app even works in mobile.
Limitations of the App
Such a huge app with so many features is bound to have some limitations.
- There were few issues like sudden halt of Quick Undo in Chrome.
- Apart from the major browsers, in browsers that are not so well known yet used by millions, the app does not work properly.
- Gliding through the options in Firefox and Chrome for Mobile still has some bugs.
- Contents of a textbox move up and down while you are rasterizing an image.


