- How to Fix ‘sudo apt-get command not found’ on macOS
- What Causes the ‘sudo apt-get command not found’ Error on macOS?
- Alternatives of APT for macOS
- Method 1: Installing Homebrew in macOS
- Method 2: Installing MacPorts in macOS
- Fix ‘sudo apt-get command not found’ on Mac
- How to Fix ‘sudo apt-get command not found’ on Your Mac
- Video on How to Fix ‘sudo apt-get command not found’ on Your Mac
- Install Homebrew
- Install MacPorts
- About the author:
How to Fix ‘sudo apt-get command not found’ on macOS
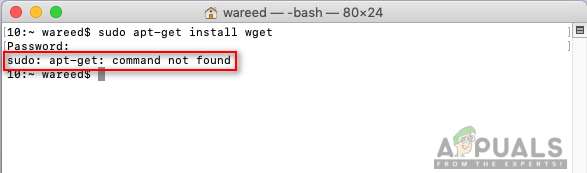
Most Debian uses dpkg packaging system which provides programs and applications for installation. Because of this packaging system, users don’t need to build programs from the source codes. The tool required to interact with this packaging system is APT (Advanced Package Tool). However, sometimes, this APT tool will not work on macOS and give an error “sudo: apt-get: command not found“.
 Error Message
What Causes the ‘sudo apt-get command not found’ Error on macOS?
Whenever there is an error ‘command not found’ on your Terminal, it means that the command you are trying to use for specific application or library is not available. If the application or utility is not installed on your system then all the commands or functions related to that utility will not work. We all know that the commands on Terminal of Linux and macOS are 99% same. However, it doesn’t mean both Linux and macOS will be using the same managers and utilities for installing and managing the packages. In conclusion, the APT commands are not available for macOS.
Alternatives of APT for macOS
APT commands are used for download, updating or upgrading applications through Terminal. However, this option is only for a few Debian Linux distributors. So macOS have few alternatives which work the same as the APT. These alternatives are used for the same work of APT and come with a few different/better features.
Method 1: Installing Homebrew in macOS
The command ‘apt-get‘ is intended for installing packages on Linux systems. Homebrew is the equivalent for the Mac. It is the package manager that most people feel comfortable with using it. Homebrew installs packages to their own directory and then symbolic links their files into /user/local. You can install homebrew and run command to install packages by following the steps below:
- Hold Command key and Press Space to open Spotlight, then type Terminal and Enter.
 Opening Terminal
 - First, you need to install the Xcode command-line tool by using the following command: Installing the xcode command-line tool
- After the Xcode tool installation, now type/copy the following command to install Homebrew on macOS: Installing homebrew
- The installation will ask for Return (Enter) key and password for confirmation.
- You will get the installation successful message for correctly installing the tool as shown below: Successfully installed message
- Now using Homebrew, type the following command to install any package you want to install: Installing the package using homebrew command
 Installing homebrew
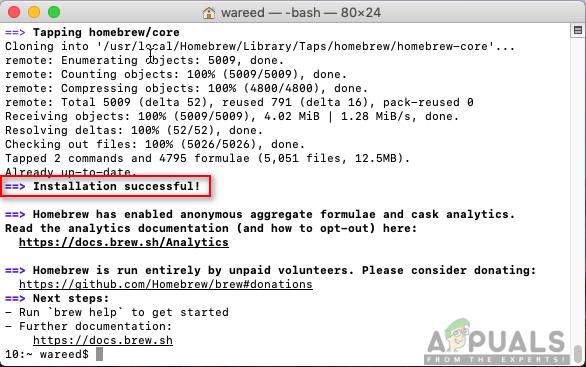 Successfully installed message
 Installing the package using homebrew command
 Note: Name in command can be the package name that you are trying to install on your macOS.
Method 2: Installing MacPorts in macOS
MacPorts software is used for compiling, installing, and managing open source software. MacPorts will automatically install any required dependencies for the given port that the user is trying to install. It is easy to use; you can install, download or compile an application and library by using a single command. MacPorts also provides upgrades and uninstalls for the installed ports. You can install it by following the below steps carefully:
- Open App Store from Dock and search for Xcode in the search box. Click on Get and install the Xcode. Be Patient this will take some time to install because the size is around 6GB.
Note: It will ask for username and password for the account you are using on App Store.
 Installing Xcode from the App Store
You can agree to the agreement of Xcode by opening the application from App Store or Dock and clicking the Agree button.  The Agree button for the agreement
Or by typing the following command in Terminal to agree with the agreements.
 Opening Terminal
 Installing the xcode command-line tool
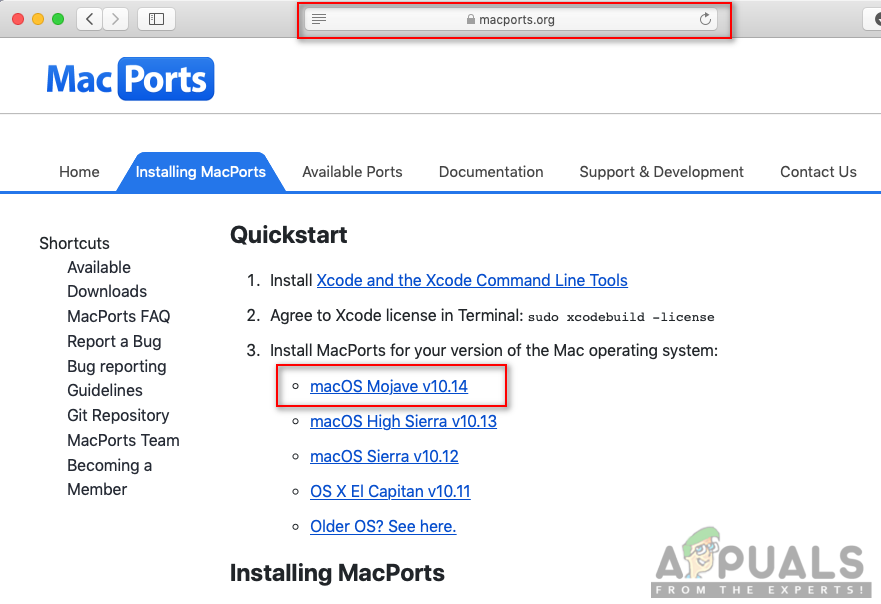 Downloading MacPorts from site
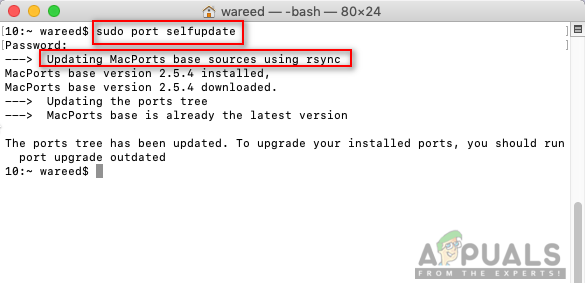 Updating and checking MacPorts in Terminal
 Note: MacPorts is successfully installed if you see the message ‘Updating MacPorts base sources using rsync‘. However, if you don’t see this message, then you need to reinstall it correctly again.
Now you can install any package by using the following command: 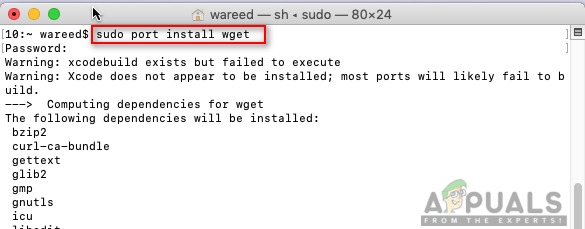 Installing through MacPorts
Note: Name in command can be the package name that you are trying to install on your macOS.
Источник
Fix ‘sudo apt-get command not found’ on Mac
 Written by Tomas Meskauskas on 12 October 2020
How to Fix ‘sudo apt-get command not found’ on Your Mac
The command ‘sudo apt-get’ is used for installing, upgrading, or removing software packages. While executing this command in the Terminal window, you have probably encountered the line ‘sudo apt-get command not found.’ That means the command ‘apt-get’ is not accessible on macOS, as it’s only specific to some varieties of Linux. Fortunately, macOS has a few alternatives that work the same as the APT. You can choose between Homebrew and MacPorts.
The difference between both systems is that Homebrew does not require ‘sudo’ to modify the system-wide software directory, while MacPorts do. Command ‘sudo’ allows you to run programs with the security privileges as the superuser. It will ask for your user password and will confirm your request to execute a command.
Suppose you prefer not to use the command ‘sudo’ when installing packages. In that case, it’s recommended not to use a system-wide directory as it won’t protect your computer from being used as a tool for exploitation. The right to install, remove, or change any software should only be available for a user with root privileges as a safety measurement.
Video on How to Fix ‘sudo apt-get command not found’ on Your Mac
Table of Contents:
It is recommended to run a free scan with Combo Cleaner — a tool to detect malware and fix computer errors. You will need to purchase the full version to remove infections and eliminate computer errors. Free trial available. Combo Cleaner is owned and operated by Rcs Lt, the parent company of PCRisk.com read more.
Install Homebrew
As was mention above, Homebrew doesn’t use sudo. Instead, they use a macOS sandbox that limits the damage done by a hijacked app. Each application gets its area, a «sandbox.» For the app to go out of the sandbox, it needs to ask for permission from the operating system. Sandbox won’t prevent attacks against your application, but it will minimize the damage.
How to install Homebrew:
1. Press the Command and the Space key on your keyboard to open Spotlight.
2. Type in «App Store» and press Enter to open it.

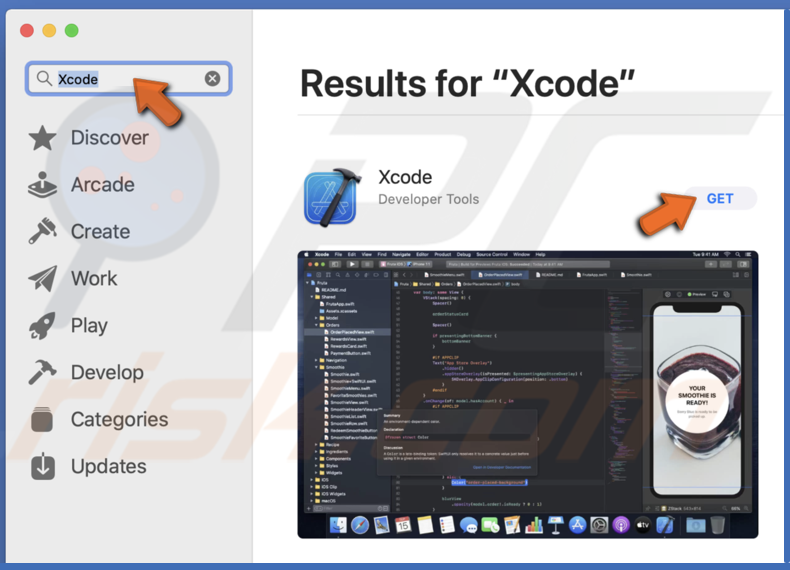
3. In the App Store, search for Xcode.
4. Click on «Get» and install the Xcode. The installation will take some time because it is around 11GB.
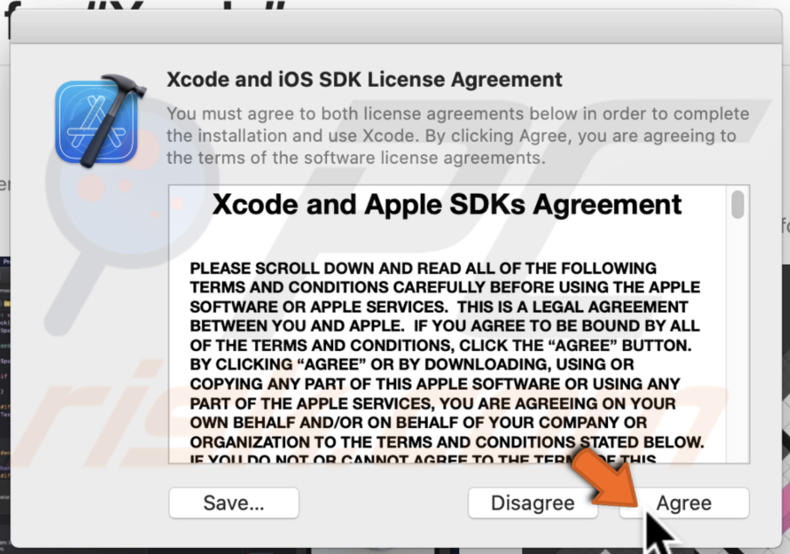
5. After the download is complete, click on «Open» and agree to the License Agreement.
6. Follow the installation process.
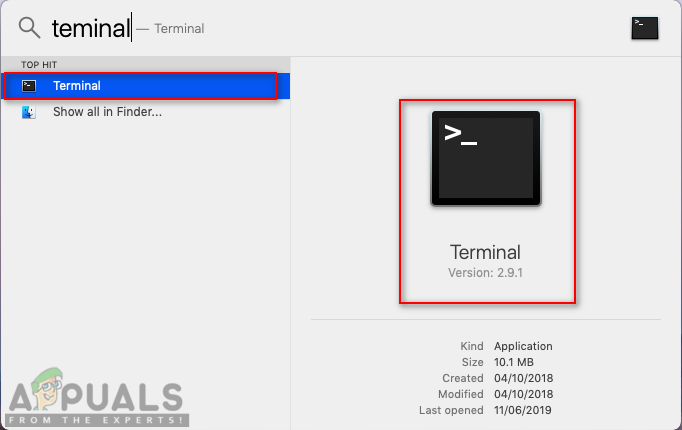
7. After installing Xcode, press the Command and the Space key on your keyboard to open Spotlight.
8. Type in «Terminal» and press Enter to open it.
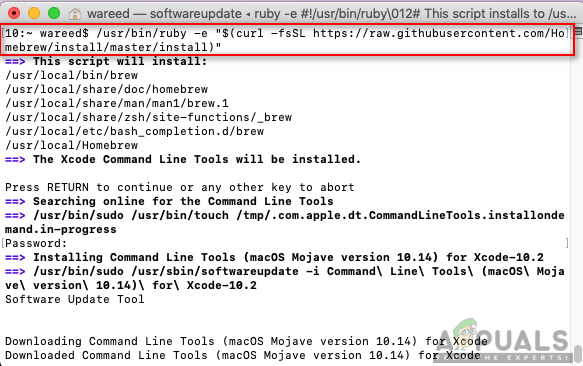
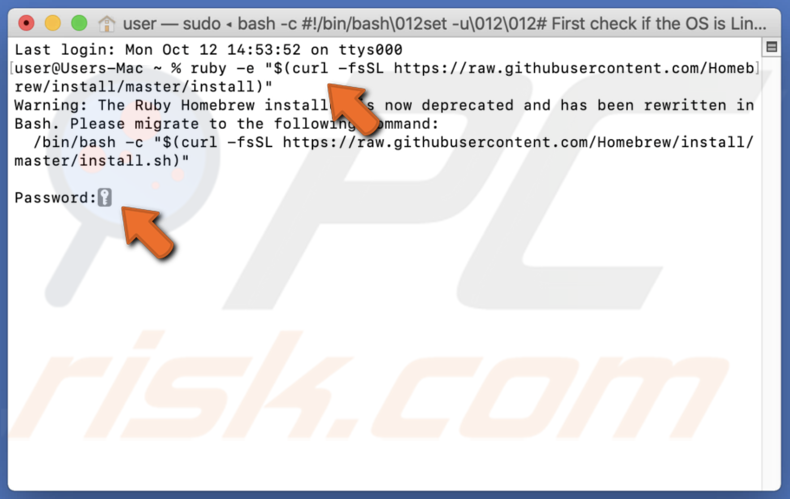
9. To install Homebrew on your Mac in the Terminal window, enter the command line: ruby -e «$(curl -fsSL https://raw.githubusercontent.com/Homebrew/install/master/install)»
10. You’ll be asked to enter your Mac passwords. The password is not shown in the terminal window.
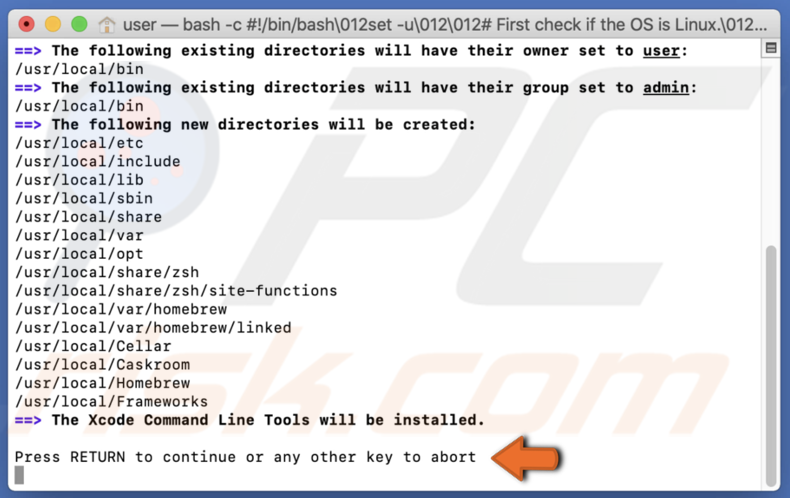
11. The installation will ask you to press the Return (Enter) button to continue the installation.
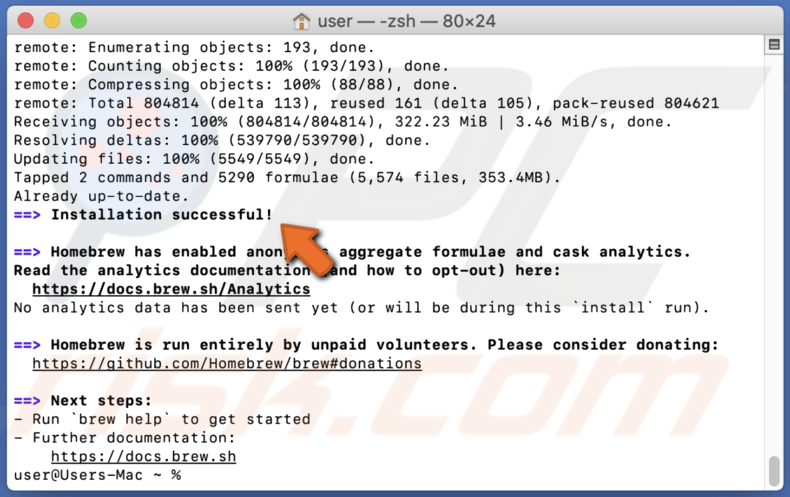
11. You’ll get the ‘installation successful‘ message in the Terminal window after the installation is done.
To use Homebrew and install any package you want, enter brew and your install name: brew install name.
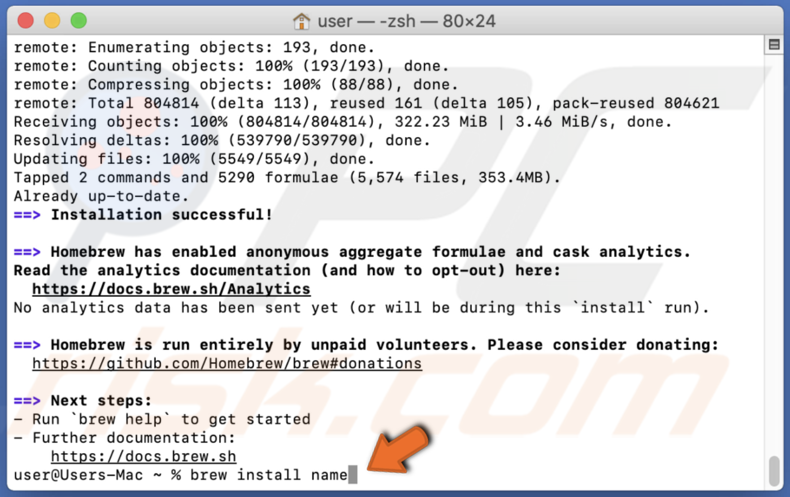
The brew command will then install the package on your macOS.
Install MacPorts
MacPorts is a great way to compile, install, and manage open-source software. Before installing any program with MacPorts, you need to use the command ‘sudo’. Without it, you won’t be able to manage your applications, as you will need to confirm that you’re the system’s superuser.
How to install MacPorts:
1. Press the Command and the Space key on your keyboard to open Spotlight.
2. Type in «App Store» and press Enter to open it.
3. In the App Store, search for Xcode.
4. Click on «Get» and install the Xcode. The installation will take some time because it is around 11GB.
5. After the download is complete, click on «Open» and agree to the License Agreement.
6. Follow the installation process.
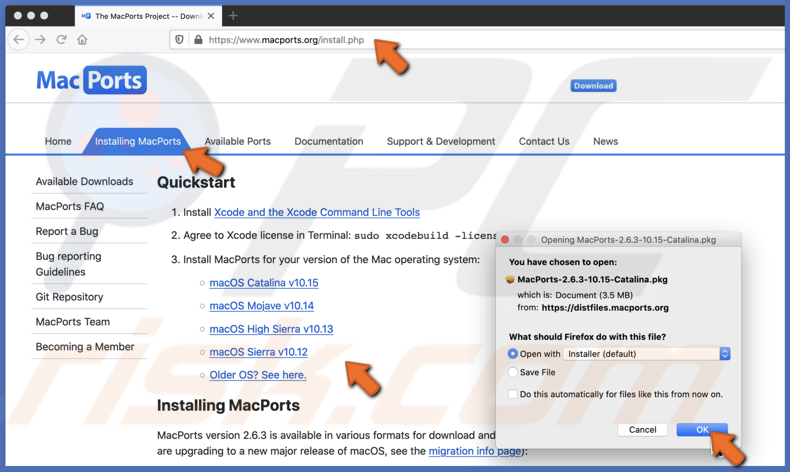
7. Download MacPorts for your operating system on their website.
8. Open the download file and install the software by following the installation steps.
9. When the installation is complete, press the Command and the Space key on your keyboard to open Spotlight.
10. Type in «Terminal» and press Enter to open it.
11. In the Terminal window, enter the following command: sudo port selfupdate
12. Enter your Mac password. The password is not shown in the terminal window.
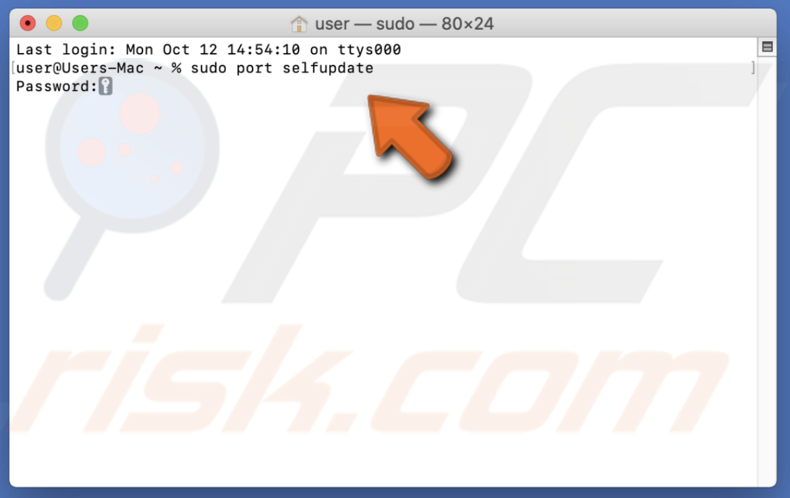
If you see the message ‘Updating MacPorts base source using rsync‘, it means that MacPorts was successfully installed. If you don’t see this message, it means you installed it incorrectly.
To install a package, you need to use the command sudo port and insert the install name: sudo port install name.
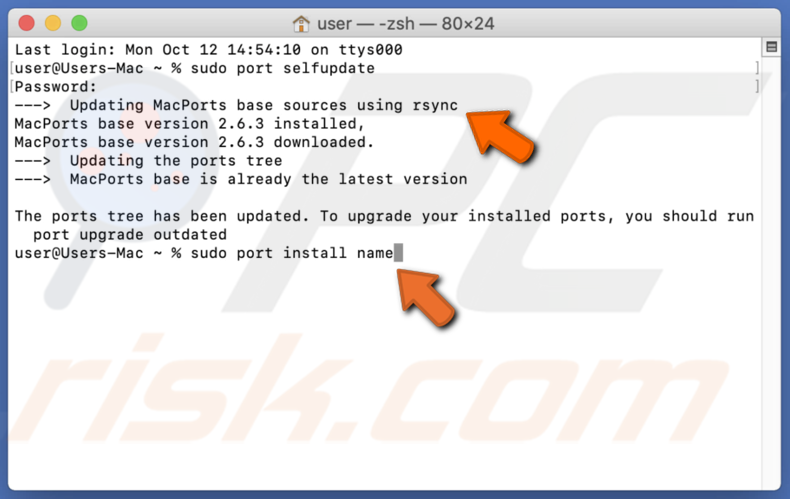
The install name can be the package name that you want to install.
Click to post a comment
About the author:

I am passionate about computer security and technology. I have an experience of 10 years working in various companies related to computer technical issue solving and Internet security. I have been working as an editor for pcrisk.com since 2010. Follow me on Twitter to stay informed about the latest tech news or online security threats. Contact Tomas Meskauskas.
Our guides are free. However, if you want to support us you can send us a donation.
PCrisk is a cyber security portal, informing Internet users about the latest digital threats. Our content is provided by security experts and professional malware researchers. Read more about us.
Источник


