- Как установить компилятор gcc / g++ для Windows. Установка gcc
- 0. Прежде чем поставить компилятор GCC
- 1. Скачиваем установщик компилятора
- 2. Установка GCC
- 3. Проверка установки
- 4. Бонус. Компиляция программ с помощью GCC
- Что ещё за a.out? Непонятно!
- А Вы знаете, что мы пишем программы на C, C++, C#, Pascal и Python?
- Почему именно мы?
- Как с нами связаться?
- Install gcc compiler on Windows with MSYS2 for C/C++
- Intro
- Installing and running MSYS2
- Updating MSYS2
- Installing gcc using MSYS2
- Installing other packages with pacman
- Optional: Add executables to your Windows PATH
- Header files and libraries
- A note about msys vs mingw64 repos
- Configuring Eclipse
- How to install the C language GCC compiler on Windows
- 1- What I want to teach you here
- Why using the gcc compiler?
- 2- How to use the gcc compiler?
- Step 1: Write your c code
- Step 2: Compile using gcc
- Step 3: Execute your code
- 2- The principle
- 3- Installing MSYS2 on your PC
- 4- Installing GCC and other development tools with the pacman package management system
- 5- Last Important Step: Add Executables to your Windows PATH
Как установить компилятор gcc / g++ для Windows. Установка gcc
15 декабря 2018
Время чтения: 5 минут
Для того, чтобы писать программы на C/C++ обычно достаточно установить какую-нибудь интерактивную среду разработки (IDE), например, Visual Studio или Eclipse, однако иногда (обычно в целях обучения студентов) требуется создавать программы в обыкновенном текстовом редакторе и компилировать приложение, используя консоль и компилятор gcc. В Unix системах он обычно установлен прямо «из коробки», а вот на Windows системах такой роскоши не наблюдается. Более того, у многих пользователей возникает множество проблем при установке компилятора. Поэтому нами было принято решение написать данную статью, чтобы помочь всем тем, кому пришлось или приходится мучаться с установкой этого компилятора на Windows.
Кстати, если вдруг на вашей Unix системе не установлен GCC, то поставить его можно командой sudo apt install gcc , введя свой пароль и согласившись на установку.
0. Прежде чем поставить компилятор GCC
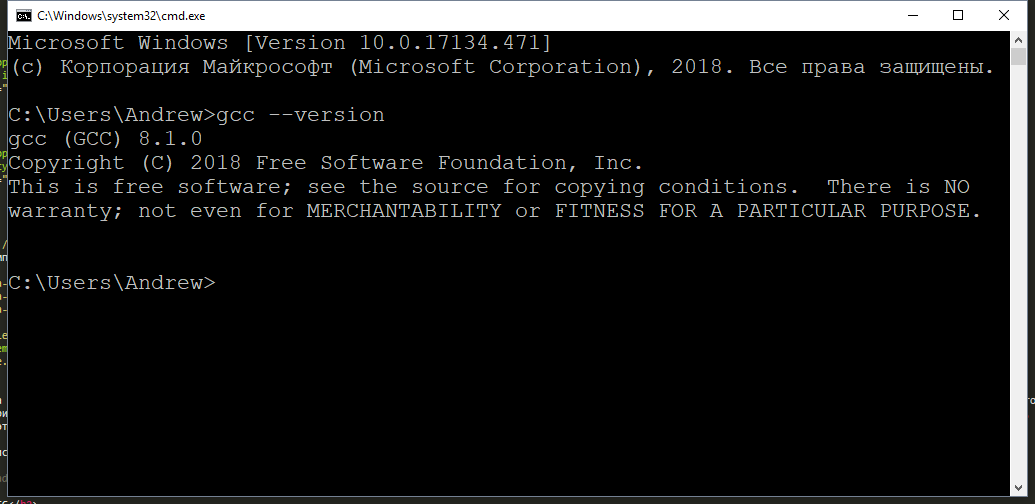
Перед тем как приступить к установке этого компилятора на ваш компьютер, убедитесь в том, что GCC ещё не установлен на нём. Для этого откройте консоль (нажмите Win + R, введите в появившемся окне cmd и нажмите клавишу Enter) и введите следующую команду: gcc —version и нажмите Enter. Если компилятор уже установлен, то выполненная команда выдаст примерно следующую информацию:
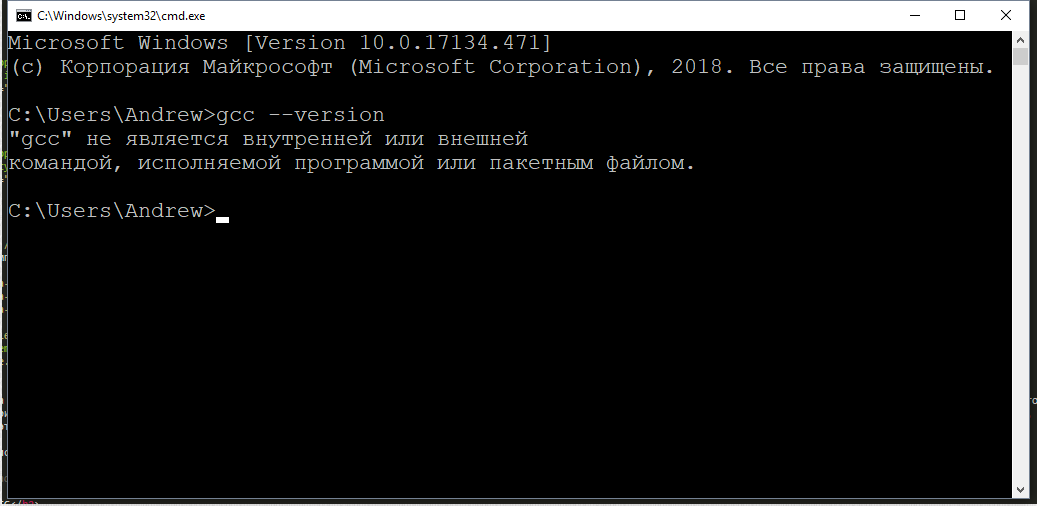
Если в окне консоли появилось сообщение с версией компилятора и другая информация о GCC (второй скриншот), значит компилятор уже установлен и больше дополнительно ничего делать не нужно. А вот если вывод командной строки такой:
— значит GCC ещё не установлен в системе, поэтому двигаемся дальше.

1. Скачиваем установщик компилятора
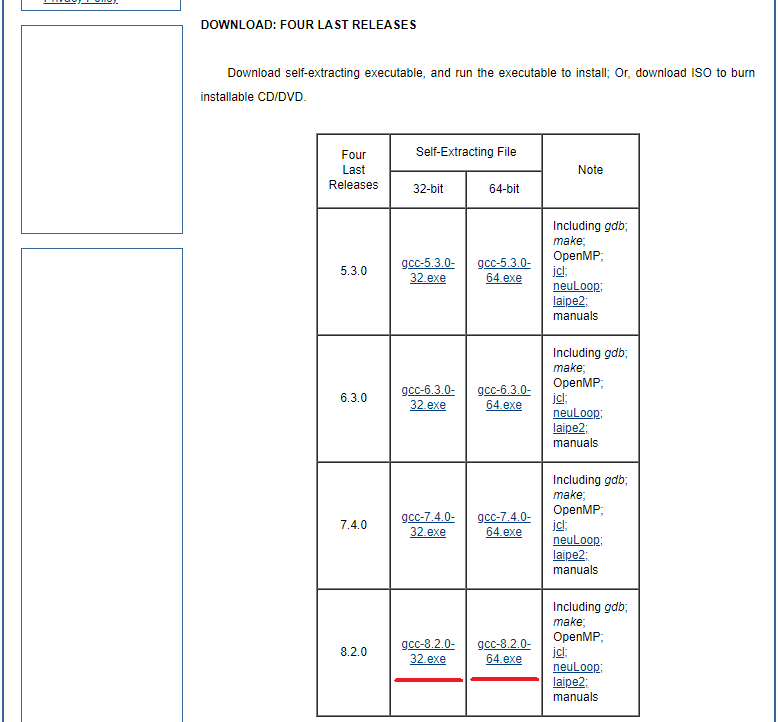
Чтобы поставить GCC на операционную систему Windows, необходимо скачать установочный файл для него. Сделать это можно здесь: equation.com/servlet/equation.cmd?fa=fortran. Найдите в таблице версию компилятора, которая вам больше нравится (мы рекомендуем скачивать самую последнюю, на текущий момент — это версия 8.2.0) и скачайте установщик для вашей системы (32 или 64 бит).
2. Установка GCC
После того, как файл был скачан, откройте в проводнике папку, в которую был скачан установщик и запустите его, кликнув по файлу дважды левой кнопкой мыши. Появится окно, требующее подтверждения действия. В нём нужно выбрать да (иначе ничего ставиться не будет).
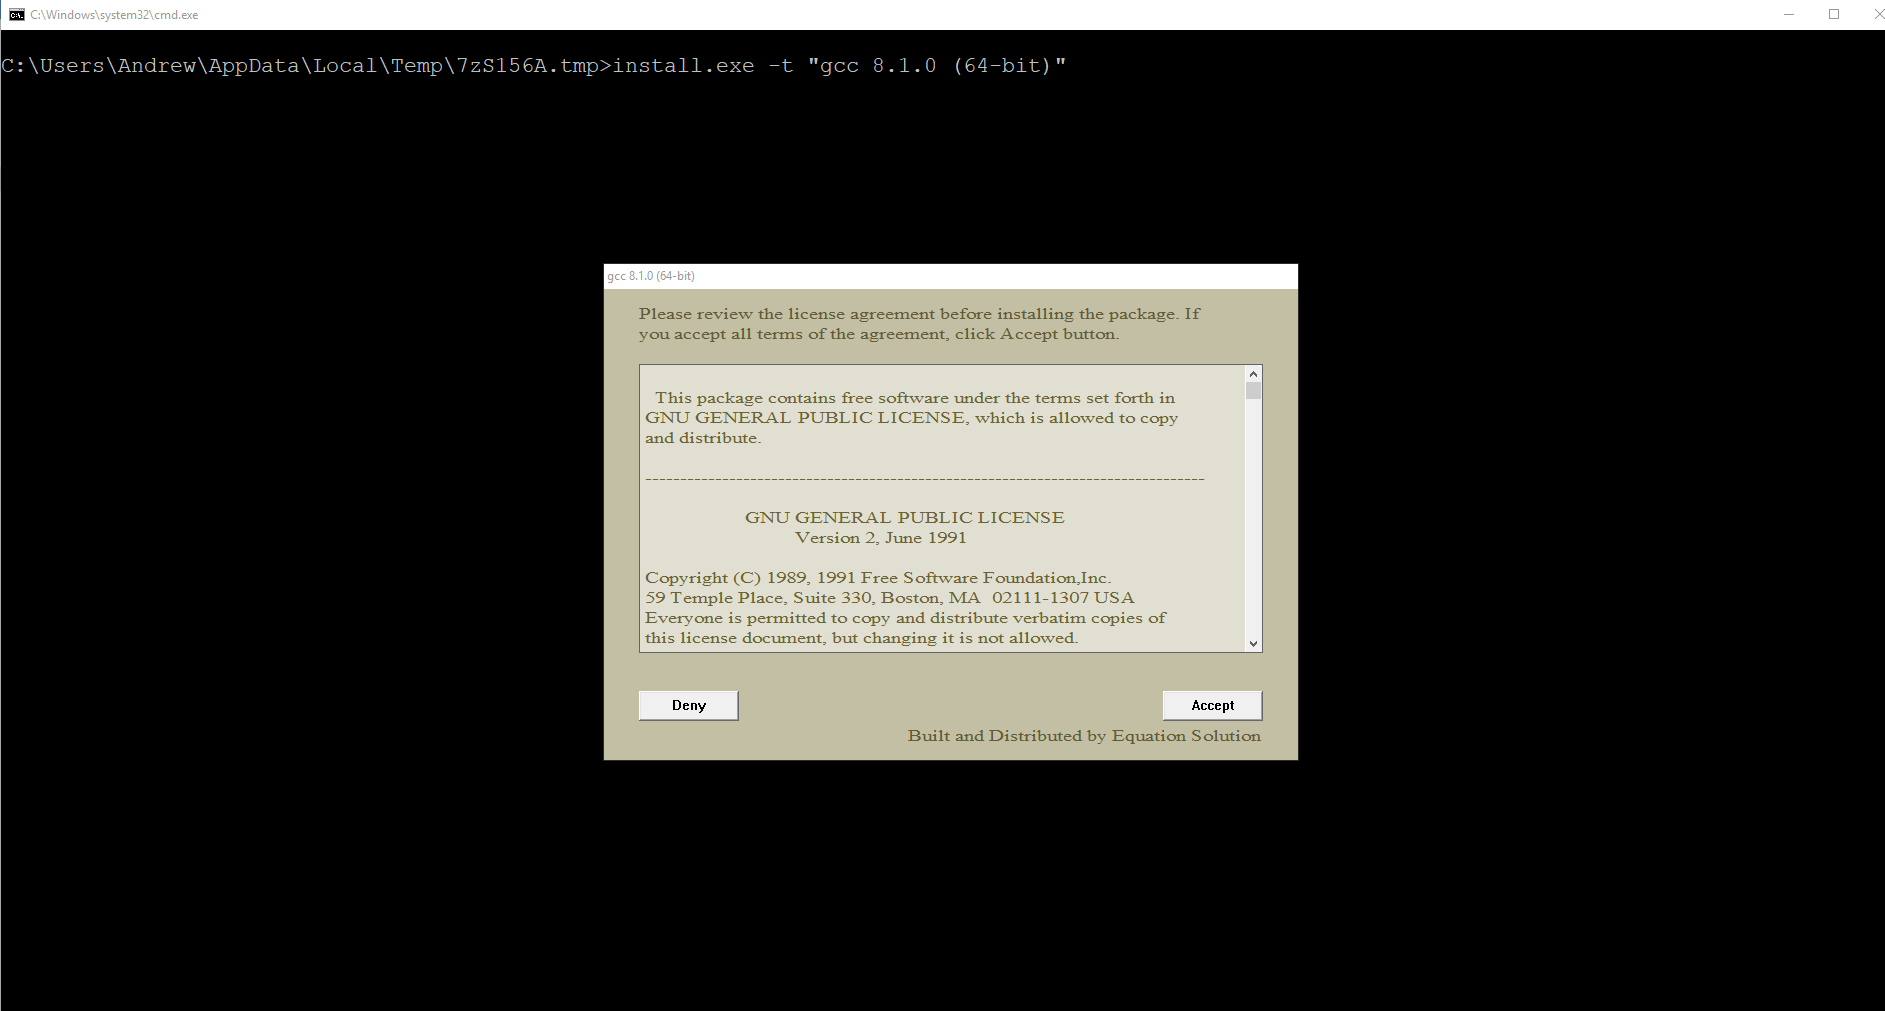
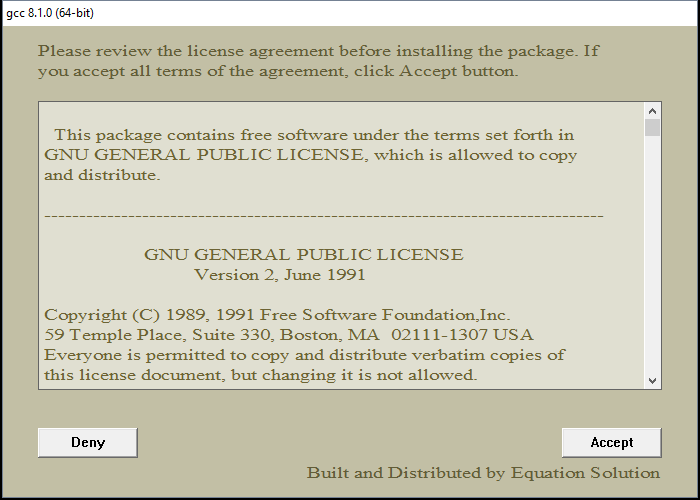
Установщик начнёт работу и отобразит окно с консолью, а также окно с бежевым фоном, в котором попросит прочесть и принять (или отклонить) лицензионное соглашение. Нажимаем Accept.
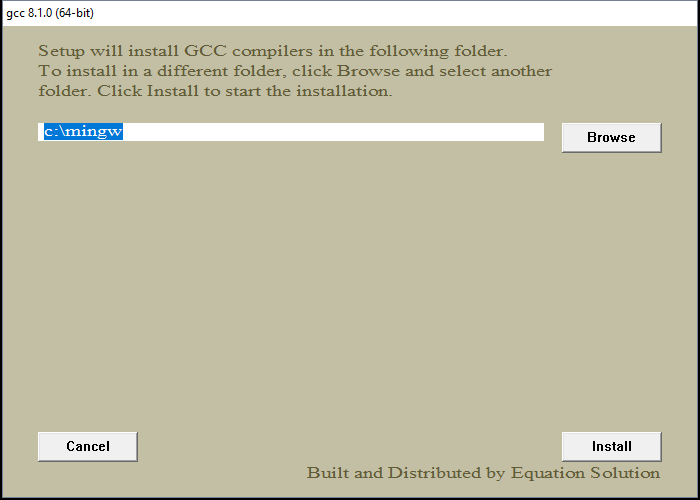
После этого установщик попросит выбрать путь для установки, предложив по умолчанию путь C:\mingw . Если вам категорически не нравится этот путь — измените его на более подходящий на ваш взгляд, в противном же случае просто нажмите Install.
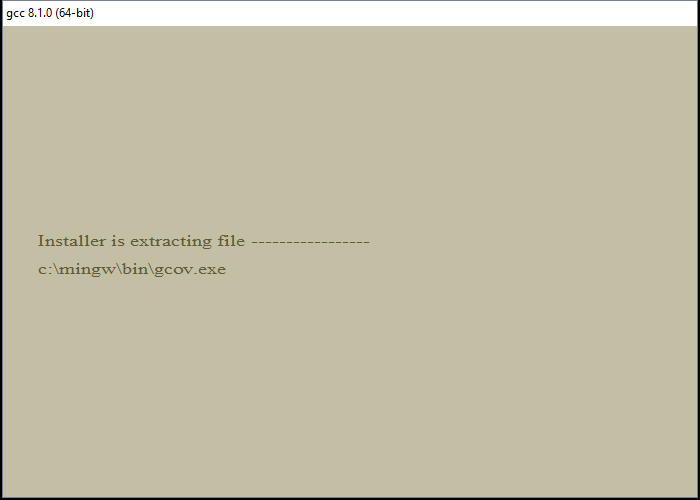
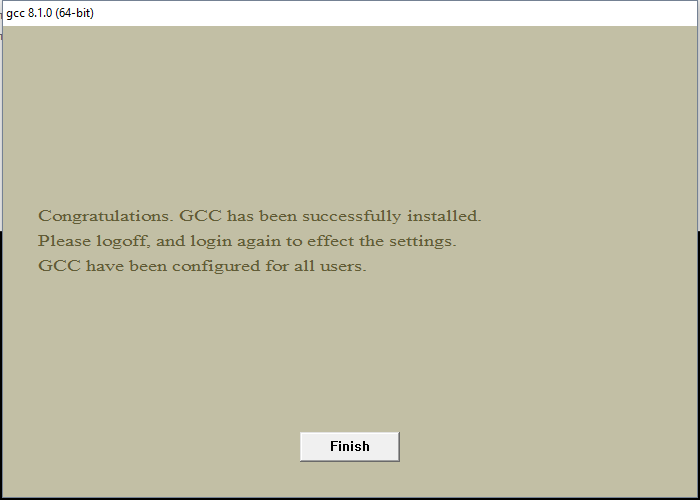
Теперь остаётся только дождаться окончания распаковки архивов и установки их на компьютер. Как только все файлы будут установлены, инсталятор сообщит об этом, после чего нужно будет нажать на кнопку Finish.
3. Проверка установки
По завершении работы установщика перезагрузите компьютер и вновь откройте окно командной строки, введите команду gcc —version и нажмите Enter. На этот раз ответ от этой команды должен будет совпадать со вторым скриншотом из пункта 0. Если это не так, то скорее всего работа установщика была некорректно или преждевременно завершена, так что просто начните установку заново.
Поздравляем! Теперь на вашем компьютере установлен компилятор GCC и вы можете писать программы на языках C и C++, а компилировать их через командную строку!
4. Бонус. Компиляция программ с помощью GCC
Теперь, когда у вас установлен компилятор GCC, вы можете создавать программы на C/C++, используя только текстовый редактор и консоль. Для этого создайте новый файл и назовите его как угодно (например, hello_world). Задайте ему расширение .c вместо .txt . Напишите (или скопируйте) текст программы на С в этот файл. Откройте командную строку (Win + R, cmd) и введите следующую команду gcc hello_world.c и нажмите Enter. Если код не содержит ошибок, то результатом команды будет пустота. В противном же случае вы увидите все ошибки, который нашёл компилятор в программе с указанием места этой ошибки. При этом в проводнике появится файл a.out.exe , который будет являться исполняемым файлом для написанной программы. Чтобы запустить его введите в консоли a.out (для Unix-систем нужно писать ./a.out ) и нажмите Enter.
Что ещё за a.out? Непонятно!
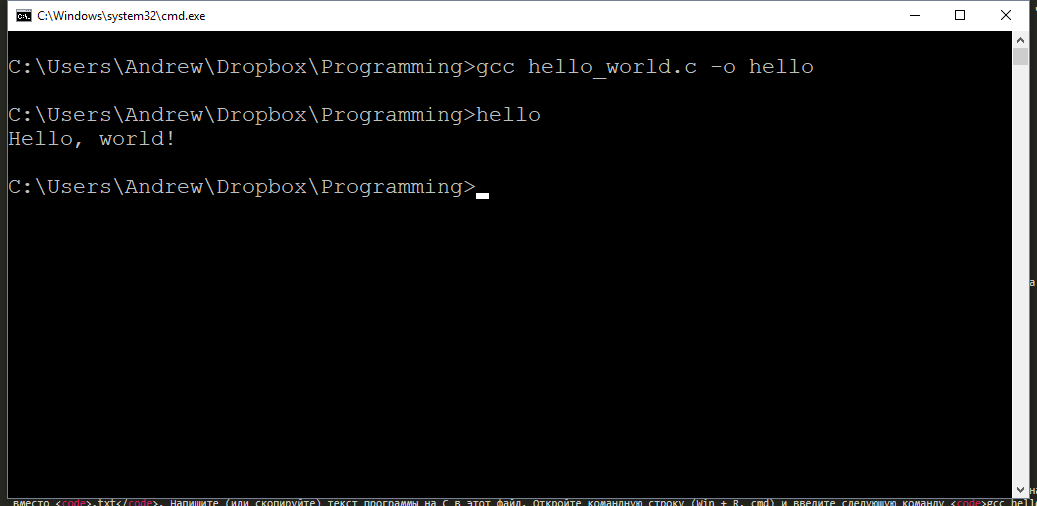
По умолчанию при компиляции программ GCC в качестве результата создаём исполняемый файл с именем a.out (если такой уже есть, то b.out и т.д.). Это может быть не очень удобно, если у вас в папке лежит сразу много программ, которые нужно скомпилировать и затем запустить. Неудобно хотя бы тем, что разобраться, что такое a.out, а что такое b.out и c.out может быть непросто. Именно поэтому мы рекомендуем компилировать программы с явным указанием имени выходного файла. делается это так: gcc имя_файла.c -o имя_программы .
В результате выполнения такой программы вместо a.out будет создаваться файл с именем, заданным в имя_программы. Например, если для файла hello_world.c мы хотим получить программу hello, то компилировать нужно такой командой: gcc hello_world.c -o hello .
Используя понятные имена выходных программ (исполняемых файлов), вы гарантируете себе простоту работы и сокращение времени на разбирательство спустя долгое время.

Программист, сооснователь programforyou.ru, в постоянном поиске новых задач и алгоритмов
Языки программирования: Python, C, C++, Pascal, C#, Javascript
Выпускник МГУ им. М.В. Ломоносова
А Вы знаете, что мы пишем программы на C, C++, C#, Pascal и Python?
Так что если Вам нужно написать программу на C/C++, C#, Pascal или Python — мы с радостью поможем с этим!
В том числе мы занимаемся репетиторством по информатике и программированию, а также готовим к ОГЭ и ЕГЭ!
Почему именно мы?
- Более 1800 выполненных заказов;
- Более 170 отзывов;
- Качественное решение
- Короткие сроки и привлекательные цены
- Различные акции и скидки
Как с нами связаться?

Programforyou — доверяя нам писать программы, вы получаете качественное решение в короткие сроки по привлекательной цене!
Install gcc compiler on Windows with MSYS2 for C/C++
DISCLAIMER: Don’t hold me accountable for any bad advice or incorrect information provided here. Use this information at your own risk. I was barely able to hack it together myself and there are still a few details I am not 100% clear on.
Intro
There are a variety of toolchains you can install on Windows for compiling C and C++ applications. Microsoft provides Visual Studio Community for free, and is a great IDE and toolchain. If you are developing exclusively for Windows, that is the tool I would recommend. For those who need or prefer the cross-platform GNU toolchain, you can install it using MSYS2. We will cover how to install gcc using MSYS2.
Another option for using gcc in Windows is to download Code::Blocks. They provide binary releases that come with the Mingw toolchain. For example, http://www.codeblocks.org/downloads/.
Qt Creator is another free IDE that optionally comes with the mingw toolchain. Check out https://www.qt.io/download and https://www.qt.io/qt-features-libraries-apis-tools-and-ide/ for more information.
If you do not need to target Windows specifically, but you are just looking to learn and play with the GNU toolchain and you have a windows machine, I recommend installing Ubuntu or Suse on Windows through the Microsoft Store. This will provide a Linux environment in Windows for you to work with. Alternatively you could install a distribution like Ubuntu inside a VirtualBox or VMWare Player virtual machine.
Installing and running MSYS2
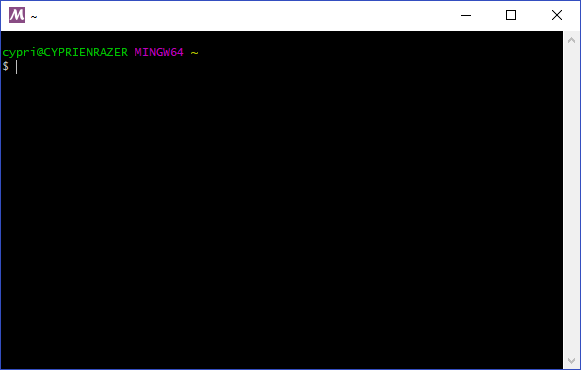
Download MSYS2 from http://www.msys2.org/. Download the .exe file and follow the installation instructions on the site. After installing, navigate to the directory where it was installed, and run msys2.exe. For this tutorial, we will assume the default location of C:\msys64. After opening it you should find yourself in a bash shell.
Updating MSYS2
MSYS2 uses the pacman package manager that the Arch Linux distribution uses. After your initial install it is a good idea to update all the packages. Update everything using:
Installing gcc using MSYS2
In the MSYS2 bash shell, use pacman again to install the build toolchain and compilers. Run the command below to install the mingw-w64-x86_64-toolchain package group.
Note that vim and cmake are optional, but handy to have. Here is the list of packages that are installed with the above. After installing those packages, you will have gcc and the other tools available to be used while in the MSYS2 shell. If you want to use them in the command prompt or otherwise outside of the MSYS2 shell, they are available in the C:\msys64\usr\bin directory.
After installing the above the .exe files will be available in C:\msys64\usr\bin. Some of the executables that will be available are: awk, base64, curl, dd, diff, dos2unix, file, gcc, gdb, gpg, grep, gzip, head, hexdump, hostname, ld, ldd, ls, make, man, md5sum, merge, mkdir, more, mv, objdump, openssl, perl, python2, python2.7, readelf, rm, rmdir, sed, sha1sum, sha256sum, sha512sum, sort, split, stat, tail, tee, telnet, uniq, uname, vim, wget, which, whoami, yes.
There are many other executables in the C:\msys64\usr\bin directory. Keep this in mind when making the decision to add the bin directory to your Windows PATH environment variable.
Installing other packages with pacman
If you want to compile an SSL program that links to libssl and libcrypto with -lssl -lcrypto you will need to install openssl-devel as shown below. There are many other devel packages. For example, libbz2-devel, libelf-devel, libunrar-devel, and libyaml-devel. The environment is rather limited, but it can be useful for learning.
Packages included in «development» group:
You also have a ton of other packages available via the pacman package manager. View the full list of options at https://github.com/msys2/msys2/wiki/Packages, or use the command below to search
Packages prefixed with msys/ will be installed to the C:\msys64\usr\ environment. Some packages are prefixed with mingw64. Those are installed to C:\msys64\mingw64\ environment.
Optional: Add executables to your Windows PATH
If you want to access everything from your Windows Command Prompt, then add the bin directory to your Windows PATH environment variable. Keep in mind this adds a lot of executables to your path which might conflict with other applications. The usr\bin\ directory contains the whole slew of executables listed above. There is a lot of unnecessary stuff in that directory. mingw64\bin\ directory has a sma
Header files and libraries
Libraries and include files can be found in two places.
A note about msys vs mingw64 repos
Some things are only available in the msys/ repo like vim and git, and will only be available in \usr\bin\. Some things like gcc are available in msys\, mingw32\, and mingw64\ repos and can potentially end up being installed in both \usr\bin\ and \mingw64\bin\. This is where you have to be careful about how you set up your PATH environment variable. If you add \usr\bin\ in order to make vim or git available, you will also add everything in that directory, which may conflict with something if you also add the \mingw64\bin\ directory to your path. If you only want the toolchain without as much extra stuff, use the mingw64 packages. Then you can add only the \mingw64\bin directory to your PATH if desired. The mingw64 repository generally has more libraries available for install that are unavailable in the general msys repo (e.g. SDL, exif, freeglut). The msys packages are intended to be used inside the msys shell, and the mingw packages are intended to be used outside of msys2.
Configuring Eclipse
For some tips on setting up Eclipse to work with this toolchain, check out tips for setting up Eclipse with MSYS2.
How to install the C language GCC compiler on Windows
On Linux, gcc is install by default and you can start to compile and execute C language code almost right away!
That’s not the case on Windows…
I have been struggling with how to do the same thing on Windows 10 for some time, but I finally succeeded
Here’s a video in which I explain the procedure:
Note: The procedure I describe here will not only allow you to install gcc, but also g++, gfortran, and many other useful tools that you usually only get in linux OS (like ls or grep)
1- What I want to teach you here
If you want a simple way to create programs based on C, C++, Fortran, etc… you will have to install a software with can compile the code you write into code that the machine understands
Such program is called a “compiler”
The most well know compiler for C language is the GNU compiler called GCC.
There are actually several compilers which go together like a suite:
- for C++, you have the compiler g++
- for Fortran, the compiler is called gfortran
Why using the gcc compiler?
If you are on Windows, you probably heard about software such as visual studio from Microsoft which also you to write and compile C and C++ code as well.
That’s true, and it’s totally fine if you want to use it…
I am personally not such a big fan of Visual Studio because of the following reasons:
- It is huge to download and install (between 10 and 20 GB if I remember)
- It’s a big pain to set up the first time
- Building even a very simple project takes much more time than it should
Because of that, I find that I kind of takes out the fun of programming and seeing immediately the result of what you did…
Now, for large pieces of software, visual studio is probably the way to go
2- How to use the gcc compiler?
Once installed on your machine, gcc is just a piece of cake to use to compile a simple c language code
Step 1: Write your c code
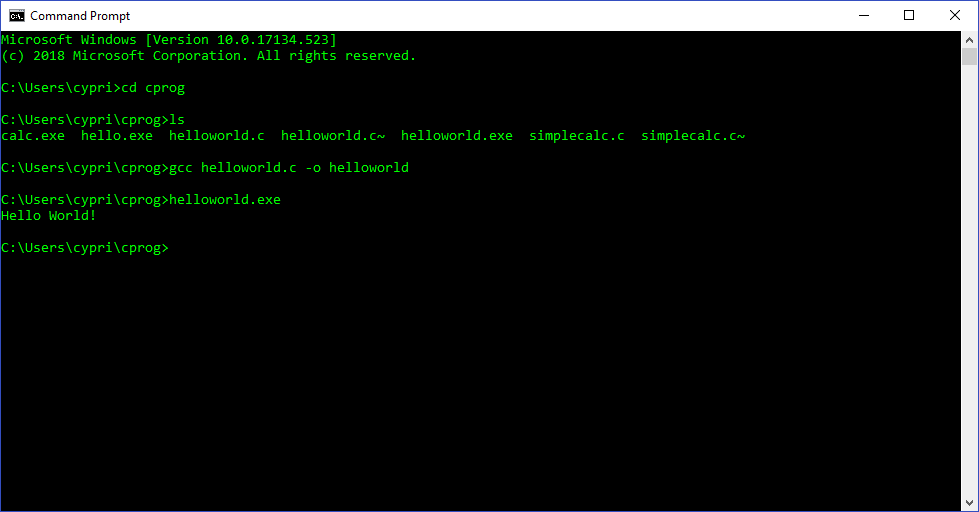
For example, let’s take this Hello World example
Step 2: Compile using gcc
Write the following line of code into your terminal:
This will generate an executable binary file called helloworld.exe which can be used to run your code

Step 3: Execute your code
Just go into the directory where your executable is and run it by writing “helloworld.exe”

2- The principle
Now that you understand how it can be easy to start with writing C code, let’s talk about the difficult part…
How to actually install gcc on Windows…
The reason it is easy to install compilers and other kind of open source software on linux is because you have a very powerful command line terminal called bash which handles the installation, uninstallation and upgrade of software using a software called “apt” on debian-based linux systems.
On Windows, if you want to have gcc (and the other compilers too), you have to download the source code and find a way to compile it…
For that, you will need to install first other software called pre-requisites which will also need to be compiled, etc…
You can spend several days trying to do that if you are really motivated
I will present you another way much simplier!
For that I will have to install a software called MSYS2, which is an “easy” way to give some linux feel to your Windows PC and able it to install programs almost as easily as in linux…
You will be able to install gcc just with one command line like this:

3- Installing MSYS2 on your PC
What is MSYS2?
According to their website, MSYS2 is a software distribution and building platform for Windows
The Website: https://www.msys2.org/
Installing it is actually a peace of cake
Just download the correct installer and launch it with admin rights and you are good to go

Expected something more complex?
Sorry about that
Once you installed it, you will see 3 programs appear in your list of programs:
- MSYS2 MinGW 32-bit
- MSYS2 MinGW 64-bit
- MSYS2 MSYS
Run the 3rd one MSYS2 MSYS to open a special command window in which you can input commands and start to install programs
The package management system which is equivalent to apt-get on linux is called pacman
When you install MSYS2 for the first time, you have to update pacman using the following command:
4- Installing GCC and other development tools with the pacman package management system
Then you can start to install gcc and other developer tools using pacman like this:
This command will install first a set of development software included in a package called base-devel and then it will install gcc, vim and cmake
vim is optional, but always good to have 😉
(You can also install emacs very easily in the same way)
In the package base-devel, you have 53 useful developement tools that can be installed:
5- Last Important Step: Add Executables to your Windows PATH
Now you are able to install all those packages easily, but how to access them through the normal windows command line?
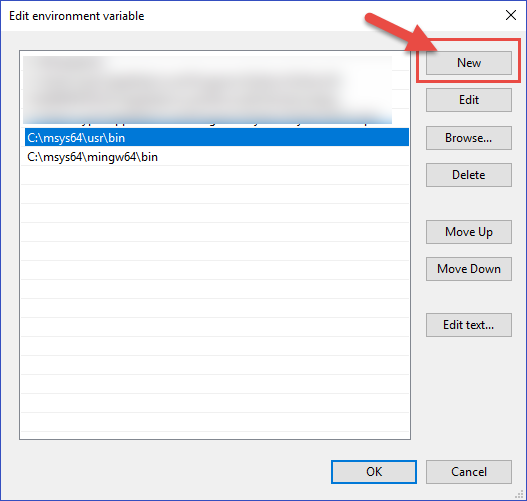
For that, you have to add the two following directories to your PATH:
To add anything to your PATH in Windows 10:
1- Search “Advanced System Settings” in the search bar
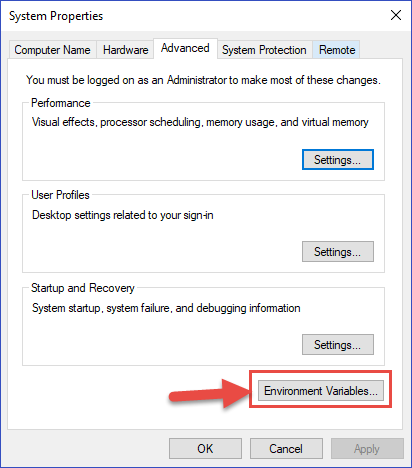
2- Open the “environment variables” window, click on the PATH variable and click on “Edit”

3- Click on the “New” button and add the 2 following directories to your PATH
Important Note: This adds a lot of executables to your path which might conflict with other applications. The usr\bin\ directory contains the whole slew of executables listed above. There is a lot of unnecessary stuff in that directory.
4- Click on OK on all the windows and open a new Command Window and you will be able to use gcc into your windows command prompt!
That’s all for today, hope you understand better now how to install and use GCC and other linux tools on windows!
I will write new articles soon about how to develop simple programs in C.
Let me know through the comments if there is something special that you want to understand!

PS: If you like what I write, subscribe to the newsletter and help me to spread the knowledge by sharing this article! We all win by learning from each other and making the engineering knowledge more accessible 🙂 THANK YOU!


