- CompizConfig Settings Manager
- Содержание
- Общая информация
- Установка и запуск
- Возможности и параметры
- Настройка дополнительных клавиш
- Переключение рабочих столов колесом мыши
- Куб рабочего стола
- Количество столов
- Дополнения
- Compiz Experimental Plugins
- Установка
- Cube Atlantis
- Show mouse
- «Сгорающие» окна
- Решение проблем
- Потеря фокуса на новых окнах
- Потеря отображения системного трея, меню запуска программ и.т.д
- Compiz maximize all windows
- What was Compiz Fusion ?
- Compiz/Configuration
- Contents
- Settings storage options
- Configuration backends
- Profiles
- Window decoration themes
- Emerald
- GTK Window Decorator
- KDE Window Decorator
- Workspaces and Viewports
- Keyboard shortcuts
- Edge bindings
- Plugins
- Scale
- Widget Layer
- Screen Magnification
- Crash handler
- Compiz configuration without CCSM
- Flat-file sample configuration
- GSettings configuration
- Enabling or disabling a Compiz plugin using GSettings
CompizConfig Settings Manager
Содержание
Общая информация
CompizConfig Settings Manager (CCSM) — это менеджер настроек композитного менеджера окон Compiz 1) .
CCSM содержит список установленных плагинов Compiz. При наведении на них появляется всплывающая подсказка с описанием плагина.
Для того, чтобы включить или отключить плагин, установите или снимите галки рядом с ними. Большинство плагинов можно отключить отдельно, но некоторые зависят от других. CCSM сообщит вам о существующих зависимостях.
В левом верхнем углу находится поисковое окно для ускоренной навигации.
Плагины сгруппированы и разделены на 8 категорий.
Установка и запуск
Для установки CompizConfig Settings Manager перейдите по ссылке слева или выполните в терминале:
Запуск программы осуществляется либо через Главное меню 2) , либо через терминал:
Еще один способ «аварийного» запуска CCSM: Правой кнопкой мышки на рабочем столе → «Создать новый документ» → «Пустой документ» → Открыть документ, вписать «ccsm», сохранить. Сделать файл исполняемым — Правой кнопкой мышки → «Свойства» → «Права» → «Разрешить исполнение файла как программы» → Двойной клик левой кнопкой мышки(запустить файл).
Возможности и параметры
Перед изменением дополнительных настроек Compiz рекомендуется установить дополнительную панель (AWN или Cairo) и добавить команду перезапускающую Compiz в автозагрузку 3) :
Настройка дополнительных клавиш
С помощью CCSM можно настраивать дополнительные клавиши. (Например регулировку звука)
Раздел «Общие», плагин «Команды», вкладка «Команды»
amixer -q sset Master 5+ (увеличивает громкость с шагом в 5%)
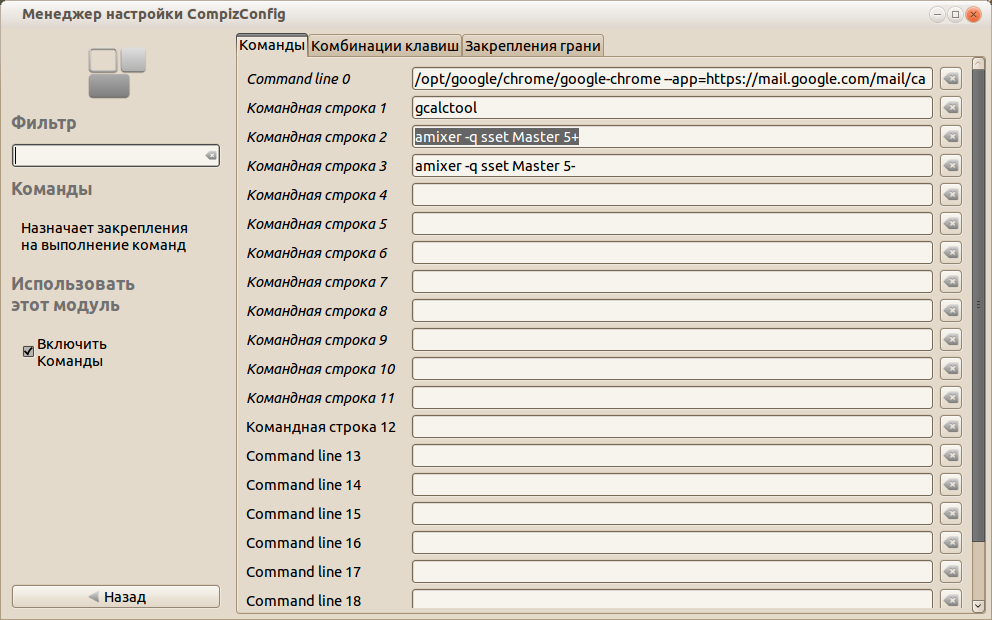
Вкладка «Комбинации клавиш». Выбрать команду.(«Выполнить команду») Нажать кнопку «отключено»⇒«изменить». Отметить «включено» 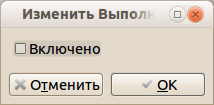
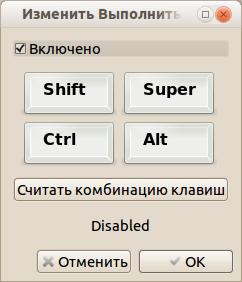 «Считать комбинацию клавиш»
Команда для уменьшения громкости:
-q sset Master 5-
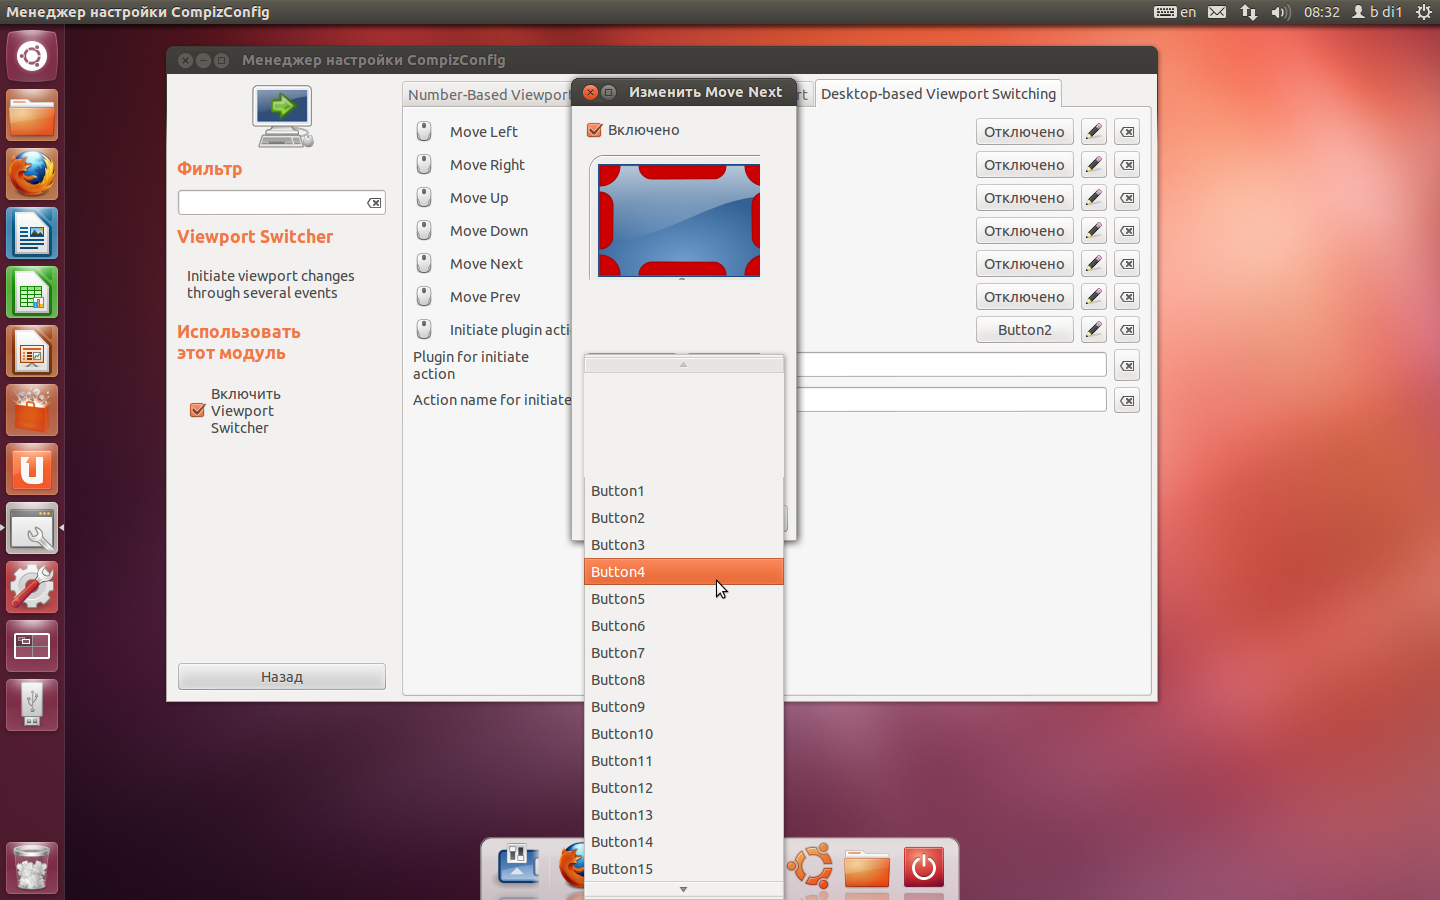
Переключение рабочих столов колесом мыши
По умолчанию в Unity используются плгины Desktop Wall (Стена рабочих столов) и Expo. Для настройки переключения раб.столов колесом мыши необходимо:
В разделе Рабочий стол нажать на плагин Переключатель рабочих мест (Viewport Switcher)

Установить галку Включено и нажать OK
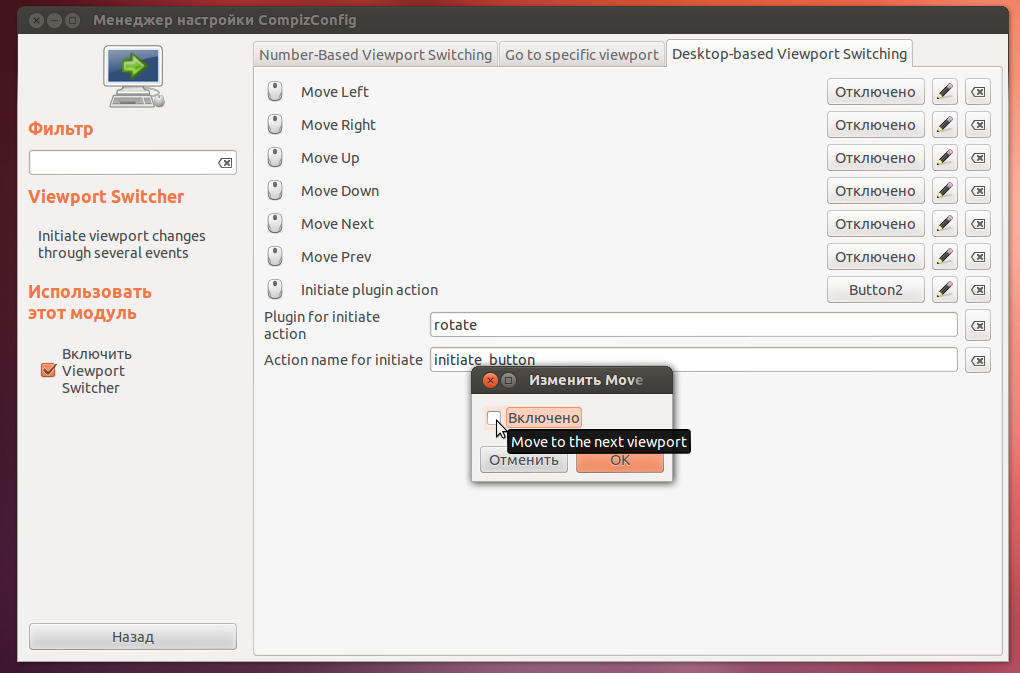
Выбрать Button 4
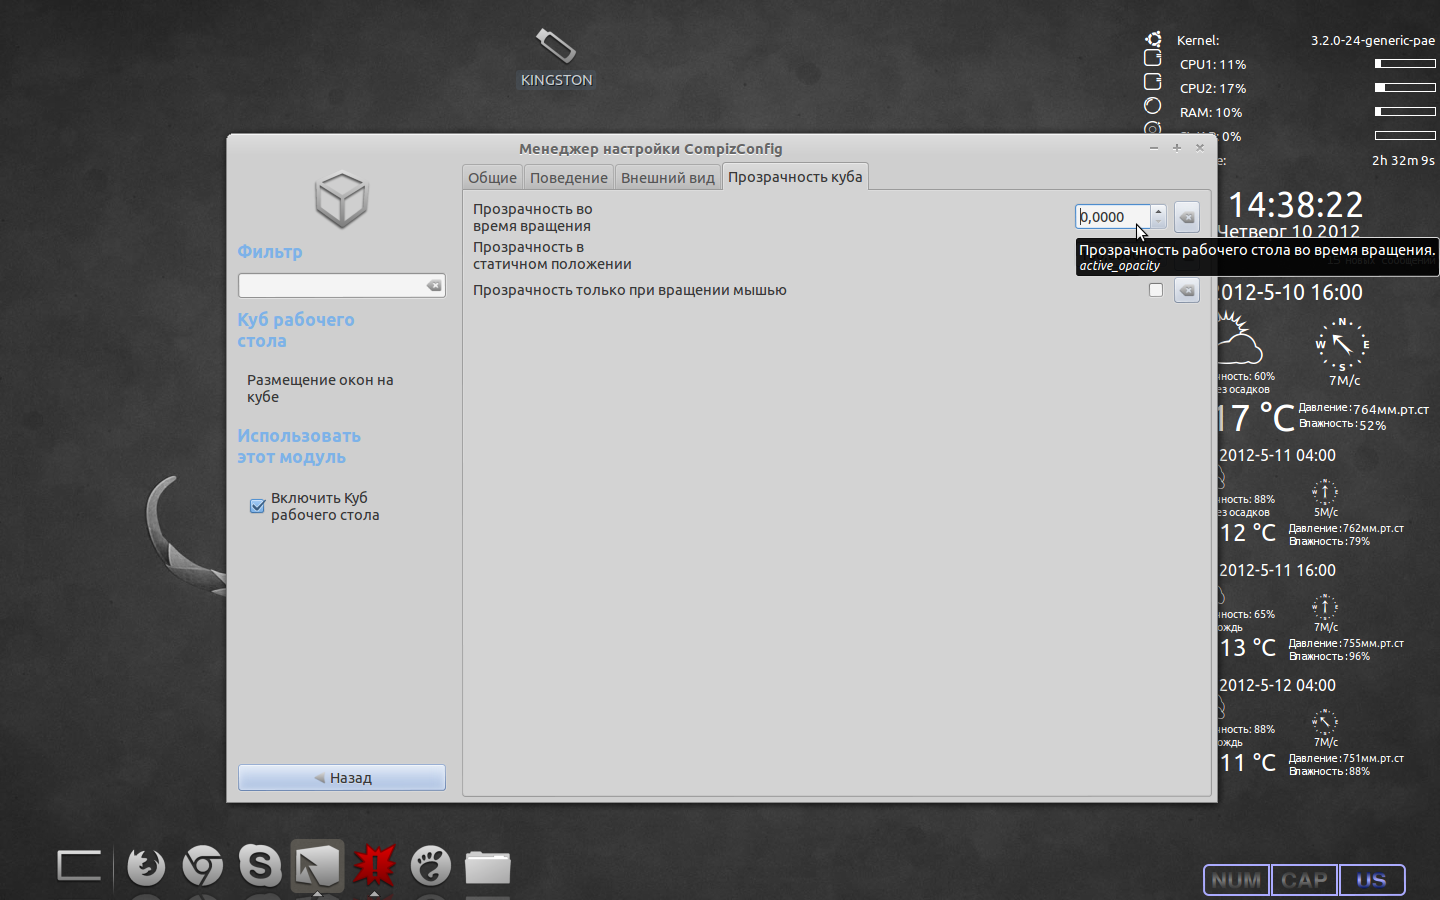
Куб рабочего стола
Часть настроек куба описаны здесь. Рассмотрим ещё некоторые.
Количество столов
На самом деле «куб» не обязательно должен быть «кубом», это может быть любая полигональная призма с числом граней от 2 до 32 ( кроме верхней и нижней).
Для настройки количества рабочих столов запустим CCSM. В разделе Общие переходим в секцию Общие настройки (General Options)  Далее (нажимая стрелку) переходим на вкладку Размер рабочего стола (Desktop Size)
 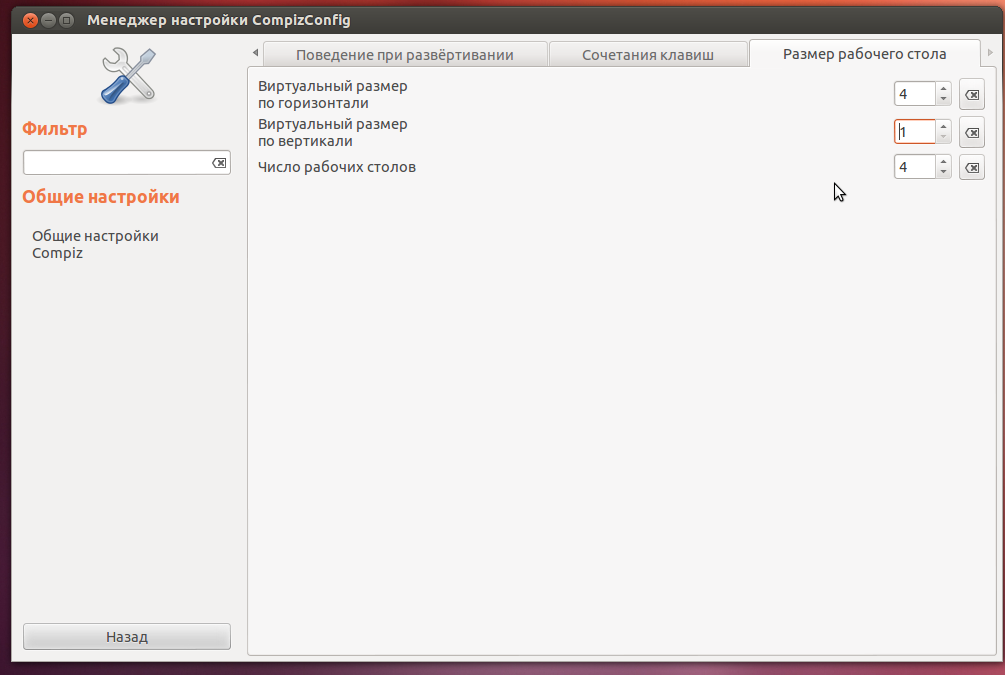 Для получения «куба» установить:
Вращать куб в любом направлении можно удерживая СКМ 4) , или используя комбинацию клавиш Ctrl + Alt + ← для прокрутки куба влево и Ctrl + Alt + → для его прокрутки вправо.
Для настройки вращения куба (переключения рабочих столов) колесом мыши, в разделе Рабочий стол, плагин Вращение куба вкладка Закрепление, выбрать Вращение куба. Далее — Вращать влево вместе с окном→Включено→Button4 Вращать вправо вместе с окном→Button5
Дополнения
Существует много дополнений для Compiz, расширяющих и без того широкий функционал менеджера. В репозиториях Ubuntu доступны для установки три набора дополнений (плагинов):
Compiz Experimental Plugins
Compiz Experimental Plugins — набор готовых к установке и использованию экспериментальных плагинов для Compiz. Домашняя страница.
Установка
Необходимо загрузить архив и извлечь его содержимое. Затем запустить исполняемый файл compiz-addons-0.9 в терминале:
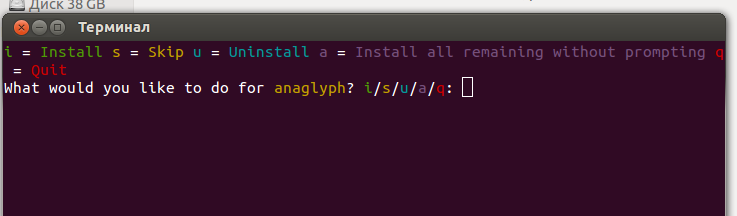 Установочный скрипт будет предлагать слкдующие действия для каждого из устанавливаемых плагинов:
Ниже представлено описание некоторых плагинов.
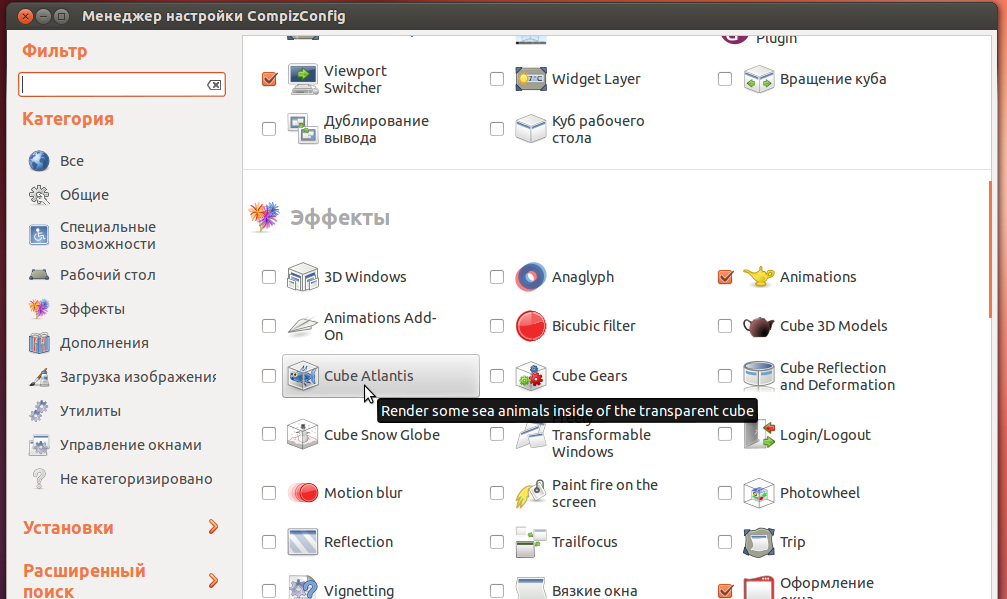
Cube Atlantis
 Cube Atlantis — один из наиболее популярных плагинов. Добавляет «аквариум» внутрь куба.
Выбираем Cube Atlantis
Show mouse
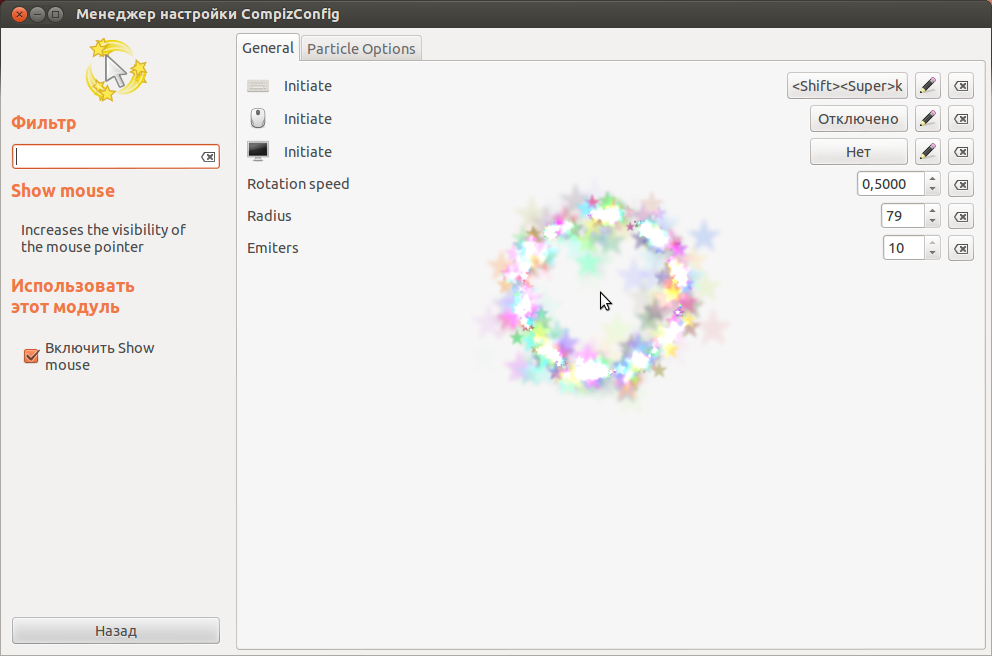 Раздел Специальные возможности→Show mouse→вкладка Общие (General)
Запуск плагина по умолчанию закреплён за комбинацией клавиш Super + K , но поскольку за клавишей в Unity закреплены довольно важные функции, комбинацию клавиш можно изменить строке Initiate 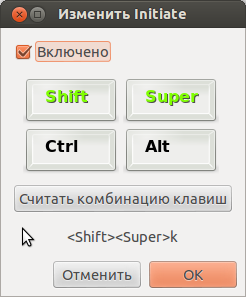 Выбрать комбинацию, затем Считать комбинацию→OК
Rotation speed — скорость вращения. Radius — радиус «шлейфа». Emiters — количество «созвездий»
Вкладка Настройки частиц (Particle Options).
Number Of Particles (Количество частиц)- количество звездочек в кластере.
Particle Size (Размер частиц)- размер отдельной звездочки.
Particle Slowdown (Замедление (затухание)частиц) — изменение скорости затухания звезд при удалении от источника, регулирует резкость «звёздного шлейфа»
Particle Life — время жизни частиц.
Darken background
Additive blending (Смешивание частиц) — если включено, частицы при наложении одна на другую будут ярче.
Particle Color (Цвет частиц) — выбор базового цвета и настройка прозрачности частиц.
Randomly Colored Particles — устанавливает произволшьный цвет частиц
«Сгорающие» окна
Настройка Сгорающих окон.
Запускаем CCSM.
Включаем Animations→Close Animations.
Первая строка — окна, вторая — всплывающие подсказки, третья — выпадающие меню. Можно настроить разные эффекты для разных типов окон.
Выбрать нужную строку. Изменить→ во всплывшем окне в выпадающем списке выбрать Burn.
Во вкладке Animations Add-On можно настроить направление сгорания, количество и цвет частиц огня.
Решение проблем
Потеря фокуса на новых окнах
При открытии окна или развёртывании окна из панели фокус не передаётся этому окну.
Решение:
General → “Focus & Rase Beheviour” ставим “отключить” “Уровень упреждающей фокусировки”.
Потеря отображения системного трея, меню запуска программ и.т.д
Полный сброс настроек CCSM в случае отсутствия отображения системного трея, меню запуска программ (Launcher), а так же в случае залипания окошек программ в верхней части дисплея и невозможности перемещения таковых по области дисплея.
Решение:
Ctrl+Alt+T
Compiz maximize all windows
(taken from Compiz README)
Compiz is an OpenGL compositing manager that use GLX_EXT_texture_from_pixmap for binding redirected top-level windows to texture objects. It has a flexible plug-in system and it is designed to run well on most graphics hardware.
Okay, this description isn’t really meaningful. In a nutshell, Compiz is a compositing manager, which means that it enhances the overall user interaction by adding fancy effects to your windows, from drop shadows to awesome desktop effects like the Desktop Cube or the Expo view.
Compiz can also be a window manager, which means that it is the software between you and your desktop apps. It enables you to move or resize windows, to switch workspaces, to switch windows easily (using alt-tab or so), and so on.
There are two release series of Compiz available that differ in certain technical respects although functionally almost identical. Plugins built for one series will not work with the other.
The latest stable release of the Compiz 0.8 series is 0.8.8.
The latest stable release of the Compiz 0.9 series is 0.9.13.0 and bug reports can be found here.
What was Compiz Fusion ?
If you heard of Beryl or Compiz Fusion, it’s us as well ! Check the wiki page for more details on the (somewhat troubled) project history.
Compiz Fusion is the result of a merge between the well-known Beryl composite window manager and Compiz Extras, a community set of improvements to the Compiz composite window manager. Compiz Fusion aims to provide an easy and fun-to-use windowed environment, allowing use of the graphics hardware to render each individual window and the entire screen, to provide some impressive effects, speed and usefulness. The first Compiz Fusion developer release was Compiz Fusion 0.5.2 on August 13th 2007, shortly after Compiz 0.5.2 was released. First stable release of Compiz Fusion is 0.6.0 released on October 20 2007.
Compiz is an open-source software project, meaning anyone can use it freely and contribute.
Compiz/Configuration
This article details more advanced Compiz configuration. It is assumed that you have successfully installed Compiz and have a basic, working configuration. For information on installation, basic configuration and troubleshooting, please consult the Compiz article.
Contents
Settings storage options
Configuration backends
By default, Compiz stores its configuration settings in a plain text file
/.config/compiz-1/compizconfig/Default.ini . In CCSM this is known as Flat-file Configuration Backend.
Compiz can also store its settings in the GSettings or GConf databases. To change how Compiz saves its settings open CCSM and click on the Preferences tab in the left hand column. Then choose your desired backend from the list under Backend.
You can also change the backend manually by editing the
Edit the line below:
- ini = Flat File Configuration Backend
- gsettings = GSettings Configuration Backend
- gconf = GConf Configuration Backend
Once you have edited and saved the file the change will take place immediately. There is no need to log out.
Profiles
Profiles allow you to switch between different sets of Compiz settings easily. To create a new profile open CCSM and click on the Preferences tab. Under Profile click the plus sign to add a new profile or the minus sign to delete one. All changes made in CCSM will be written to your current profile.
Profiles are specific to the backend you are using. For instance, if you are using the GSettings backend then any new profile you create will be a GSettings profile. If you switch to a different backend then your current profile will not work and you will automatically switch to a profile available for that backend.
Window decoration themes
Emerald
Many Emerald themes are available for download on compiz-themes.org [dead link 2020-03-28 ⓘ] . Emerald themes can be installed, selected, removed and edited using the emerald-theme-manager program. For downloaded themes, unzip the tarball and then install it using the Import option in the theme manager.
Emerald themes are store in two locations:
The currently selected Emerald theme is copied into the
Emerald settings such as window button pulse can be configured in emerald-theme-manager and are written to the
GTK Window Decorator
The GTK Window Decorator can be compiled with support for the Metacity or Marco window managers (depending on the Compiz version). If it is compiled with this support, the theme used by Metacity or Marco will also be used by GTK Window Decorator. If GTK Window Decorator is not compiled with Metacity or Marco support, a builtin fallback theme will be used.
Many Metacity themes are available for download on gnome-look.org. Once downloaded, they should be unpacked into a directory such as /usr/local/share/themes (for Metacity) or
/.themes (for Marco).
The GTK Window Decorator provided by Compiz 0.9 can be compiled with Metacity (version 3) support. Assuming this support is compiled in, change the Metacity theme using the commands below:
- In a GNOME Flashback session
Firstly, ensure that the theme type is set to metacity:
Then the theme can be set with the following command:
Use the following command:
Use the following command:
The GTK Window Decorator included in the Compiz provided by the Compiz-Reloaded upstream (versions 0.8.10 and higher) can be compiled with Marco support. Assuming this support is compiled in, use the command below to change the Marco theme:
The GTK Window Decorator included in the Compiz provided by the original Compiz upstream (versions 0.8.9 and below) can be compiled with Metacity (version 2) support. This GTK Window Decorator version expects the theme to be defined as a GConf setting. Assuming this support is compiled in, use the command below to change the Metacity theme:
KDE Window Decorator
Kwin themes can be downloaded, installed and managed using the KDE systemsettings panel.
Workspaces and Viewports
Unlike many other window managers, Compiz does not use multiple workspaces. Instead, it uses one workspace but splits it into multiple sections known as viewports. See [1] for more information.
The number and layout of viewports can be configured in CCSM -> General Options -> Desktop Size. Changing the Horizontal Virtual Size will change the number of viewports in a row. Changing the Vertical Virtual Size will add or remove rows of viewports.
If you are using the Desktop Cube plugin, you will not be to use the rows of viewports added by increasing the Vertical Virtual Size. To take advantage of multiple rows of viewports, use the Desktop Wall plugin instead.
Keyboard shortcuts
Below is a list of the default keyboard shortcuts for Compiz.
- Switch windows = Alt+Tab .
- Switch to next desktops = Ctrl+Alt+← .
- Switch to previous desktop = Ctrl+Alt+→ .
- Move window = Alt+Left click .
- Resize window = Alt+Right click .
A more detailed list can be found under CommonKeyboardShortcuts in the Compiz wiki or you can always just look at your plugin’s configuration.
Extra shortcuts can be added using the commands plugin in CCSM.
Edge bindings
Besides mouse and key bindings, Compiz can also assign commands to certain actions involving the screen edges, for example: dragging a window to the screen edge. For instance: the Rotate Cube plugin has an option to switch to the next viewport if a window is dragged to the screen edge. Edge bindings can usually be disabled, through CCSM, by unticking Edge Flip options in the plugin’s settings section or by disabling actions which have the screen icon next to them in the Bindings section of the relevant plugin.
Plugins
Almost all Compiz functionality is implemented using plugins. Some plugins must be enabled for standard window manager functionality — see Compiz#Enabling important plugins. Plugins that provide extra functionality, above and beyond standard window management, are discussed here.
If you want to compare two windows side by side by dragging them to the edges of the screen, similar to the «Aero Snap» feature introduced in Windows 7, enable the Grid plugin in CCSM. If you are using the Desktop Wall or Rotate Cube plugin then disable the Edge Flip options in that plugin’s section to ensure that windows do not move to the next desktop when dragged to the screen edge.
Scale
The Scale plugin provides an option to view scaled thumbnails of all windows in the current viewport, similar to the «Present Windows» feature in KDE or the «Overview Mode» in GNOME Shell. Once the plugin is enabled, the view can be accessed by moving the mouse cursor into the top right corner of the screen. The active corner can be configured in the Bindings tab of the plugin’s settings section.
Widget Layer
The Widget Layer plugin allows you to define certain windows as widgets. Widget windows are shown on a separate «layer» of the screen. When the widget layer is hidden, all windows defined as widget windows will be iconified. By default, the widget layer is shown and hidden using F9 key.
To define a window as a widget, open CCSM and navigate to the Widget Layer plugin. Click on the Behaviour tab and click on the plus sign button next to the Widget Windows field. In the dialog box that appears, choose Window Title from the Type menu. In the Value field enter the title for the window you wish to define as a widget, for example: galculator.
Screen Magnification
There are two Compiz plugins that can provide magnification functionality. The first is Magnifier which acts much like a magnifying glass (everything within the rectangular box will be zoomed). The magnifier can be used by enabling the plugin in CCSM and pressing Super+m .
The other plugin is called Enhanced Desktop Zoom. When this plugin is enabled, pressing the Super key and scrolling the middle mouse button will magnify the part of the desktop that is under the mouse cursor.
Crash handler
It is a good idea to enable the Crash handler plugin in CCSM. This plugin ensures that if, for whatever reason, Compiz fails to start with the session or crashes at some point during the session, crash logs will be dumped and an alternative window manager will be started. To specify a window manager that can replace Compiz in the event of a crash, click on the Crash handler plugin and tick the Start Other Window Manager option. Then, in the Window Manager Command Line field, enter a command to start the window manager of choice, for instance: xfwm4 —replace .
Compiz configuration without CCSM
Compiz does not have to be configured through CCSM. Settings can be changed by editing the profile directly. For Flat File profiles, this will mean making editing changes to the
/.config/compiz-1/compizconfig/Default.ini file or similar. For GSettings or GConf profiles, this will mean making changes to the DConf or GConf databases using the gsettings or gconftool-2 tools.
Flat-file sample configuration
Features of this sample configuration:
- Ctrl+Alt+[numpad] arranges the current window.
- Left and right bottom corner shows taskbar.
- Mouse control for everything (but typing).
- Some effects.
GSettings configuration
List all of the available Compiz profiles:
Show the active Compiz profile:
Set the active Compiz profile:
List all the available Compiz plugins schemas:
View all of the available settings for a Compiz plugin and their values (this example will show the settings of Static Application Switcher):
View the value for a specific Compiz setting (this example checks the whether the Icon option in Static Application Switcher is enabled:
Change the value for a Compiz plugin setting (this will disable icons in Static Application Switcher):
Enabling or disabling a Compiz plugin using GSettings
Two steps are required. Firstly, get the list of active Compiz plugins using the command below:
This should return an output similar to the one below:
Copy and paste the output and add it to the command to set the active plugins, adding or removing plugins from the array as appropriate. The example below will enable the Static Application Switcher:


