- ИСПРАВЛЕНО: Conexant HD Audio не работает в Windows 10
- 6 решений для исправления проблем Conexant HD Audio в Windows 10
- Как исправить проблемы с аудио драйвером Conexant HD
- Решение 1. Обновите драйверы
- Решение 2 – Отключить улучшения звука
- Решение 3 – Изменить максимальный объем памяти
- Решение 4 – Изменить формат звука по умолчанию
- Решение 5 – Переустановите драйвер Conexant HD
- Решение 6 – Запустите средство устранения неполадок аудио
- FIX: Conexant ISST Audio not working in Windows 10
- What can I do if Conexant ISST Audio is not working?
- 1. Update your drivers
- DriverFix
- 2. Disable audio enhancements
- 3. Change Maximum memory
- 4. Change the default sound format
- 5 – Run the Audio Troubleshooter
- FIX: Conexant HD audio microphone driver not working
- How do I fix the Conexant HD audio microphone driver?
- 1. Download the latest audio drivers
ИСПРАВЛЕНО: Conexant HD Audio не работает в Windows 10
6 решений для исправления проблем Conexant HD Audio в Windows 10
- Обновите драйверы
- Отключить улучшения звука
- Изменить максимальный объем памяти
- Изменить формат звука по умолчанию
- Переустановите драйвер Conexant HD .
- Запустите средство устранения неполадок со звуком
В зависимости от вашей звуковой карты или текущей версии звукового драйвера в Windows 10 могут возникать некоторые проблемы со звуком. На этот раз пользователи Conexant HD Audio заметили проблемы со звуком после обновления до Windows 10.
Если вы один из них, я собрал несколько способов решения этой проблемы. Дайте нам знать, какой из них работал для вас.
Как исправить проблемы с аудио драйвером Conexant HD

Решение 1. Обновите драйверы
Я предполагаю, что вы уже проверили, установлены ли ваши драйверы Conexant HD Audio. Тем не менее, я решил включить этот шаг в качестве фактического решения, просто чтобы убедиться, что ваши драйверы обновлены.
Если вы не обновляли свои драйверы, я рекомендую вам обратиться к диспетчеру устройств и проверить наличие обновлений ваших драйверов.
Теперь вы можете выбрать автоматический поиск обновленного драйвера или поиск компьютера, если у вас есть файл драйвера. Следуйте инструкциям на экране и не забудьте перезагрузить компьютер. В некоторых случаях требуется перезагрузка, чтобы новый драйвер работал.
Есть также некоторые другие решения, которые не строго привязаны к Conexant HD Audio. Многие люди сообщили, что они решили проблему для них. Итак, ознакомьтесь со следующими решениями.
– СВЯЗАННЫЕ: Исправлено: ошибка «Аудиоустройство отключено» в Windows 10
Решение 2 – Отключить улучшения звука
Первое, что вы можете попробовать, чтобы заставить ваш Conexant HD Audio снова работать, это отключить улучшения звука. Это очень простое решение, и все, что вам нужно сделать, это:
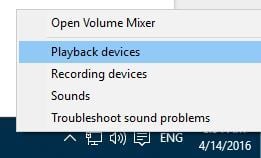
- Щелкните правой кнопкой мыши значок Динамики на панели задач и откройте Устройства воспроизведения.

- Откройте устройство воспроизведения по умолчанию, дважды щелкнув по нему
- Перейдите на вкладку Расширения и установите флажок Отключить все улучшения .
- Нажмите OK и перезагрузите компьютер
Теперь попробуйте, если ваш Conexant HD Audio работает, если нет, попробуйте некоторые из следующих решений.
Решение 3 – Изменить максимальный объем памяти
Другим обходным решением, которое может помочь вам избавиться от проблемы со звуком в Conexant HD Audio (и других аудиодрайверах, в том числе), является изменение максимального объема памяти при загрузке. Вот что вам нужно сделать, чтобы изменить максимальную память:
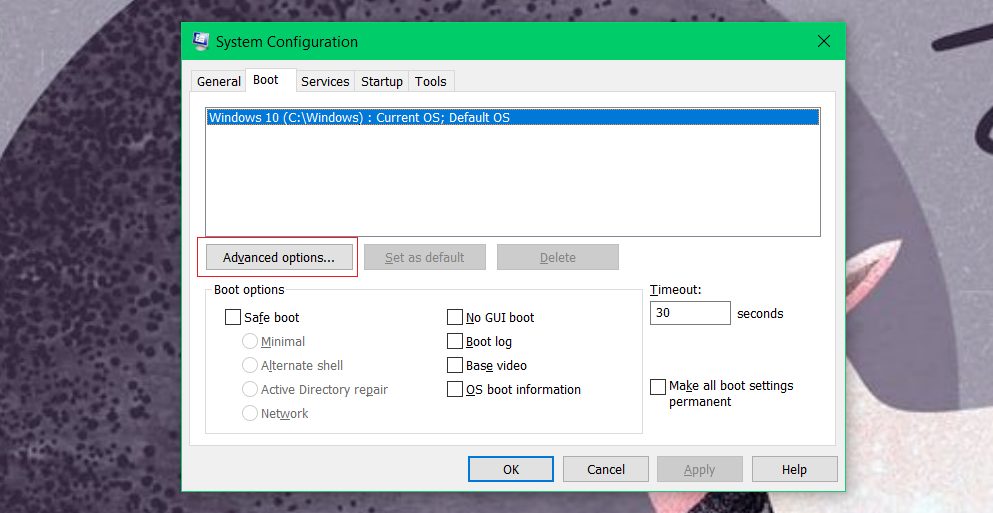
- Перейдите в Поиск, введите msconfig и откройте Конфигурация системы
- Перейдите на вкладку Boot
- Нажмите Дополнительные параметры
- Установите для Максимальный объем памяти значение 3072 (это лучший вариант)
- Перезагрузите компьютер.
– СВЯЗАН: полное исправление. Аудио Skype не работает в Windows 10, 8.1, 7 .
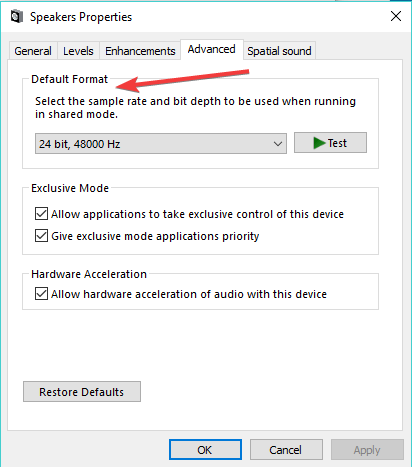
Решение 4 – Изменить формат звука по умолчанию
Если ни одно из вышеуказанных решений не сработало, вы также можете попробовать другое. Возможно, изменение формата звука по умолчанию поможет вам. Вот что вам нужно сделать, чтобы изменить стандартный звуковой формат вашей системы:
- Щелкните правой кнопкой мыши значок Динамики на панели задач и откройте Устройства воспроизведения .
- Откройте устройство воспроизведения по умолчанию, дважды щелкнув по нему
- Перейдите на вкладку Дополнительно .
- Измените битрейт в разделе Формат звука по умолчанию , пока не найдете тот, который работает
- Нажмите ОК.
Вот и все, мы уже показали вам, как решить проблемы с микрофоном Conexant HD, и теперь, я надеюсь, эта статья также поможет вам решить проблемы со звуком.
Решение 5 – Переустановите драйвер Conexant HD
Иногда, просто переустановка драйвера Conexant HD может решить проблему. Вот как это сделать:
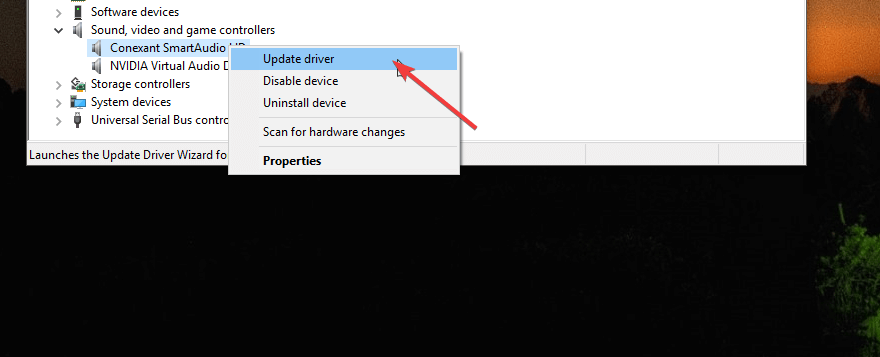
- Нажмите клавишу с логотипом Windows, введите в поле поиска «Диспетчер устройств» и откройте его.
- Разверните раздел «Звуковые, видео и игровые устройства»
- Щелкните правой кнопкой мыши на «Conexant Smart Audio HD» и выберите «Удалить драйвер»
- Теперь перейдите в View> Scan для изменений оборудования. Выбор этой опции позволяет автоматически переустанавливать последние аудио драйверы.
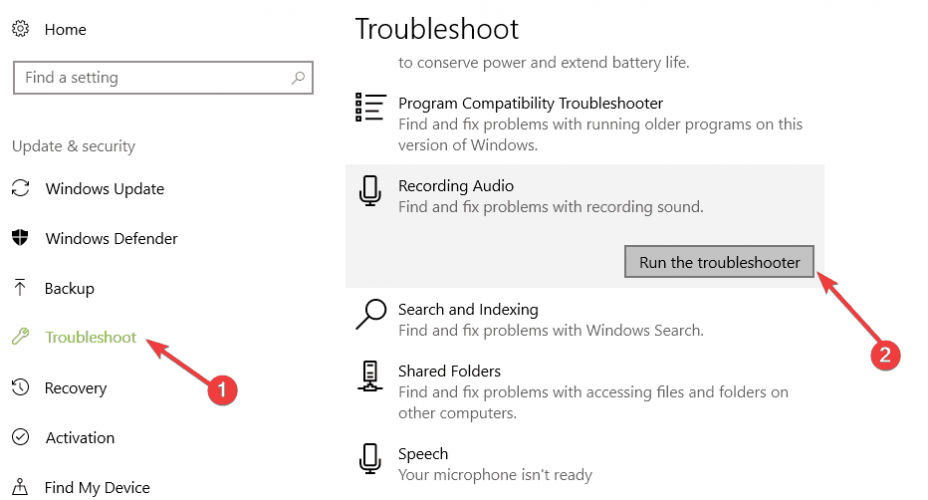
Решение 6 – Запустите средство устранения неполадок аудио
Еще одно быстрое решение – просто запустить встроенный в Windows 10 инструмент устранения неполадок со звуком.Для этого перейдите в Настройки> Обновление и безопасность> Устранение неполадок.
Если у вас есть какие-либо другие проблемы, связанные с Windows 10, вы можете найти решение в разделе исправлений Windows 10.
FIX: Conexant ISST Audio not working in Windows 10

- Did you notice a Conexant ISST Audio with no sound after a Windows 10 update?
- The same might occur for Conexant SmartAudio HD drivers, unfortunately, and it’s quite common.
- The main causes for Conexant ISST Audio issues are outdated drivers or some audio settings.
- Using the right software to keep your computer up to date is crucial to avoid this kind of issues.

- Download Restoro PC Repair Tool that comes with Patented Technologies (patent available here).
- Click Start Scan to find Windows issues that could be causing PC problems.
- Click Repair All to fix issues affecting your computer’s security and performance
- Restoro has been downloaded by 0 readers this month.
Depending on your sound card or the current version of the sound driver, you can face some sound problems in Windows 10.
For example, users of Conexant SmartAudio HD Audio or Conexant ISST Audio noticed sound issues after upgrading to Windows 10.
If you’re one of them, we’ve compiled a few workarounds for this problem. Let us know which one worked for you.
What can I do if Conexant ISST Audio is not working?
- Update your drivers
- Disable audio enhancements
- Change maximum memory
- Change the default sound format
- Run the Audio Troubleshooter
1. Update your drivers
If you haven’t updated your drivers, we recommend you to head to the Device Manager and check for the updates of your drivers.
You can choose to search automatically for an updated driver or browse the computer for if you have a driver file.
Follow the on-screen instructions and don’t forget to restart your computer. In some cases, a restart is required in order for the new driver to work.
Alternativelly, you can use a dedicated software that does this jobs for you, while also recommending the right updates. Keep in mind that such a tool will be useful for any future similar scan.
DriverFix
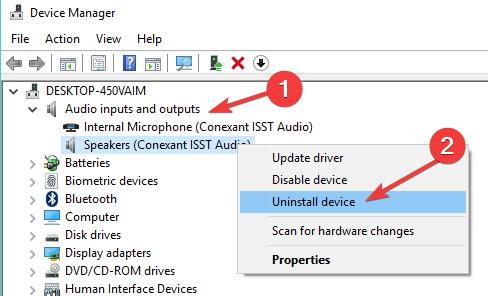
Uninstall and reinstall the Conexant driver
- While in the Device Manager, expand the Sound, video and game controllers section.
- Right-click on the Conexant Smart Audio HD and click on Uninstall device.
- Now, go to View >Scan for hardware changes to reinstall it. Or use DriverFix for the same purpose. The latter will save you the time of searching for the right driver.
2. Disable audio enhancements
- Right-click on the Speakers icon in the taskbar and open Playback devices.
- Open your default playback device, by double-clicking on it.
- Go to Enhancements tab and check Disable all enhancements.
- Click OK and restart your computer.
Now try if your Conexant HD Audio works, if not, try some of the following solutions.
3. Change Maximum memory
- Go to Search, type msconfig, and open System Configuration.
- Go to the Boot tab.
- Click Advanced options.
- Set Maximum memory to 3072 (this happens to be the best option).
- Restart your computer.
4. Change the default sound format
- Right-click on the Speakers icon in the taskbar and open Playback devices.
- Open your default playback device, by double-clicking on it.
- Go to the Advanced tab.
- Change the bitrate under Default sound format, until you find the one that’s working.
- Click OK.
5 – Run the Audio Troubleshooter
Another quick solution is to simply run Windows 10’s built-in audio troubleshooter. To do this, go to Settings > Update & Security > Troubleshoot.
That’s it, we’ve already showed you how to solve Conexant HD microphone problems, and now, I hope this article will help you to solve sound problems, as well.
If you have any other Windows 10-related issues you can check for the solution in our Windows 10 Fix section.
FIX: Conexant HD audio microphone driver not working
- Your microphone is an important peripheral, and an integral part of your ability to communicate with others.
- Many users have reported that their Conexant HD audio microphone driver is not working.
- To learn more about fixing Microphone issues, go to our Microphone Fix Hub.
- If other attached devices are giving you a hard time, we have an entire Peripherals Fix section.

- Download DriverFix now for free (secured download)
- Launch the program and press the Scan icon
- Wait for the scan to finish and start installing the needed drivers
- DriverFix has been successfuly downloaded by 0 readers this month.
Has your microphone stopped working after you installed the latest Windows 10 build? Well, I can tell you that you are not the only user who is having an issue with the audio drivers on Windows 10.
Follow the lines below and you will be able to fix your audio microphone driver and get going with your normal daily work.
Although your Microphone is showing as a normal default operational device in the Control Panel window, unfortunately, you cannot access Cortana.
The troubleshooting steps described involving using the built-in device troubleshooter to see if there is anything wrong with the device itself, uninstalling the driver and install it back in, and removing errors affecting the system.
The article below also covers the following topics:
- Conexant ISST audio microphone not working
- Conexant SmartAudio HD microphone not working
- Conexant microphone not working
How do I fix the Conexant HD audio microphone driver?
1. Download the latest audio drivers
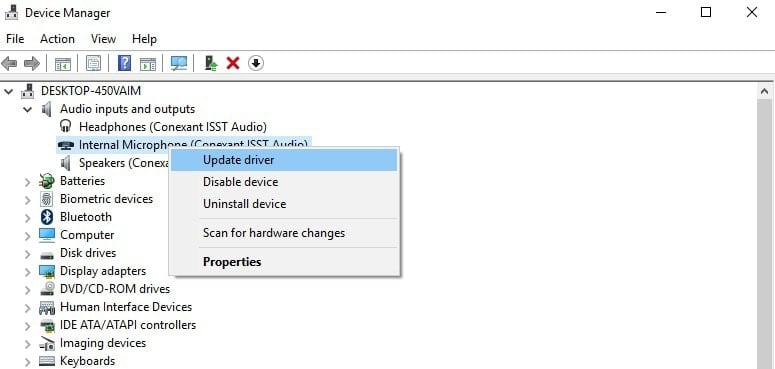
Use the Device Manager
- Go to Start > type device manager > double click the first result to launch the Device Manager.
- Locate the audio device driver in the left-hand pane.
- Right-click on it > select Update Driver.
- After you successfully updated the driver, reboot your computer.
- Check again if your microphone is working correctly.
Update drivers manually
- If the update driver feature failed, to go on the manufacturer’s website and download the latest driver from there.
- After you successfully downloaded the driver, go to the directory where you saved it and right-click on it.
- From the menu that appears, select Run as Administrator
- Note: if you are asked for an administrator account and password please type it in.
- Run the installation process normally and reboot your operating system afterward.
- Check again if you still have issues with your microphone.
Update drivers automatically (suggested)
Downloading drivers manually is a process that carries the risk of getting the wrong driver installed, which may lead to serious malfunctions.
The safer and easier way to update drivers on a Windows computer is by using an automatic tool such as DriverFix.


