- Configure java jdk windows
- Шаг 2: Установить JDK из файла
- Шаг 3: Установка переменных среды — JAVA_HOME и PATH
- Configure java jdk windows
- System Requirements for Installing the JDK on 64-Bit Windows Platform
- JDK Installation Instruction Notation for Windows
- JDK Installation Instructions for Windows
- Downloading the JDK Installer
- Running the JDK Installer
- Installing the JDK Silently
- Setting the PATH Environment Variable
- Beginning to Use the JDK
- Uninstalling the JDK on Windows
- Uninstalling the JDK in Silent Mode
- JDK Installation Troubleshooting
- System Error During Decompression
- Program Cannot Be Run in DOS Mode
- Characters That Are Not Part of the System Code Page
- Cleanup the Registry After a Failed JDK Uninstall
- Fixing Shim Situation when JDK 15 and JRE 8 is Installed
- Установка JDK в Windows
- Как установить JDK
- Скачайте нужный дистрибутив JDK
- Настройка переменных окружения
- Проверка установки
- Резюме
Configure java jdk windows
На сегодня местонахождения файлов для скачивания JDK находится по адресу Java SE Downloads
Думаю, что вы можете взять самый последний JDK — в нашем курсе это JDK 1.7 update 3. Но еще раз повторюсь — принципиальных отличий в установке вы не увидите. Ваша задача — найти версию JDK, которая установится на ваш компьютер — выберите операционную систему и разрядность.
Шаг 2: Установить JDK из файла
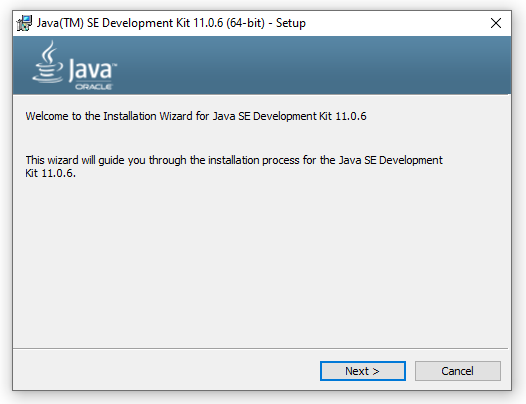
Здесь тоже каких-либо сложностей быть не должно — я не видел принципиальной разницы между версиями 1.4, 1.5, 1.6 и 1.7. Запускаем скачанный файл и после некоторого ожидания вы увидите стартовый экран для установки. Нажимаем «Next».

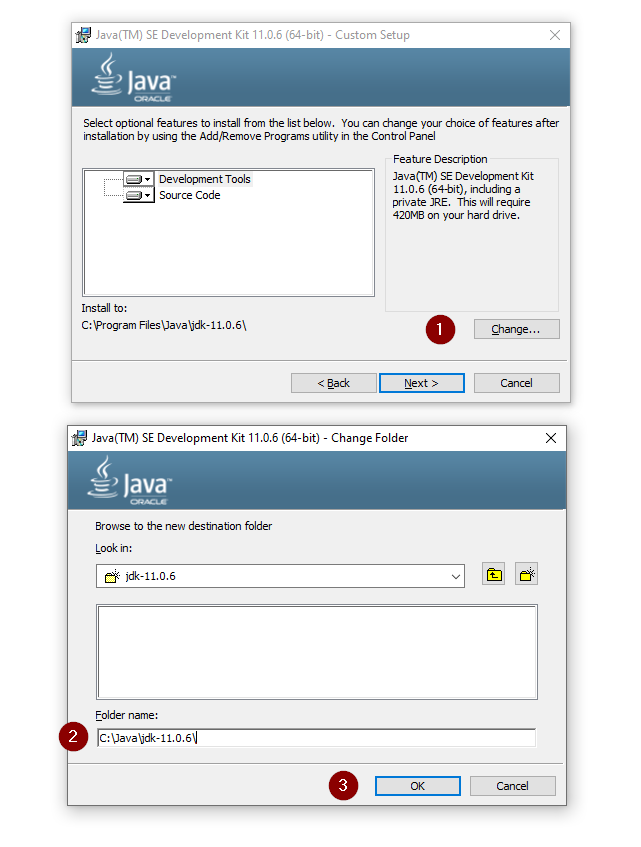
На следующем экране вам предложат директорию для установки. Мне больше нравится установка не в директорию по умолчанию. (она выделена красным). Нажмите кнопку «Change…».

В появившемся окне установите директорию «C:\Java\jdk1.7.0_03». После этого я вам настоятельно советую выделить этот путь и сохранить его в буфере обмена (чуть позже мы им воспользуемся). Дальше жмем «OK».

После этого можно увидеть установленную директорию в окне. Снова нажимаем кнопку «Next».

Через некоторое время установка JDK почти закончится, но вам также придется установить JRE (Java Runtime Environment). Вы это сразу увидите по форме, которая должна появиться. Здесь нет необходимости менять директорию — смело жмем «Next».

Какое-то время перед вами будет экран, на котором будет говориться, что 3 миллиарда устройств используют Java.

И наконец вы увидите, что установка закончилась.

В версии 1.7 появился еще один шаг — выбор установки JavaFX 2.0. У вас появиться экран для выбора директории (мне не очень понравилось, как он реализован). Но в общем можно просто нажимать кнопку «Next». Т.к. я плохо отношусь к диреториям с пробелом, то я выбрал свой вариант.

Шаг 3: Установка переменных среды — JAVA_HOME и PATH
На этом установка практически завершена. Останется сделать только еще один шаг — прописать путь до файлов JDK в путях операционной системы. Это позволит нам запускать основные файлы из командной строки — удобный момент. И также мы установим переменную JAVA_HOME — это правда нам пригодится не скоро, но сделаем это прямо сейчас. Думаю, что большинство из вас знает как это сделать. Но давайте все-таки это сделаем вместе. Я использую ОС Windows 7.0 — поэтому буду демонстрировать на ней. В меню «Пуск» найдите пункт «Компьютер» и щелкните на нем правой кнопкой мыши. В появившемся меню выберите пункт «Свойства». Появится окно
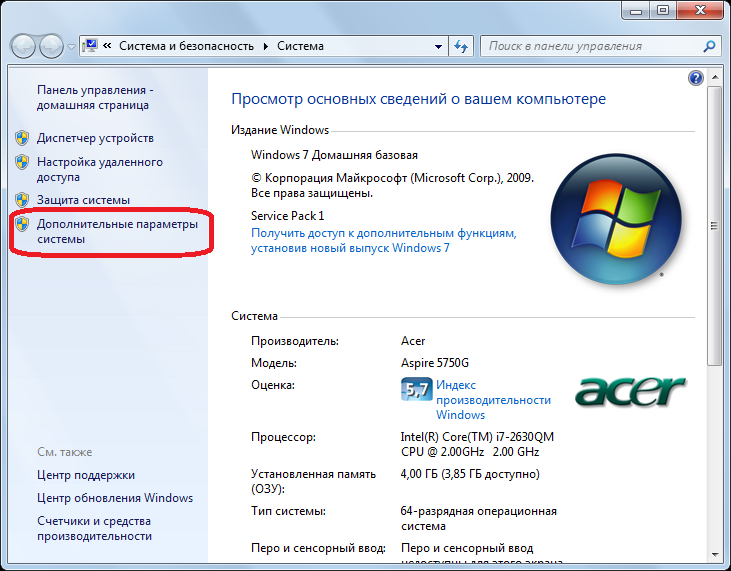
Выбираем пункт «Дополнительные параметры системы» (я выделил этот пункт). Получим окно, в котором надо выбрать пункт «Переменные среды».

В появившемся окне вам надо создать одну переменную — «JAVA_HOME». И отредактировать переменную «Path». Для этого нажимаем кнопку «Создать».

Вариант установки переменной «JAVA_HOME» показано на рисунке. Вот тут как раз и пригодится та строка, которую я предлагал вам запомнить при установке JDK.

Для установки переменной «Path» скорее всего ее создавать не надо — она уже обычно есть. Так что надо ее найти в списке и нажать кнопку «Изменить». Но будьте внимательны — во-первых здесь надо вводить строку предварительно поставив «;» в конце списка всех путей. И во-вторых — надо добавить строку «\bin» после. Пример показан на рисунке.
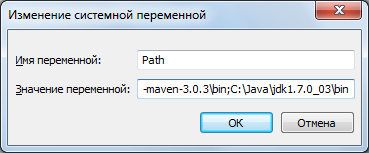
И еще раз — БУДЬТЕ ВНИМАТЕЛЬНЫ при редактировании PATH — она содержит важную информацию. Не надо ее целиком стирать и оставлять только свою строку. Надо после точки с запятой ДОБАВИТЬ строку до каталога с JDK (+ строка «\bin»). Т.е. если у вас JDK установлен в каталог C:\Java\jdk1.7, то в PATH надо добавить (через «;») строку C:\Java\jdk1.7\bin.
Теперь мы сделали все необходимые шаги для установки JDK — пора приступать к написанию простой программы. Основные шаги
Configure java jdk windows
This topic includes the following sections:
System Requirements for Installing the JDK on 64-Bit Windows Platform
JDK Installation Instruction Notation for Windows
For any text in this document that contains the following notation, you must substitute the appropriate update version number:
For example, if you are downloading the JDK installer for 64-bit systems for update 15 Interim 0, Update 0, and Patch 0, then the file name jdk- 15 . interim.update.patch _windows-x64_bin.exe becomes jdk- 15 _windows-x64_bin.exe .
JDK Installation Instructions for Windows
You run a self-installing executable file to unpack and install the JDK on Windows computers.
Install JDK on Windows computers by performing the actions described in the following topics:
Downloading the JDK Installer
Access Java SE Downloads page and click Accept License Agreement . Under the Download menu, click the Download link that corresponds to the .exe for your version of Windows.
Download the file jdk- 15 . interim.update.patch _windows-x64_bin.exe .
Verify the successful completion of file download by comparing the file size on the download page and your local drive. Alternatively, you can ensure that the downloaded file’s checksum matches the one provided on the Java SE Downloads page.
Running the JDK Installer
- Start the JDK 15 installer by double-clicking the installer’s icon or file name in the download location.
- Follow the instructions provided by the Installation wizard.
- After the installation is complete, delete the downloaded file to recover the disk space.
Installing the JDK Silently
Instead of double-clicking or opening the JDK installer, you can perform a silent, non interactive, JDK installation by using command-line arguments.
The notation jdk stands for the downloaded installer file base name, such as jdk- 15 _windows-x64_bin.exe .
Setting the PATH Environment Variable
It is useful to set the PATH variable permanently for JDK 15 so that it is persistent after rebooting.
If you do not set the PATH variable, then you must specify the full path to the executable file every time that you run it. For example:
- Select Control Panel and then System .
- Click Advanced and then Environment Variables .
- Add the location of the bin folder of the JDK installation to the PATH variable in System Variables .
The PATH environment variable is a series of directories separated by semicolons (;) and is not case-sensitive. Microsoft Windows looks for programs in the PATH directories in order, from left to right.
You should only have one bin directory for a JDK in the path at a time. Those following the first instance are ignored.
If you are not sure where to add the JDK path, append it.
The new path takes effect in each new command window that you open after setting the PATH variable.
The following is a typical value for the PATH variable:
Beginning to Use the JDK
Use the Java Development Kit in the Windows Start menu to access information related to Reference Documentation.
During JDK install, Java menu items are added to the Windows Start menu to provide easy access to Reference Documentation, which is online documentation web page.
During JDK installation and uninstallation processes, the appropriate start menu items are updated so that they are associated with the latest JDK version on the system
The Windows 7 and Windows 10 have a Start menu; however, the menu is not available in Windows 8 and Windows 8.1. The JDK and Java information in Windows 8 and Windows 8.1 is available in the following Start directory: %ALLUSERSPROFILE%\Microsoft\Windows\Start Menu\Programs .
Uninstalling the JDK on Windows
Uninstalling the JDK in Silent Mode
You can use the command line for uninstalling the JDK.
For example, to uninstall JDK 15, run the command:
- This command can be run from anywhere.
- The msiexec.exe executable is located in the windows system directory.
- A reboot is required only if some files are in use during uninstallation; it is not necessary everytime. However, to manually suppress reboot while uninstalling, append REBOOT=R option to the command.
- Append /l “C:\ path >setup.log” option to the command if you want to create a log file describing the uninstallation status.
Windows Installer dialog appears prompting you for confirmation. Click Yes to uninstall JDK.
Finding the JDK Registry Key and UninstallString Value
- Go to Start and type Regedit .
- In the Registry Editor, go to HKEY_LOCAL_MACHINE/Software/Microsoft/Windows/CurrentVersion/Uninstall .
Under the Uninstall folder, you will find many registry entries within curly brackets.
Highlight Uninstall folder before performing search for a particular registry.
The registry key is highlighted on the right-hand side of the pane and values of various uninstall strings are displayed on the left-hand pane.
JDK Installation Troubleshooting
The topic provide tips for resolving issues while installing JDK.
System Error During Decompression
If you see the error message: system error during decompression , then there might not be enough space on the disk that contains the TEMP directory.
Program Cannot Be Run in DOS Mode
If you see the error message: This program cannot be run in DOS mode , then do the following:
Open the MS-DOS shell or command prompt window.
Right-click the title bar.
Select the Program tab.
Ensure that the item Prevent MS-DOS-based programs from detecting Windows is not selected.
Select OK again.
Exit the MS-DOS shell.
Restart your computer.
Characters That Are Not Part of the System Code Page
The associated bug number is 4895647.
Cleanup the Registry After a Failed JDK Uninstall
Sometimes, attempts to uninstall JDK through the Windows Add/Remove program leave behind some Java entries in the registry that are not fully removed. These left behind registry entries can cause problems in installing a new version of Java. The following are the methods to cleanup registry entries:
- Program Install and Uninstall troubleshooter (Recommended Method)
- Manual Registry Edit
Program Install and Uninstall troubleshooter (Recommended Method)
Run the Program Install and Uninstall troubleshooter to repair the corrupted registry keys that prevent programs from being completely uninstalled, or blocks new installations and updates.
Manually edit the registry (Use this only if the Fix It utility does not work)
Incorrectly editing your registry may severely damage your system. You should back up any valued data from your computer before making changes to the registry.
Use the File->Export functionality of the registry editor to save the registry key before deleting. In case you deleted the wrong registry key, you can restore the registry from your saved backup file, by using the File->Import functionality.
To delete the registry key:
Highlight the key, Right click and select Delete .
Click Yes when prompted.
The JDK gets uninstalled.
Fixing Shim Situation when JDK 15 and JRE 8 is Installed
When you install JDK 15 and then install JRE 8, and then run the java -version command, 1.8.0 is displayed in the output instead of 15 . This is because the javapath is placed before JDK 15 location in the user environment path.
This is a bug with the JRE 8 uninstaller. To fix this shim situation, uninstall and reinstall JDK 15.
Установка JDK в Windows
В этой статье мы установим JDK 11 на Windows. Java Development Kit (JDK) – это набор программ и библиотек для разработки программ на Java. Если вы хотите разрабатывать на Java программы, сперва вам нужно установить актуальную версию JDK.
В данной статье мы покажем, как установить JDK 11. Эта версия LTS (long time support), которая будет поддерживаться до сентября 2022 года. Вы можете установить любую другую версию JDK на ваш вкус, используя эту инструкцию.
Как установить JDK
Скачайте нужный дистрибутив JDK
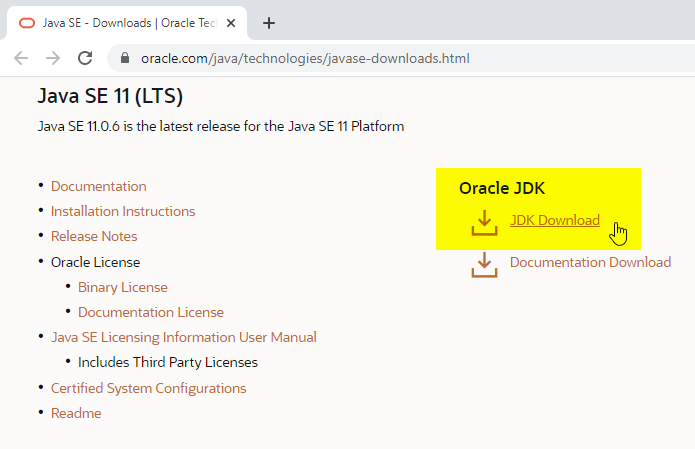
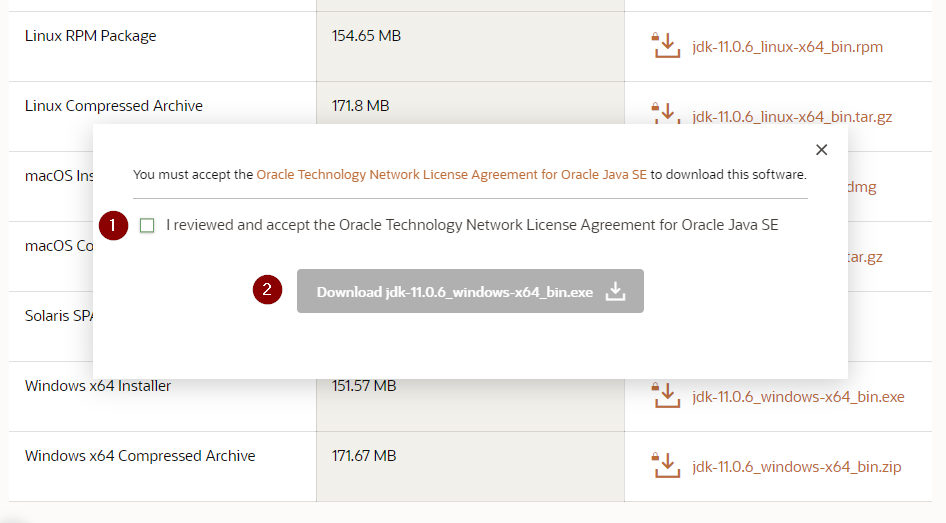
На следующей страницу выберите дистрибутив «Windows x64 Installer»:

Появится всплывающее окно. Согласитесь с условиями лицензии и нажмите кнопку Download:
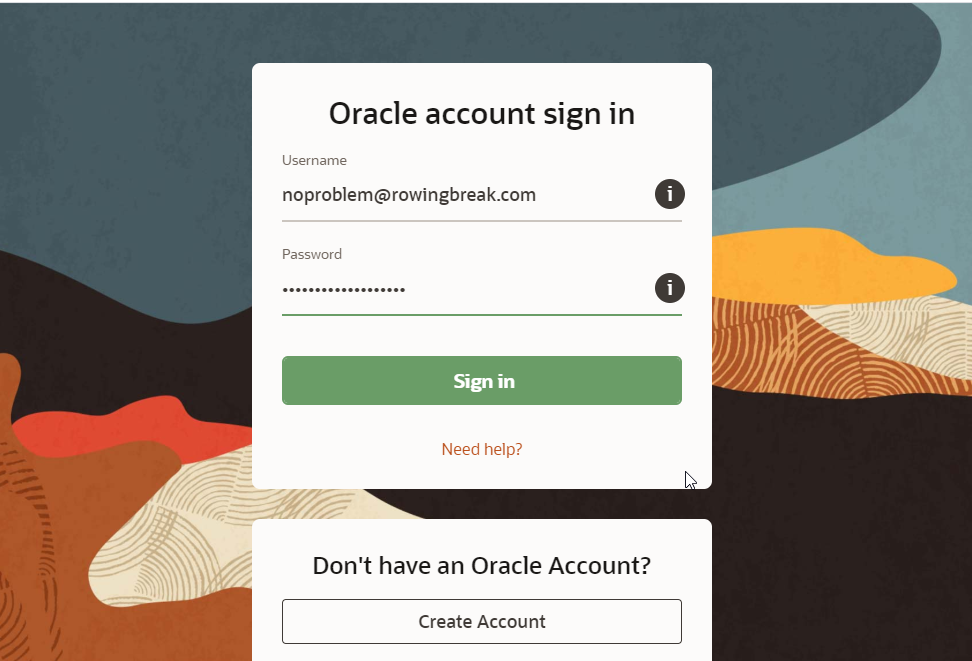
Для скачивания вам потребуется залогиниться в существующую учётную запись Oracle. Если у вас её нет, вы можете создать новую учётную запись.
Если вам лень заморачиваться с созданием учётных записей, найдите работающий логин/пароль на сайте bugmenot
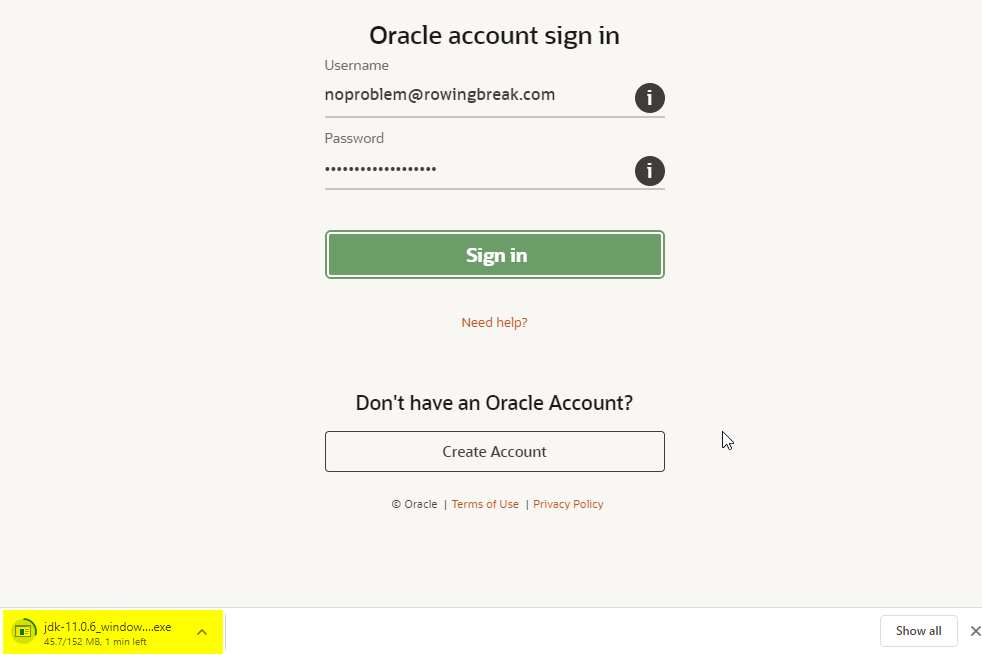
Начнётся скачивание инсталлятора. По окончанию загрузки запустите установку:
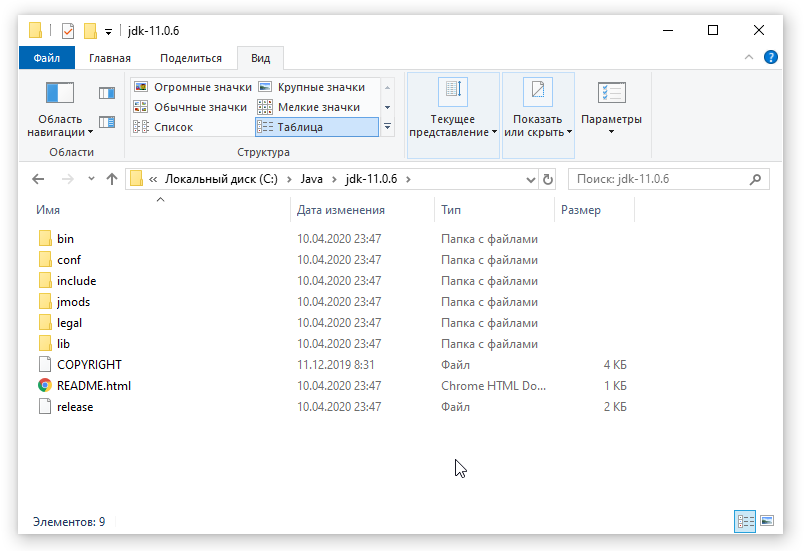
На этапе выбора компонентов укажите путь установки. Я крайне рекомендую вам заменить стандартный путь C:\Program Files путём, не содержащих пробелов, например, C:\Java\jdk-11

Через несколько минут установка завершится:

Для проверки вы можете зайти в указанный вами путь и проверить, что там есть следующий контент:
Настройка переменных окружения
После успешной установки JDK, крайне желательно объявить переменную окружения JAVA_HOME. Эта переменная используется многими программами и инструментами из стандартного набора Java разработчика.
Для этого откройте окно «Этот компьютер» → «Свойства»:
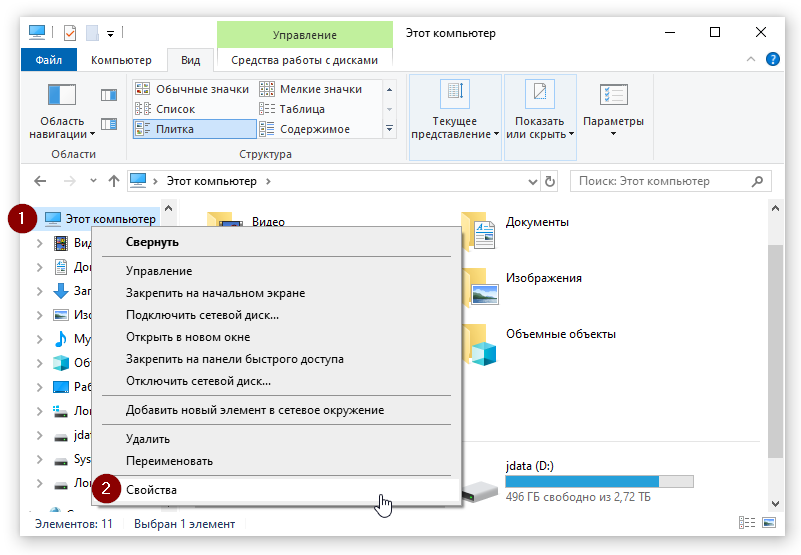
Затем откройте окно «Дополнительные параметры системы» и в нём нажмите кнопку «Переменные среды…»

В окне «Переменные среды» нажмите кнопку «Создать…»

В появившемся окне введите следующие значения:
Имя переменной: JAVA_HOME
Значение переменной:

Затем найдите системную переменную Path и измените её:
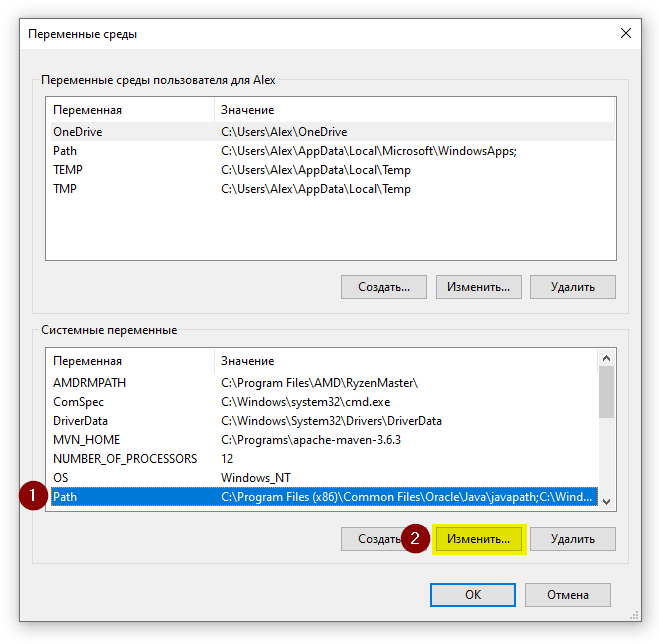
Нажмите кнопку «Создать», и укажите в новой строке значение %JAVA_HOME%\bin

Также, если вы видите в этом списке путь к программе javapath (как на скриншоте), удалите его.
Проверка установки
После установки переменных окружения откройте консоль (Win+R, cmd)

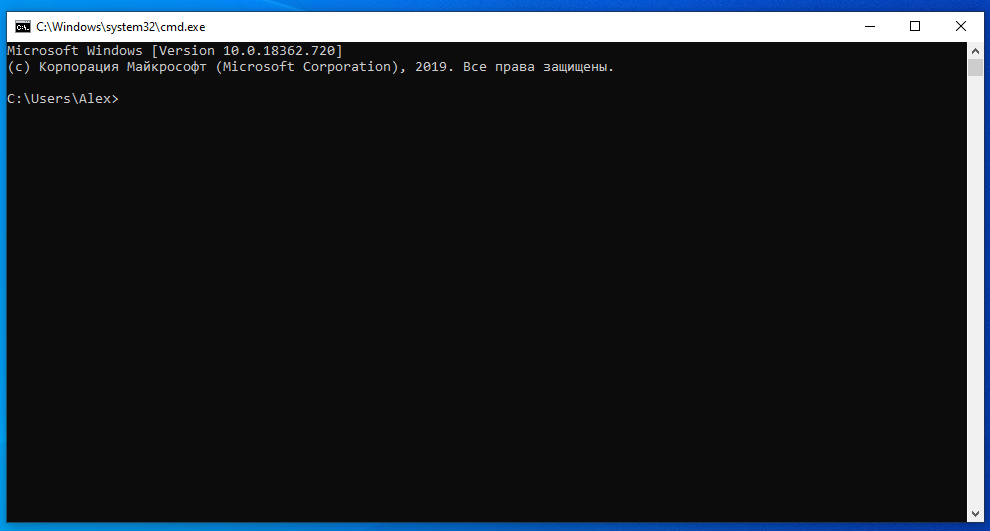
Последовательно выполните две команды:
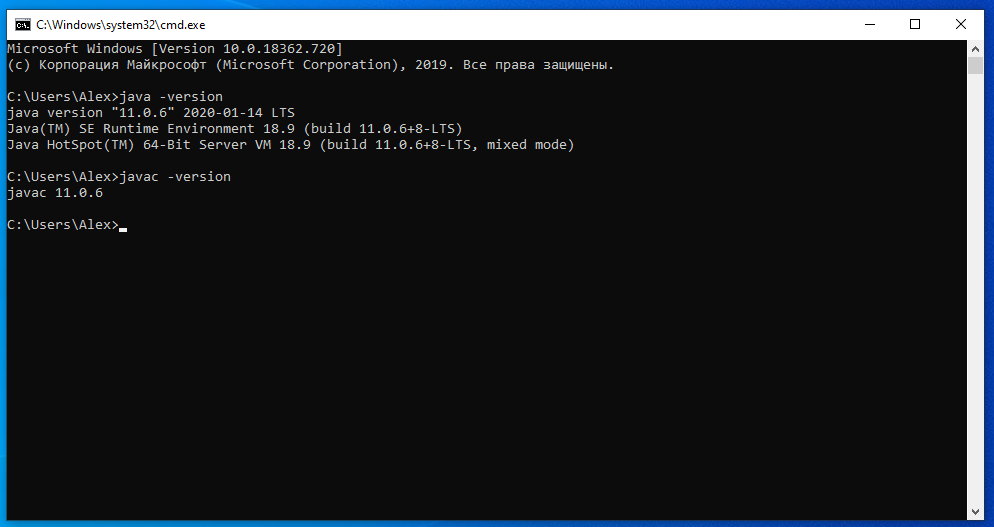
Если вы видите вывод наподобие этого, значит, вы корректно установили JDK и правильно указали переменные окружения. Вы готовы написать свою программу на Java!
Резюме
В данном уроке мы научились устанавливать JDK и настраивать перменные окружения. В следующих уроках мы установим основные инструменты Java программиста.


