- Connect linux and mac
- Connect to the server
- Change the root password
- Next steps
- Share this information:
- Connect linux and mac
- Introduction
- Log in
- Remote host identification
- Generate a new SSH key pair
- Add the public key to your cloud account
- Create a new server by using a stored key
- Add the key to an existing server
- Shortcut configuration
- Troubleshooting
- Share this information:
- How to connect a linux pc (Ubuntu) to a Mac OSX that run only in single user mode terminal
- 1 Answer 1
- Connect linux and mac
- Connecting to Linux over RDP from a Mac is very easy and fun.
- How to RDP to Linux from a Mac computer
Connect linux and mac
Last updated on: 2018-10-26
Authored by: Rose Contreras
If you use MacOS® X, you don’t need to install a third-party client like PuTTY to connect to your cloud server by using Secure Shell (SSH). Terminal is a terminal emulation program included with MacOS X that you can use to run SSH.
Note: For the corresponding steps for an OnMetal server, see Create OnMetal Cloud Servers.
Connect to the server
These instructions are for users who are connecting to a new Cloud Server for the first time. If you’re connecting as a non-root user, replace root in the instructions with your username.
Go to Applications > Utilities, and then open Terminal.
A Terminal window displays the following prompt:
Establish an SSH connection to the server by using the following syntax:
The following code block uses an example value:
Note: You can find the command that you use to connect to your server via SSH in the right sidebar of the Server Details page of the Cloud Control Panel.
The first time that you connect to your server, a message asks you if you want to continue connecting. This message appears because your server has an RSA key that’s not stored in your system registry. As a result, the identity of the key can’t be verified.
Type yes and press Enter. This action adds the RSA key to the list of known hosts so that you don’t see this warning again when you make future connections.
Enter the root password for the server. The password does not echo to the screen.
If you entered the correct password, a shell prompt is returned:
Change the root password
After your first login, change the root password by using the following steps:
At the shell prompt, enter the following command:
Change your password by entering a new one at the following prompts:
If the passwords that you enter match, you receive the following confirmation that the authentication tokens have updated successfully:
The password does not echo to the screen.
Use the new password with the root user when you connect to your server.
Next steps
The next article shows you how to use Rescue Mode to connect to your Cloud Server. Rescue Mode is useful when you’re troubleshooting and when your server becomes unresponsive.
Share this information:
©2020 Rackspace US, Inc.
Except where otherwise noted, content on this site is licensed under a Creative Commons Attribution-NonCommercial-NoDerivs 3.0 Unported License
Источник
Connect linux and mac
Last updated on: 2019-12-20
Authored by: Rackspace Support
This article provides steps for connecting to a cloud server from a computer running Linux® or MacOS® X by using Secure Shell (SSH). It also discusses generating an SSH key and adding a public key to the server.
Introduction
SSH is a protocol through which you can access your cloud server and run shell commands. You can use SSH keys to identify trusted computers without the need for passwords and to interact with your servers.
SSH is encrypted with Secure Sockets Layer (SSL), which makes it difficult for these communications to be intercepted and read.
Note: Many of the commands in this article must be run on your local computer. The default commands listed are for the Linux command line or MacOS X Terminal. To make SSH connections from Windows®, you can use a client similar to the free program, PuTTY. To generate keys, you can use a related program, PuTTYGen.
Log in
Using the Internet Protocol (IP) address and password for your cloud server, log in by running the following ssh command with username@ipaddress as the argument:
The system prompts you to enter the password for the account to which you’re connecting.
Remote host identification
If you rebuilt your cloud server, you might get the following message:
One of the security features of SSH is that when you log in to a cloud server, the remote host has its own key that identifies it. When you try to connect, your SSH client checks the server’s key against any keys that it has saved from previous connections to that IP address. After you rebuild a cloud server, that remote host key changes, so your computer warns you of possibly suspicious activity.
To ensure the security of your server, you can use the web console in the Cloud Control Panel to verify your server’s new key. If you’re confident that you aren’t being spoofed, you can skip that step and delete the record of the old SSH host key as follows:
On your local computer, edit the SSH known_hosts file and remove any lines that start with your cloud server’s IP address.
Note: Use the editor of your choice, such as nano on Debian or the Ubuntu operating system or vi on RPM or CENTOS servers. For simplicity, this article just uses nano . If you prefer to use vi , substitute vi for nano in the edit commands. For more on using nano , see /support/how-to/modify-your-hosts-file/.
If you are not using Linux or MacOS X on your local computer, the location of the known_hosts file might differ. Refer to your OS for information about the file location. PuTTY on Windows gives you the option to replace the saved host key.
Generate a new SSH key pair
You can secure SSH access to your cloud server against brute force password attacks by using a public-private key pair. A public key is placed on the server and a matching private key is placed on your local computer. If you configure SSH on your server to accept only connections using keys, then no one can log in by using just a password. Connecting clients are required to use a private key that has a public key registered on the server. For more on security, review Linux server security best practices.
Use the following steps to generate an SSH key pair:
Run the following command using your email address as a label. Substitute your email address for your_email@example.com in the command.
A message indicates that your public-private RSA key pair is being generated.
At the prompt, press Enter to use the default location or enter a file in which to save the key and press Enter.
If you want the additional security of a password for the key pair, enter a passphraseand press Enter. If you don’t want to use a password with the key pair, press Enter to continue without setting one.
Your key pair is generated, and the output looks similar to the following example:
Optionally, add your new key to the local ssh-agent file to enable SSH to find your key without the need to specify its location every time that you connect:
You can use an SSH configuration shortcut instead of the ssh-agent file by following the instructions in the Shortcut configuration section later in this article.
Add the public key to your cloud account
To make it easy to add your key to new cloud servers that you create, upload the public key to your cloud account by following these steps:
In the top navigation bar, click Select a Product > Rackspace Cloud.
Select Servers > SSH Keys.
Click Add Public Key.
Enter a key name, such as Work Laptop, to remind you which computer this key is for.
Select the region for which you want to store the public key. To store your key in multiple regions, repeat these steps for each region. The key must reside in the same region as the server.
Paste the contents of the id_rsa.pub file that you created into the Public Key field. You can get the file contents by either opening the file in a text editor or by running the following command:
Click Add Public Key.
If you want to add the key manually, instead of by using the Control Panel, review Linux server security best practices and use the following command:
Create a new server by using a stored key
When you create a new cloud server, you can add a stored key to the new server.
On the Create Server page, expand the Advanced Options section.
From the SSH Key menu, select your key from the list.
If you don’t see a stored key in the list, you can perform one of the following actions:
- Switch the region for the new server to the region where you have stored the SSH key.
- Repeat the steps in the preceding section, Add the public key to your cloud account, to add the key to the region in which you want to create the new server.
Add the key to an existing server
You can’t use the Cloud Control Panel to add a public key to an existing server. Follow these steps to add the key manually:
On your cloud server, create a directory named .ssh in the home folder of the user that you connect to by using SSH.
Create or edit the authorized_keys file and add your public key to the list of authorized keys by using the following command:
A key is all on one line, so ensure that the key isn’t broken by line breaks. You can have multiple keys in the authorized_keys file, with one key per line.
Set the correct permissions on the key by using the following commands:
If you have any issues and need to fix permissions issues, run the following comand:
After you have added the public key to the authorized_keys, you can make an SSH connection by using your key pair instead of the account password.
Shortcut configuration
Use the following instructions to set up a connection shortcut by creating a
/.ssh/config file on your local computer and adding your server and key details to it.
Using a text editor, add the following text to the
/.ssh/config file, changing the values to match your server information:
Each of the following entries describes a feature of the server:
- Host: A shortcut name that you use to tell SSH to use this connection.
- HostName: The address of the server to which you connect.
- User: The name of the user account to connect to on the server.
- IdentityFile: The location of the private key file (id_rsa).
After you set up the config file, connect to the server by using the following command with your shortcut name:
Troubleshooting
If you have trouble making a new connection after you restart the server, use the following steps to help you resolve the issue:
The best way to troubleshoot SSH or SFTP login issues is to attempt to login through SSH while logged into the Emergency Console and to watch the log, which typically includes the reason for a failure. If no reason is given, it could be a firewall issue. For RPM servers, run the following command to watch the log:
For Debian servers, run the following command to watch the log:
If you get a connection timeout error, check the IP address that you used to ensure that it’s correct. You might also check the server’s iptables to ensure that it isn’t blocking the port used by SSH.
If you get a connection refused error, you might be trying to use SSH with the wrong port. If you changed your server to listen to a port other than 22, use the -p option with SSH to specify the port.
If your login is rejected, then you might have an issue with your key. Change the sshd configuration to allow password connections by setting PasswordAuthentication to yes . Restart the server and try again. If you connect after these changes, then the issue is with the key and you must verify that the key is in the right place on the server.
If all else fails, review your changes and restart the SSH daemon on the server by running the following command:
If you get a message that the SSH service is unknown, run the command with sshd as the service name instead.
Share this information:
©2020 Rackspace US, Inc.
Except where otherwise noted, content on this site is licensed under a Creative Commons Attribution-NonCommercial-NoDerivs 3.0 Unported License
Источник
How to connect a linux pc (Ubuntu) to a Mac OSX that run only in single user mode terminal
First time posting here, so be kind with me. This is a problem I’m facing. A Mac on OSX (10.7.x) is dead on graphic card,so is bootable only in single mode from terminal. I want to get data from disk, but is rather painful to make it from terminal. I need a way to have access to the disk with a GUI from a linux PC. I’ve read that Macs can use an SSH remote connection natively, but I do not now how to do it and with a GUI support. Can someone give me a step by step advice to connect those two machines (Linux to Mac) and get data from disk the easy way, through using SSH, or other way? Thank you all for reading this, and waiting for some answers.

1 Answer 1
First, you need to make sure if you have SSH enabled on your Mac. If not you have to enable it.
Now, you need to create a group that can remote login.
After this, you need to add users to this group. Only user or user groups linked to this group will be allowed remote login access.
Now you have SSH on your Mac which can accept remote connections.
To connect to your Mac, on Ubuntu you need to enter the following command
remote_host is the IP address or domain name of your remote PC. The Mac in this case. To get IP of your Mac, type in ifconfig . user is the username.
To copy over files, you need to use scp or Secure Copy.
Источник
Connect linux and mac
Posted: September 21, 2018. At: 10:35 AM. This was 3 years ago. Post ID: 12471
Page permalink.
WordPress uses cookies, or tiny pieces of information stored on your computer, to verify who you are. There are cookies for logged in users and for commenters. These cookies expire two weeks after they are set.
Connecting to Linux over RDP from a Mac is very easy and fun.
How to RDP to Linux from a Mac computer
I managed to connect to an Ubuntu 18.04 machine from a Macintosh very easily. I used the Microsoft Remote Desktop app from the app store. This allows a user of a Macintosh machine to RDP to a Windows machine and administer it easily. Get this app here.
https://itunes.apple.com/au/app/microsoft-remote-desktop-10/id1295203466?mt=12. Then install xrdp on the Ubuntu machine to allow RDP connections from a remote machine.
sudo apt install xrdp
Now the user may run the RDP app and connect to the remote Ubuntu machine very easily. This is of course just as easily managed from a Windows machine.
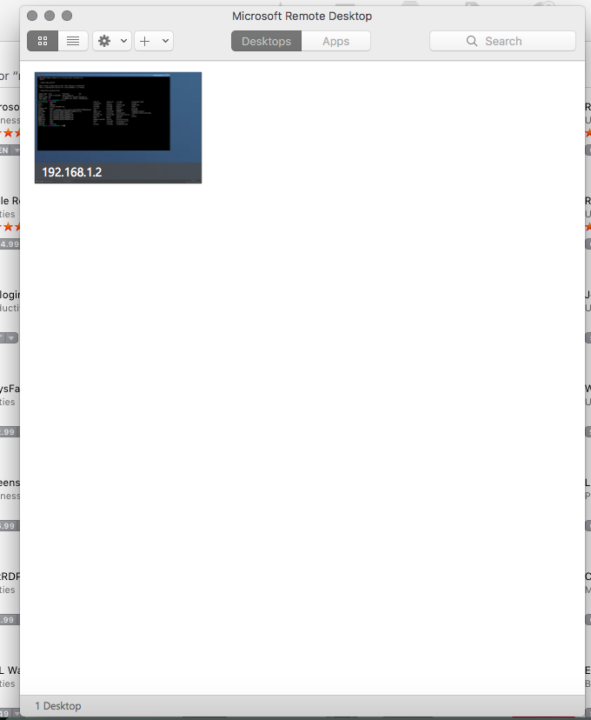 Connecting via RDP to an Ubuntu Fluxbox session from a Mac.
Just enter your username and password to connect to the Ubuntu session. I just hate Macintosh app store, I was asked to add payment details to install a free app. But I set payment details as “none” and added a valid phone number and it let me install the app. Nevertheless, it works and this is a great way to connect to a remote machine.
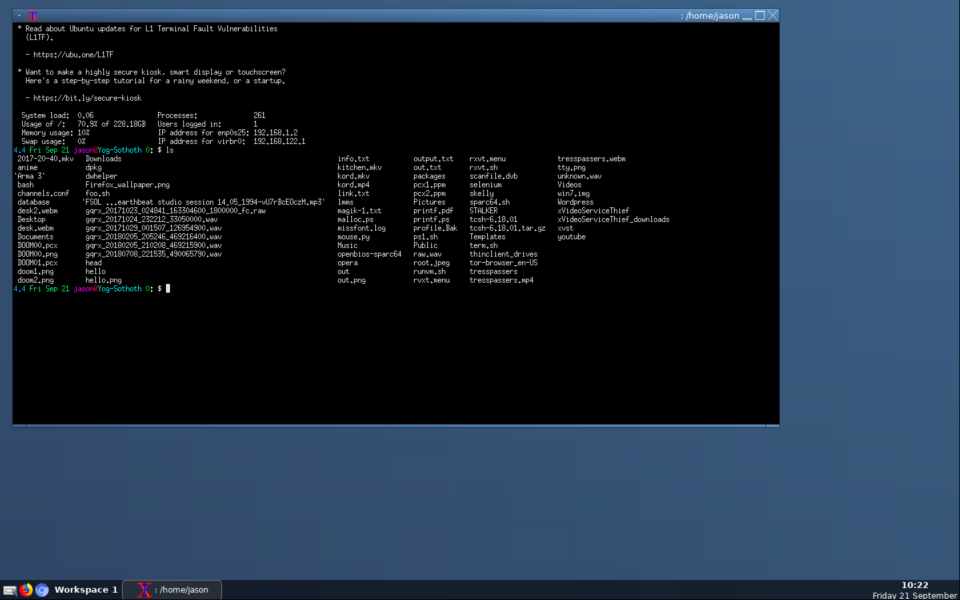 Linux desktop viewed over RDP.
Looks very good too. So if you are a Macintosh user and are looking for a good Remote Desktop app for a Mac, look no further than the Microsoft offering, as it works very well. I got a message when connecting regarding the operating system, as it could not detect what it was connecting to, but just click next and it works fine.
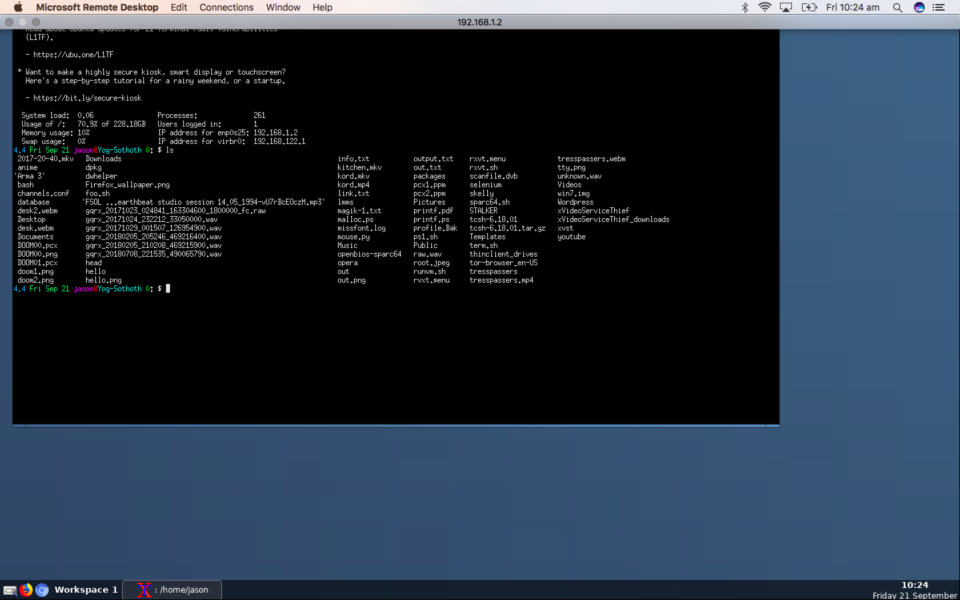 This is a very good app for RDP.
I recommend Xrdp, it makes Linux life easier, you can connect to your Linux box from any Windows or Mac PC and administer it simply, over a Remote Desktop connection, very nice to be able to use graphical desktop applications in a real desktop in a window or full screen. There is a tip on this page on how to control which desktop environment appears when you connect. As on my machine it opens Fluxbox instead of MATE or Gnome, but that is fine. This really works for me as a remote administration solution.
Источник


