- Connecting to Your Instance
- Before You Begin
- Connecting to Your Linux Instance Using SSH
- Running Administrative Tasks on the Instance
- What’s Next
- Как подключиться по SSH
- Что такое SSH?
- Как подключиться по SSH
- 1. Подключение через SSH в Linux
- 2. Подключение через SSH в Windows
- Выводы
- How to Connect to a Linux Server Using Secure Shell (SSH)
- Remote Login
- Tools
- Login Using a Password
- Login From Linux or MacOS X
- Login From Windows
- Password-less Login
- Generate an SSH Keypair on MacOS X and Linux
- Copy a Public Key to a Server
- Securing a Private Key
- Login With a Keypair on Linux or MacOS X
- Generate an SSH Keypair on Windows
- Login using Keypair using PuTTY
- Copying Files Using Secure Copy
- Copying Files From Linux or MacOS X Using SCP
- Copying Files From Windows Using WinSCP
- Running a Command Remotely On Server
- Conclusion
Connecting to Your Instance
You connect to a running Linux instance using a Secure Shell (SSH) connection. Most Linux and UNIX-like operating systems include an SSH client by default. Windows 10 and Windows Server 2019 systems should include the OpenSSH client, which you’ll need if you created your instance using the SSH keys generated by Oracle Cloud Infrastructure . For other Windows versions, you can download a free SSH client called PuTTY from http://www.putty.org.
Before You Begin
- You know the public IPВ address of your instance. See Launching a Linux Instance.
- You know the path to the private key file.
Connecting to Your Linux Instance Using SSH
Log in to the instance using SSH.
Use the following command to set the file permissions so that only you can read the file:
is the full path and name of the file that contains the private key associated with the instance you want to access.
Use the following SSHВ command to access the instance.
Note
Copy the following example to ensure the correct characters are used. If the wrong character is used in ssh -i , a Could not resolve hostname . No such host is known. error might occur.
is the full path and name of the file that contains the private key associated with the instance you want to access.
is the default username for the instance. For Oracle Linux and CentOS images, the default username is opc . For Ubuntu images, the default username is ubuntu .
is your instance IPВ address that you retrieved from the Console .
If the instance uses a key pair that was generated by Oracle Cloud Infrastructure , use the following procedure.
If this is the first time you are using this key pair, you must set the file permissions so that only you can read the file. Do the following:
- In Windows Explorer, navigate to the private key file, right-click the file, and then click Properties.
- On the Security tab, click Advanced.
- On the Permissions tab, for Permission entries, under Principal, ensure that your user account is listed.
- Click Disable Inheritance, and then select Convert inherited permissions into explicit permissions on this object.
- For Permission entries, select each permission entry that is not your user account and click Remove.
- Ensure that the access permission for your user account is Full control.
- Save your changes.
To connect to the instance, open Windows PowerShell and run the following command:
Note
Copy the following example to ensure the correct characters are used. If the wrong character is used in ssh -i , a Could not resolve hostname . No such host is known. error might occur.
is the full path and name of the file that contains the private key associated with the instance you want to access.
is the default username for the instance. For Oracle Linux and CentOS images, the default username is opc . For Ubuntu images, the default username is ubuntu .
is your instance IPВ address that you retrieved from the Console .
SSH private key files generated by Oracle Cloud Infrastructure are not compatible with PuTTY. If you are using a private key file generated during the instance creation process you need to convert the file to a .ppk file before you can use it with PuTTY to connect to the instance.
Note
If you changed the file permissions on your key to connect from a Windows system using OpenSSH, the key will not work with a PuTTY connection. Use OpenSSH to connect instead.
Convert a generated .key private key file:
Click Load, and select the private key generated when you created the instance. The extension for the key file is .key .
Click Save private key.
Specify a name for the key. The extension for new private key is .ppk .
Connect to the Linux instance using a .ppk private key file:
If the instance uses a key pair that you created using PuTTY Key Generator, use the following procedure.
In the Category pane, select Session and enter the following:
Host Name (or IP address):
is the default username for the instance. For Oracle Linux and CentOS images, the default username is opc . For Ubuntu images, the default username is ubuntu .
is your instance public IPВ address that you retrieved from the Console
Click Browse, and then select your .ppk private key file.
Click Open to start the session.
If this is your first time connecting to the instance, you might see a message that the server’s host key is not cached in the registry. Click Yes to continue the connection.
Tip
If the connection fails, you may need to update your PuTTY proxy configuration.
Running Administrative Tasks on the Instance
When you’re logged in as the default user, opc , you can use the sudo command to run administrative tasks.
What’s Next
Now that you’ve got an instance and have successfully connected to it, consider the following next steps:
Install software on the instance.
If you’re having trouble connecting, see Troubleshooting the SSH Connection.
Источник
Как подключиться по SSH
SSH — это основной протокол для удаленного управления серверами на базе операционной системы Linux. Все действия при подключении к SSH выполняются в командной строке, но при достаточном уровне знаний и привилегий в системе там можно сделать практически все что угодно, в отличие от того же FTP где можно только передавать и редактировать файлы.
Если вы покупаете VPS сервер или продвинутый хостинг, обычно в письме вместе с другими данными авторизации есть данные доступа по SSH. В этой статье мы рассмотрим как подключиться по SSH к серверу из Linux или Windows.
Что такое SSH?
Поскольку эта статья рассчитана именно на новичков, то перед тем, как перейти дальше давайте подробнее разберемся что из себя представляет SSH. Исторически так сложилось что на большинстве серверов используется операционная система Linux, во многом этому посодействовала ее бесплатность. Графический интерфейс на серверах Linux не используется для экономии ресурсов, поэтому единственным способом администрирования сервера остается командная строка.
Но это не является недостатком, потому что в командной строке Linux можно сделать больше чем графическом интерфейсе. Протокол SSH позволяет вам выполнять команды в удаленной системе так, как будто вы это делаете в своей системе. Вам доступен буфер обмена, вы вводите команды и можете использовать их вывод. Недоступны разве что файлы из вашей файловой системы. Например, когда вы подключитесь к серверу по SSH из Ubuntu, то все будет выглядеть так, как будто вы открыли терминал в своей системе.
Как подключиться по SSH
Для подключения по SSH нам необходимо знать такие данные:
- ip адрес сервера, к которому мы собираемся подключится;
- порт, на котором ожидает подключения SSH сервер, по умолчанию используется 22, но в целях безопасности порт подключения ssh часто изменяют;
- имя и пароль пользователя на удаленном сервере.
Больше ничего не нужно, обычно эти данные присылают в письме вместе с описанием VPS. Теперь перейдем к практике.
1. Подключение через SSH в Linux
В Linux подключение по SSH выполняется с помощью утилиты ssh. Мы более подробно рассматривали работу с ней в статье как пользоваться ssh. Для подключения к удаленному компьютеру ее синтаксис будет выглядеть следующим образом:
$ ssh имя_пользователя @ айпи_адрес
Это самый простой вариант, если вам также нужно задать порт, используйте опцию -p:
$ ssh имя_пользователя @ айпи_адрес -p порт
Чтобы выполнить подключение по SSH Linux нажмите Ctrl+Alt+T для открытия терминала и наберите команду, заменив нужные значения:
Или, с нестандартным портом:
ssh sergiy@192.168.1.2 -p 2223
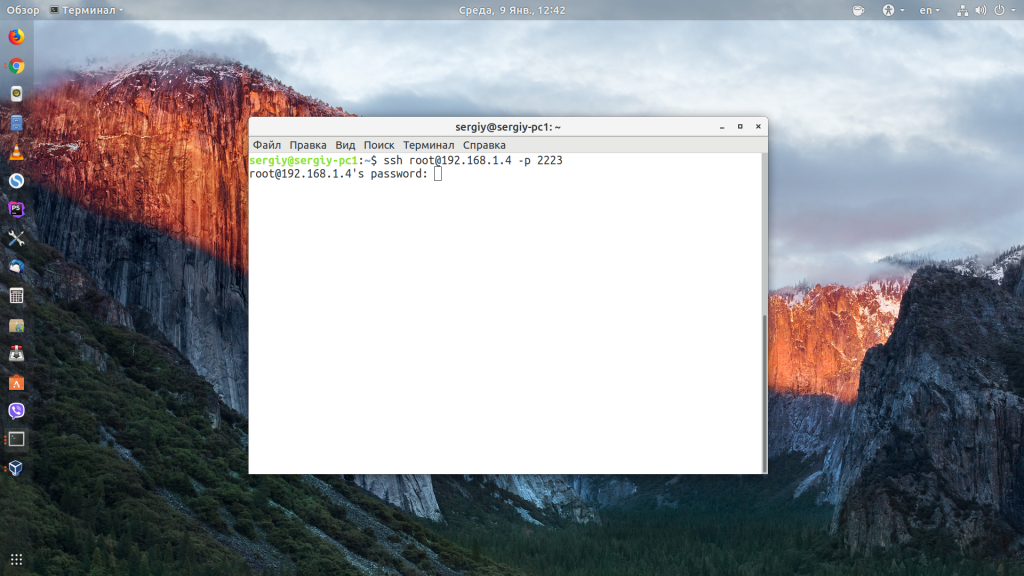
Если ip_адрес и порт правильные, то на следующем шаге программа попросит у вас ввести пароль:
Если пытаетесь подключится через SSH к этому серверу первый раз, то утилита также попросит подтвердить добавление нового устройства в свой список известных устройств, здесь нужно набрать yes и нажать Enter:

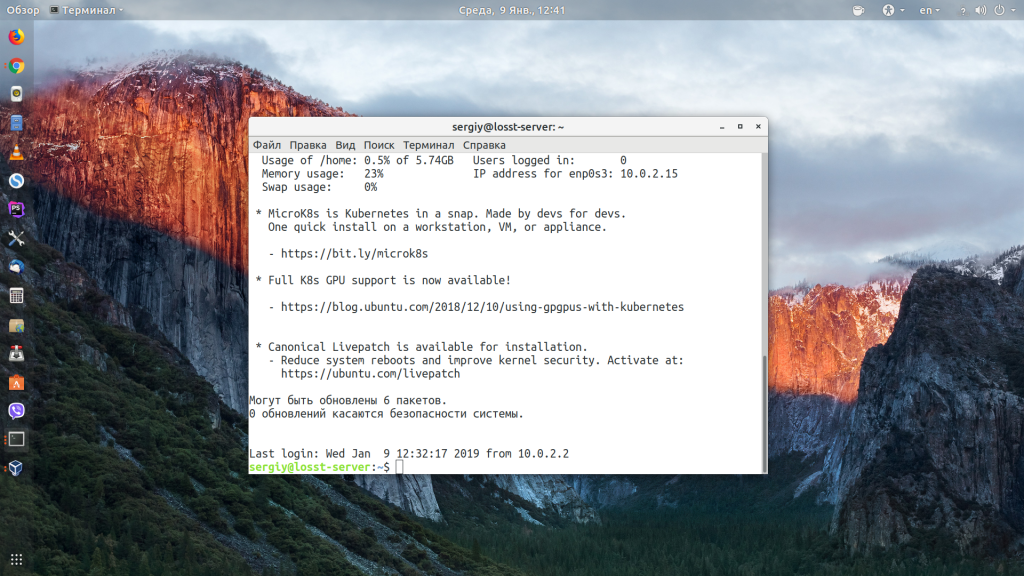
Теперь вы подключены, и все вводимые далее команды будут выполнены на удаленном сервере:
Если же произошла ошибка и IP адрес или порт введены неверно, то вы получите ошибку Connection Refused:
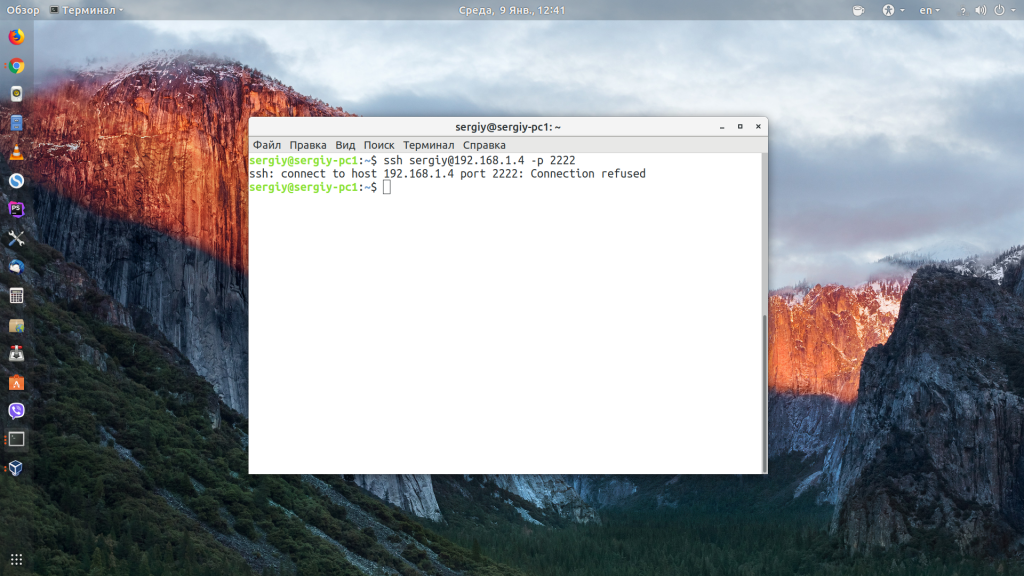
Просто убедитесь что порт введен верно. Если это ваш сервер, то, возможно на нем еще нужно разрешить подключение SSH в брандмауэре. В Ubuntu/Debian для этого на удаленном сервере выполните:
sudo ufw allow 22/tcp
А в CentOS/Fedora:
firewall-cmd —permanent —zone=public —add-port=22/tcp
Если вы используете другой порт для SSH, то замените 22 на свой порт. Для удобства подключения по SSH в дальнейшем можно настроить авторизацию по ключу ssh, чтобы не вводить каждый раз пароль.
Теперь вы знаете как подключиться по ssh linux и решить проблемы с подключением. А теперь перейдем к Windows.
2. Подключение через SSH в Windows
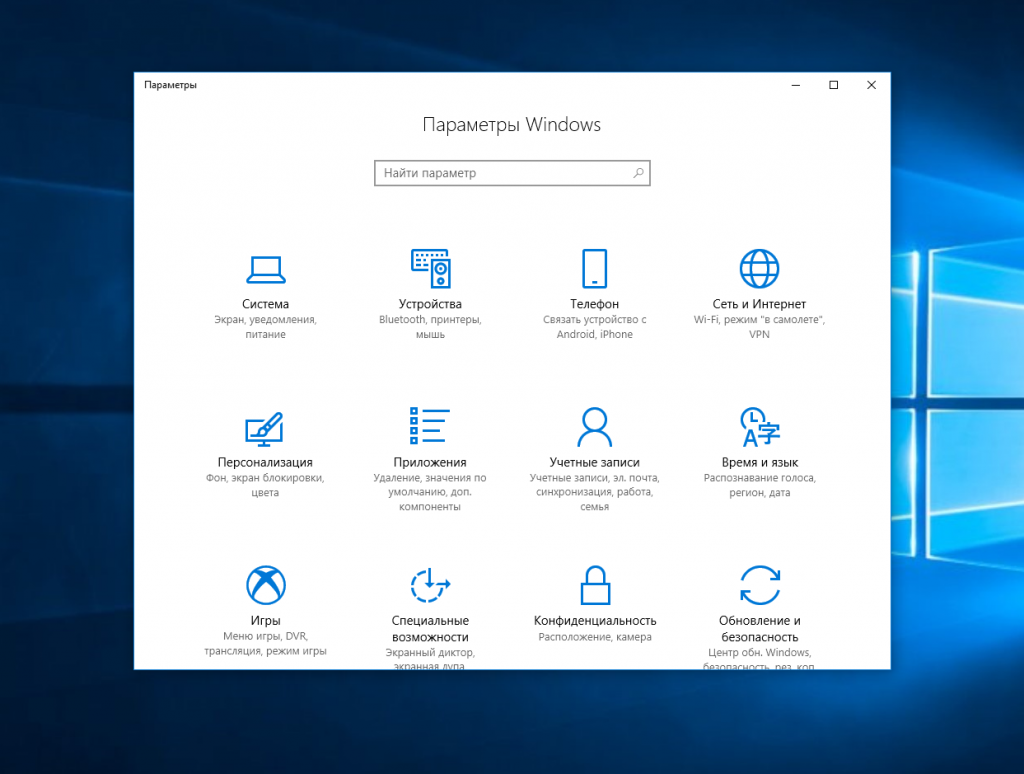
Раньше подключение по SSH из Windows выполнялось только с помощью сторонних утилит, например PuTTY. Но в Windows 10 был добавлен встроенный OpenSSH клиент и работает он точно так же, как и в Linux. По умолчанию этот компонент не активирован. Для его установки откройте Параметры -> Приложения:

Затем выберите Управление дополнительными компонентами:
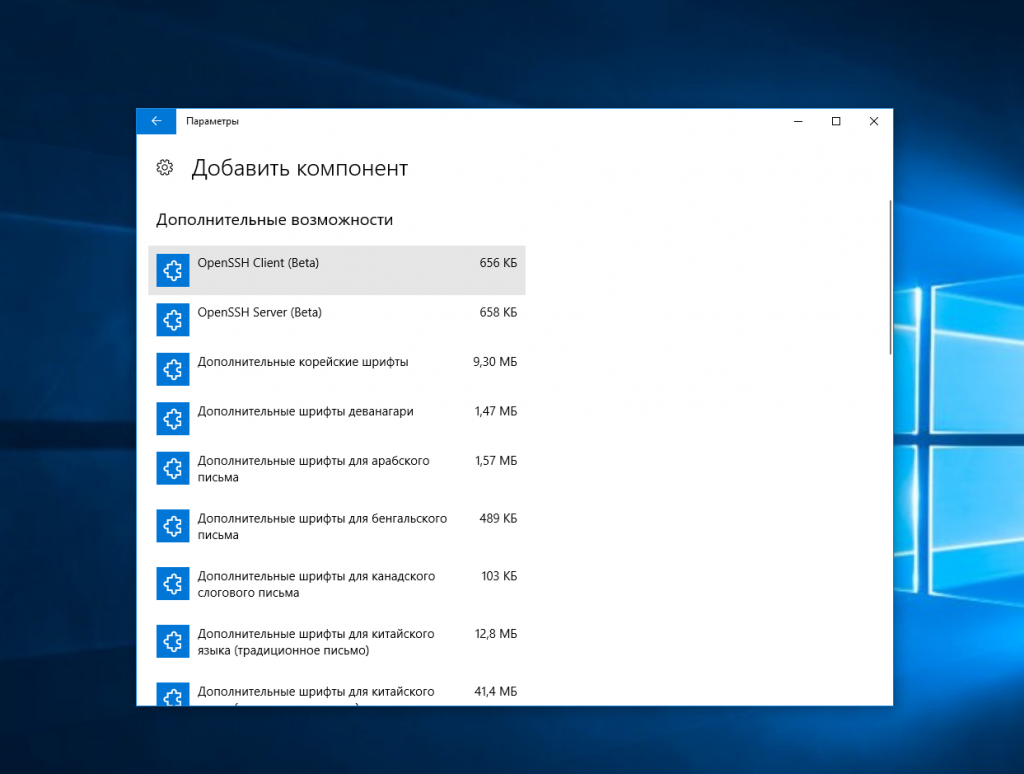
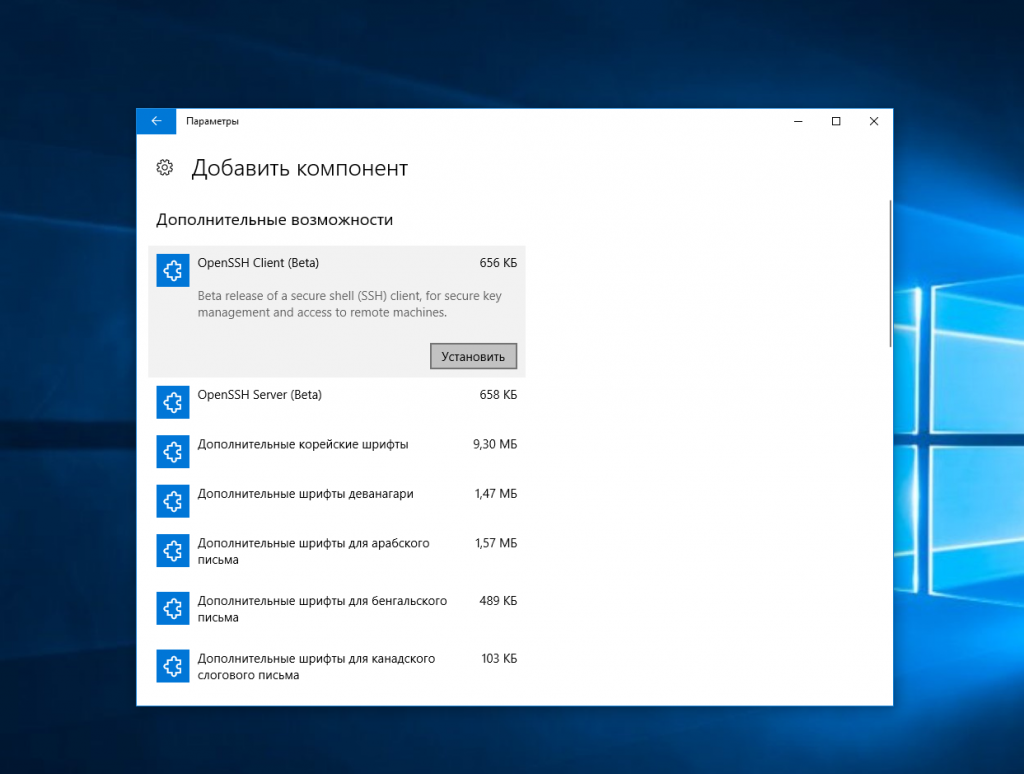
Здесь нажмите добавить новый компонент и в открывлемся меню выберите OpenSSH Client и нажмите Устанвоить:
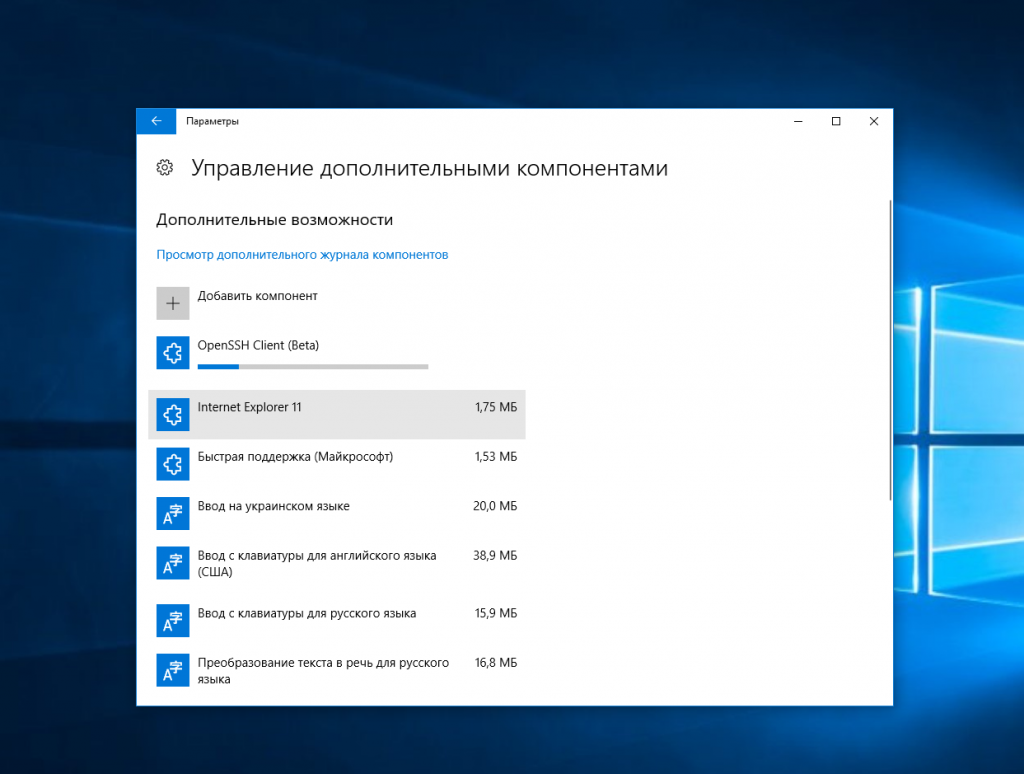
Дальше вернитесь назад и дождитесь завершения установки. После того, как SSH клиент будет установлен нужно обязательно перезагрузить компьютер.
После перезагрузки нажмите Win+R чтобы открыть окно запуска команд и наберите в нем cmd:
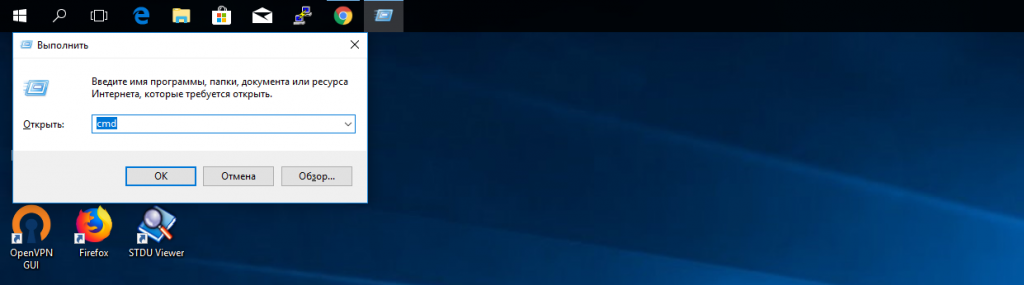
Далее нажмите Enter. Перед вами откроется командная строка Windows. Здесь можно использовать утилиту ssh. Синтаксис у нее абсолютно такой же, как и для Linux:
ssh имя_пользователя @ айпи_адрес -p порт
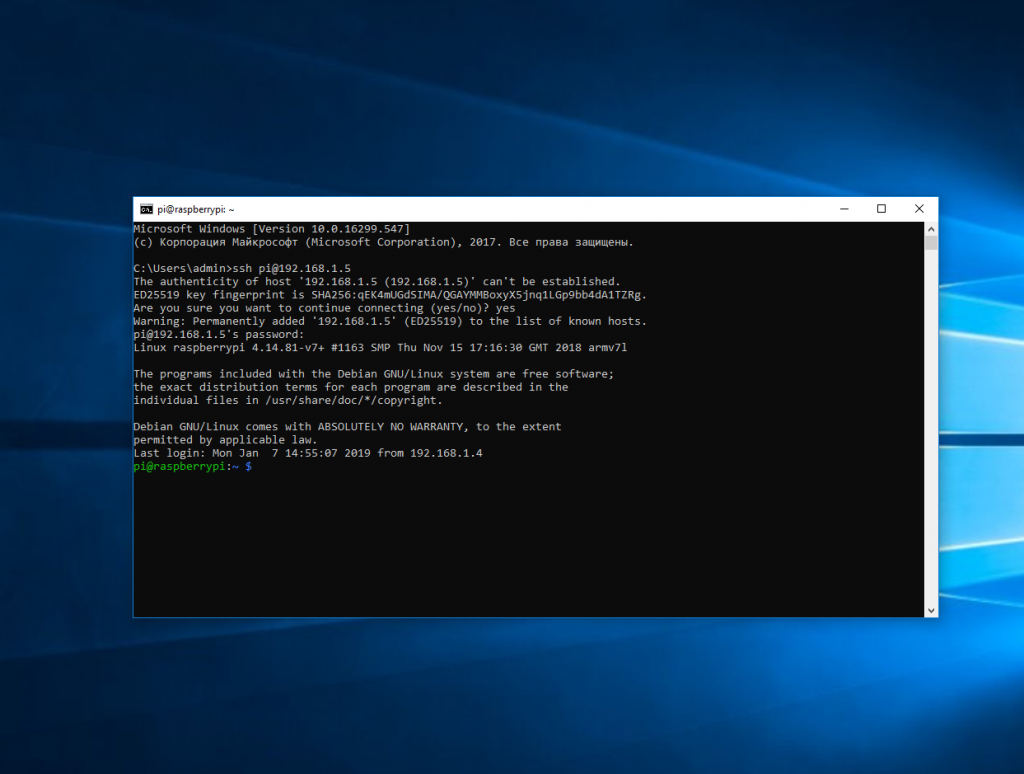
Например, такой командой можно подключится по SSH к Raspberry Pi, который находится в вашей локальной сети по адресу 192.168.1.5:
Утилита предложит добавить устройство в список известных:

Затем предложит ввести пароль:

Все следующие команды будут выполняться уже на Raspberry Pi или другой удаленной машине, к которой вы подключились.
Теперь подключиться к серверу по ssh из этой операционной системы также просто как и из Linux.
Выводы
В этой статье мы рассмотрели как выполняется подключение к серверу по SSH из Linux или Windows. Как видите, это очень просто. А дальше, для работы с удаленным сервером вам понадобятся команды терминала Linux.
Источник
How to Connect to a Linux Server Using Secure Shell (SSH)
Need Hosting? Try ours, it’s fast, reliable and feature loaded with support you can depend on.
Remote Login
There are times when we have access to physical servers and we can login directly from the server console in front of the server, or at least next to the server via KVM console. But, most of the time we don’t have access to the physical server so that we have to login remotely to the server. In this tutorial we’ll learn how to login remotely to a Linux Server using Secure Shell (SSH). Of course, you can also use this tutorial as guide to login to *NIX family operating systems as long as they have SSH installed.
Tools
- On Linux you can always use Terminal application. This application should be available no matter what desktop environment that you use.
- MacOS X also has Terminal.app installed by default. You can also use iTerm2 as Terminal alternative on Mac.
- Windows does not have an SSH client or server included. You can use PuTTY to do remote SSH logins from Windows. You can download PuTTY for free. You can download the individual program or PuTTY installer that not only installs PuTTY but also additional programs like puttygen.
Login Using a Password
The most simple way to login to Linux Server is using a password as an authentication mechanism. In this section we’ll learn how to login to Linux server using a username and password pair.
Login From Linux or MacOS X
Linux, MacOS X and most UNIX variants have SSH installed by default, you don’t need to install any additional packages unless you only install the minimalist package that does not install openssh package. In this tutorial I assume that you already have ssh client installed.
To login to a Linux server using ssh you can use the command below :
Another way to login is using the -l option for username :
In case you need to access a server that is not using SSH default port (22), you can specify an SSH server port number using -p option. In the example below the SSH port is 2222.
In the example below we try to login to server 128.199.138.34 using username root .
The warning above is shown if you are connecting to the server for the first time. The SSH client will check the authenticity of the server by checking the SSH fingerprinting. Since this is first time connection, SSH does not have any record of this server fingerprint and wil ask you whether you want to trust this server or not. You can type yes on the question above and input your password.
If you have logged into this server before and you get this message again there are several possibilities that could happen :
- Your server is reinstalled and of course the SSH fingerprint changed.
- Your server compromized or someone act as man in the middle (MITM), so instead of connecting to the real server you are connecting to the MITM machine.
- Wrong change on DNS records entry so you are connecting to the wrong server.
Login From Windows
Now we’ll learn how to login to a Linux Server from a Windows Machine using PuTTY. I assume that you already download PuTTY.
- Input the server address, this can be a hostname or IP Address

If you login to this server for the first time you will get a security alert regarding server fingerprint. If you are sure that you’re connecting to the right server you can click Yes.
You have to input your username and password to login. 
Password-less Login
In the section above, we already learned how to login using username and password pair. In this section we’ll learn how to login without password, we’ll use keypair instead.
First thing that we have to do is creating keypair. We’ll get a private and public key. You have to keep your private key secure while you can use the public key on the server. You can use the same private & public key on multiple servers.
Generate an SSH Keypair on MacOS X and Linux
To generate keypair on MacOS X and Linux, you can use comand below :
-C options will allow you to give comment for this keypair, this is -f option allow you to specify filename for the keypair. This process will create two files, since we use filename keyfile above, ssh-keygen will create keyfile and keyfile.pub . You might already guess the one with the .pub extension is public key and the one without extension is your private key.
Copy a Public Key to a Server
To copy public key to server, we can use scp program. We’ll learn a little bit more about using scp on the section below. You can run command below to copy keyfile.pub that you just generated to a server:
(tidle) symbol above means home. So this command will copy the public key to the user home directory.
After copying the file you need to login to the server and run command below on the server:
Securing a Private Key
I recommend moving your private key to
/.ssh on your computer. After that, change the file permission to 400 . This will make the file only readable by you, group and other users cannot read this file.
Login With a Keypair on Linux or MacOS X
Now the keypair is ready to be used to login to the server. You can use the ssh command below :
The -i option will tell SSH which private key to use.
Generate an SSH Keypair on Windows
- From the same site where you download putty, you can download puttygen. Open this application.
- To Generate a new keypair you can click Generate. Hover your mouse cursor around the blank space to give randomness to the generator.
- Key Created. To save the public key from the pair you can click Save public key button.
- Save as keyfile.pub. You can copy this file to the server.
- To save the private key you can click Save private key button. The warning from puttygen is that your key is not protected. We can ignore this warning.
- Save the private file as keyfile.ppk. This is the private key format used by PuTTY and not the .pem format that usually used in Linux / MacOS X.
- To export the private key to .pem format, you can choose menu Conversion ->Export OpenSSH Key
- Save the key as keyfile.pem
Login using Keypair using PuTTY
- Make sure that you have already copied your public key to
/.ssh/authorized_keys on the server
- You only need to input username. and Voila! No need to input the password but you can login to the server.
Copying Files Using Secure Copy
Copying Files From Linux or MacOS X Using SCP
In this section we’ll learn how to copy files and or folders to a Linux server and vice versa. Linux and MacOS X also have scp program installed by default so you don’t have to install additional program.
To copy a single file from our computer to a server, we can run :
To copy a folder and it’s contents including other folders you can use option -r (recursive). Below is sample of the command to copy folder data to server.
Copying Files From Windows Using WinSCP
You can copy files and/or folders from a Windows client to Linux Servers and vice versa using WinSCP. You can choose between portable executable or installable WinSCP.
- Open WinSCP. Choose SCP on File Protocol. Input Hostname, username and Password
- This is host fingerprint verification. You will get this message when you are connecting to the server for the first time. Click Yes
- You are connected to the server via SCP. The pane on the left is your local computer. The pane on the right is your folder on server.
Running a Command Remotely On Server
We can also run one off commands from our computer to the server. We can use -C option on ssh. You can only use this option with SSH client on Linux or MacOS X. PuTTY, even if you run it from the commmand prompt does not have such option. For example. to check process on server, instead of logging in and run ps , you can run the command below from your computer :
Conclusion
In this tutorial we’ve learn how to connect via SSH from Windows, Linux and MacOS X machine. We also learned how to do password-less login and run remote commands on the server from the computer.
Источник


